
Tutorial | Git for projects#
Get started#
Let’s practice using the Git integration for version control in a Dataiku project!
Objectives#
In this tutorial, you will:
Create and update new branches for a project.
Resolve merge conflicts between branches locally.
Connect a local project to a remote Git repository.
Push, pull, and merge changes remotely.
Prerequisites#
To complete this tutorial, you should have a firm understanding of the Git model and terminology. In addition, you’ll need to meet the following requirements:
Section |
Requirements |
|---|---|
Version control with the local Git repository |
|
Version control with remote Git repositories |
|
Create the project#
From the Dataiku Design homepage, click + New Project.
Select Learning projects.
Search for and select Git for Projects.
If needed, change the folder into which the project will be installed, and click Create.
From the project homepage, click Go to Flow (or type
g+f).
Note
You can also download the starter project from this website and import it as a ZIP file.
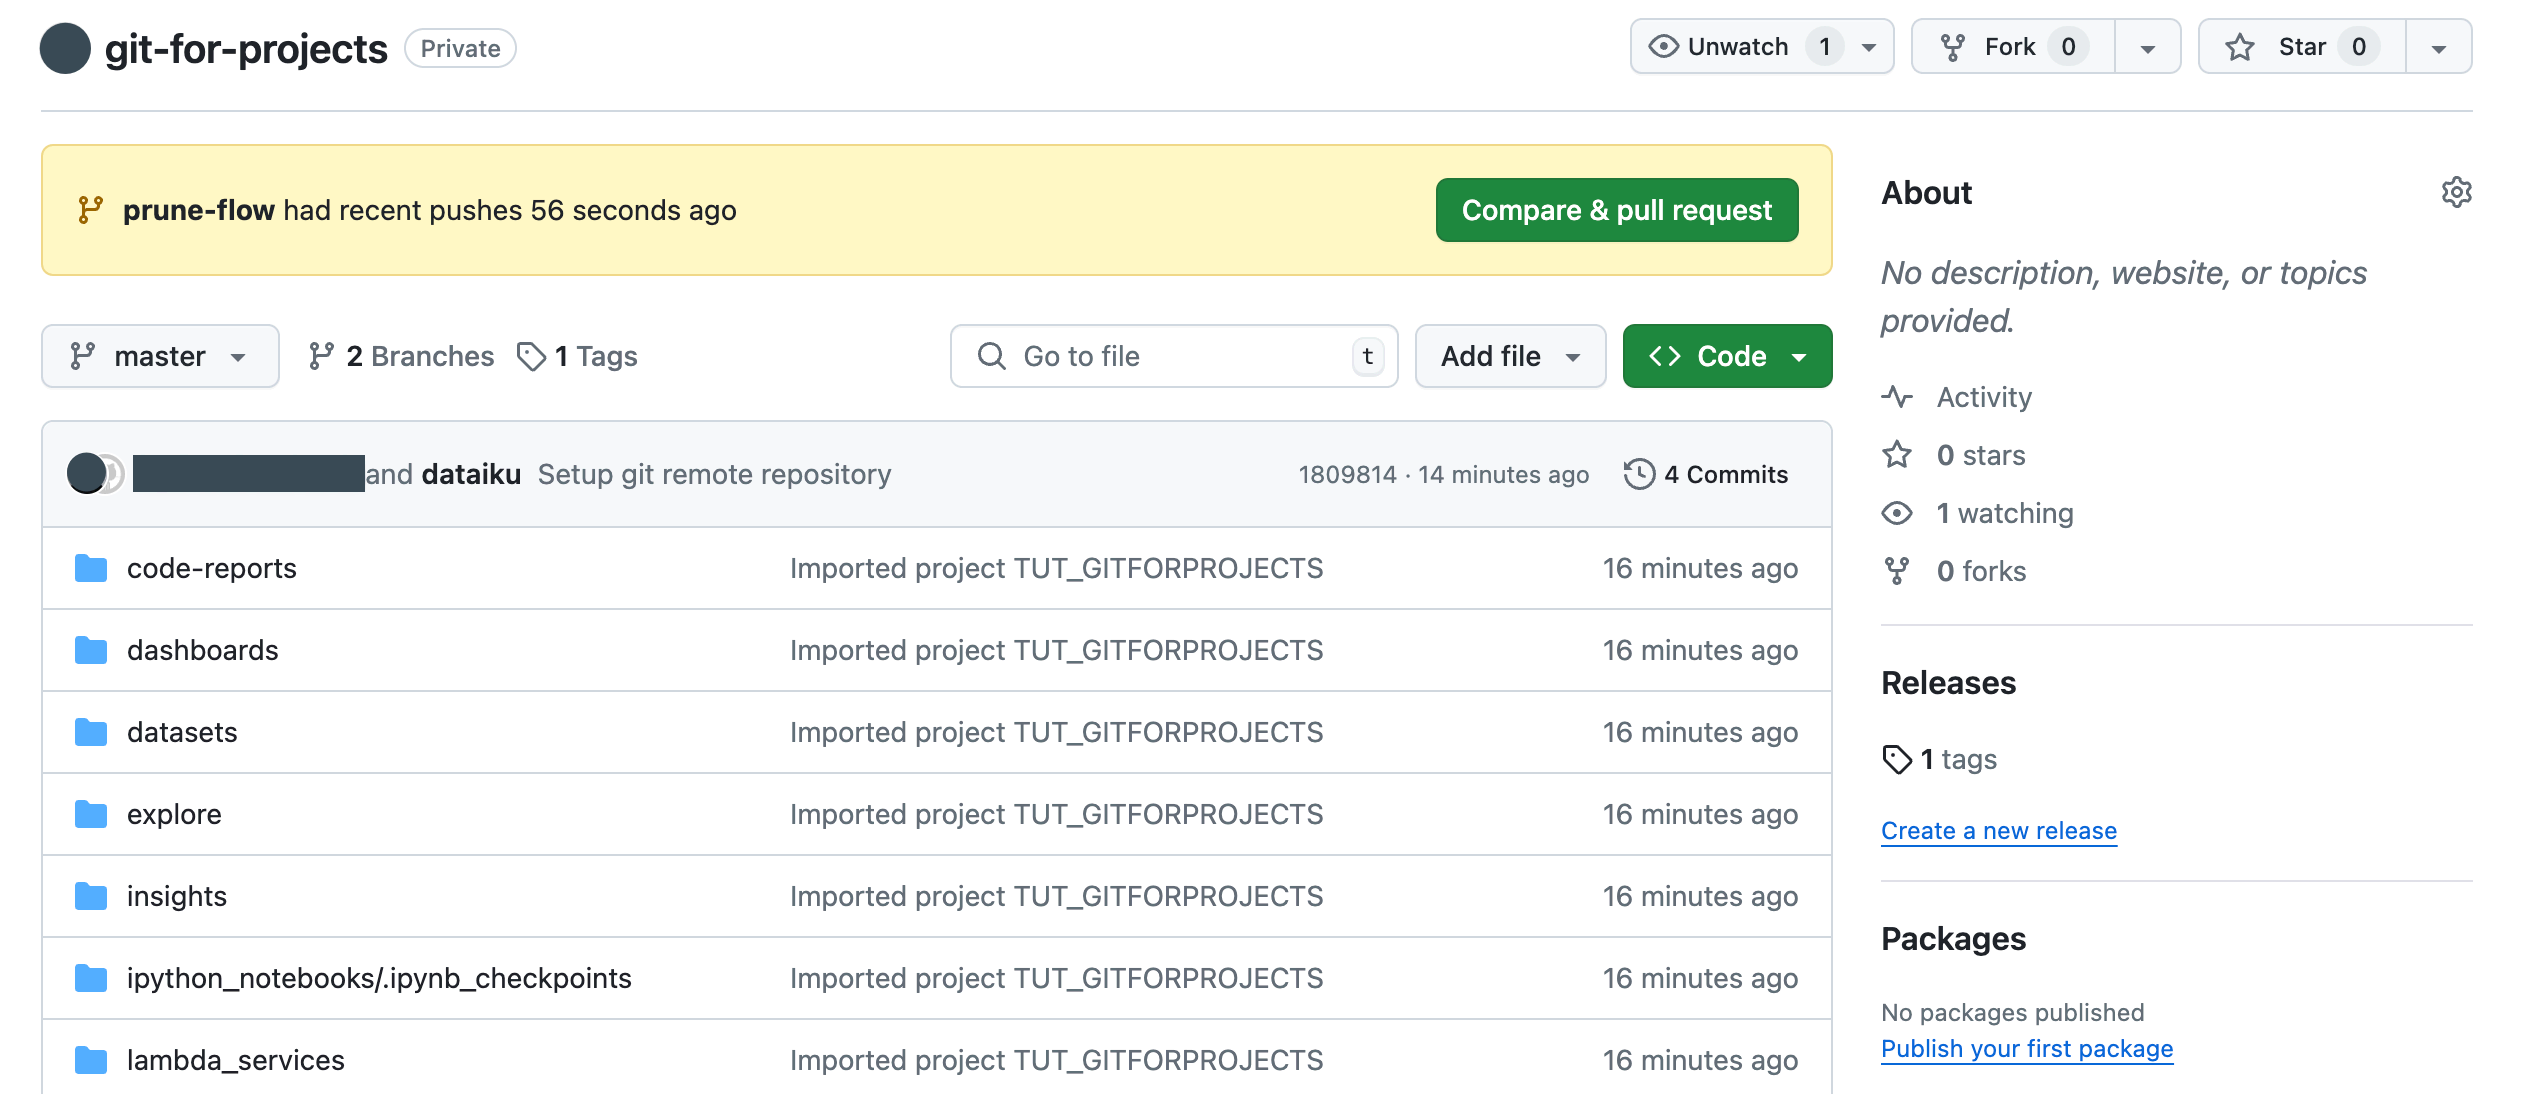
Once you have the project, open the Version Control page from the More Options (![]() ) menu in the top navigation bar.
) menu in the top navigation bar.
Version control with the local Git repository#
Branch the project#
Let’s make a new working branch from the master branch of the project. New projects are automatically on master.
From the branch (
 ) indicator, click Create new branch.
Name the new branch
update-wiki.Choose Duplicate project to work on new branch.
Select Next.
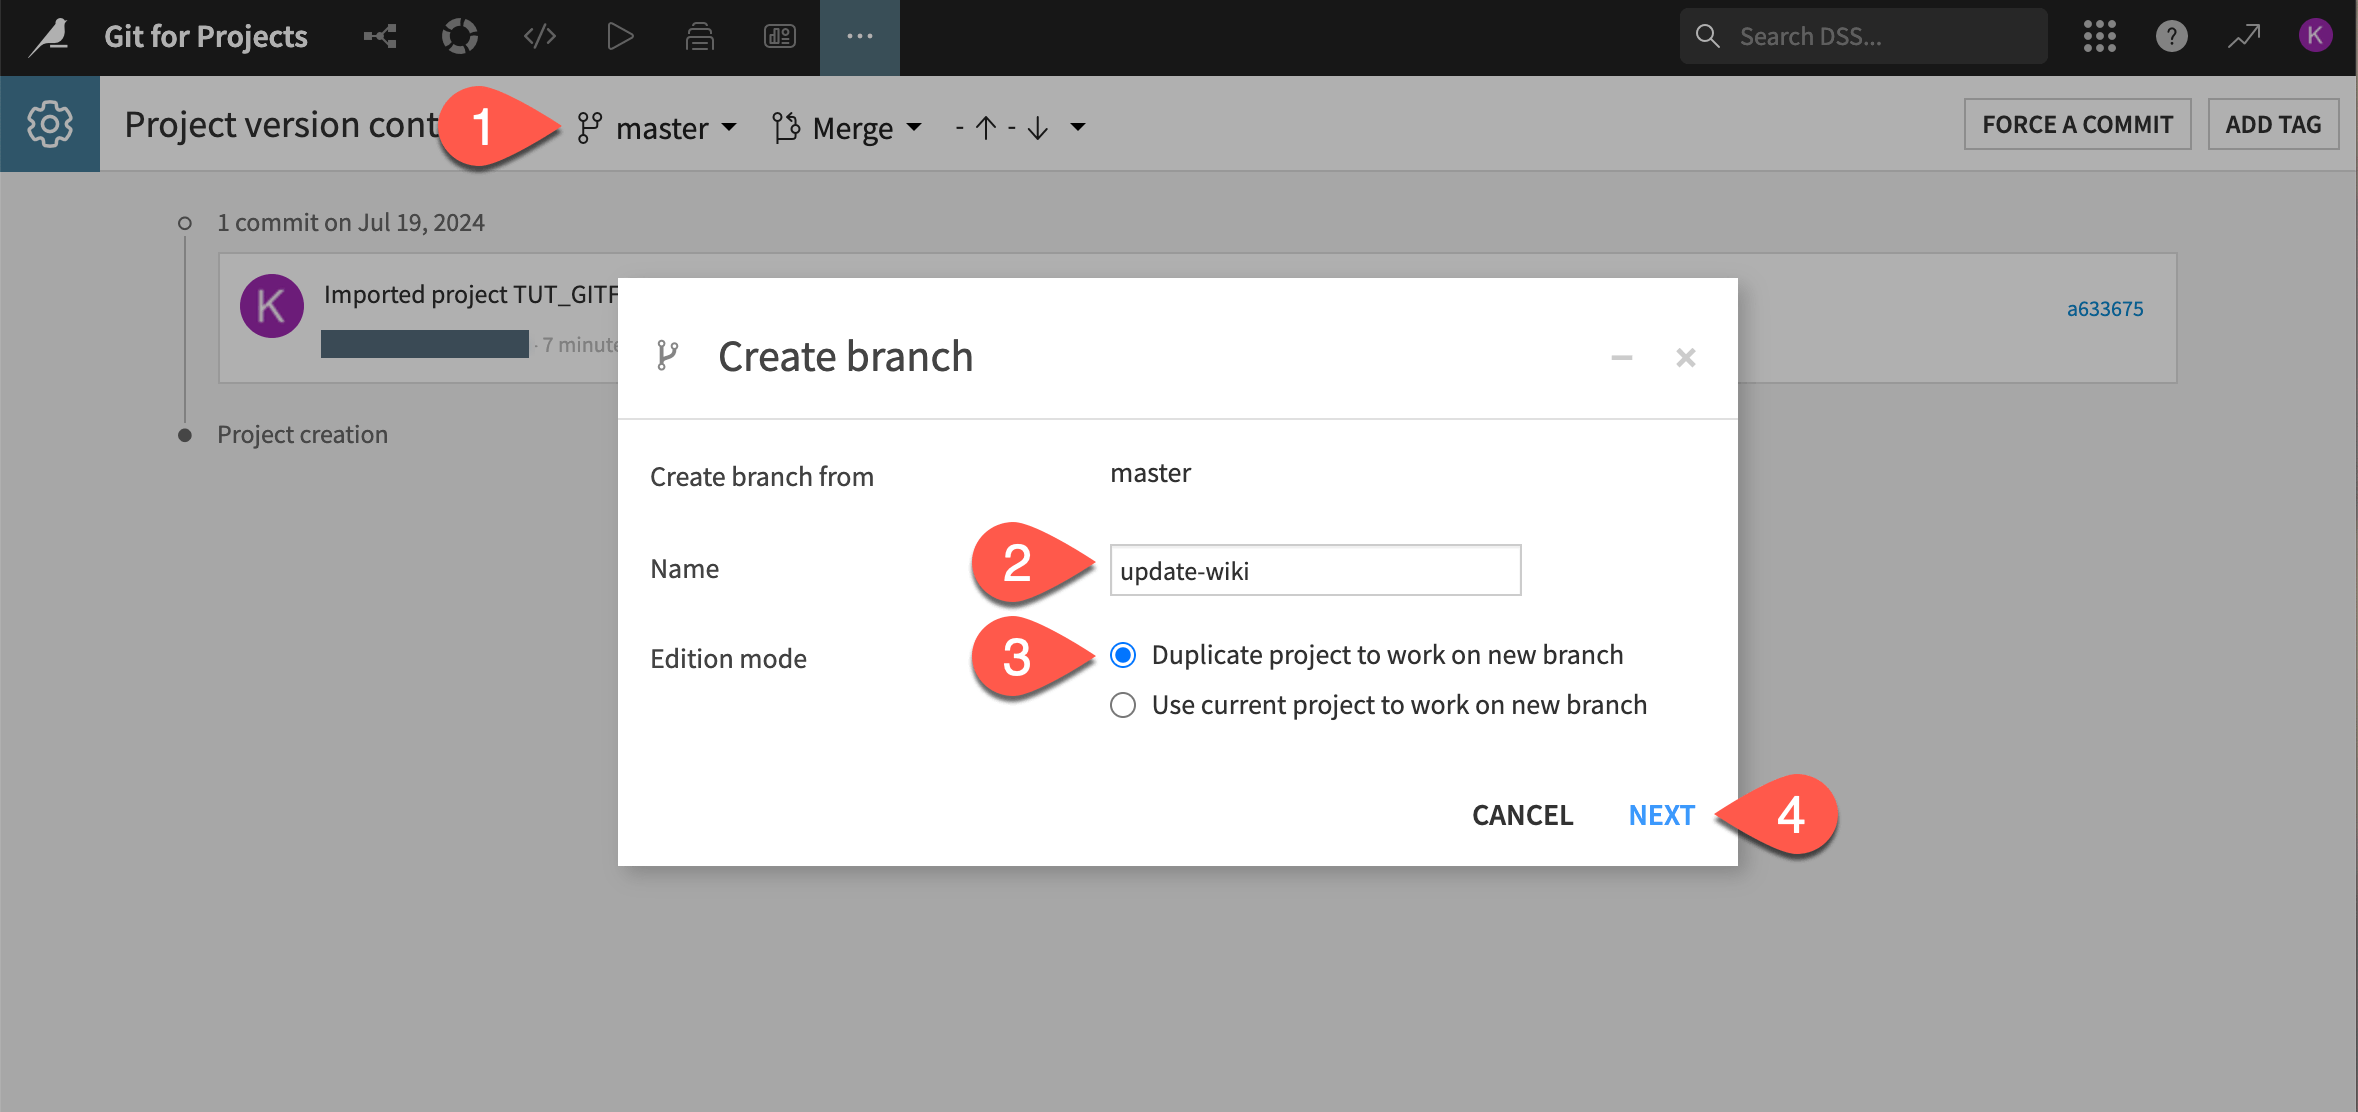
Select a project folder if you wish.
Click Duplicate and Create Branch.
Your new project on the new branch will open automatically. Your starter project will stay on the master branch.
Important
A Dataiku project can only be on one branch at any given time. If you switch the branch of the current project, it will also be switched for any collaborator who then might accidentally make a change to the wrong branch. This is why it’s best to make a duplicate project for the new branch if you are working in a team.
Edit the branched wiki#
Next, you’ll make wiki changes on both the master branch and the update-wiki working branch. Since you duplicated the project, you’ll have to make changes on two separate projects.
In this case, you’re simulating a situation in which two people unknowingly make changes to the same part of the project on separate branches.
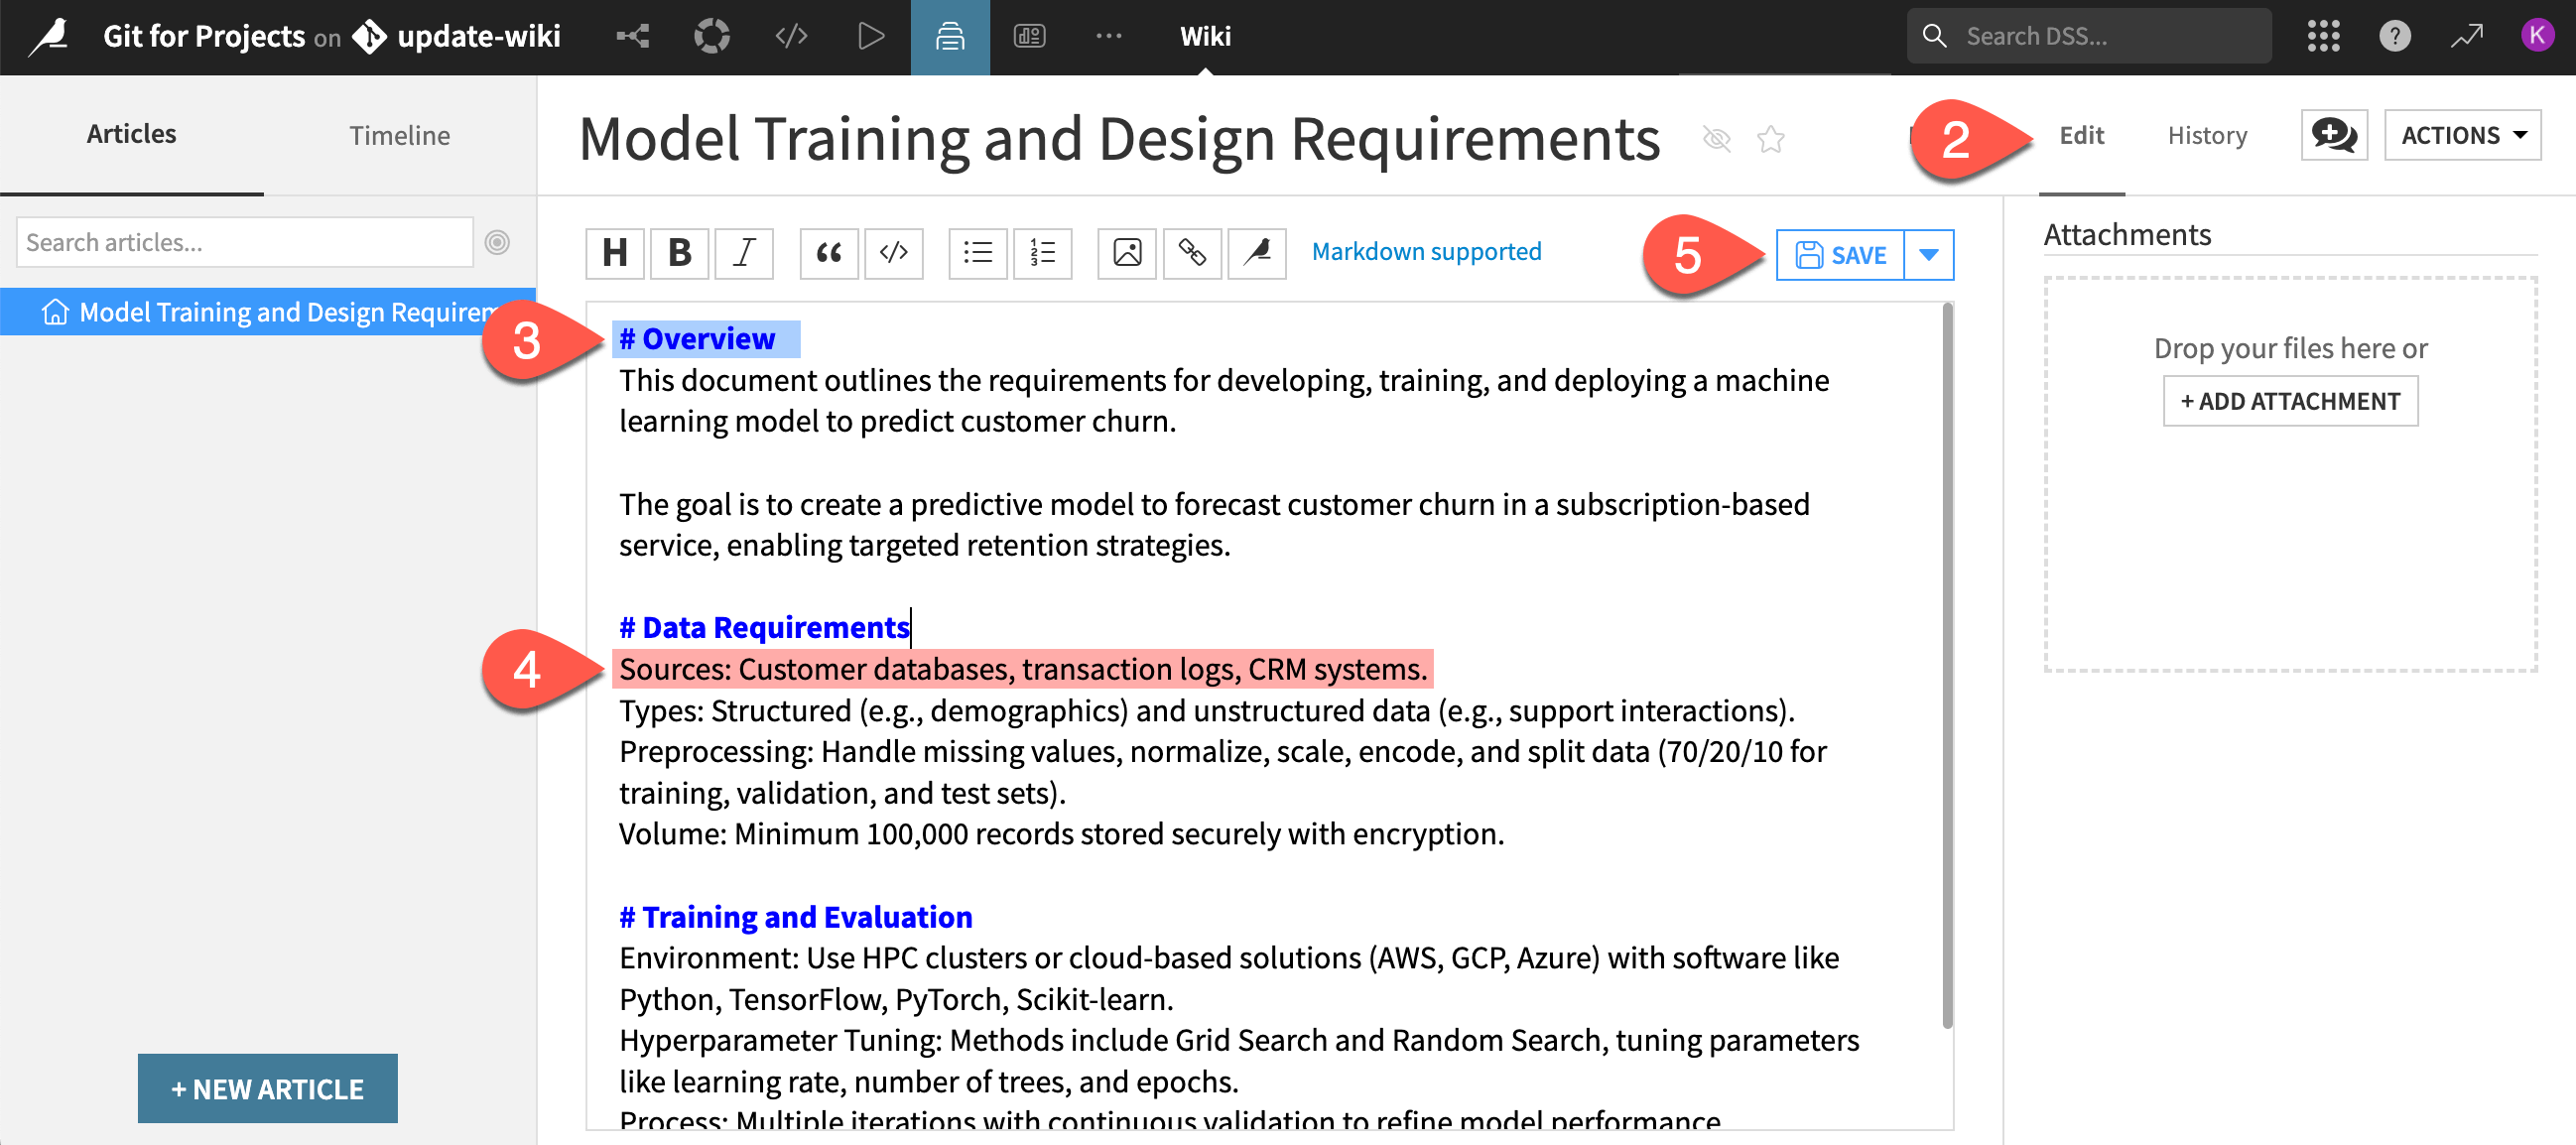
From the top navigation bar, open the branched project’s wiki (
 ) (or
) (or g+w).Click the Edit tab of the Model Training and Design Requirements article.
Change the first heading from Introduction to
Overview.Delete the line that includes
Sources: Customer databases, transaction logs, CRM systems.Save your changes.
Open the Version Control page.
Note that the latest commit should reflect that you saved your wiki article.
Note
Recall that any change that’s saved in a Dataiku project is automatically committed to the local Git repository. In other words, you don’t have to stage and commit your changes manually.
Edit the master wiki#
Now, you’ll create a conflicting change on the master branch.
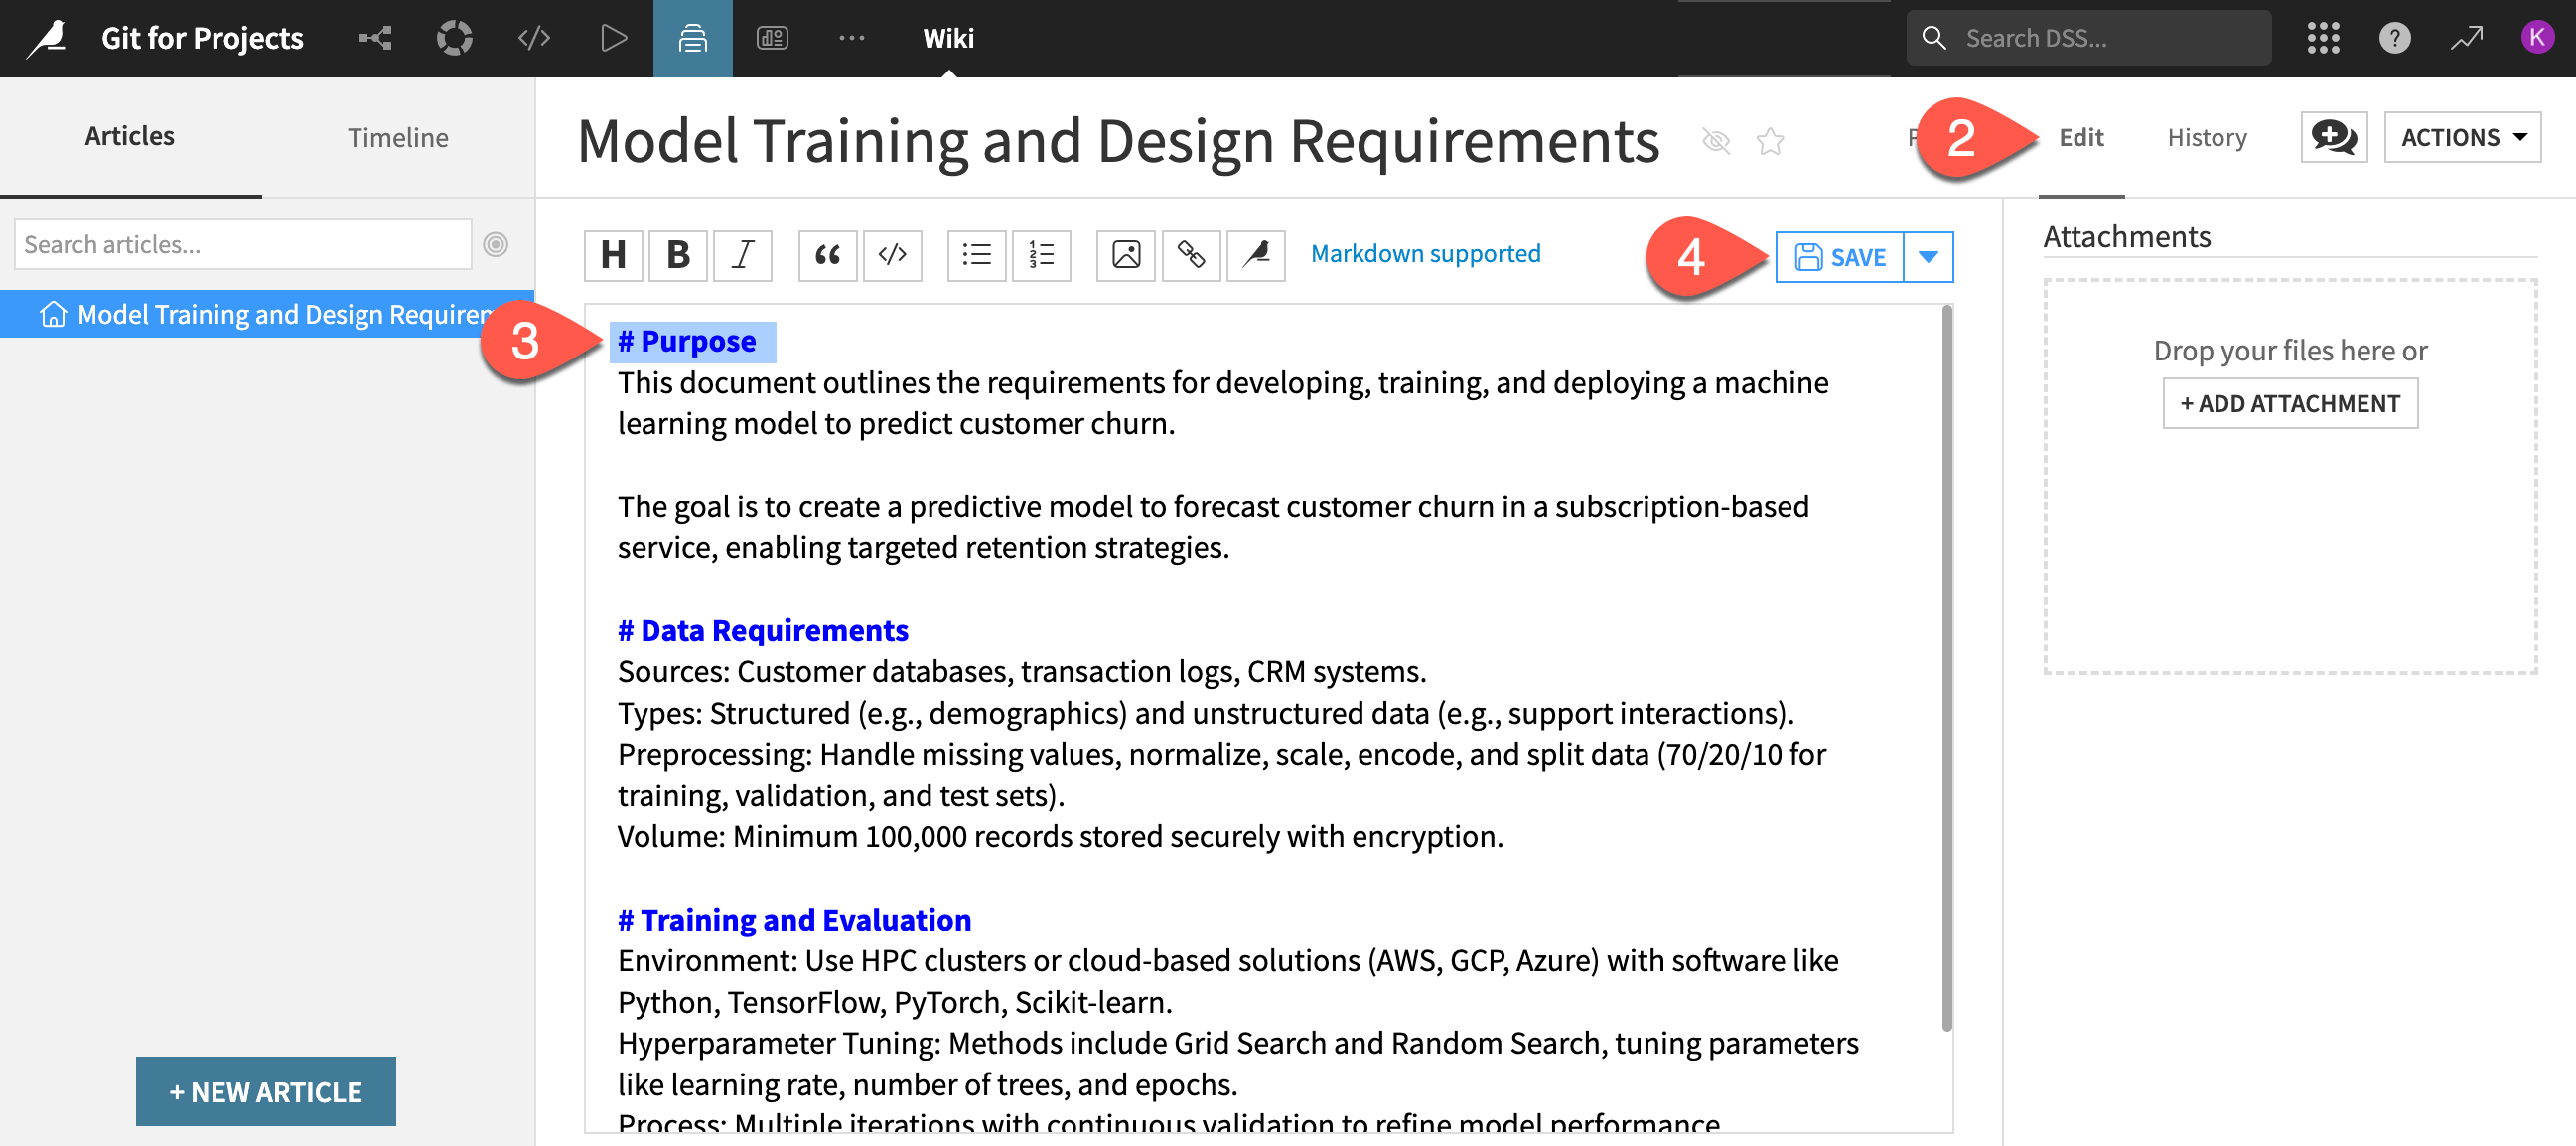
In a new tab, open the original project that’s on master.
Open the wiki and switch to Edit mode.
This time, change the first heading from Introduction to
Purpose.Save your changes.
Create a merge request#
Let’s see what happens when trying to merge the changes from the update-wiki branch into the master branch.
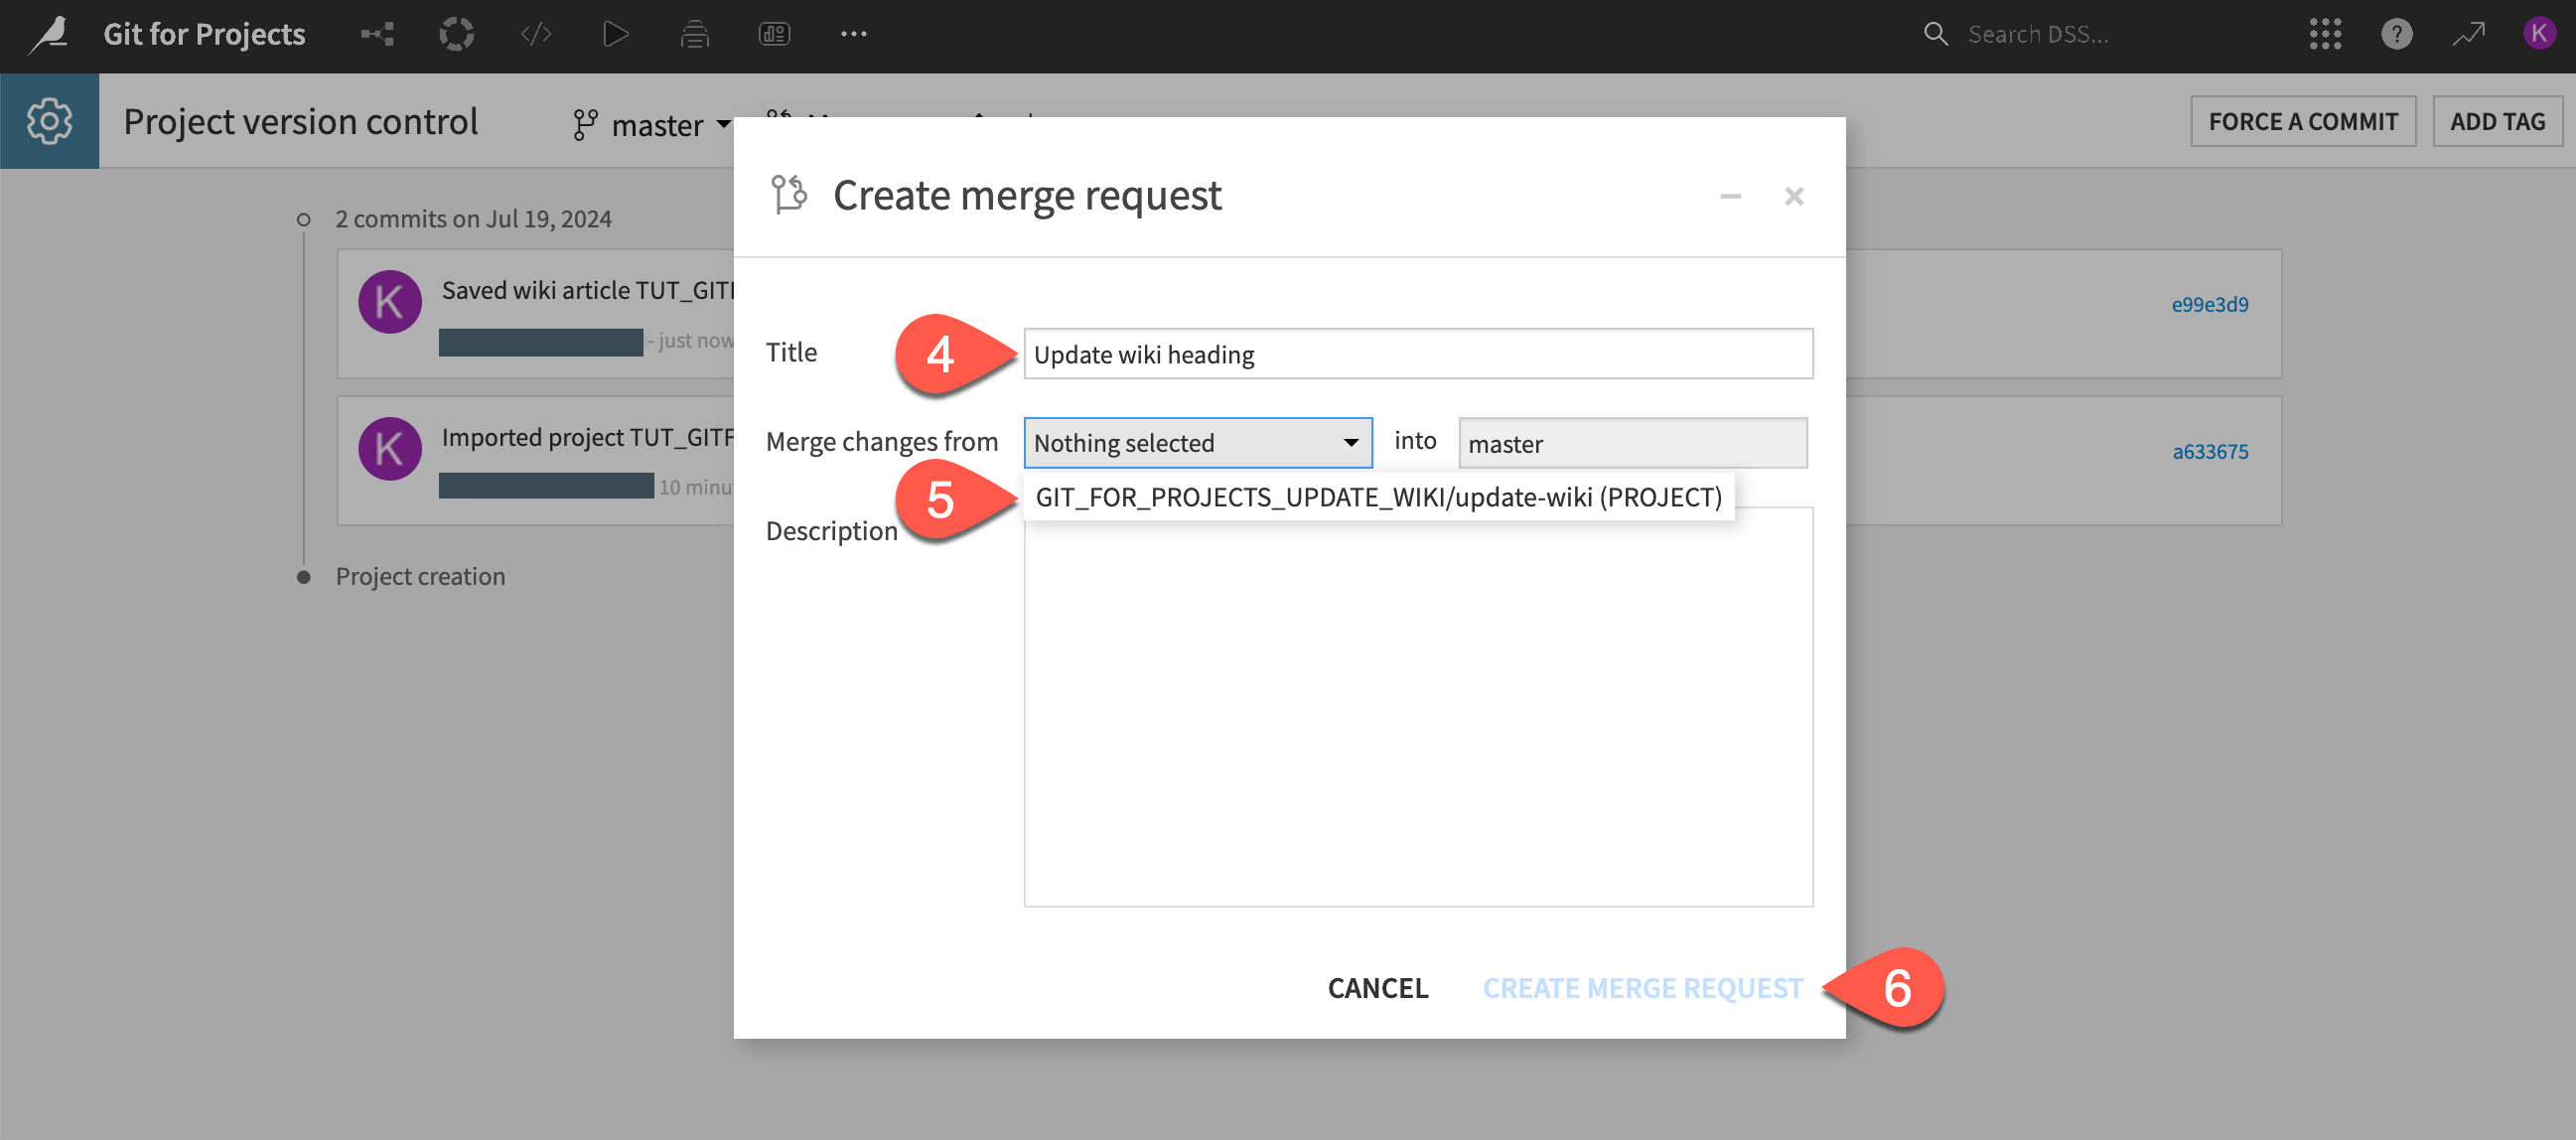
From the project on
master, open the Version Control page.Click on the Merge dropdown.
Select Create a new merge request.
For the Title, type
Update wiki heading.Select the update-wiki branch project to merge into
master.Click Create Merge Request.
In the Commits tab, review the commits that will be merged into
master.In the Changed files tab, you should see the wiki article that you modified.
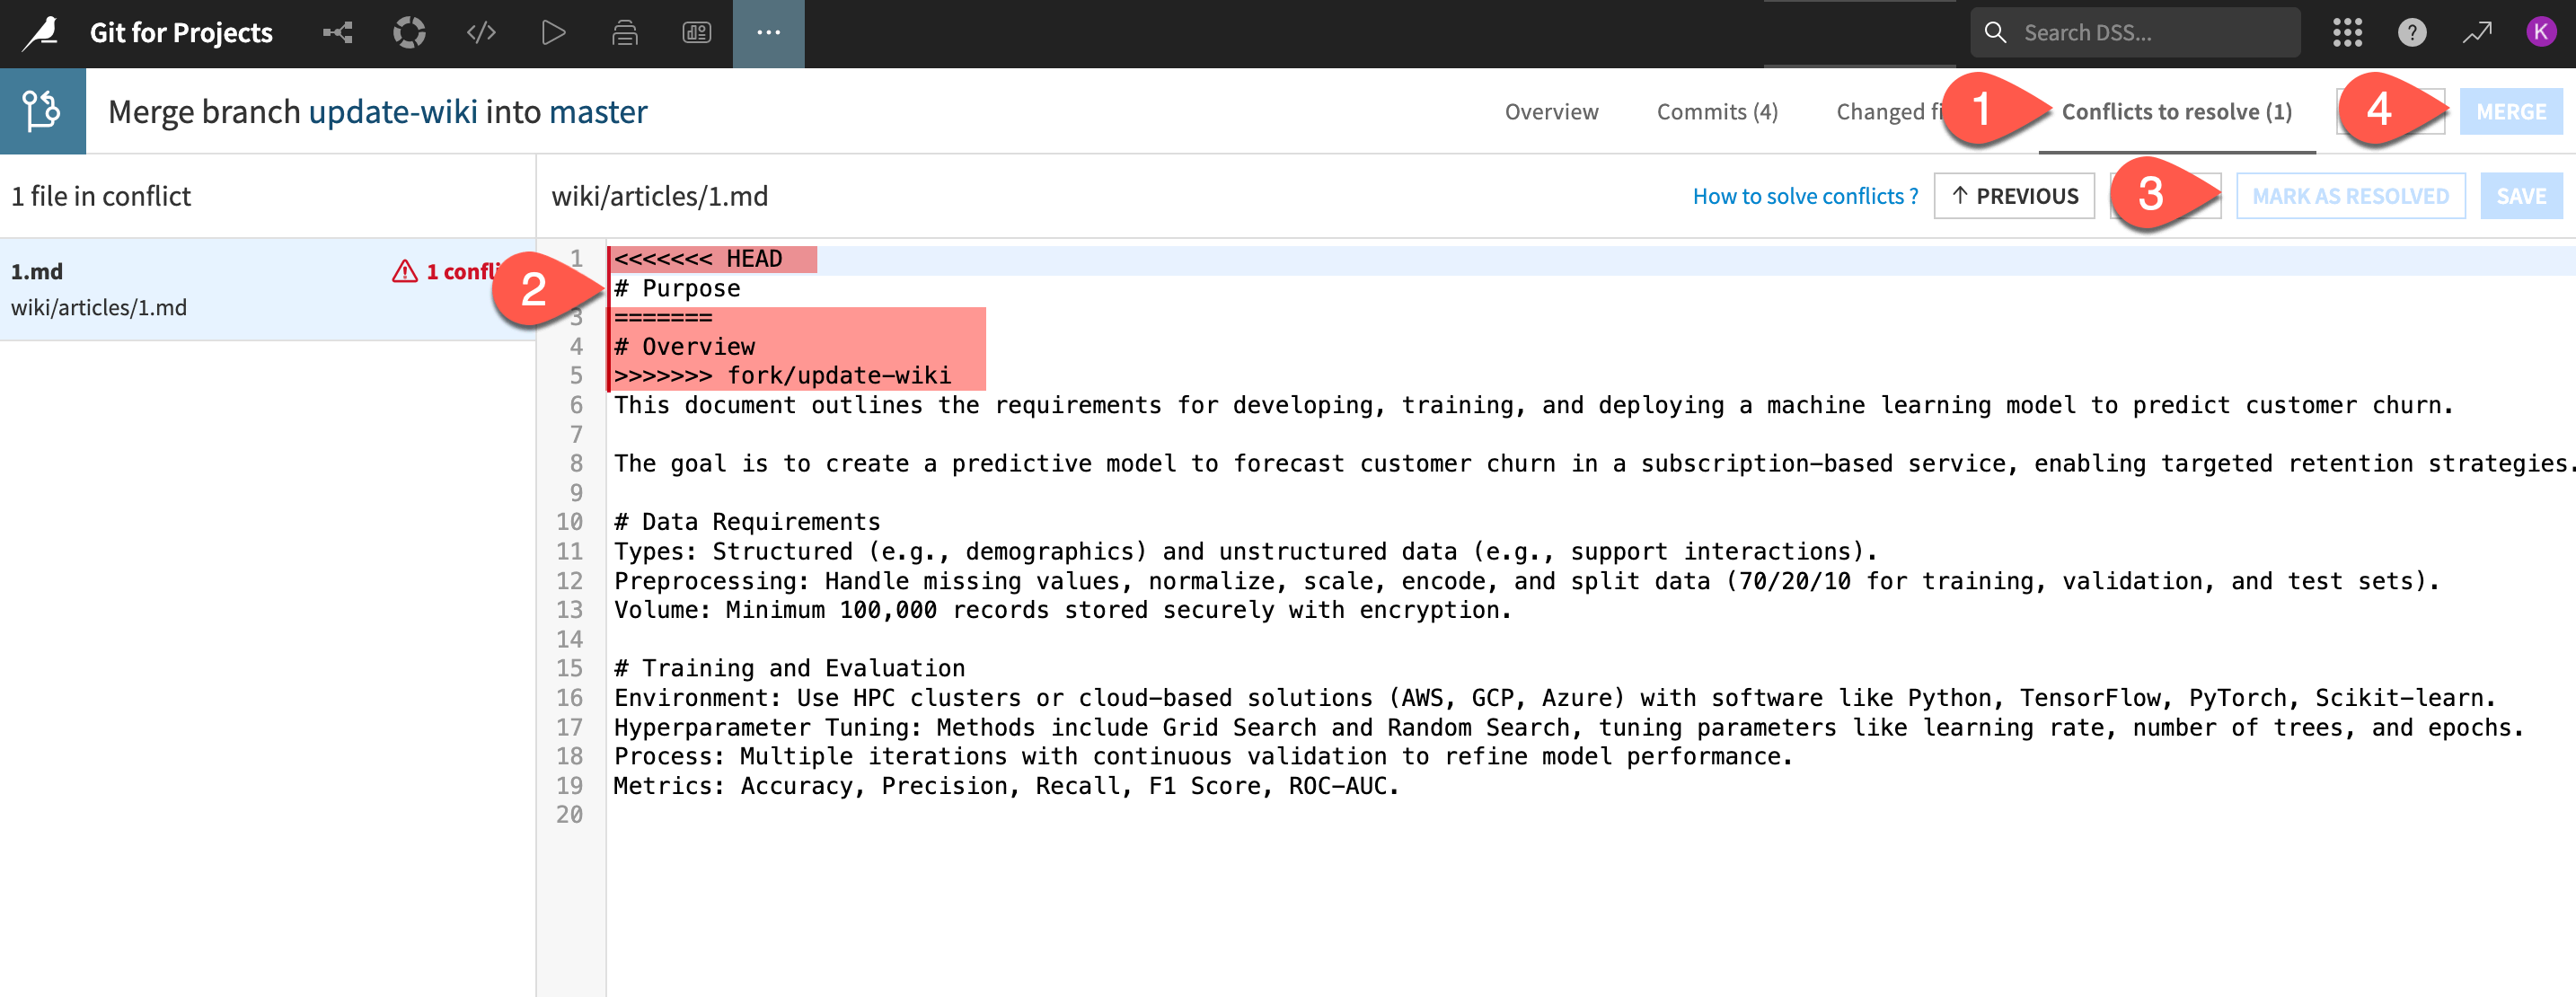
Resolve a merge conflict#
Since you changed the same line of the wiki on both branches, you need to resolve a merge conflict. You’ll see that you can’t click Merge until the conflict is resolved.
Navigate to the Conflicts to resolve tab.
Delete all lines between and including
<<<<<<< HEADand>>>>>>> fork/update-wikiexcept # Purpose.Note
You can also make other changes to the file during this time if you want them to be included in the merge.
Notice that the line that you removed doesn’t appear in the article.
Save and select Mark as Resolved.
Merge the changes.
Close the Request.
Tip
If you want, return to the wiki article page and make sure that the changes are correctly reflected in the master branch.
Version control with remote Git repositories#
Connect to a remote Git repository#
In this section, you’ll have to connect your project to a remote Git repository. Each project must have its own repository.
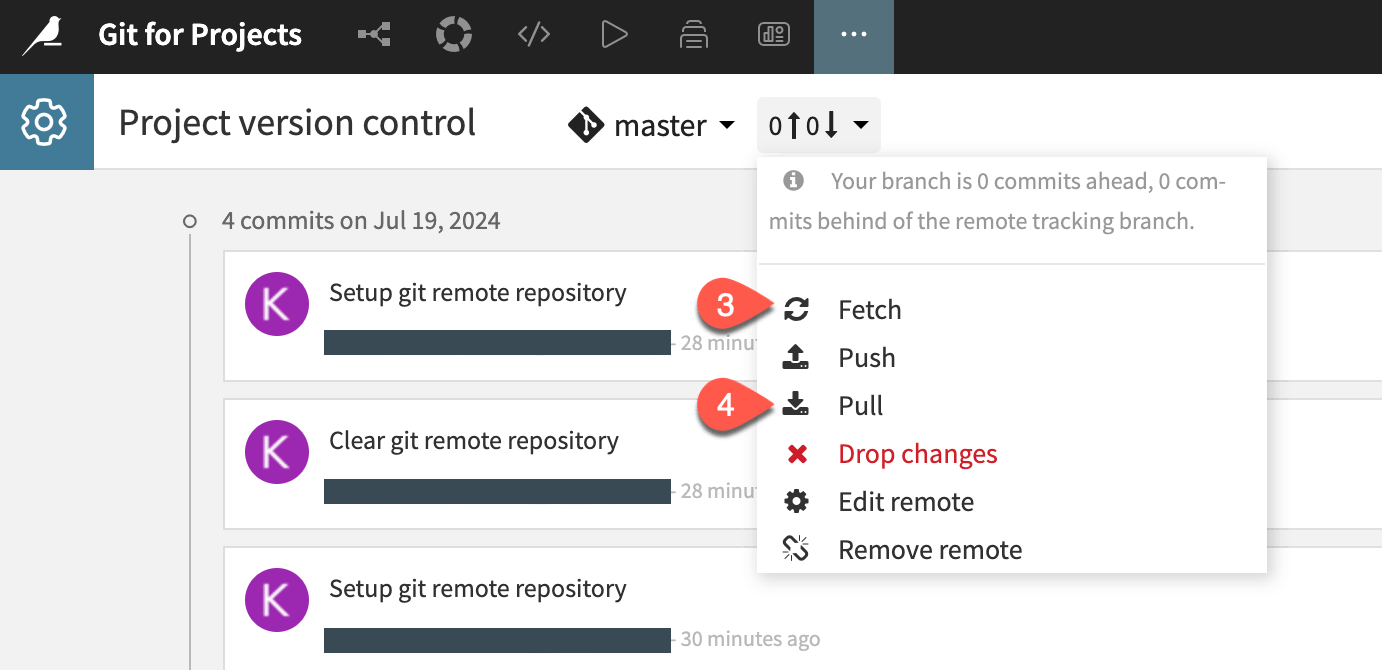
On the
masterbranch project, navigate to the Version Control page.Click on the change tracking (-
 -
- ) indicator, and select Add remote.
Enter the SSH URL of the remote and click OK.
From the change tracking indicator, select Push.
In your remote Git repository, view that the
masterbranch has been successfully pushed.
Branch the project#
Next, you’ll create a new branch.
From the branch (
) indicator, click Create new branch.Name the new branch
prune-flow.Choose Duplicate project to work on new branch.
Select Next.
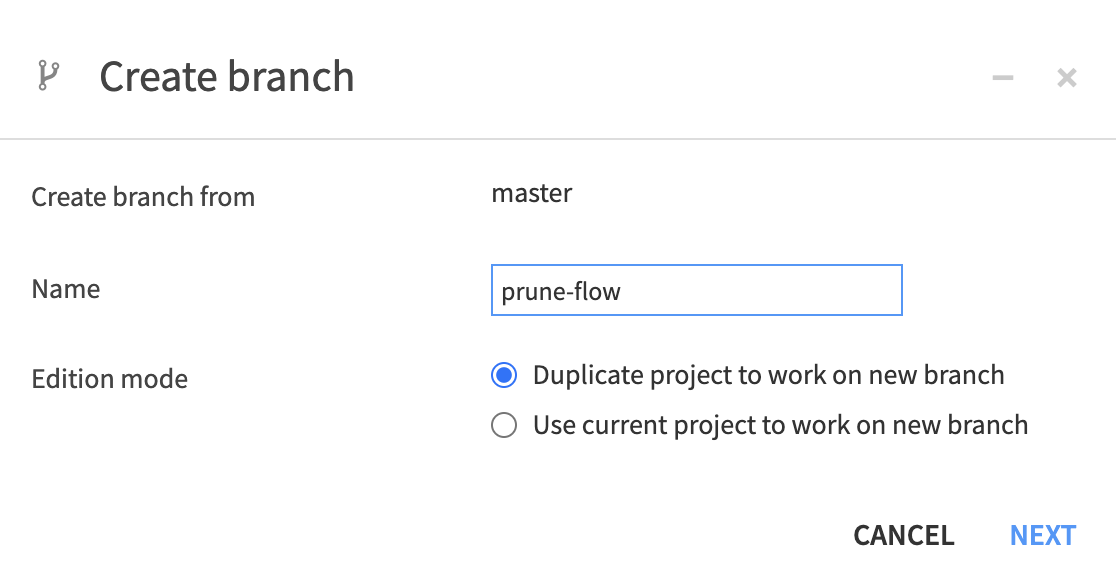
Select a project folder if you wish.
Click Duplicate and Create Branch.
This creates a duplicate project on the prune-flow branch.
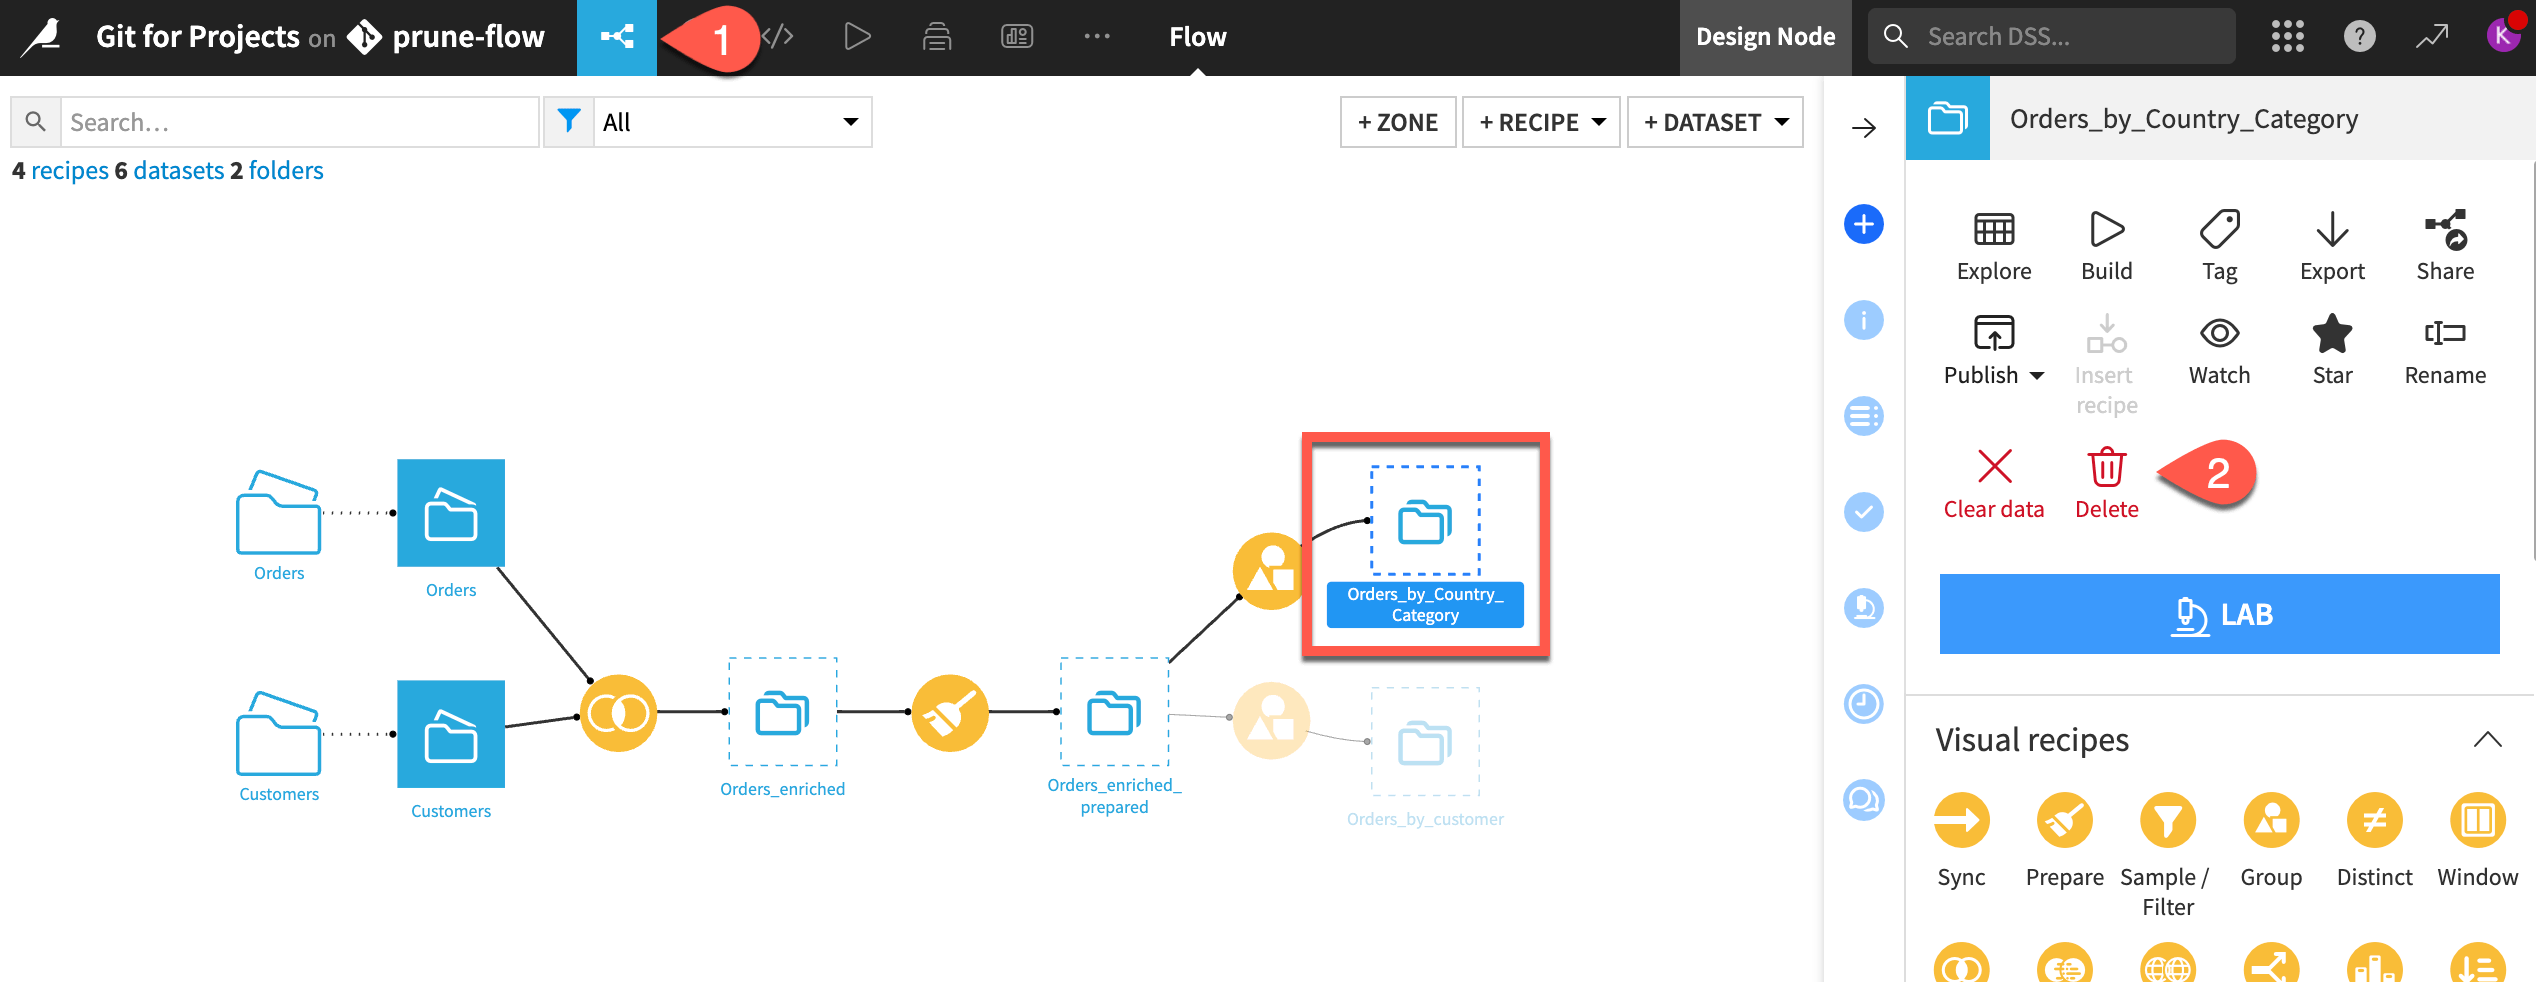
Make changes on the branch#
Now, you can make changes to the duplicate project on the prune-flow branch without disturbing the rest of the data team’s use of the master branch of the project.
In the new project, go to the Flow.
Delete the Orders_by_Country_Category dataset.
Push changes to the remote repository#
To make your changes appear in the remote repository:
Return to the Version Control page.
From the change tracking (-
-) indicator, select Push.
You will see that the prune-flow branch has been pushed to your remote Git repository.
Merge branches#
To merge the changes on prune-flow into master, you can either:
Merge the changes locally and push the merge commit to the remote repository.
Merge the changes in the remote repository and pull the changes locally.
For instance, if Pull Requests are part of your team’s workflow, you might choose to merge on GitHub.
In this case, merge the changes remotely. (You can use the command line, a Git client, or whatever you are comfortable with.)
Return to the original project on the
masterbranch.From the change tracking (-
-) indicator, Fetch the changes from the remote Git repository.Note
You’ll notice on the change indicator that your branch is behind the remote master branch, as expected.
Pull the changes to your local Git.
Important
Branching and Merge Conflicts: This tutorial describes an extremely simple branch and merge. If multiple collaborators each create a separate branch off of master, and then try to merge their separate branches back to master, they’re likely to encounter Git merge conflicts.
These can be difficult or impossible to resolve. Your data team should agree on a plan for how to collaborate on projects using Git to avoid merge conflicts.
Next steps#
To learn more about other integrations with Git and Dataiku, see the reference documentation on Working with Git.