Deploy an API endpoint#
See a screencast covering this section’s steps
Although you have created a version of an API service including the endpoint, it exists only on the Design node, which is a development environment. A production use case requires separate environments for development and production. For example:
A batch deployment use case would require enabling an Automation node.
A real-time API deployment use case (as shown here) could use an API node if staying within Dataiku’s ecosystem. Additionally, depending on your MLOps strategy, you also have external deployment options such as Amazon SageMaker, Azure ML, Google Vertex AI, Snowflake, or Databricks.
At a high-level, you can think of the entire process in three steps:
Create the API service in a Design node project (already done!).
Publish the API service in the Design node project to the API Deployer.
Deploy the API service from the API Deployer to a production environment (typically an API node).
See also
Many organizations incorporate an additional governance framework throughout this process. They use a Govern node to manage the deployment of projects and models with a sign-off process. Learn more in the AI Governance Specialist learning path.
Configure an API node#
Before deploying, you first need to configure a production environment. In this example, you’ll use an API node.
Dataiku Cloud users, which includes those on free trials, need to activate the API node extension from their Launchpad.
Users on self-managed instances need their instance administrators to follow API Node & API Deployer: Real-time APIs in the reference documentation.
From the Design node to the Deployer#
Once you have the necessary infrastructure in place, it’s a few more clicks to actually deploy the endpoint.
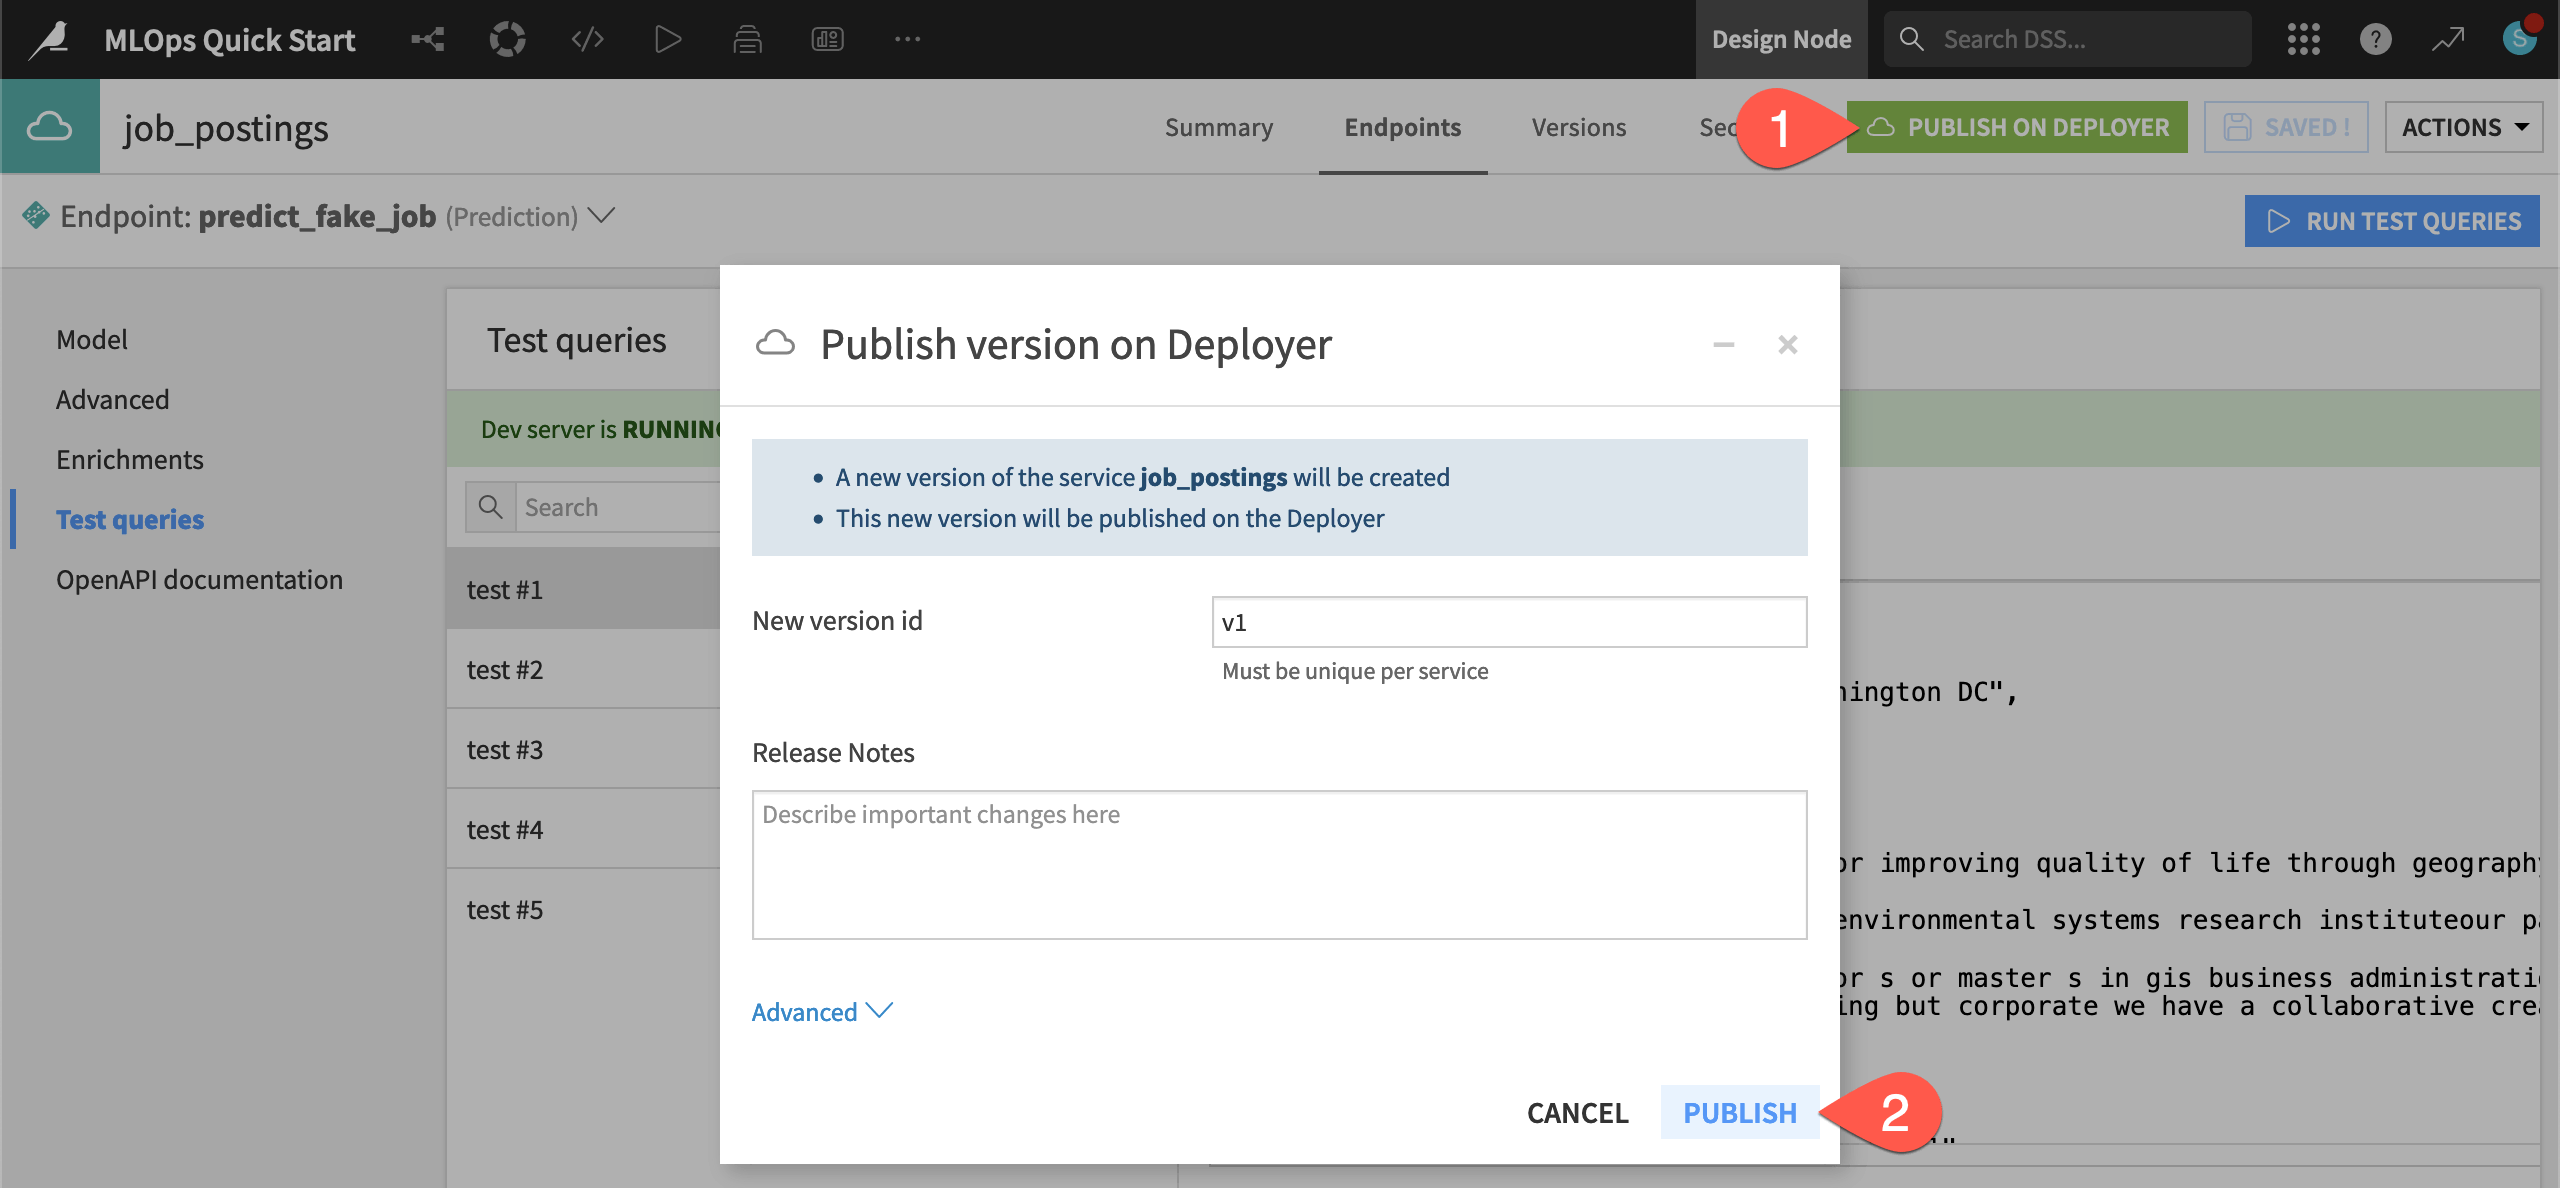
From the job_postings API service on the Design node, click Publish on Deployer.
Click Publish, accepting the default version ID.
From the Deployer to an API node#
You now have published the API service from the Design node to the API Deployer. Navigate there next.
Immediately after publishing, you can click the popup notification to Open API Deployer.
If you miss it, open the waffle (
) menu in the top right.
Choose Local/Remote Deployer (depending on your instance configuration).
Then select Deploying API Services.
Now that you have published the API service to the API Deployer, there is one more step to deploy the service to an API node.
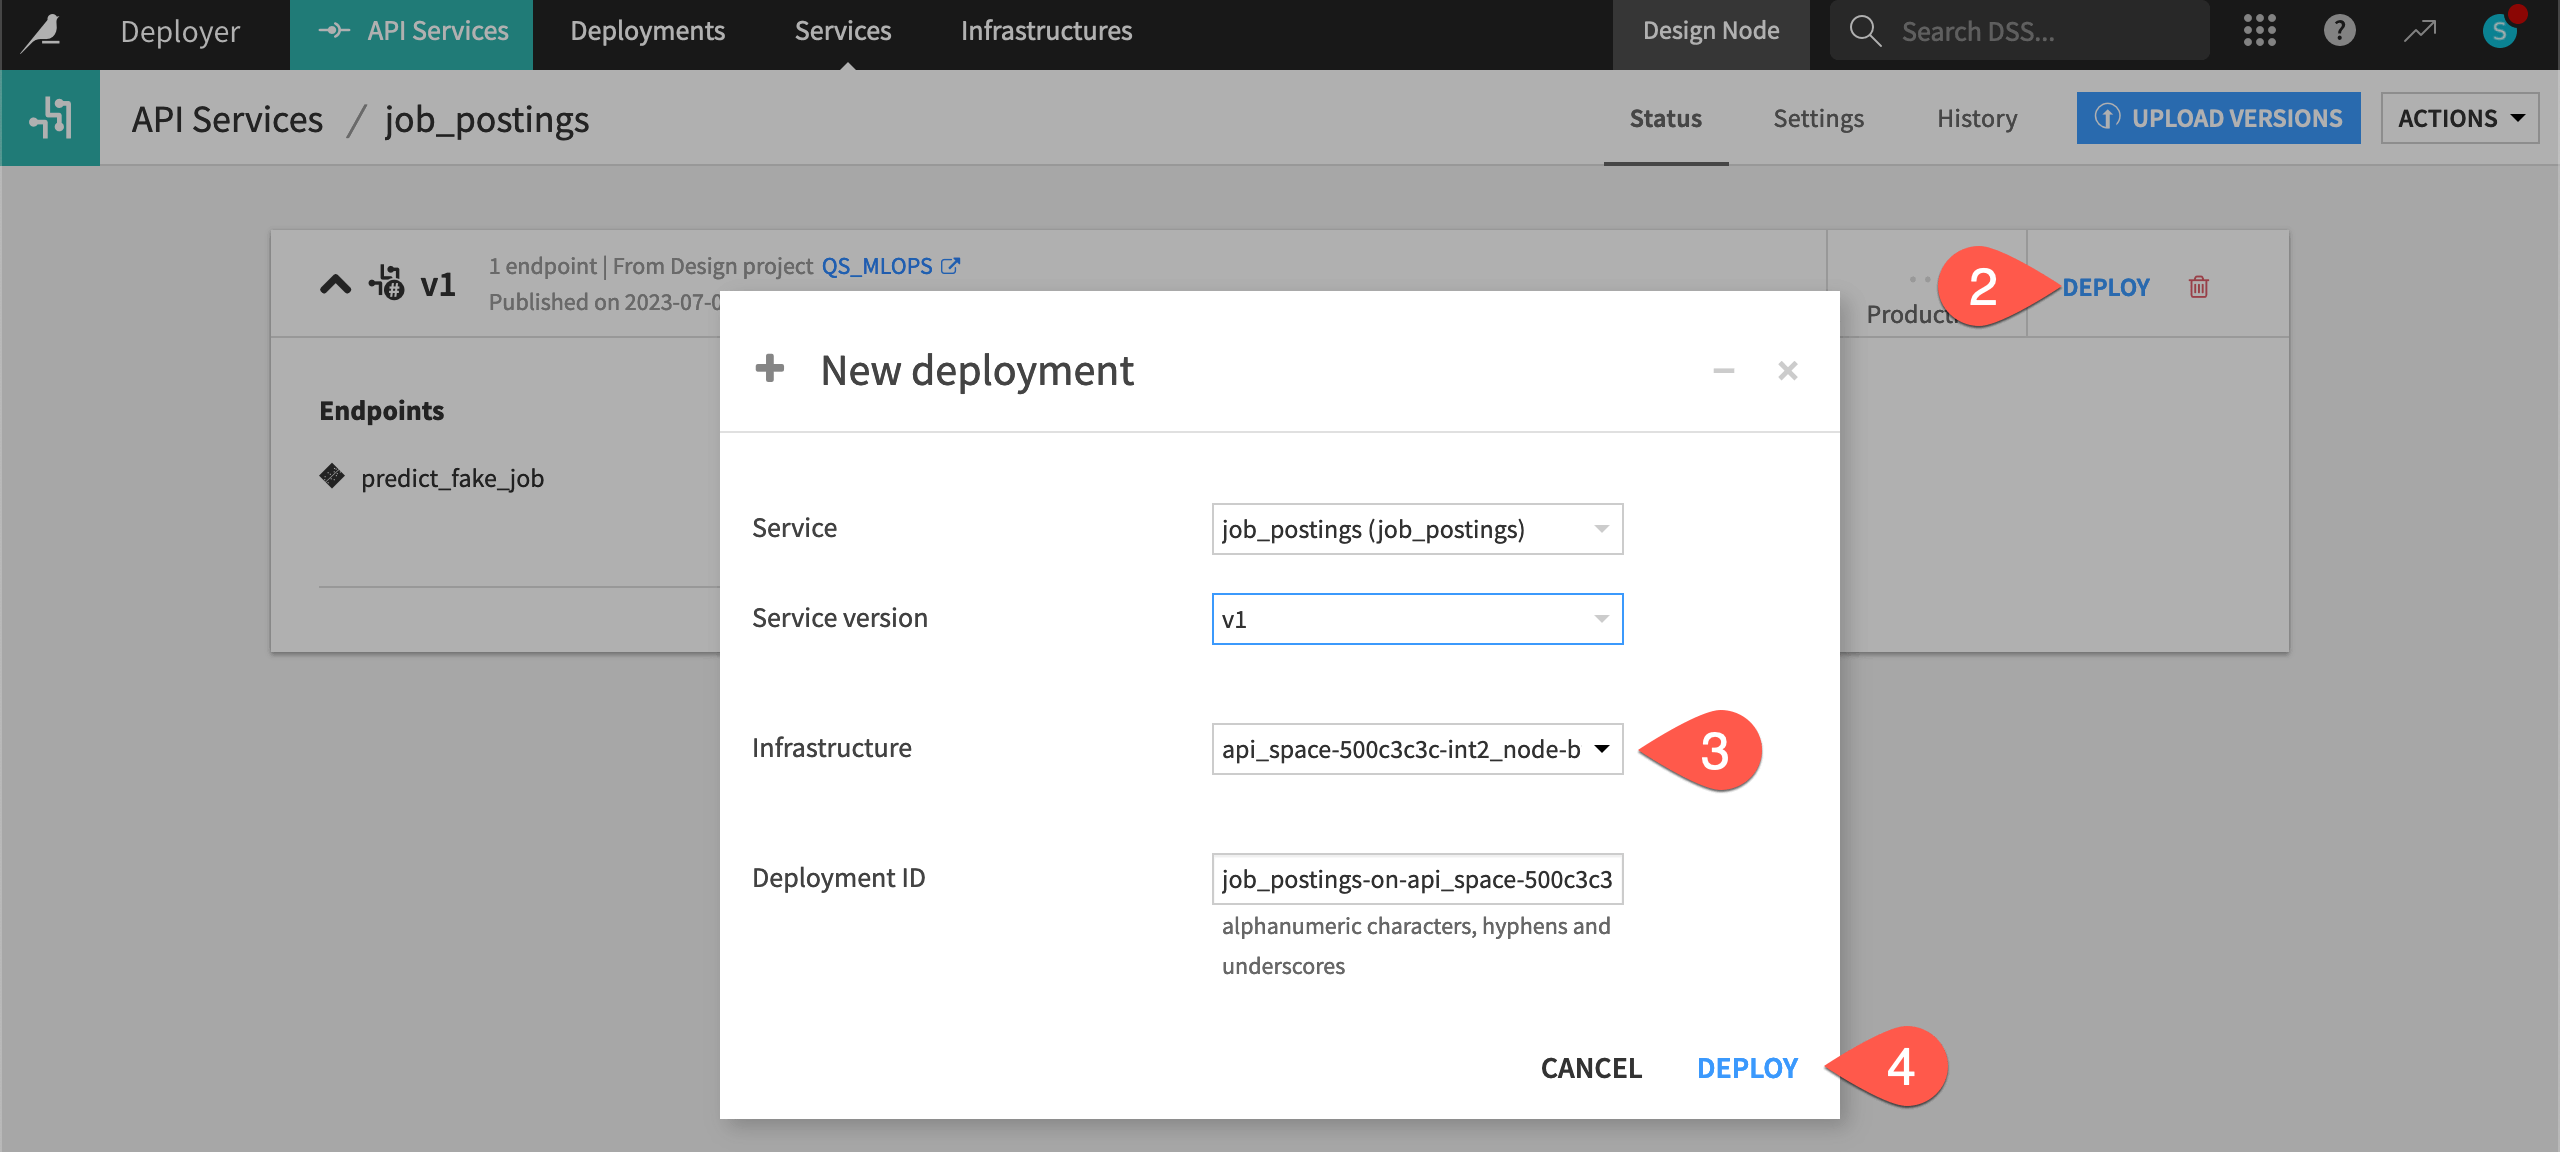
On the API Deployer, find your API service job_postings.
Click Deploy.
If not already chosen for you, select an available infrastructure.
Click Deploy again.
Important
It’s possible you’ll see a warning or even an error at this point due to the Govern policy associated with your chosen infrastructure. If you see a warning, you can ignore it. If you encounter an error, you’ll need to choose another infrastructure.
Click Deploy once more to confirm.
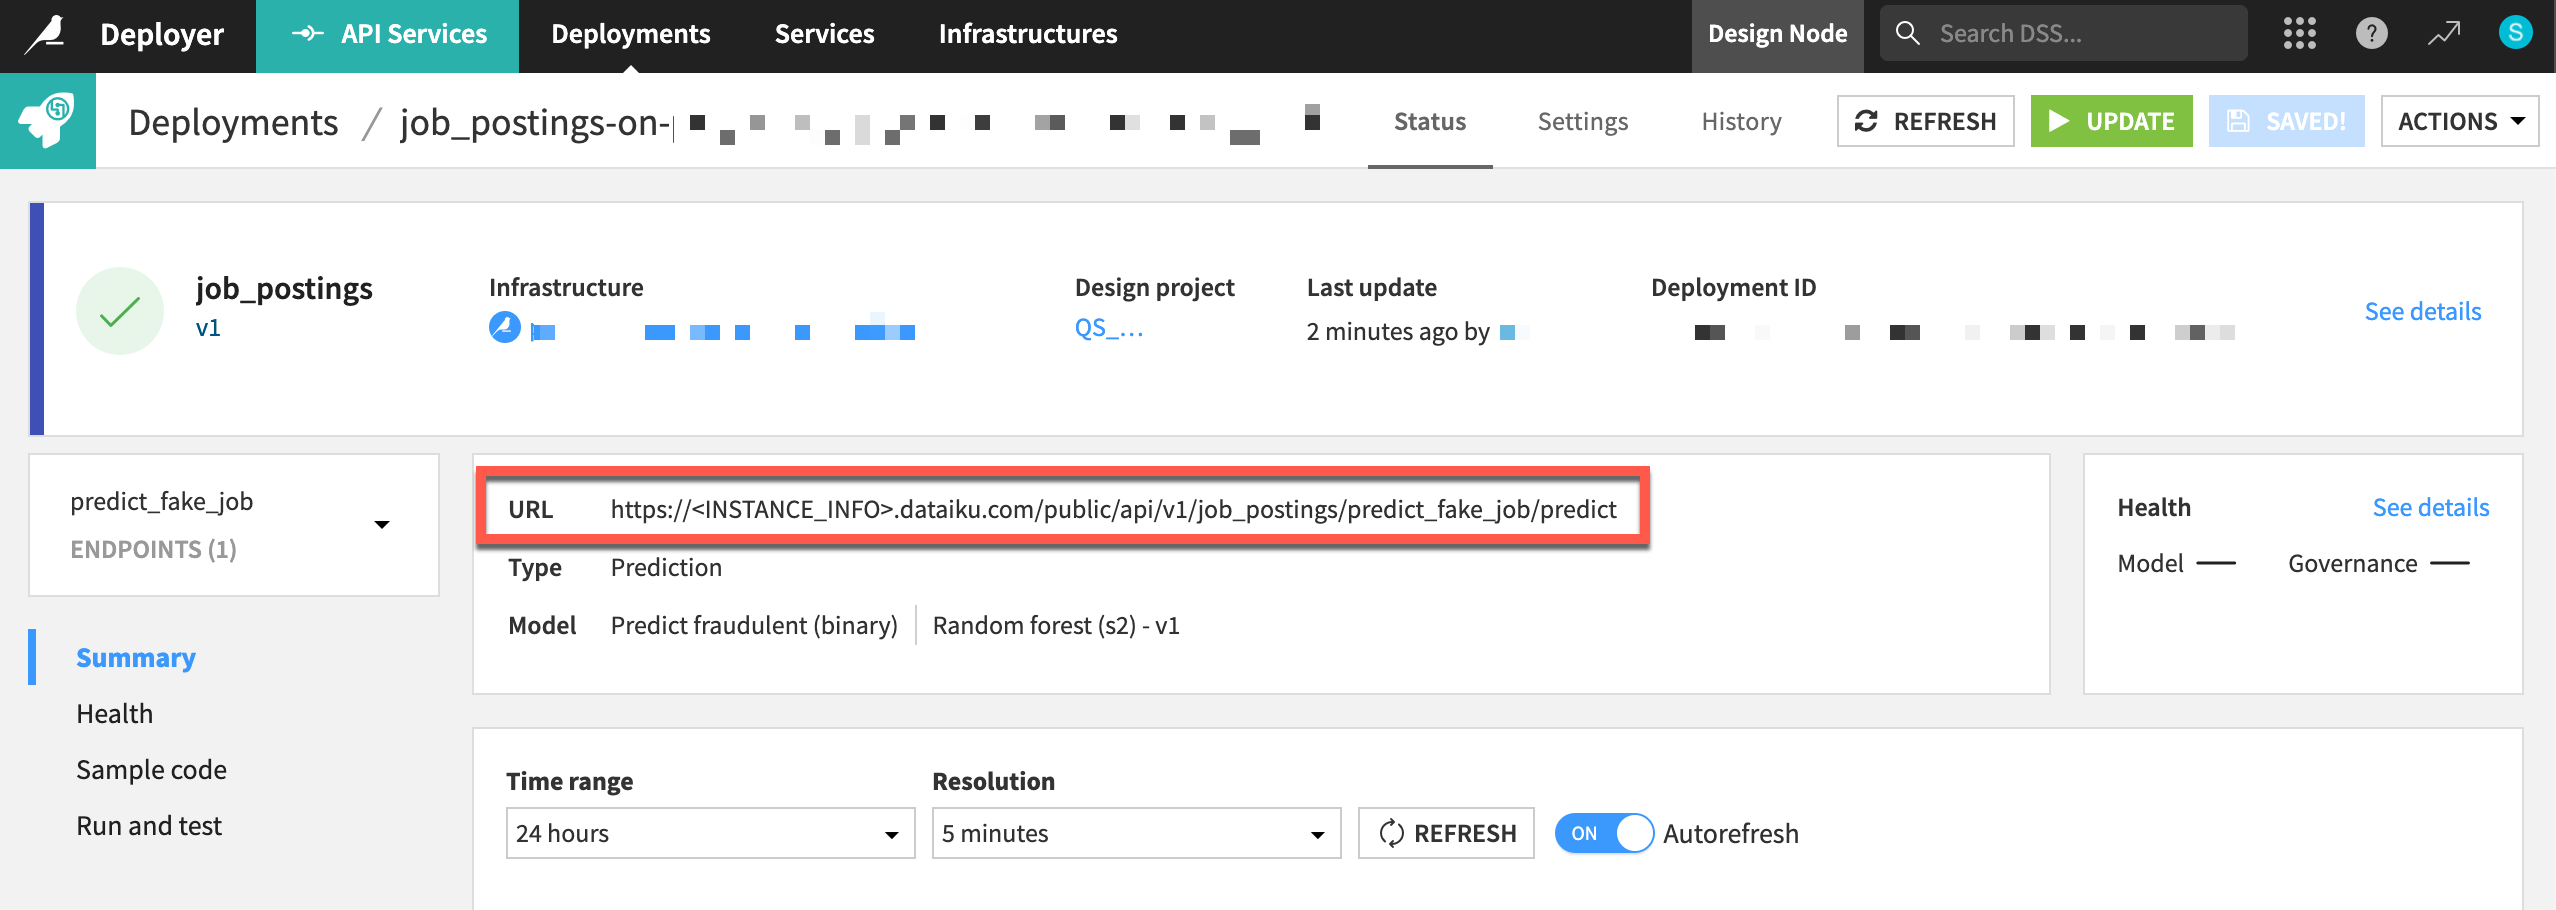
You should now have an API endpoint running in a production environment!
Send test queries to the API node#
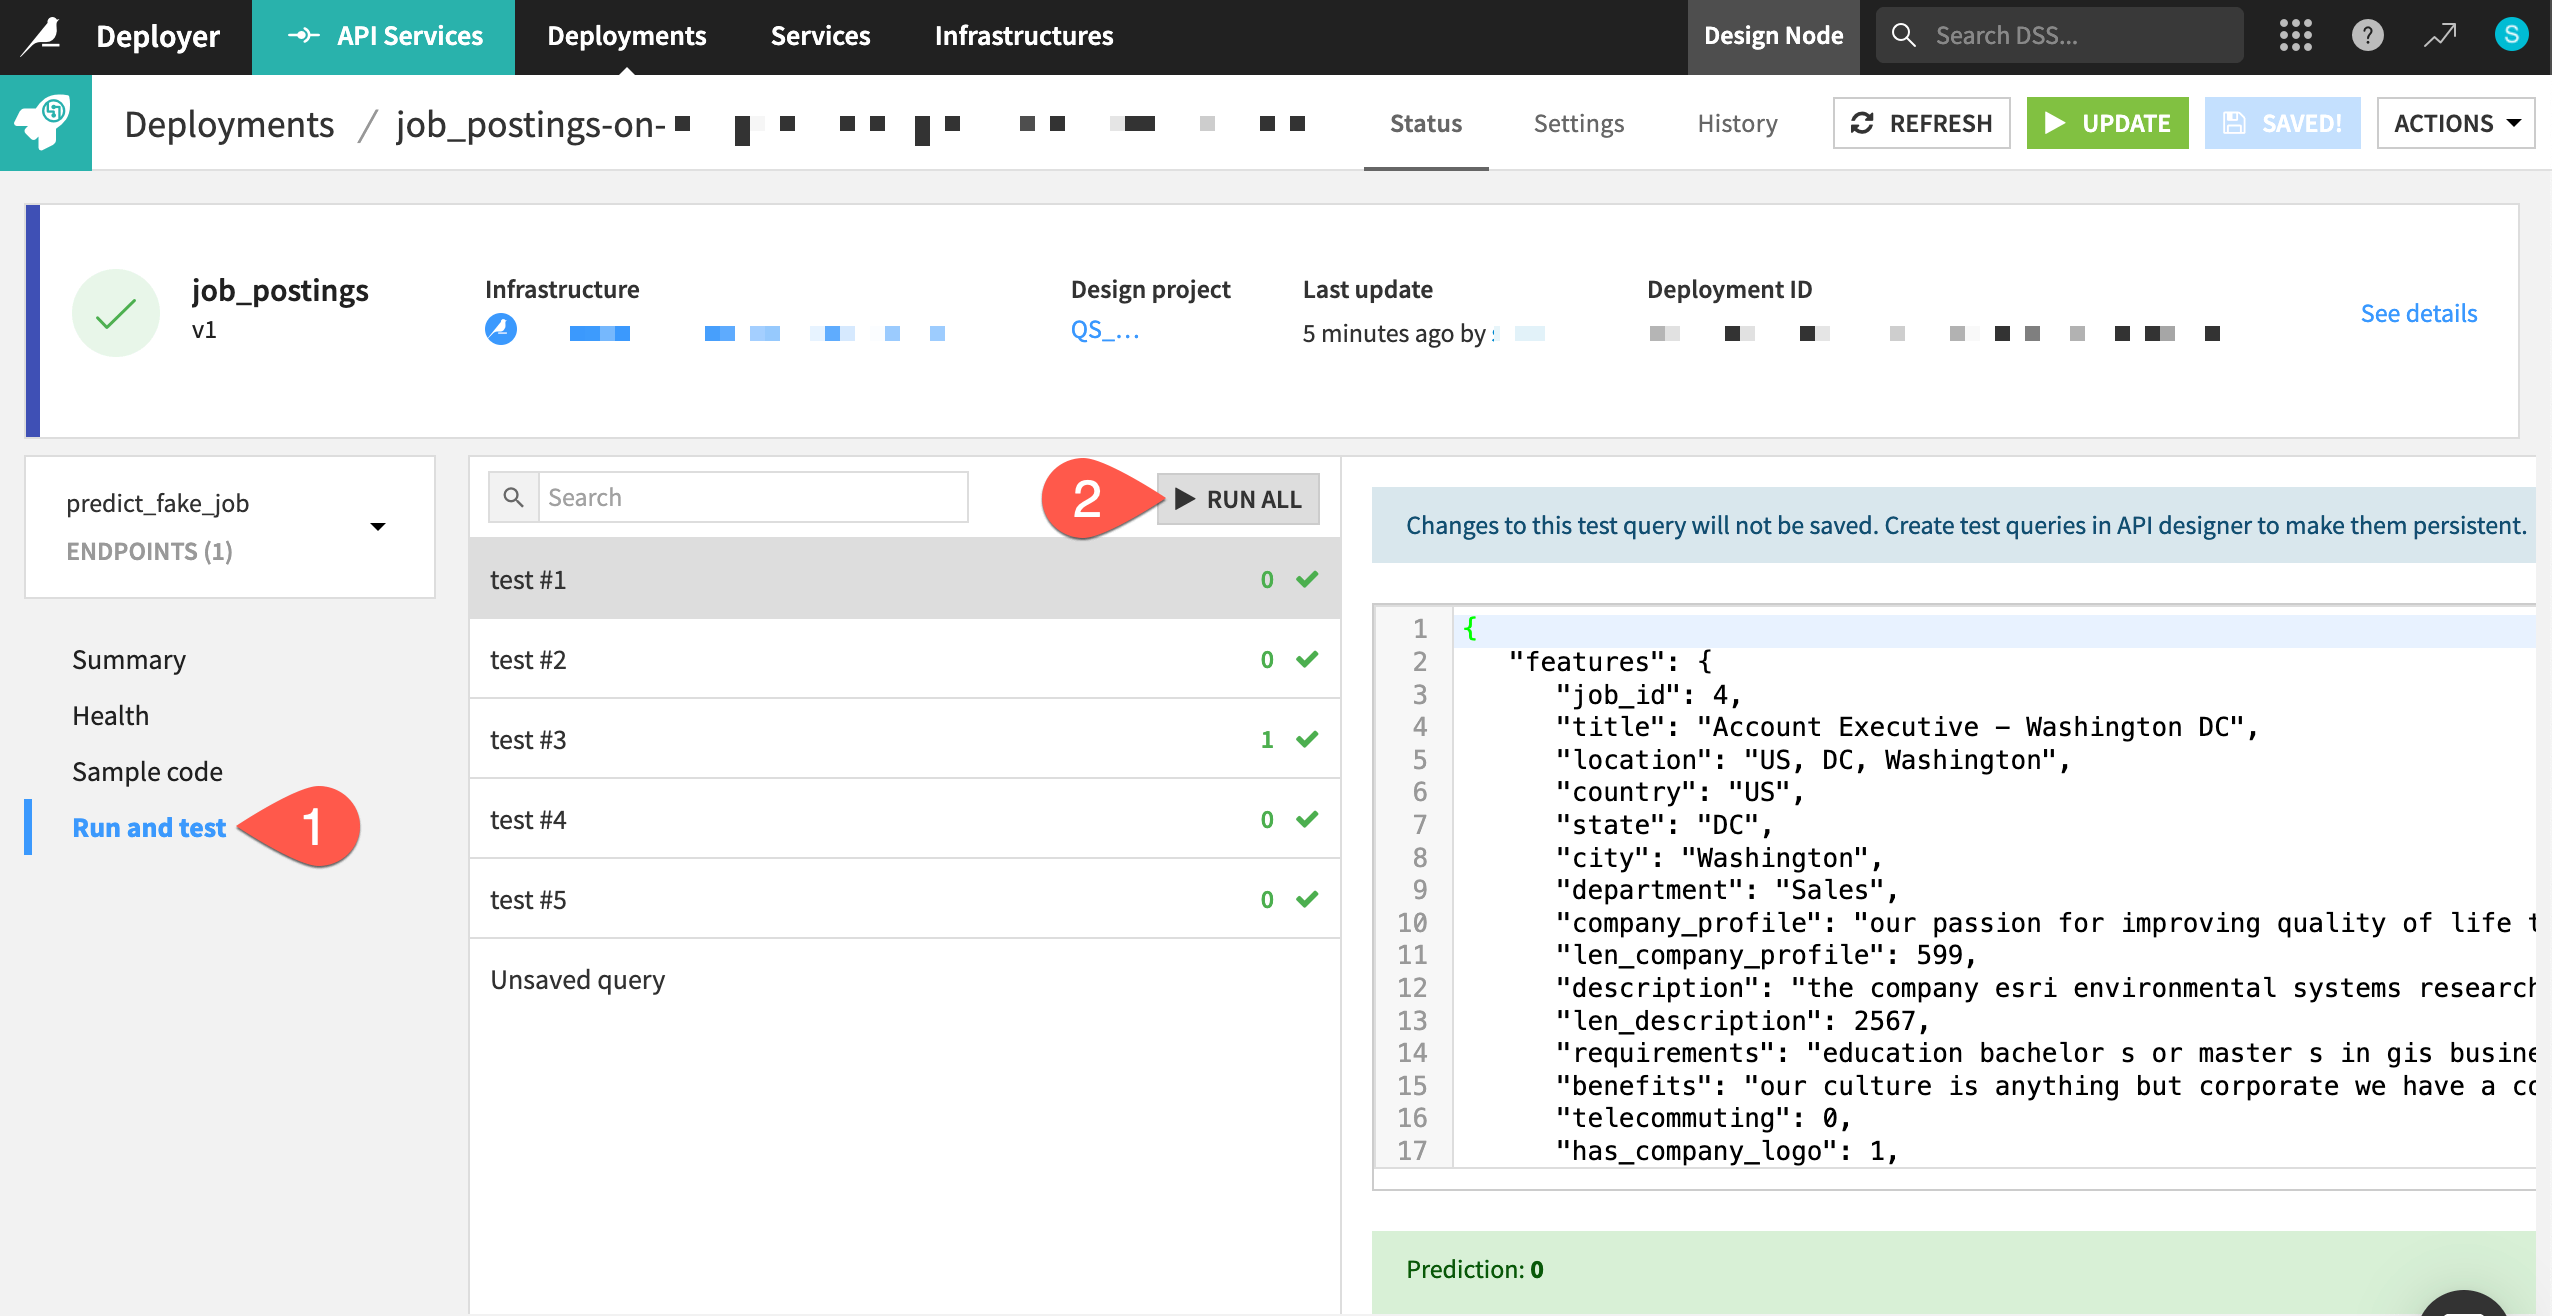
Once again, test the endpoint with a few more queries—this time sending them to an API node.
From the predict_fake_job endpoint on the API Deployer, navigate to the Run and test panel.
Click Run All.
See also
Once you’ve deployed an API service, the next step would be to monitor it using a model evaluation store. You’ll learn more in the MLOps Practitioner learning path!

