
Tutorial | Configure a connection between Dataiku and an SQL database#
Get started#
Data projects begin with establishing connections to data sources. Those connections are often SQL connections.
Objectives#
In this tutorial, you will:
Create a local SQL connection if you don’t already have one available.
Create a connection to this source in Dataiku.
Prerequisites#
Dataiku 12.0 or later.
Admin permission.
Create an SQL database#
To get started, you need to have an SQL database available. If you already have one, please skip to the next section.
Important
This example uses PostgreSQL, but you can follow a similar process for any supported SQL database.
Install PostgreSQL#
If it isn’t already available, install PostgreSQL version 9 or above. Take note of the host on which PostgreSQL is installed.
Tip
On macOS, try using the Postgres.app.
Configure your PostgreSQL database#
At a minimum you need a user and a database, as explained in the PostgreSQL guide. As a best practice, we recommend using schemas to administer multiple projects within a database.
For example, the sample code below creates the user matthieu, with password Password, and grants this user all privileges (can create and delete tables) in the dku_churn schema in the dku database. Similarly, it grants user dku_tshirt_admin all privileges on the dku_tshirt schema in the dku database.
psql -h localhost
CREATE DATABASE dku;
\c dku
CREATE SCHEMA dku_churn;
CREATE USER matthieu WITH PASSWORD 'Password';
GRANT ALL PRIVILEGES ON SCHEMA dku_churn TO matthieu;
CREATE SCHEMA dku_tshirt;
CREATE USER dku_tshirt_admin WITH PASSWORD 'Password';
GRANT ALL PRIVILEGES ON SCHEMA dku_tshirt TO dku_tshirt_admin;
\q
Configure an SQL connection in Dataiku#
Now that you have credentials for an SQL database, you need to establish a connection between Dataiku and this database.
Create a connection#
Log in as the Dataiku Administrator.
From the waffle (
 ) menu in the top navigation bar, choose Administration.
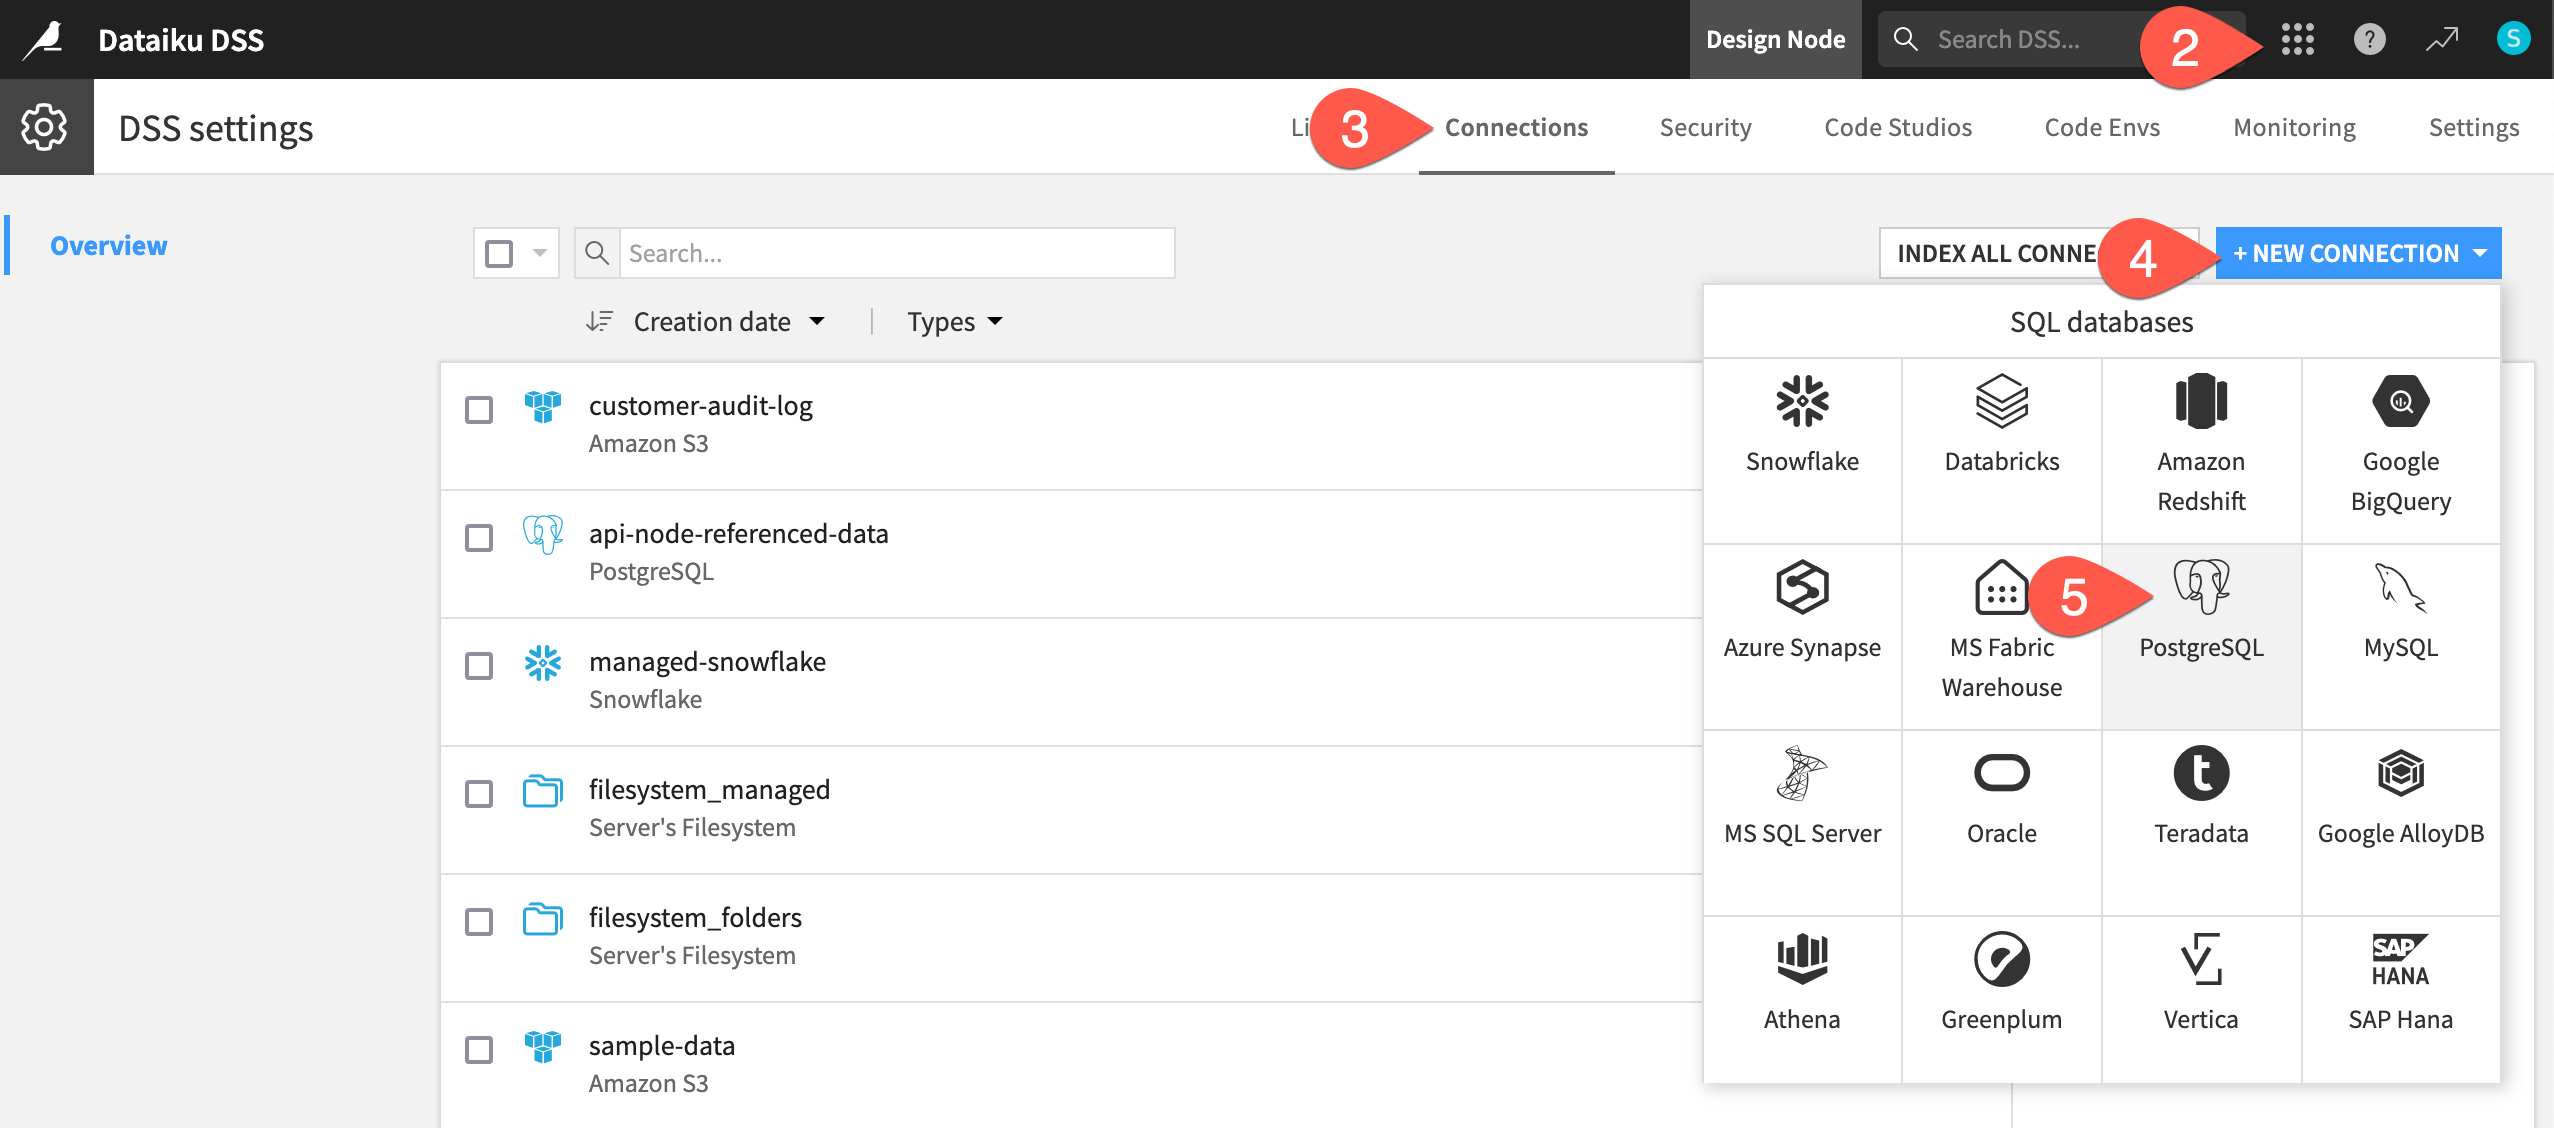
Navigate to the Connections tab.
Select + New Connection.
Select PostgreSQL (or another database).
Fill in the information required for the connection. Don’t forget to give a name to your connection!
Warning
You can’t change the connection name afterward.
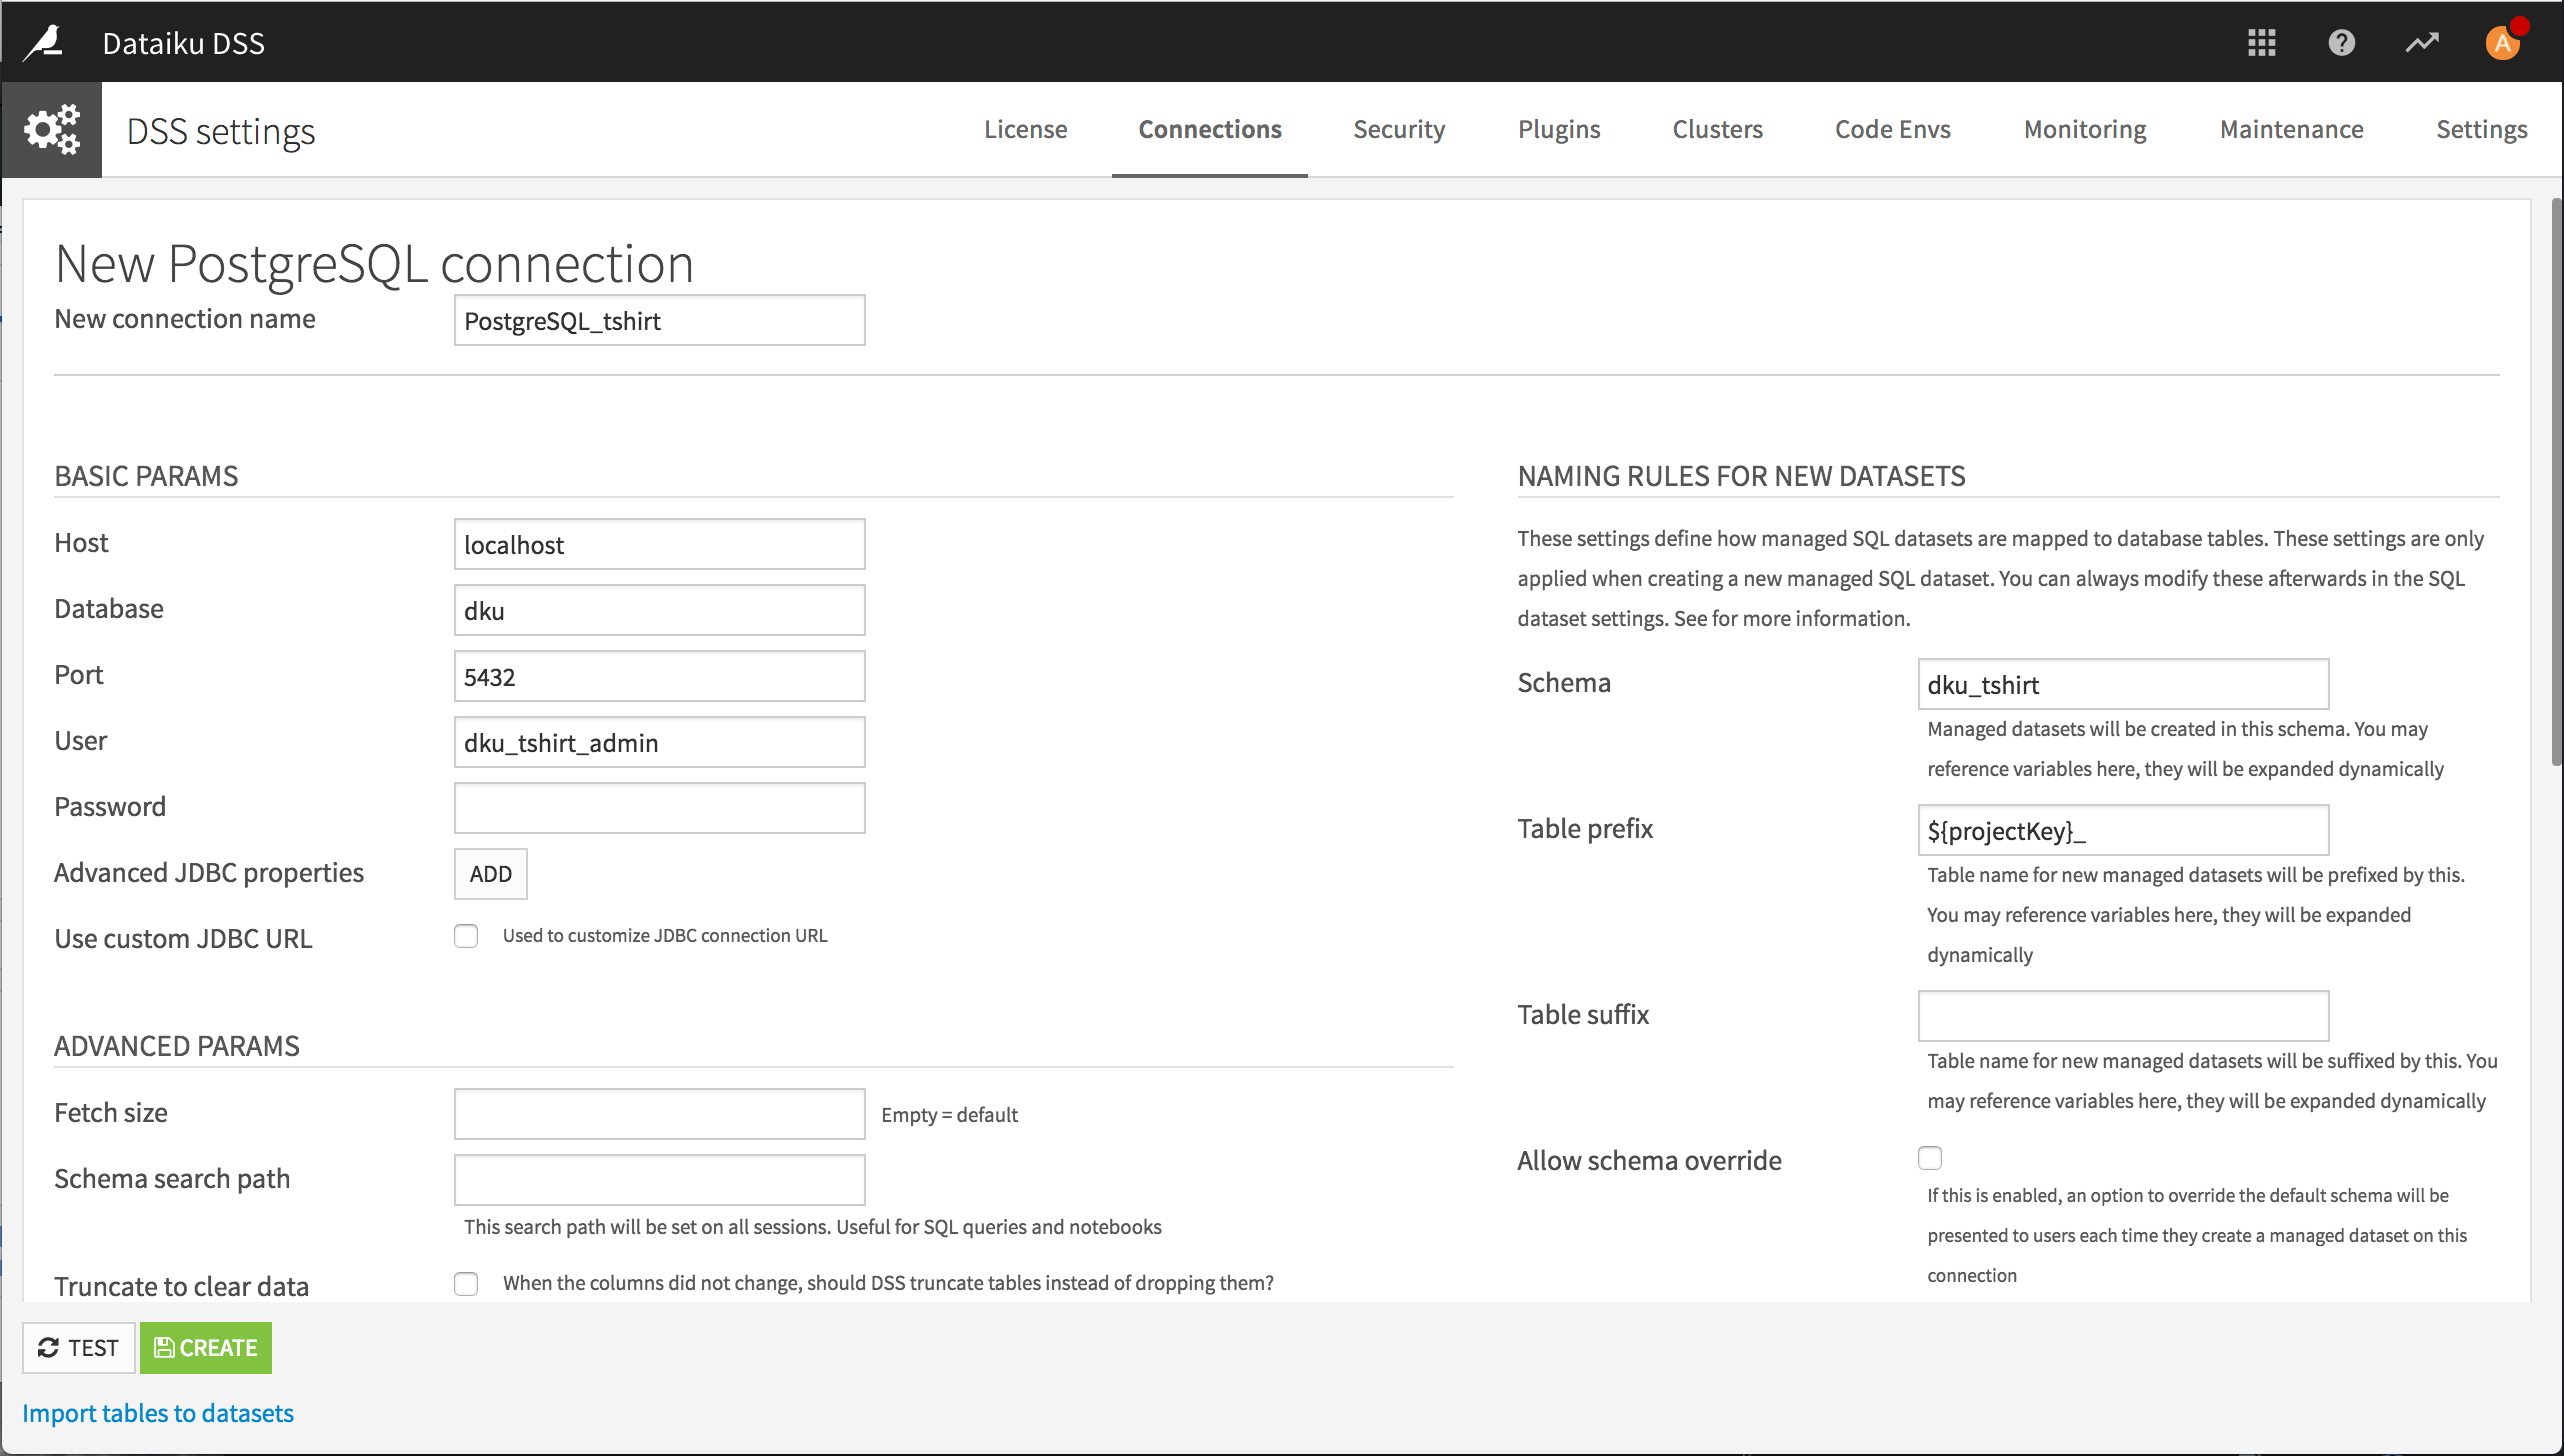
Test and create your PostgreSQL connection.
Import datasets into Dataiku#
After creating your connection, if you are connecting to a pre-existing SQL database, you can create a Dataiku dataset for every table in the database.
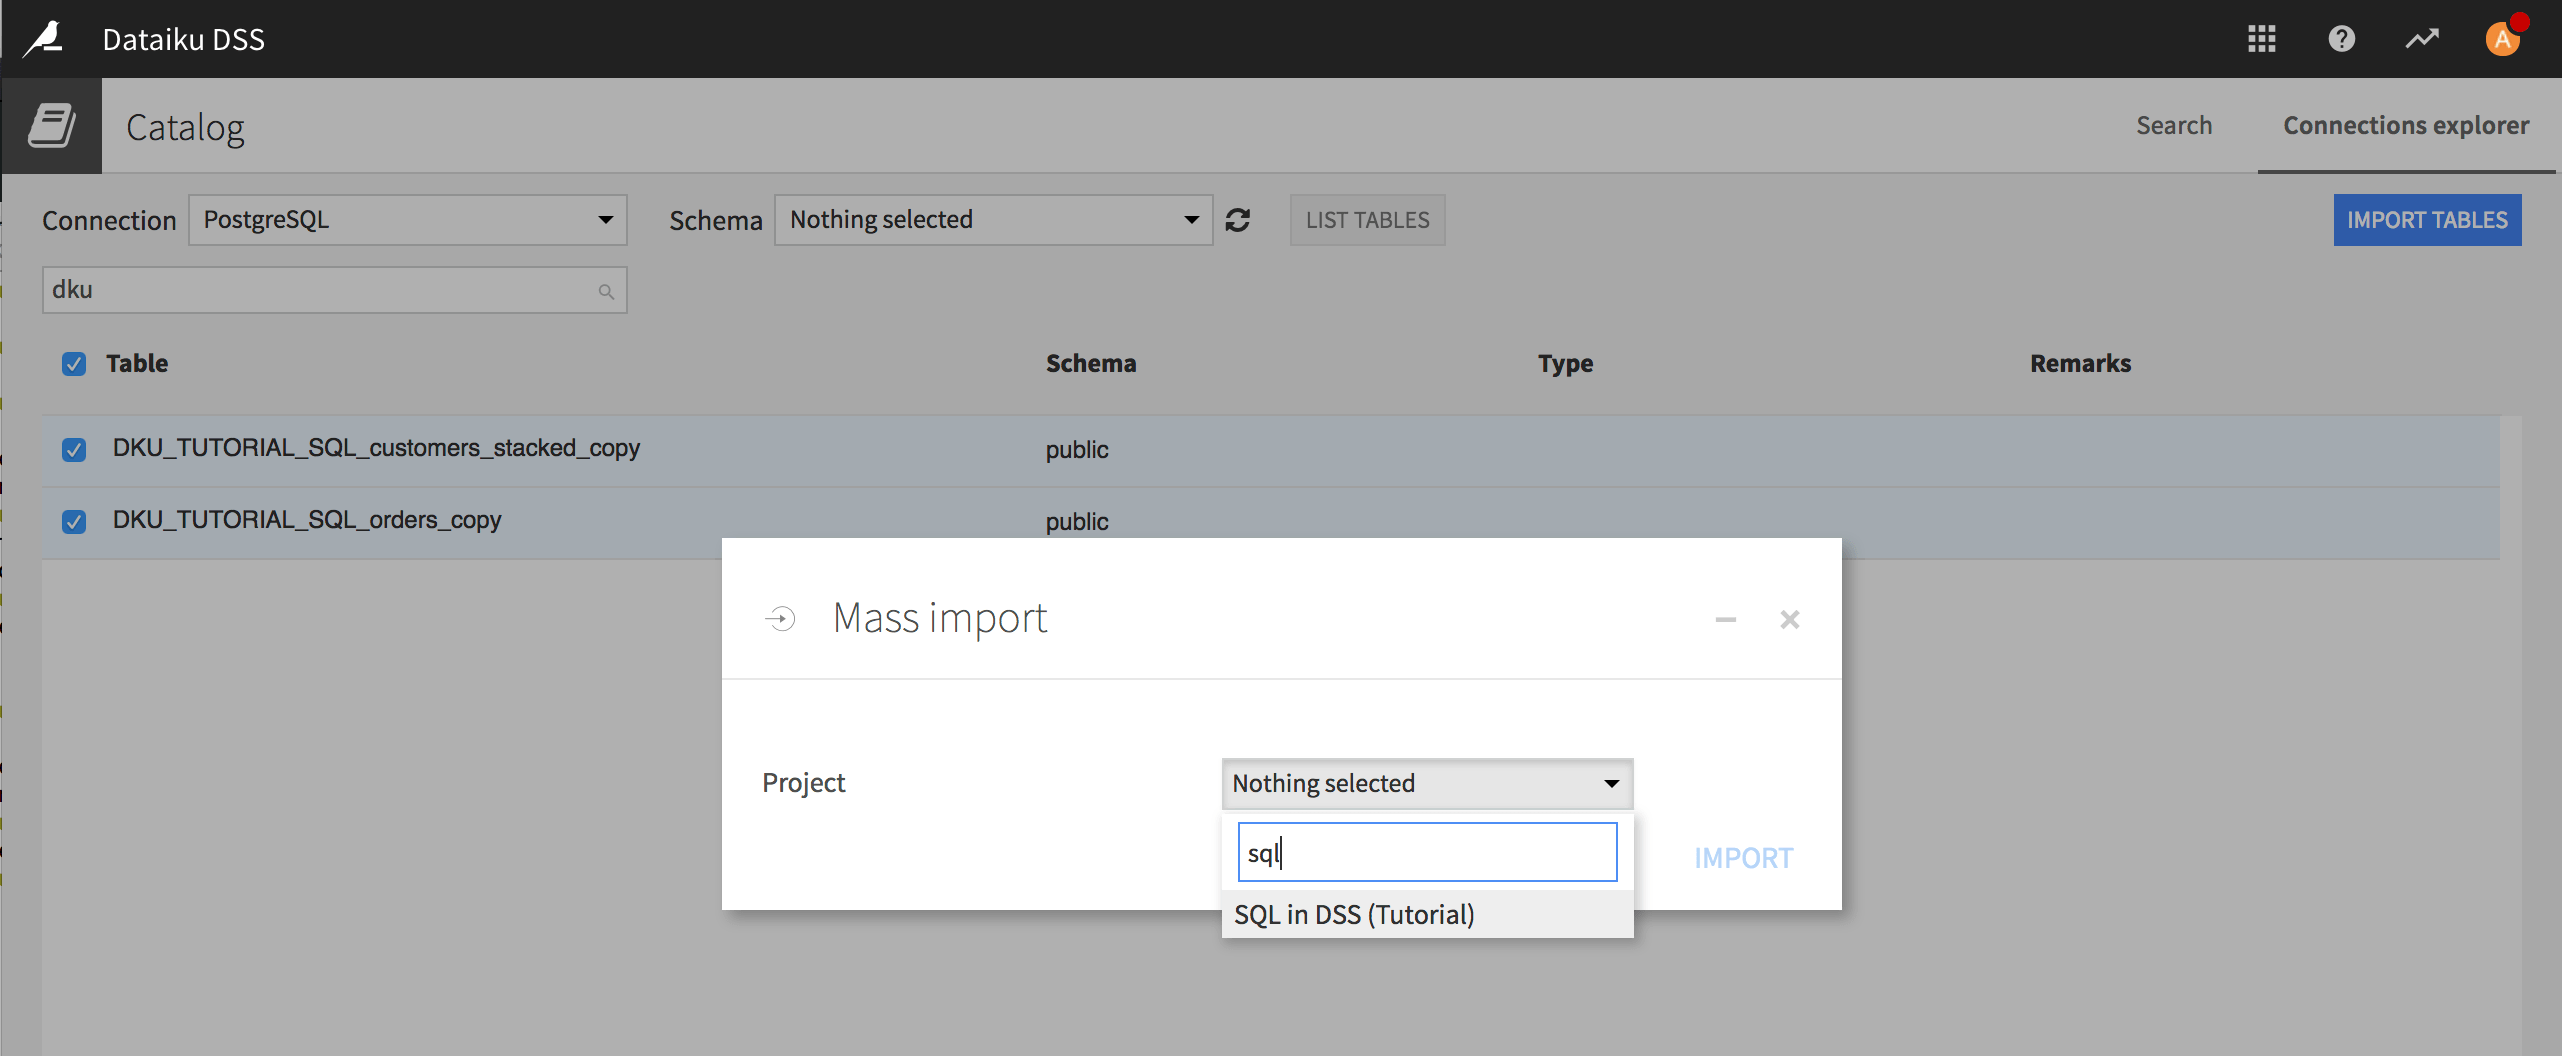
Click Import tables to datasets.
Select the tables you want to import.
Click Import tables.
Select the project in which the datasets associated with these tables should appear.
Next steps#
Congratulations! You now have an SQL connection to use underneath your Dataiku Flows.
Learn more about how to take advantage of this type of connection in Tutorial | Data transfer with visual recipes!