
Get started#
Are you interested in using Dataiku to deploy projects and models into production environments? Automate your data pipelines? You’re in the right place!
Create an account#
To follow along with the steps in this tutorial, you need access to a 12.6+ Dataiku instance. If you don’t already have access, you can get started in one of two ways:
Follow the link above to start a 14 day free trial. See How-to | Begin a free trial from Dataiku for help if needed.
The locally installed free edition isn’t fully compatible.
Open Dataiku#
The first step is getting to the homepage of your Dataiku Design node.
Go to the Launchpad.
Within the Overview panel, click Open Instance in the Design node tile once your instance has powered up.
Important
If using a self-managed version of Dataiku, open the Dataiku Design node directly in your browser.
Once you are on the Design node homepage, you can create the tutorial project.
Create the project#
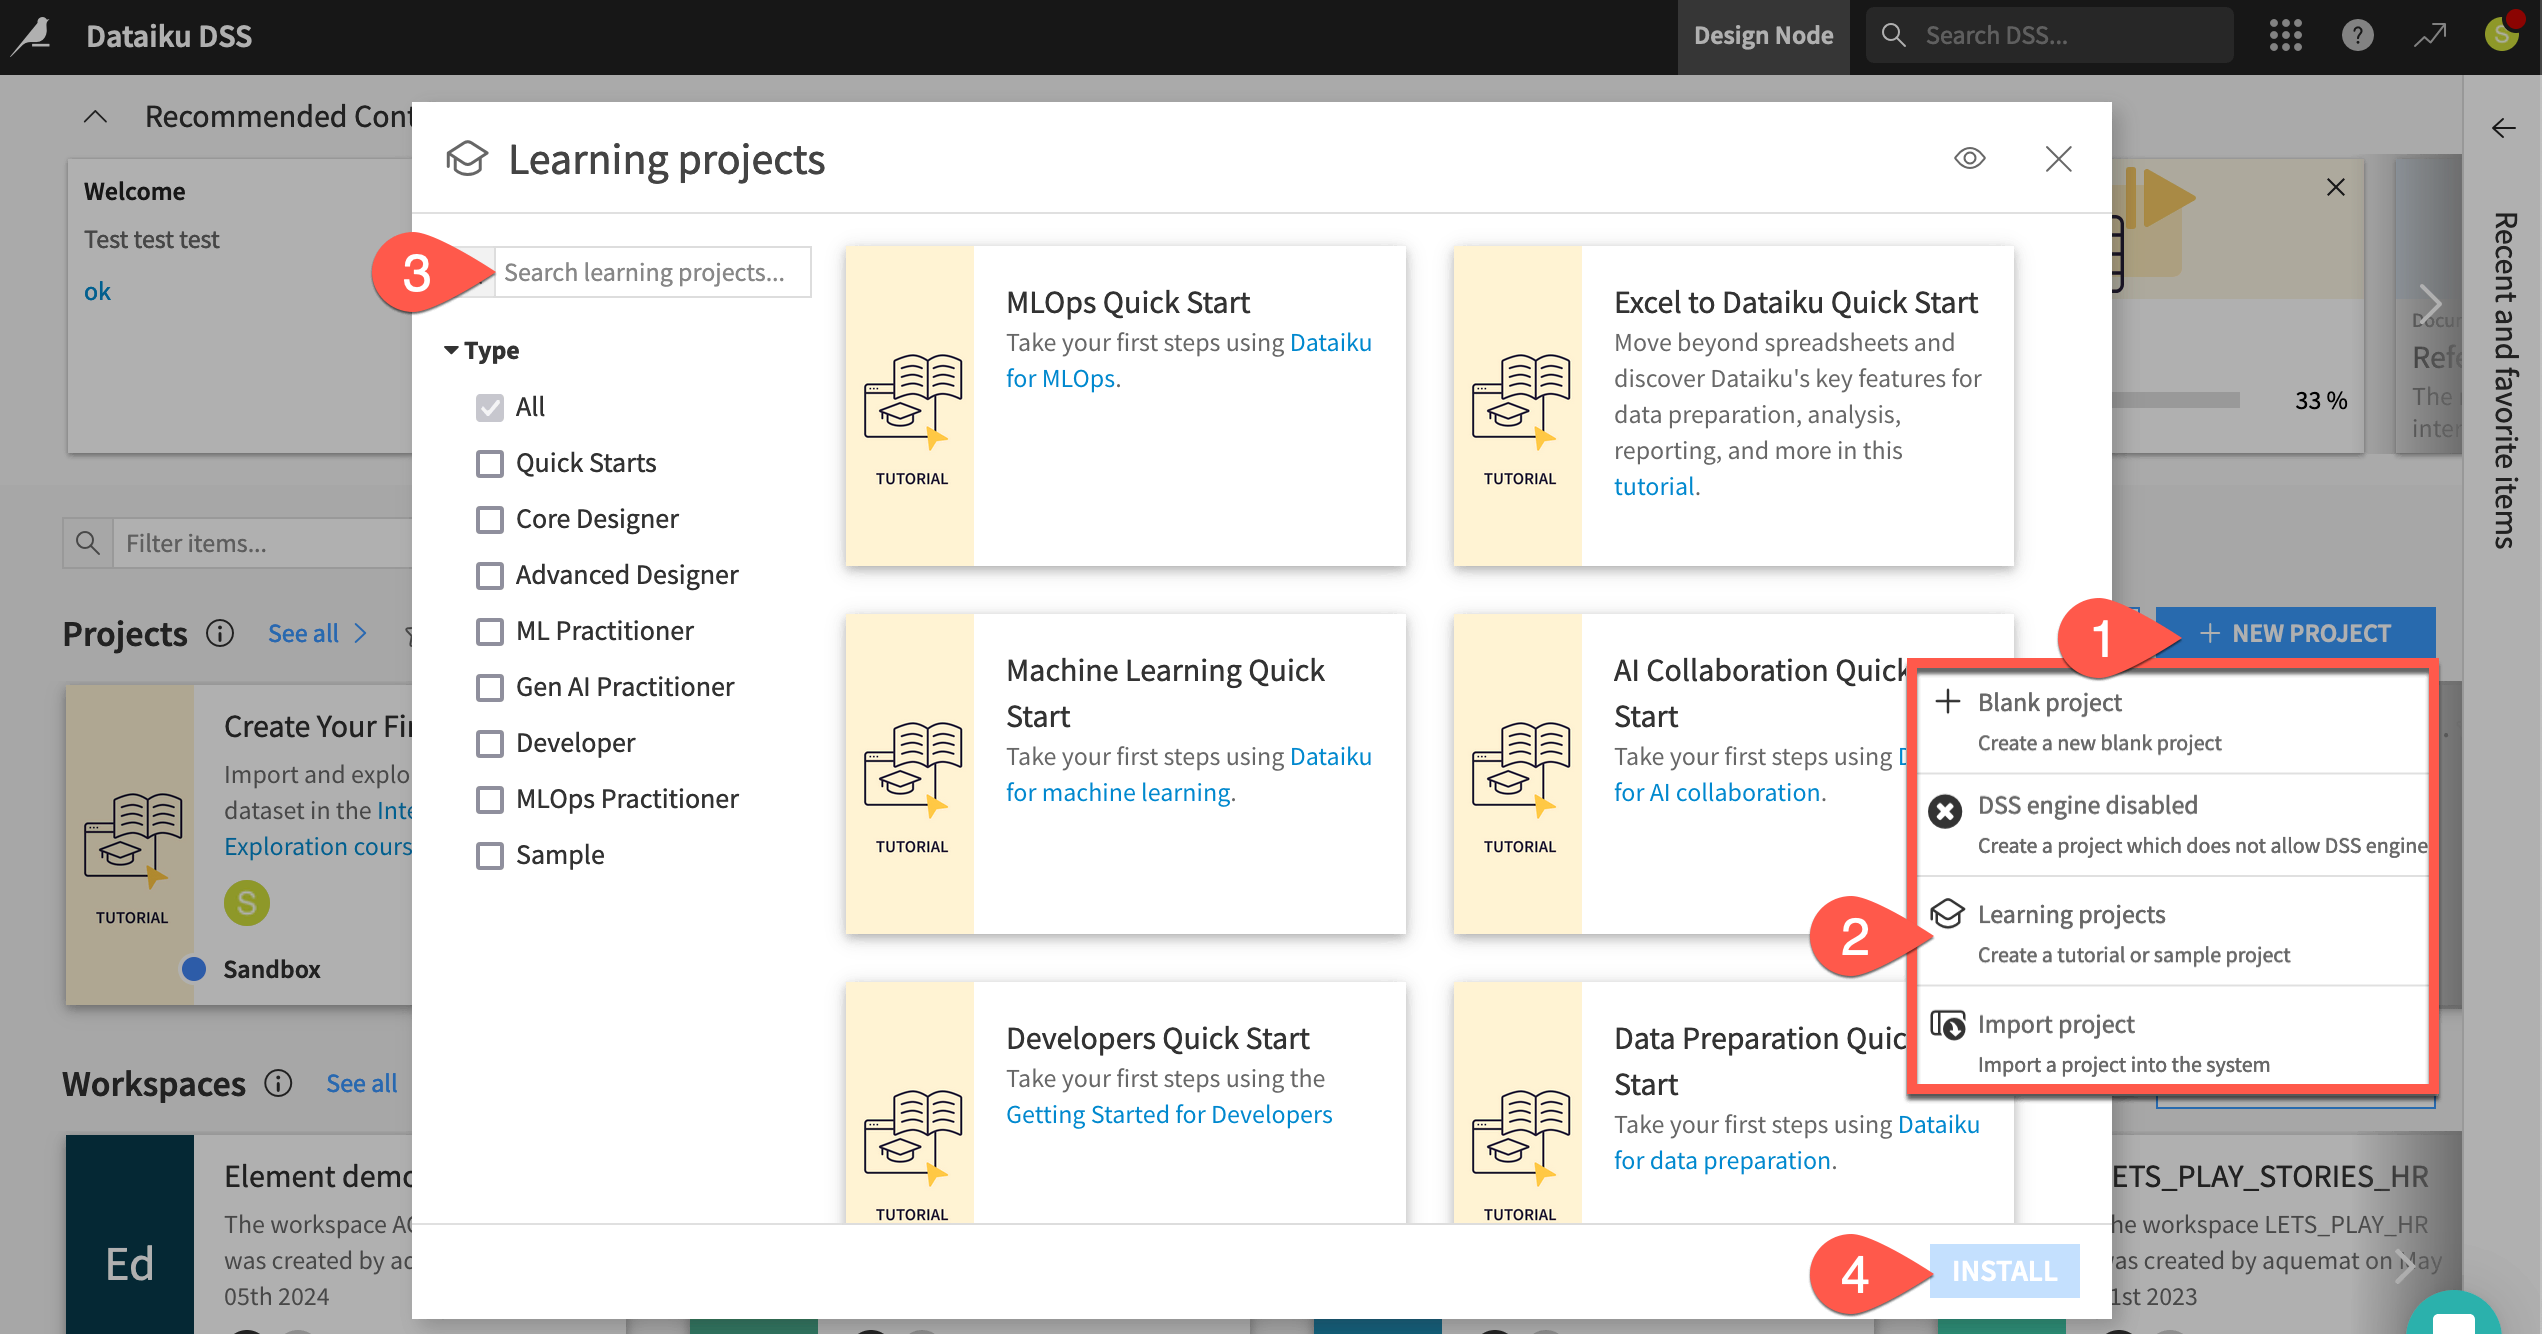
From the Dataiku Design homepage, click + New Project.
Select Learning projects.
Search for and select MLOps Quick Start.
If needed, change the folder into which the project will be installed, and click Create.
From the project homepage, click Go to Flow (or type
g+f).
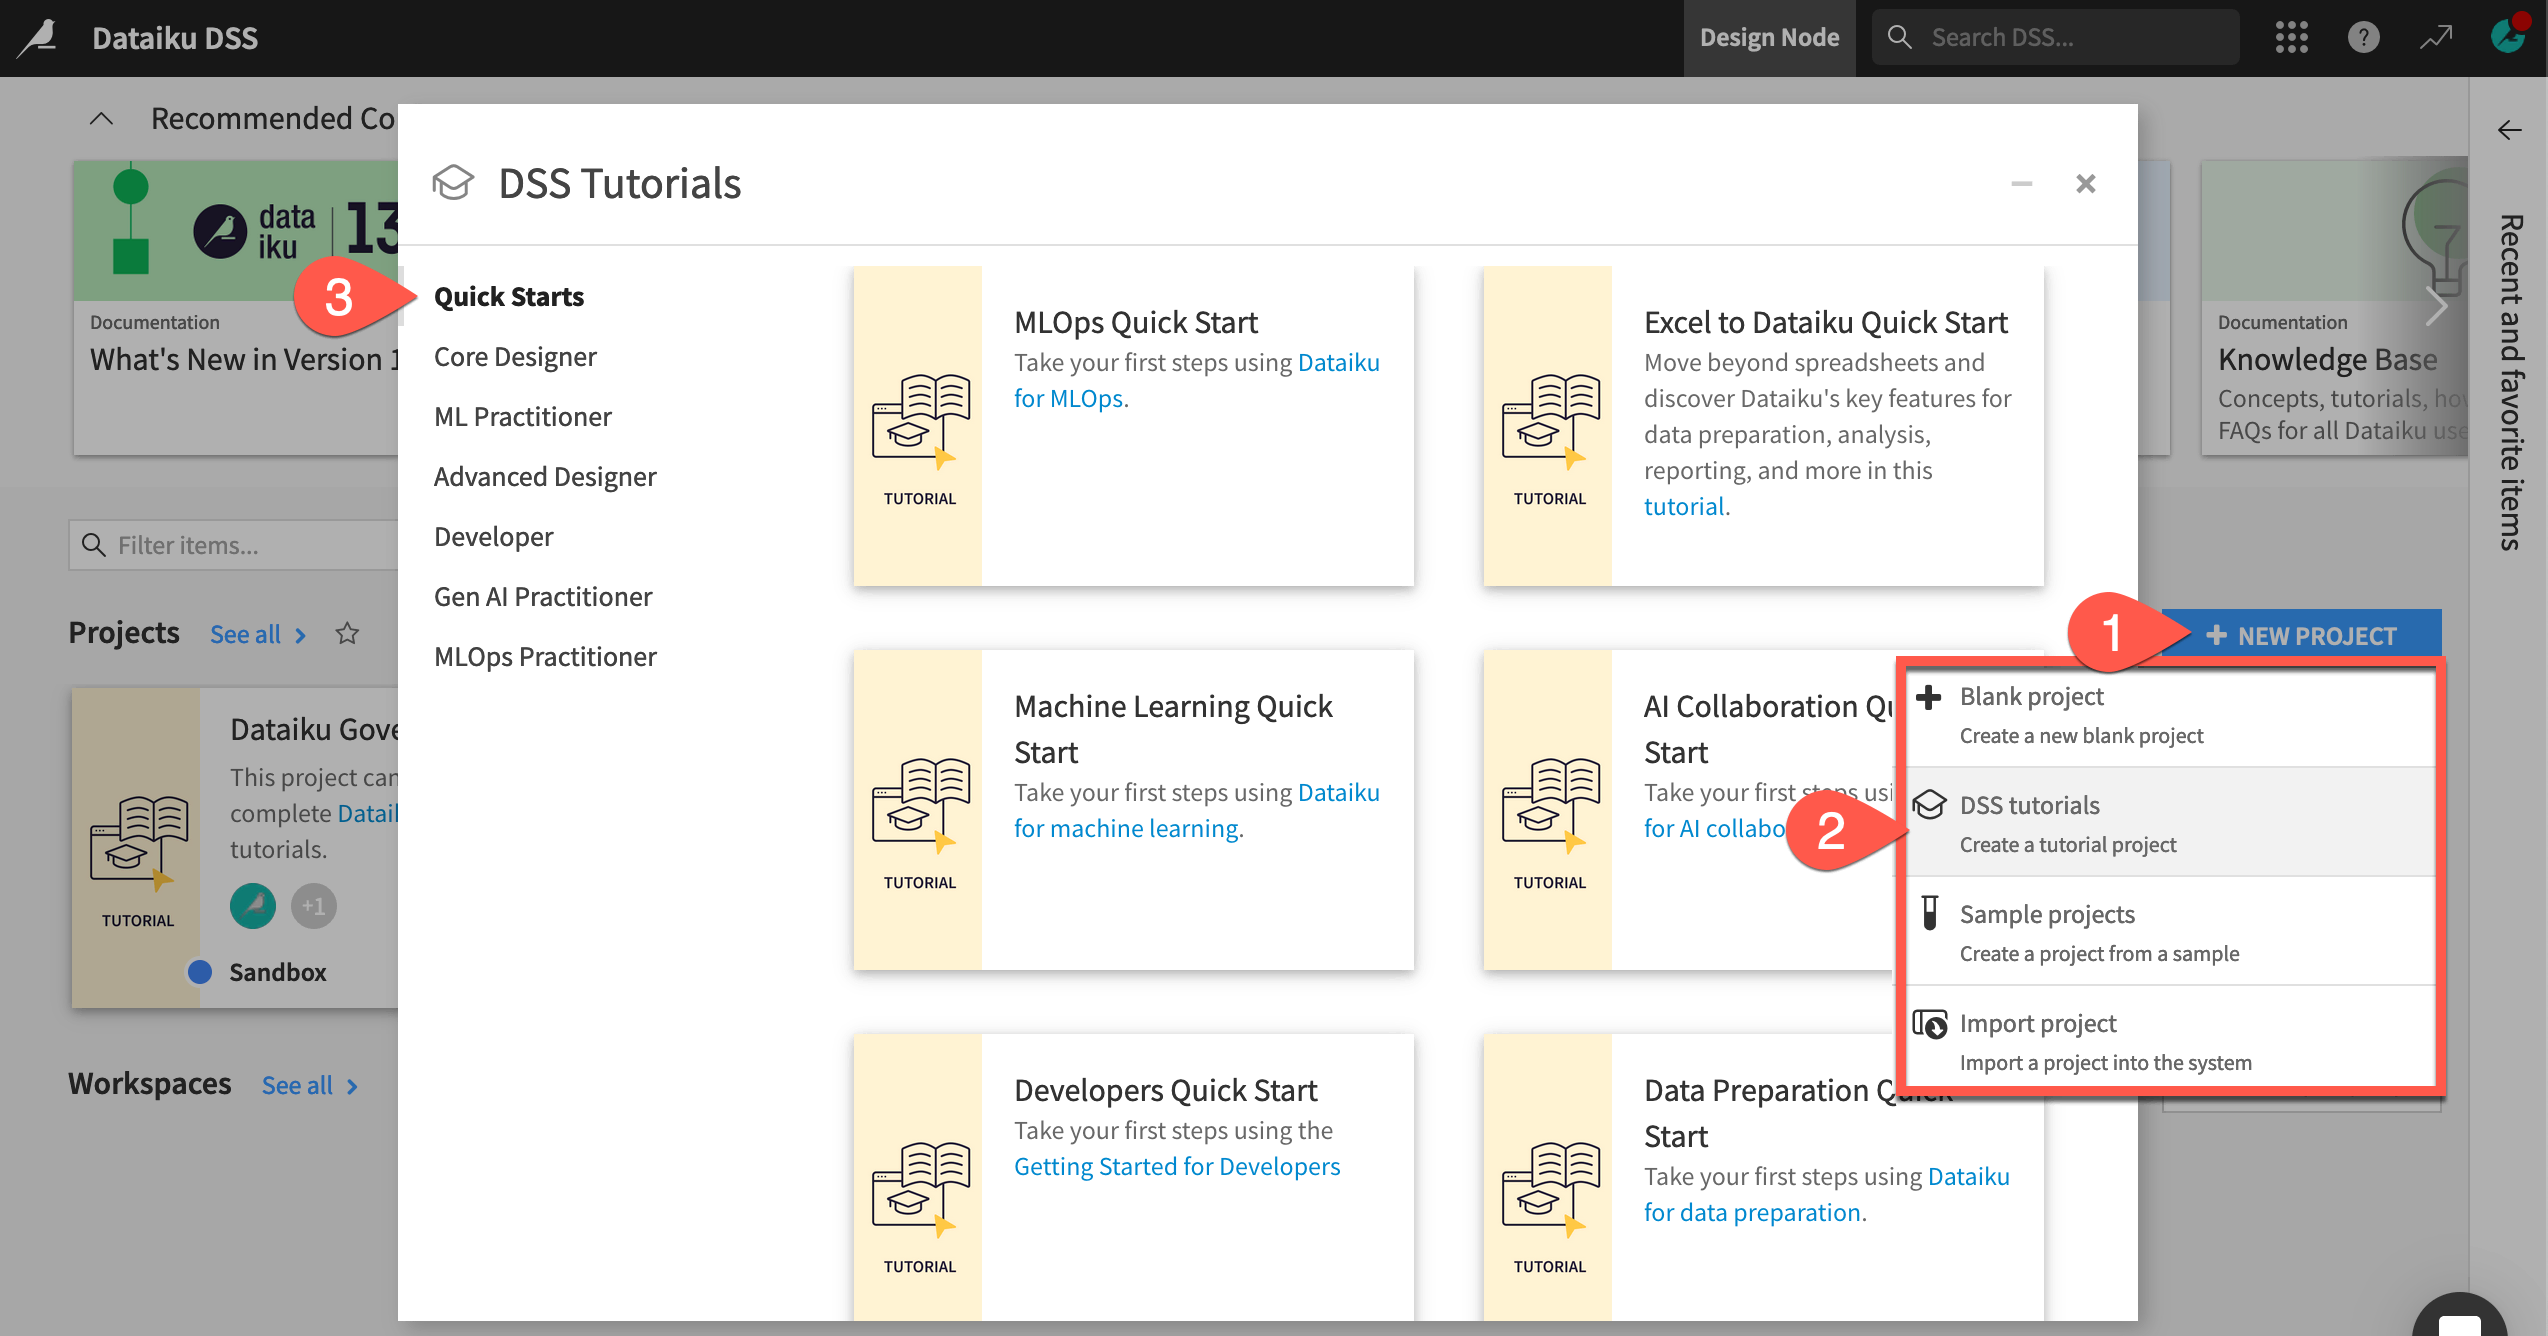
From the Dataiku Design homepage, click + New Project.
Select DSS tutorials.
Filter by Quick Starts.
Select MLOps Quick Start.
From the project homepage, click Go to Flow (or type
g+f).
Note
You can also download the starter project from this website and import it as a ZIP file.