
How-to | Create a code environment#
Code environments address the problem of managing dependencies and versions when writing code in Python and R. They’re similar to the Python virtualenv or to renv for R users.
Prerequisites#
Instance administrators can set permissions to create, modify, and use code environments. Consult the reference documentation for details.
Options to create a code environment#
There are two main ways to create a code environment:
Create a new Python or R environment from scratch and import various packages to it.
Import a previously created Python or R environment from a zip file into a Dataiku instance and optionally configure it further.
Find the Code Envs page#
The first step is to navigate to the Code Envs administration page.
From the Dataiku Design homepage, click the waffle (
 ) > Administration menu in the top navigation bar.
Navigate to the Code Envs tab.
Note
Dataiku Cloud users can also find this page by going to the Code Envs panel of their Launchpad, and clicking Add a Code Env.
Create a code environment from scratch#
Once in the Code Envs tab, the process to create a code environment is the same. We’ll demonstrate Python, but the process for R is similar.
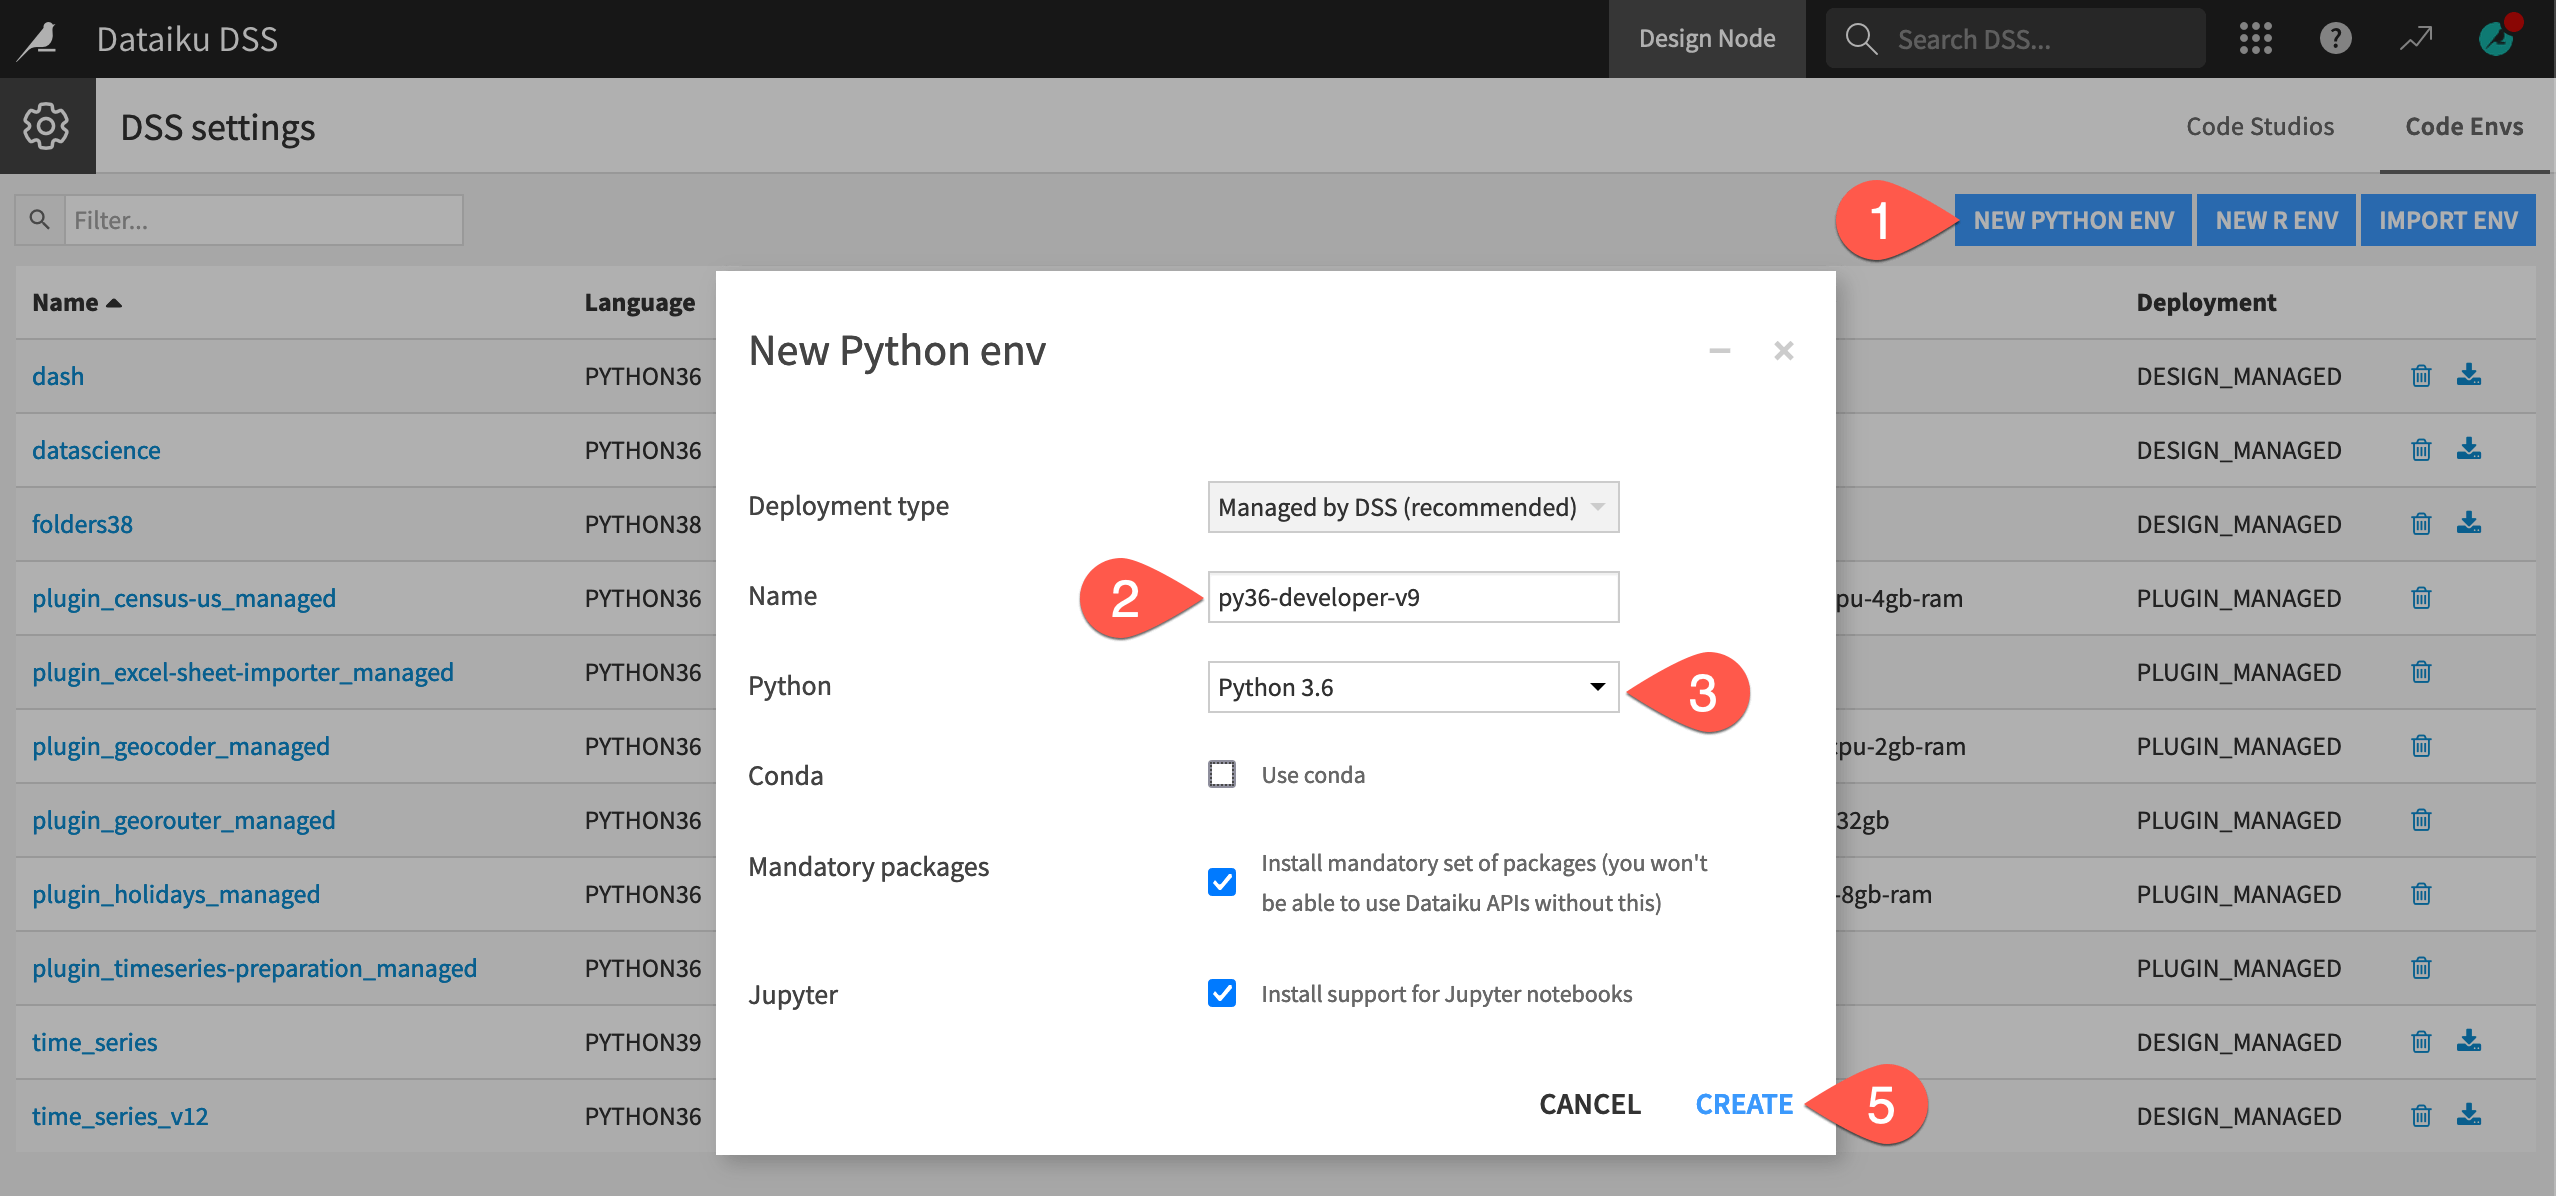
Click New Python Env.
Give it a descriptive name.
Select a Python version.
Leave the default deployment type, Managed by DSS (recommended), and other default settings for conda, mandatory packages, and Jupyter.
Click Create.
Note
As explained in the reference documentation, you’ll need the requested version of Python to be installed on your system to create that kind of code environment.
Install packages in a code environment#
The next step is to install the packages that you want to include in the environment.
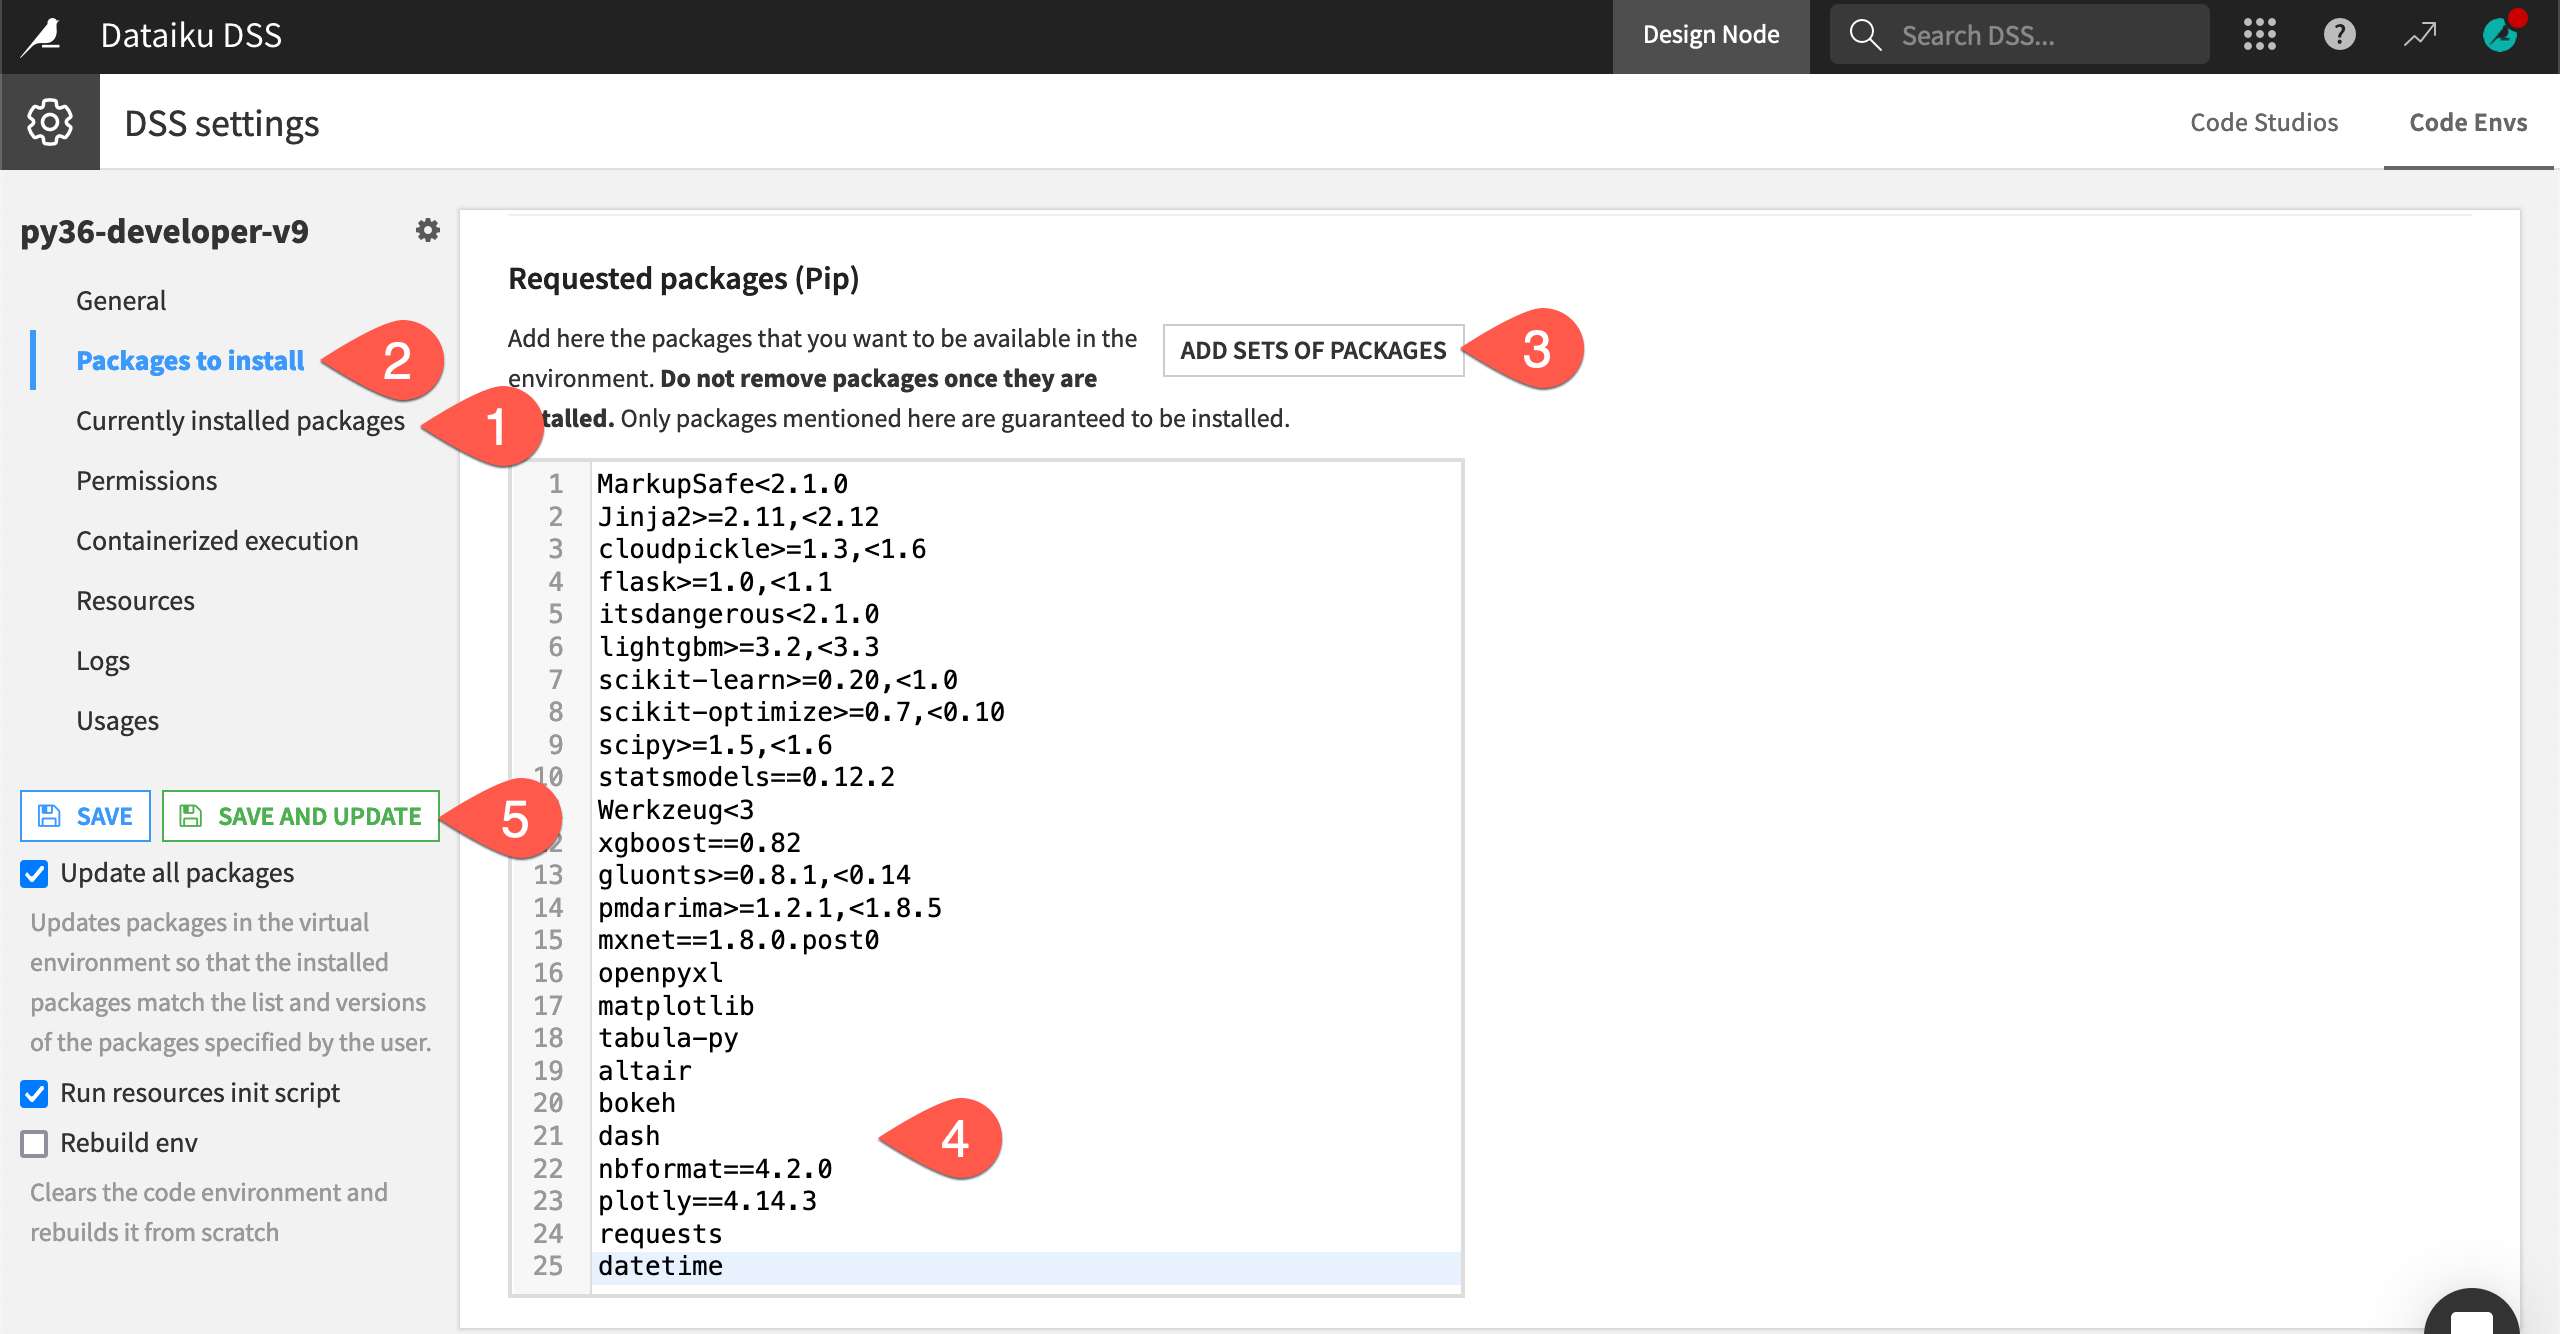
Once the environment has been created, select Currently installed packages. Notice that the mandatory packages are already installed.
Select Packages to install. This is where you can install additional packages.
Under Requested packages, you have the option to Add Sets of Packages frequently used together for common tasks according to certain infrastructure requirements.
You can also directly enter specific packages you would like to include in the Requested packages (Pip) code field. Use the Syntax help to ensure the correct format.
Click Save and Update.
Tip
To apply a custom code environment in Dataiku objects like projects, recipes, and notebooks, see How-to | Set a code environment.
Example#
As an example, let’s create a single code environment with all the required packages for the tutorials of the Developer learning path.
Navigate to the Code Envs page.
Create a new Python 3.6 code environment named
py36-developer-v9.Under Packages to install, click Add Sets of Packages > Visual Machine Learning and Visual Time series forecasting (CPU).
Also in the Requested packages field, paste the packages below:
openpyxl
matplotlib
tabula-py
altair
bokeh
dash
nbformat==4.2.0
plotly==4.14.3
requests
datetime
Click Save and Update.