Join data#
See a screencast covering this section’s steps
This second dataset documents the median weekly earnings in USD according to the U.S. Bureau of Labor Statistics.
The categories in the education_level column in the earnings_by_education dataset are the same as the categories in the required_education column in the job_postings_prepared dataset.
Create a Join recipe#
Based on this relationship, enrich the job_postings_prepared dataset with the earnings data. Use another visual recipe: a Join recipe.
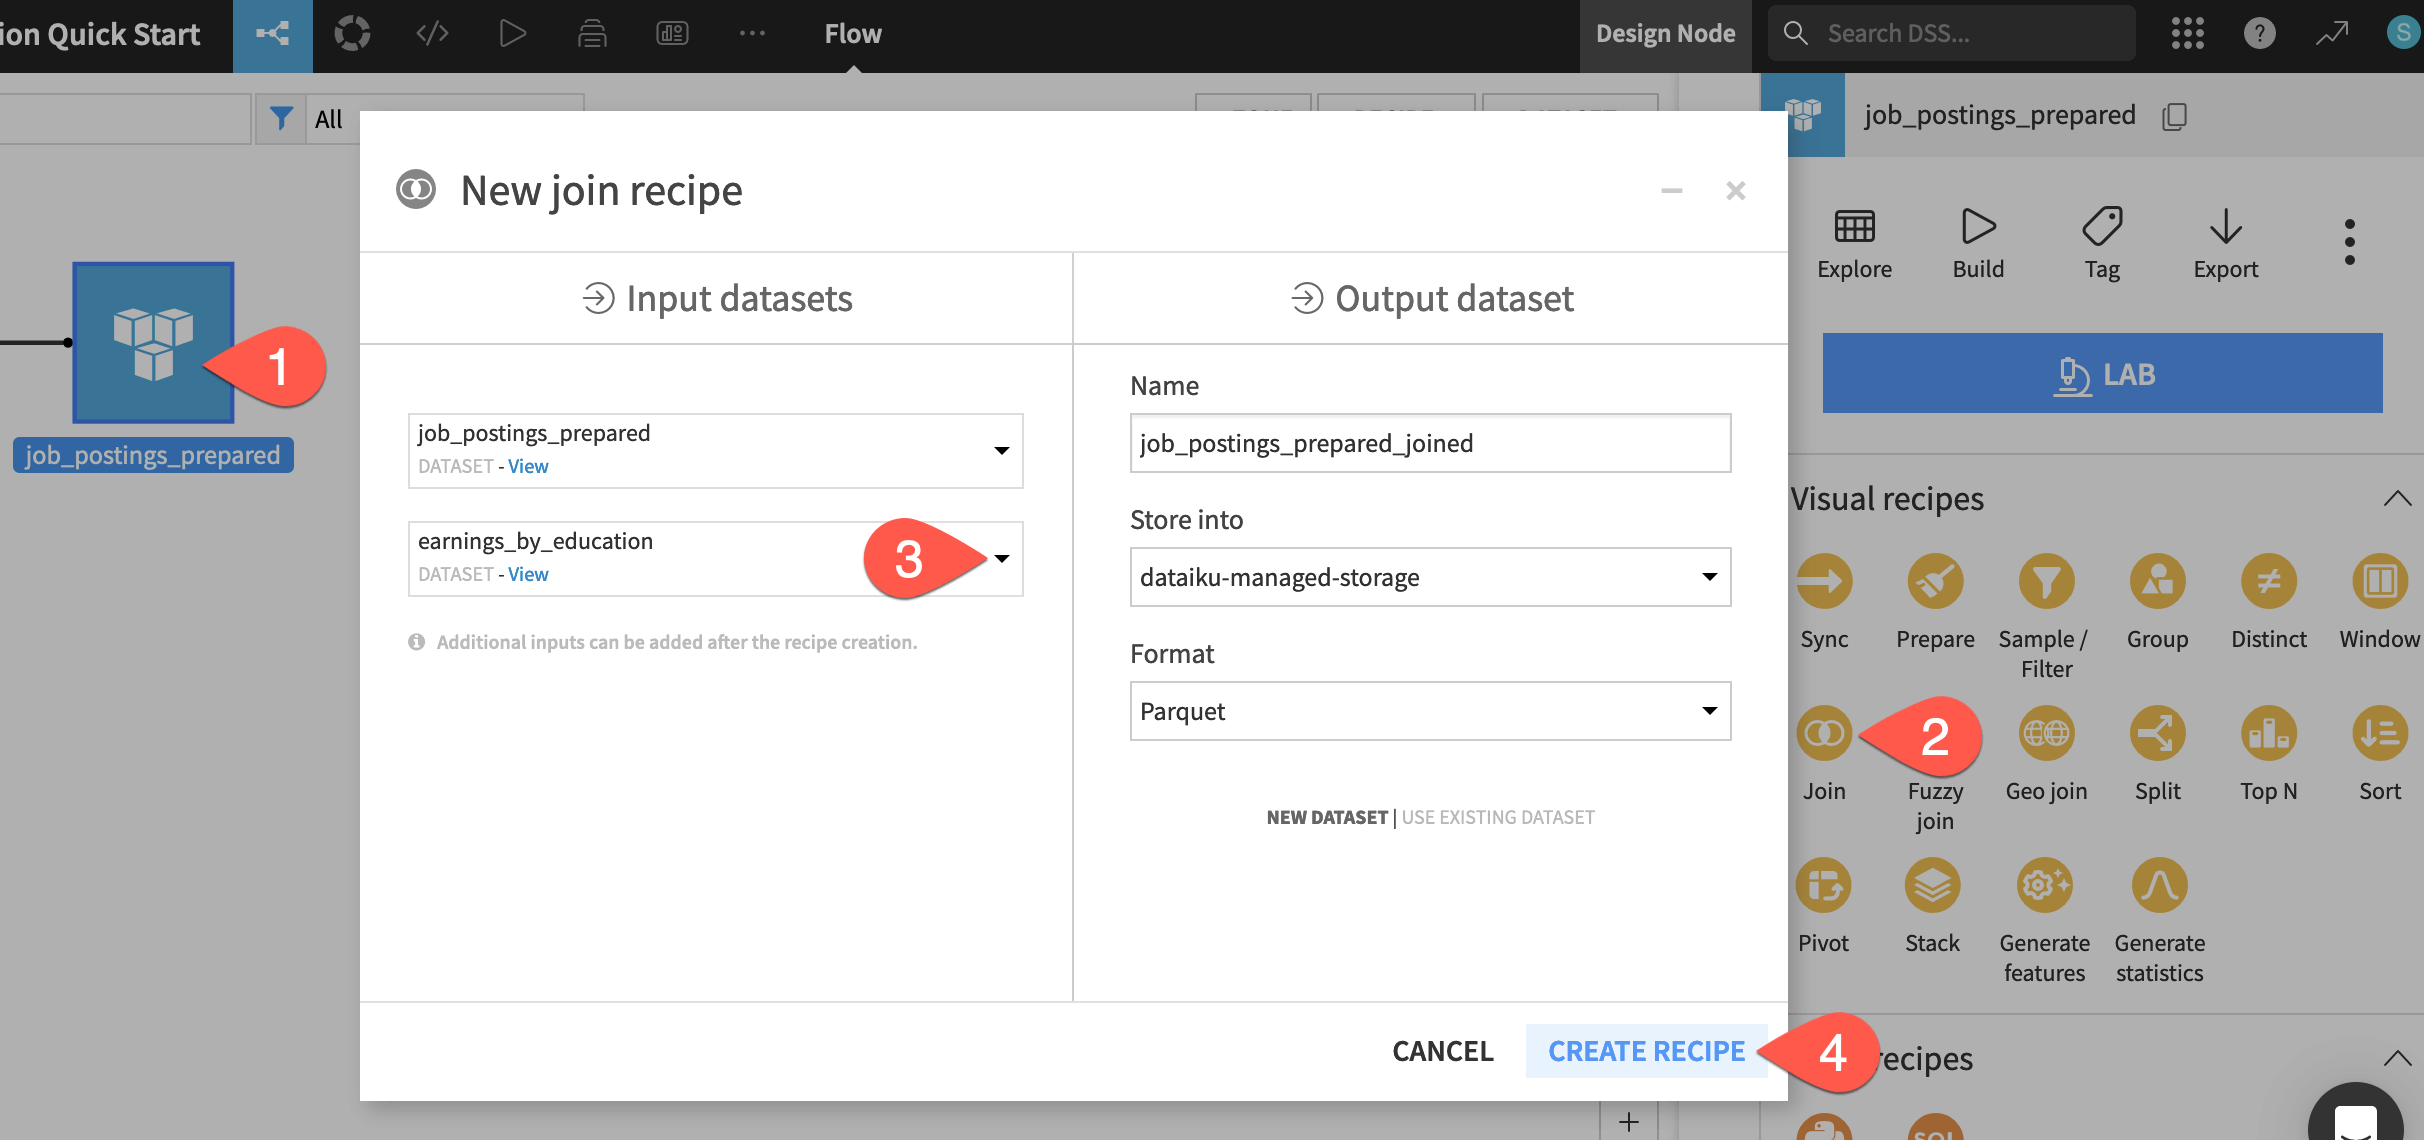
From the Flow, click to select job_postings_prepared. (This will be the “left” dataset).
Open the Actions (
) tab, and select Join from the menu of visual recipes.
On the left hand side of the dialog, click No dataset selected, and provide earnings_by_education. (This will be the “right” dataset).
Click Create Recipe.
Configure the Join step#
You have a number of different options when deciding how to join datasets.
Choose a join type#
Dataiku can perform the standard types of joins familiar to SQL users depending on which matches between the datasets you wish to retain.
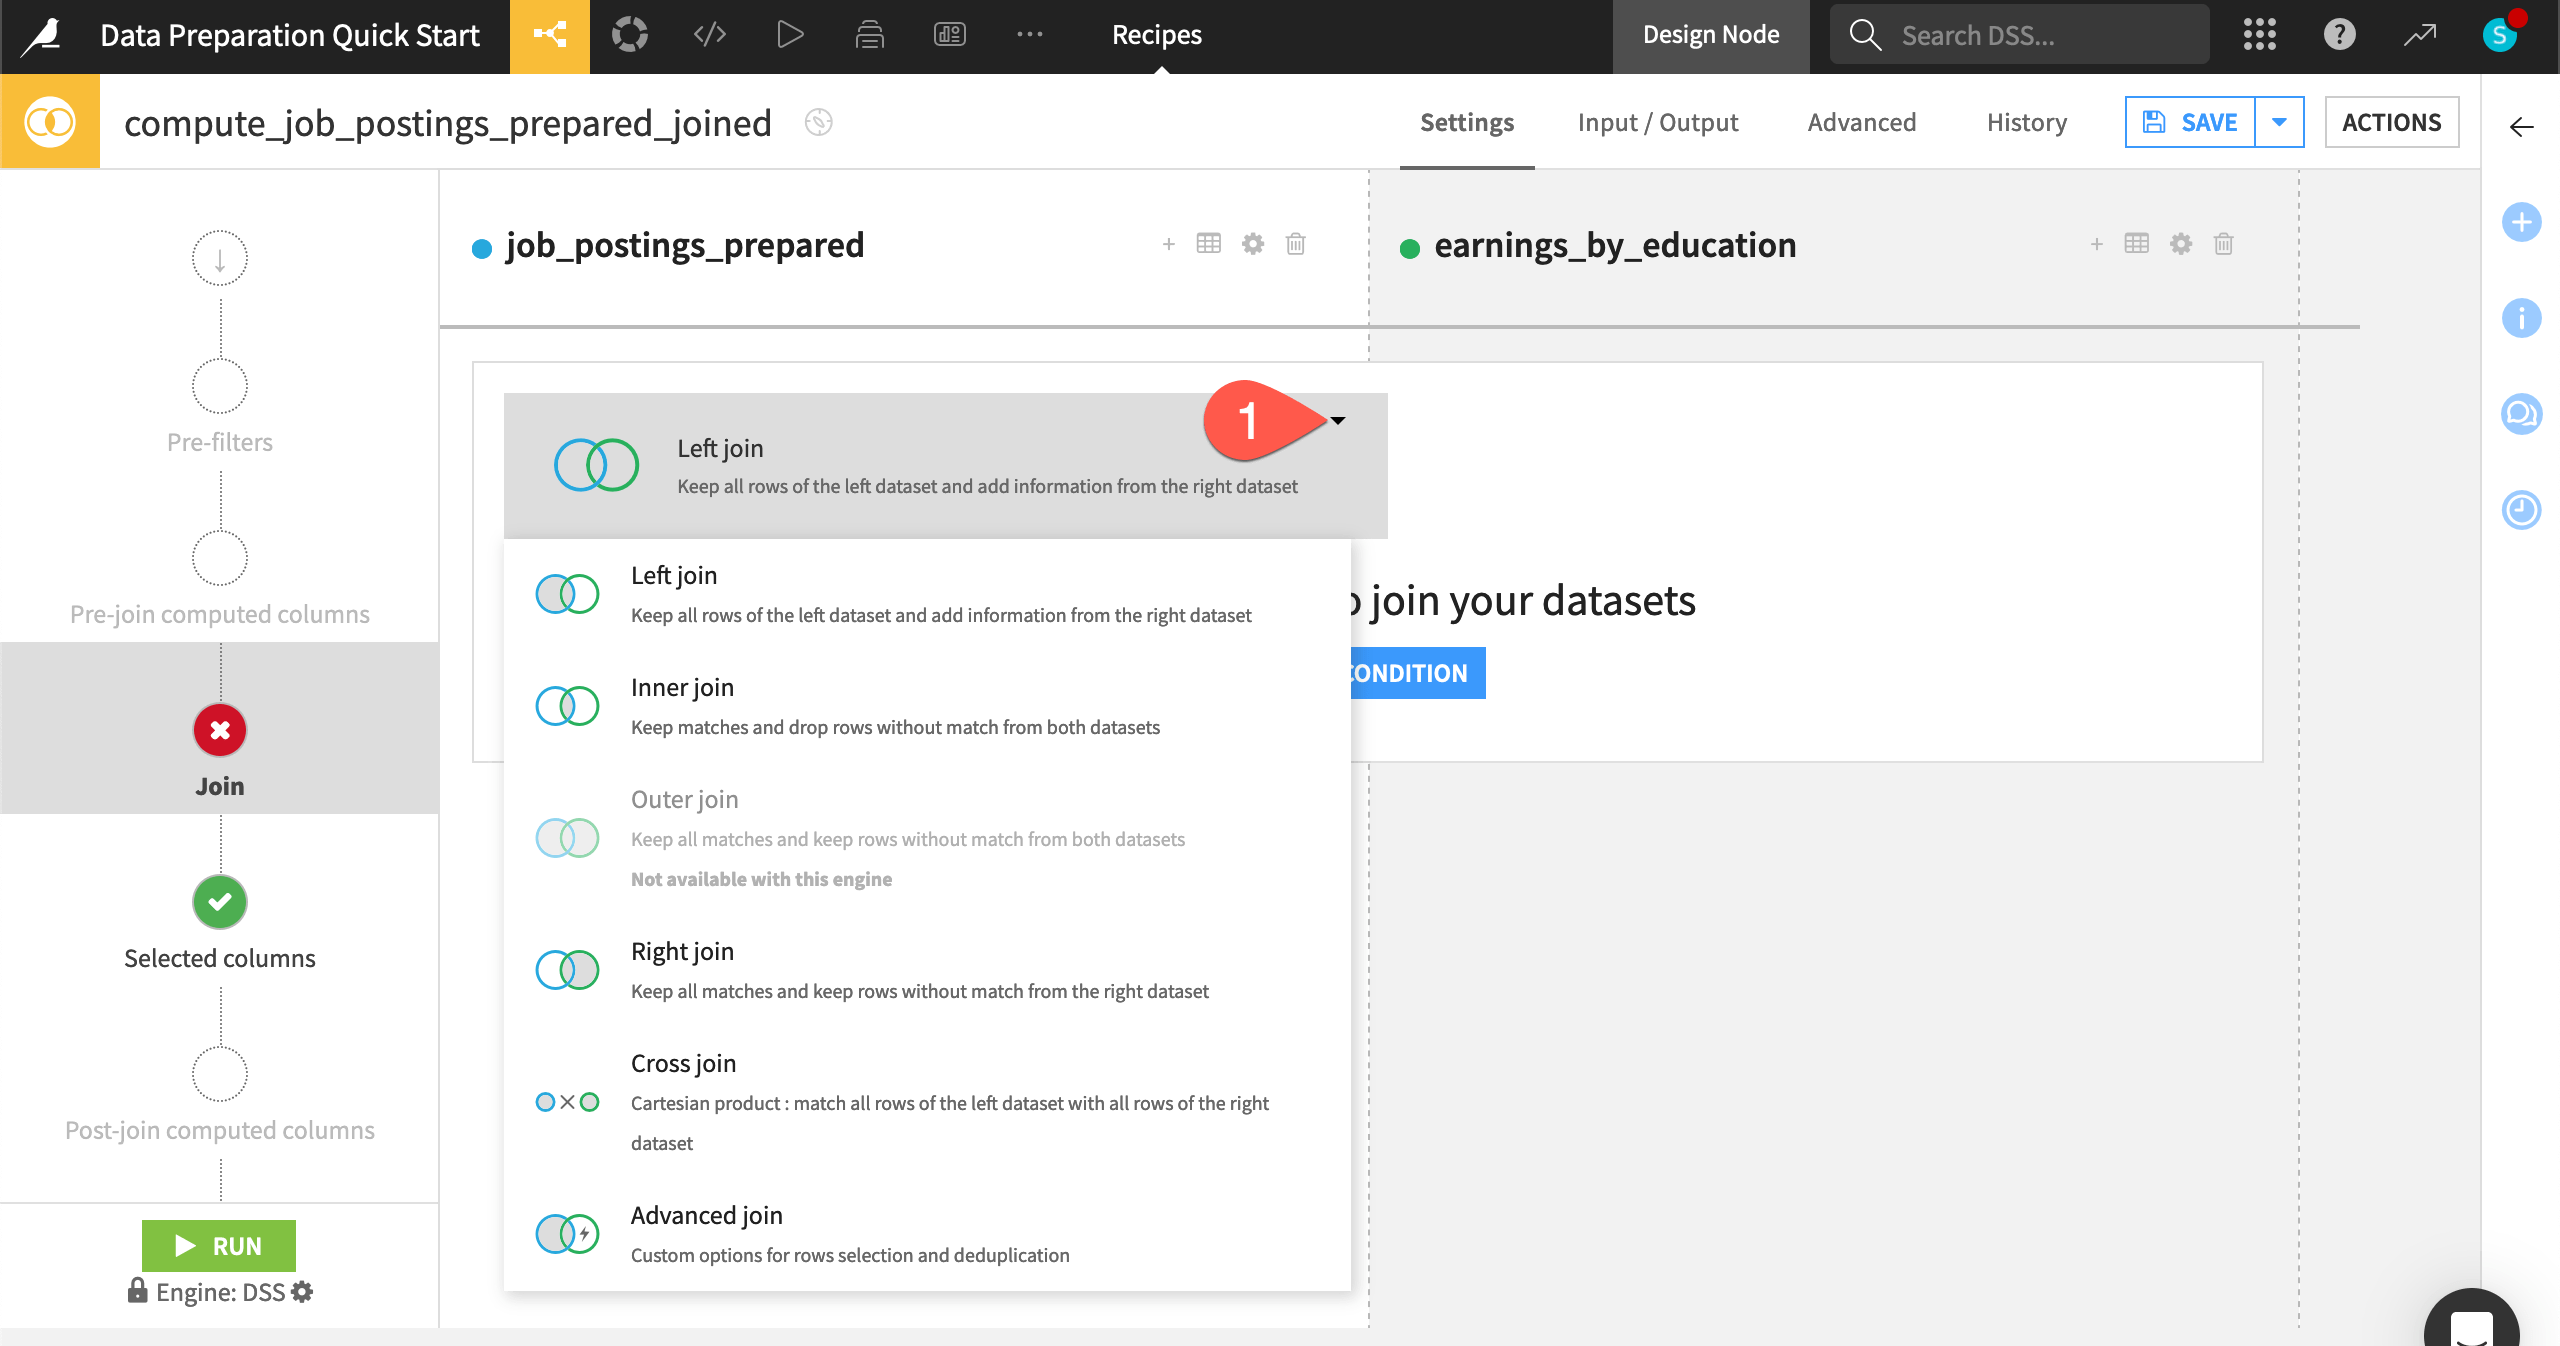
On the Join step, click on Left join to view the various join options.
Leave the default Left join so that the output dataset retains all records of job postings even if a matching education level isn’t found.
Add a join condition#
Once you know the type of join required for your use case, you can define the conditions for the join key.
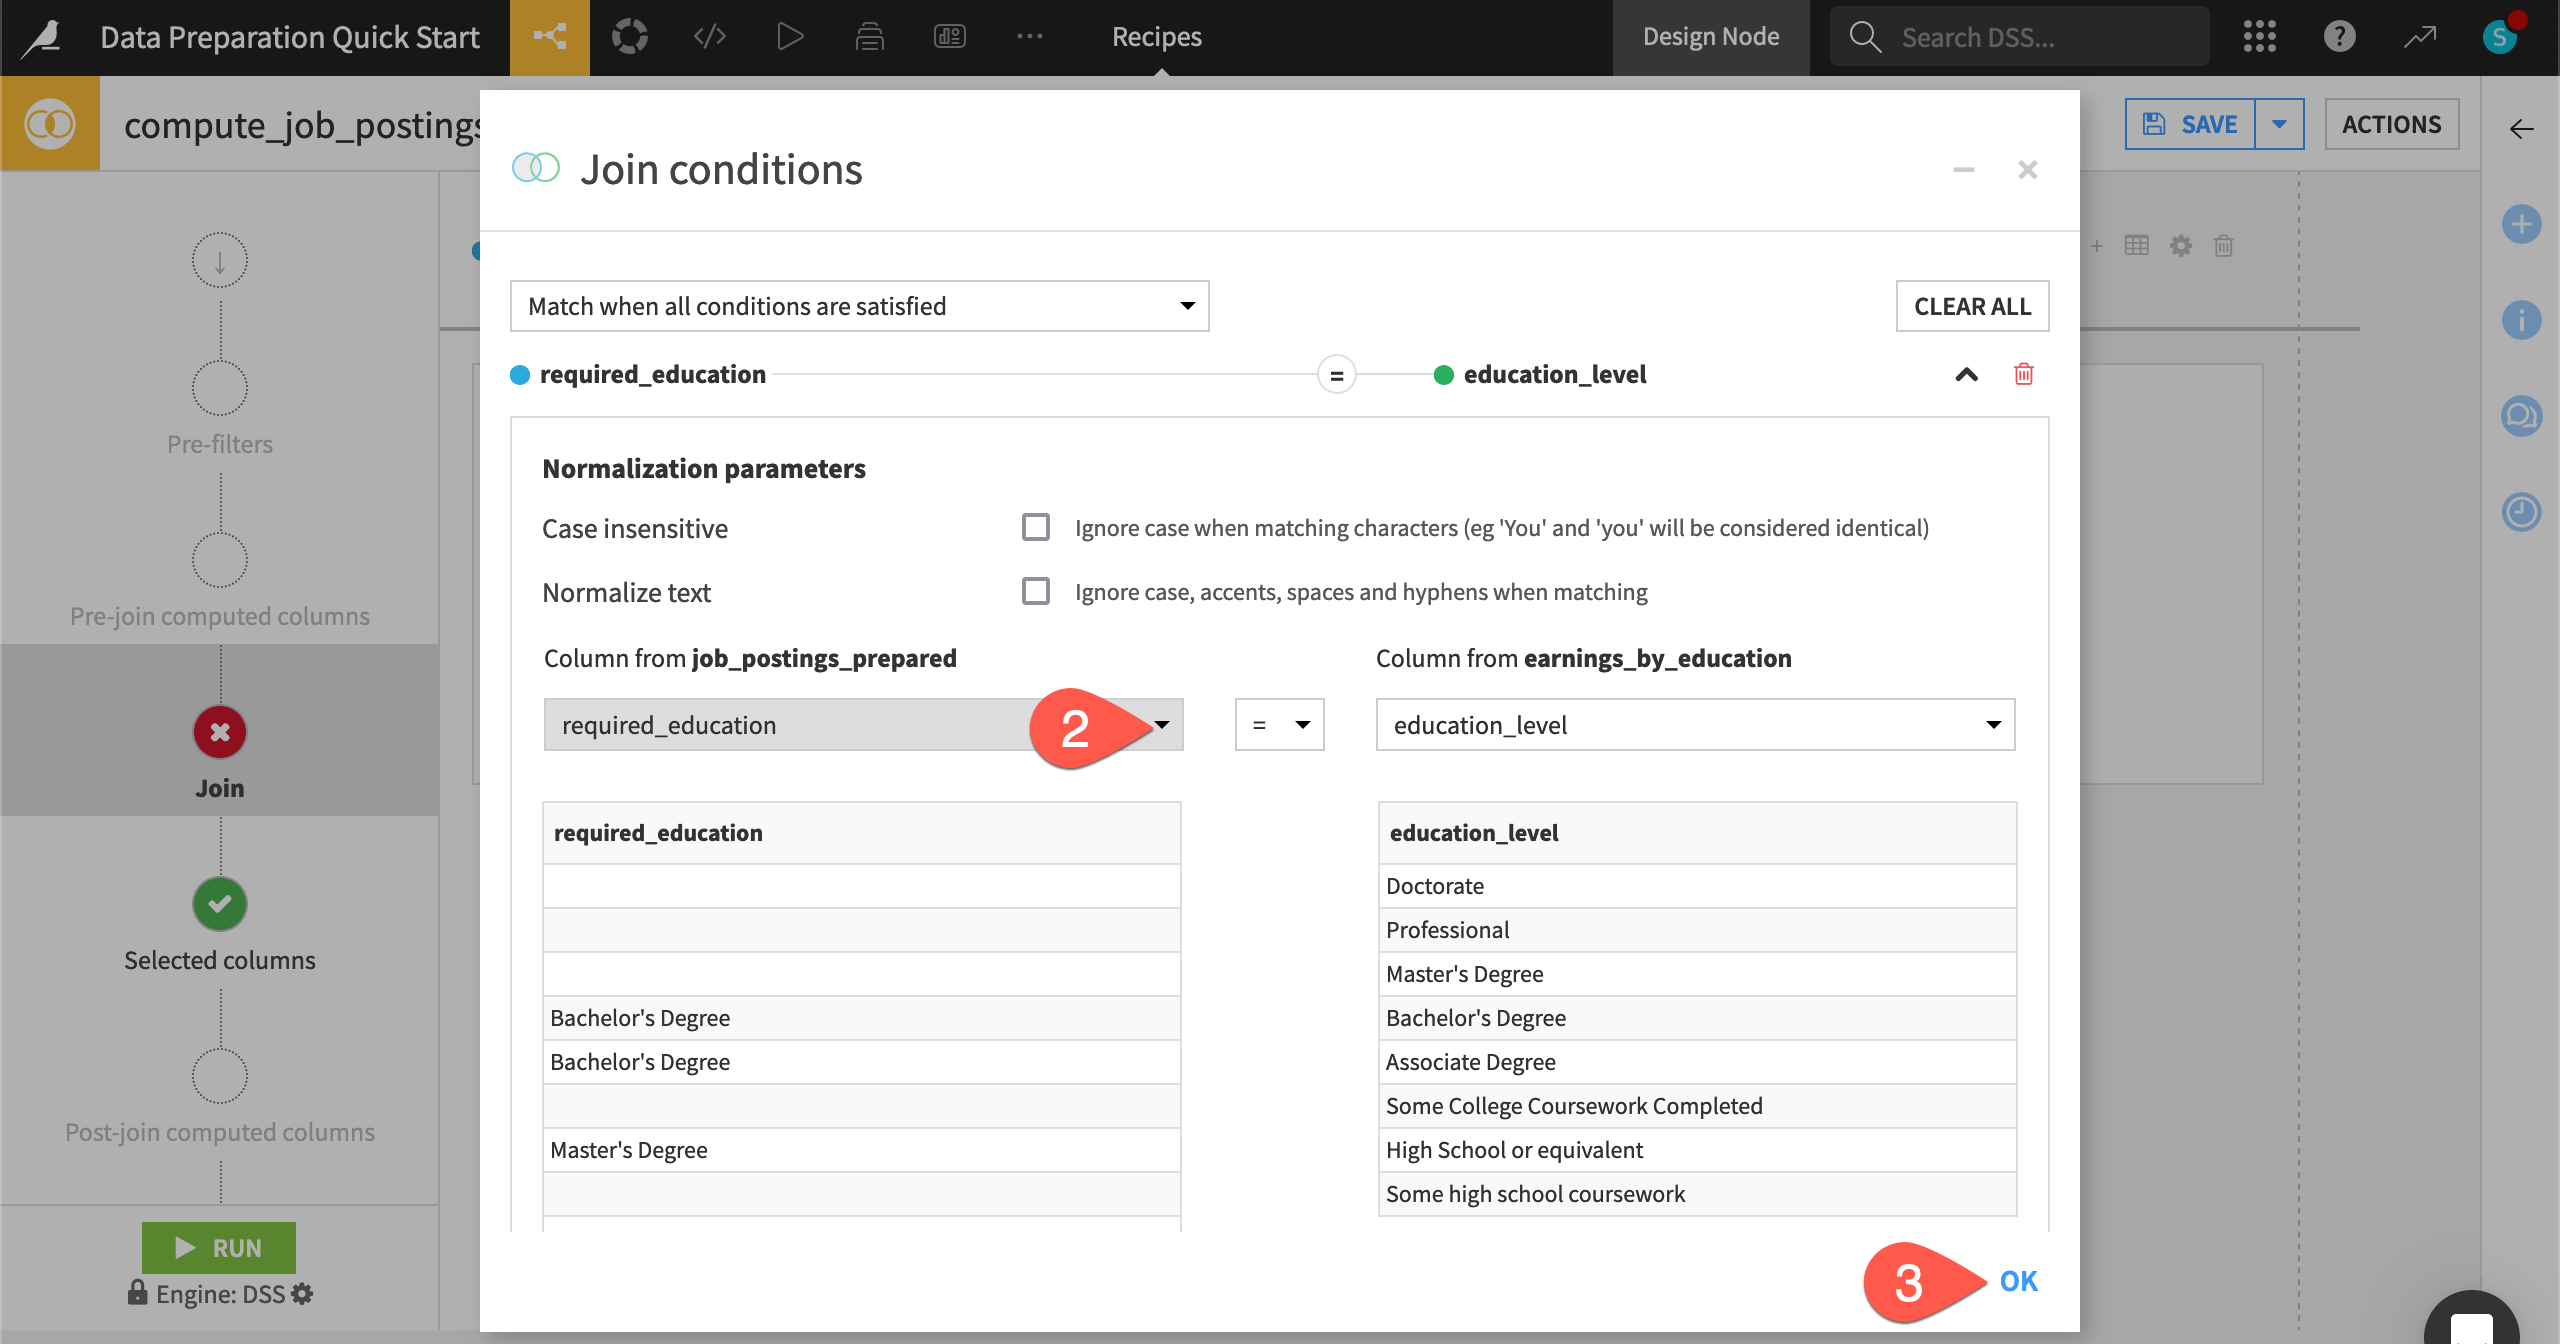
On the Join step, click Add a Condition.
For the job_postings_prepared dataset on the left, change the join column to required_education.
Click OK.
Handle unmatched rows#
By default, the Join recipe drops any unmatched rows, but you can also send unmatched rows to another dataset by clicking the dropdown menu beneath the join key. This can be especially useful for verifying assumptions about the datasets, or, in general, anytime you want to handle unmatched rows in some particular way.
On the Join step, select the dropdown menu underneath the join condition.
Select Send unmatched rows to other output dataset(s).
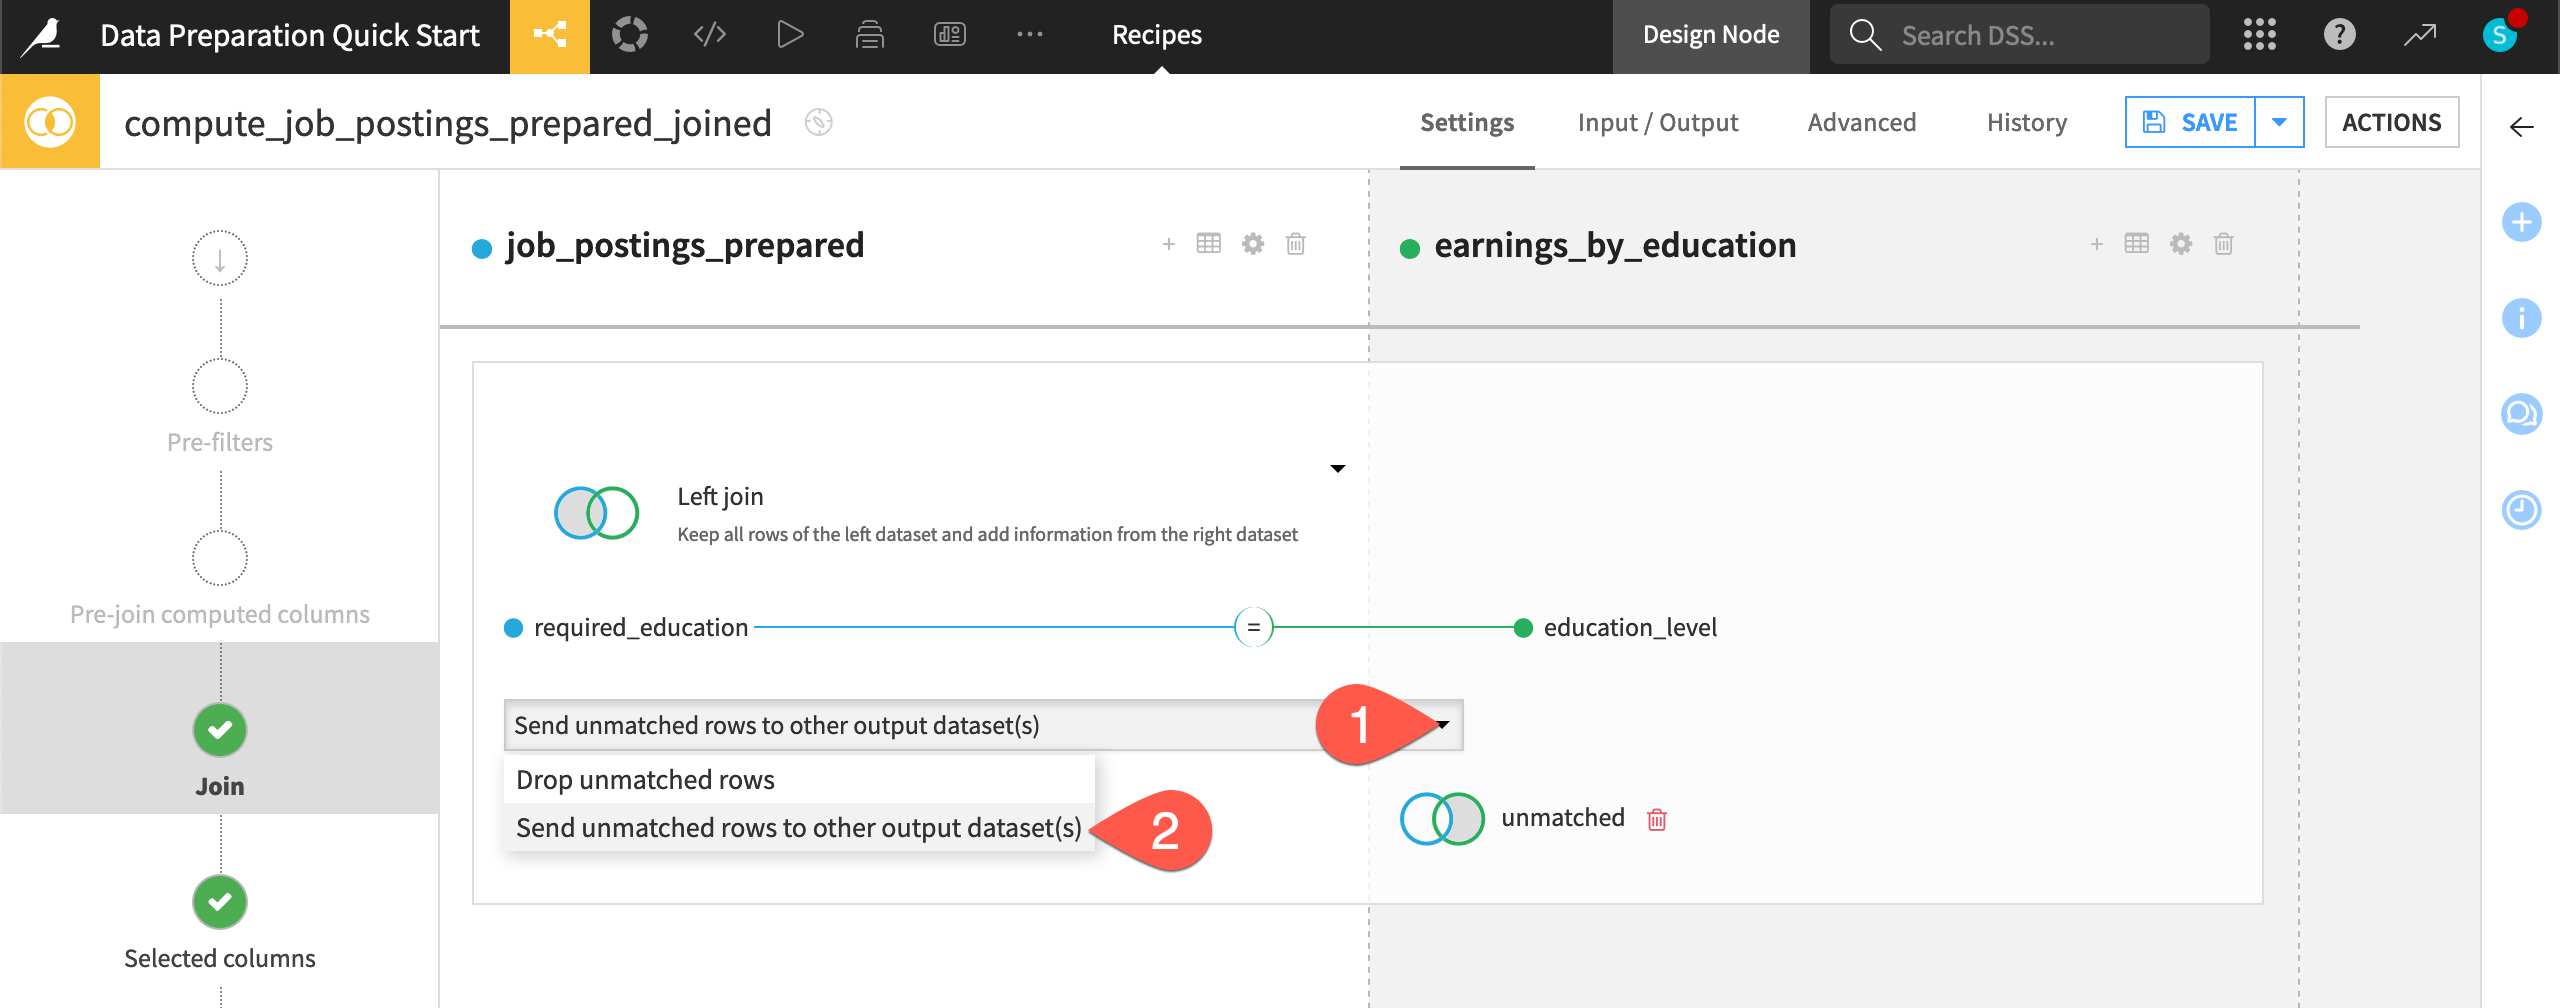
Click + Add Dataset.
Give the name
unmatched.Click Use Dataset.
Select columns for the output dataset#
The next step is to choose which columns should appear in the output.
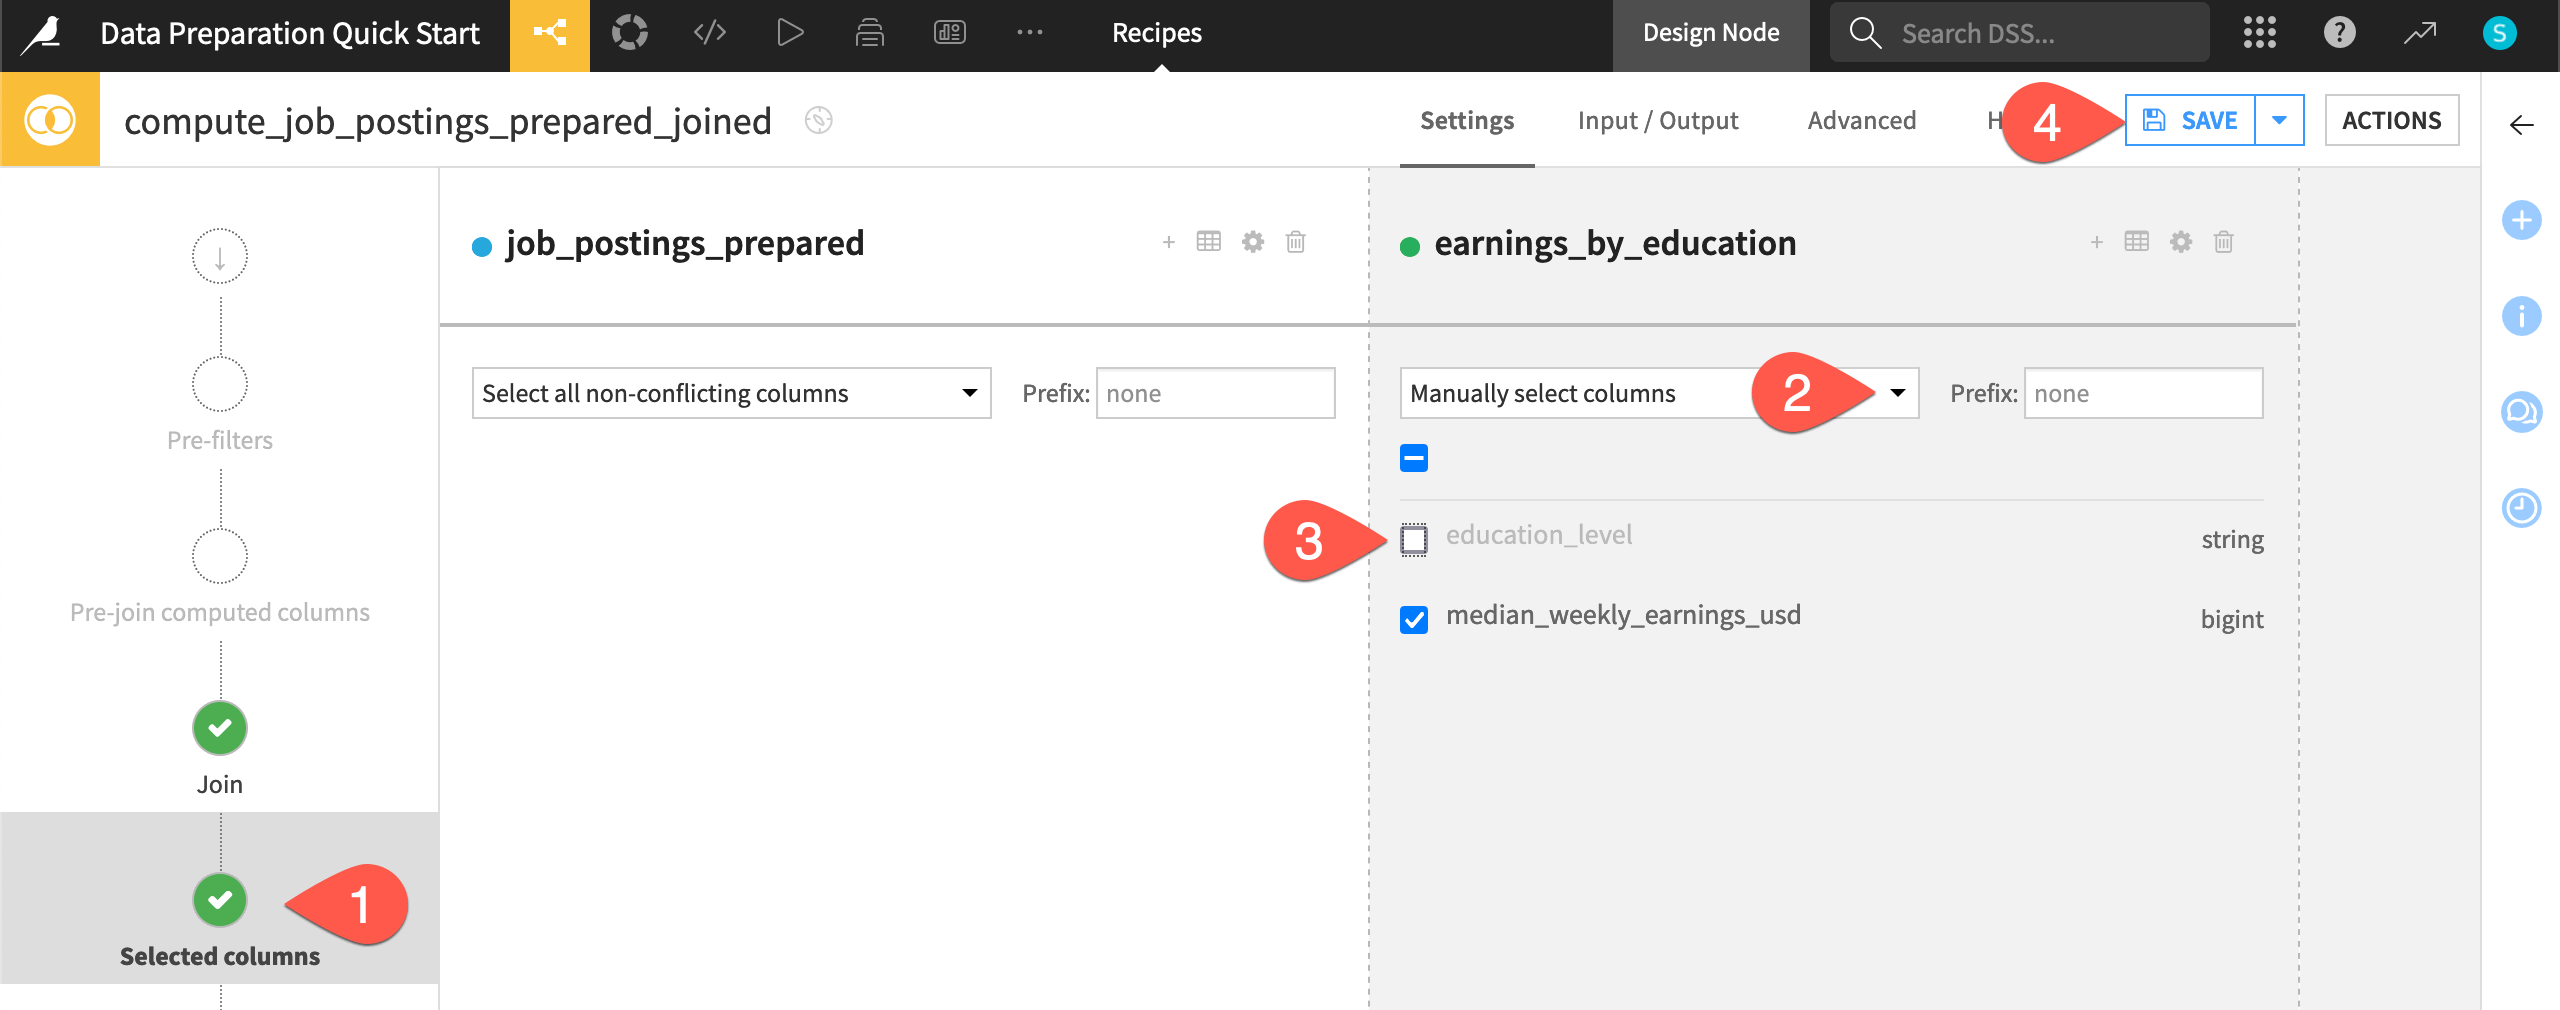
In the left hand panel, navigate to the Selected columns step.
Under earnings_by_education, open the dropdown menu, and choose Manually select columns.
Uncheck education_level since the required_education column of the left dataset contains the same information.
Click Save (or
Cmd/Ctrl+S).
Check the computation engine#
Before running the Join recipe, you may be curious where the actual computation will take place.
Click the gear (
) icon to open the recipe engine settings.
Click Show to view the non-selectable engines as well.
Click Close when finished reviewing this information.
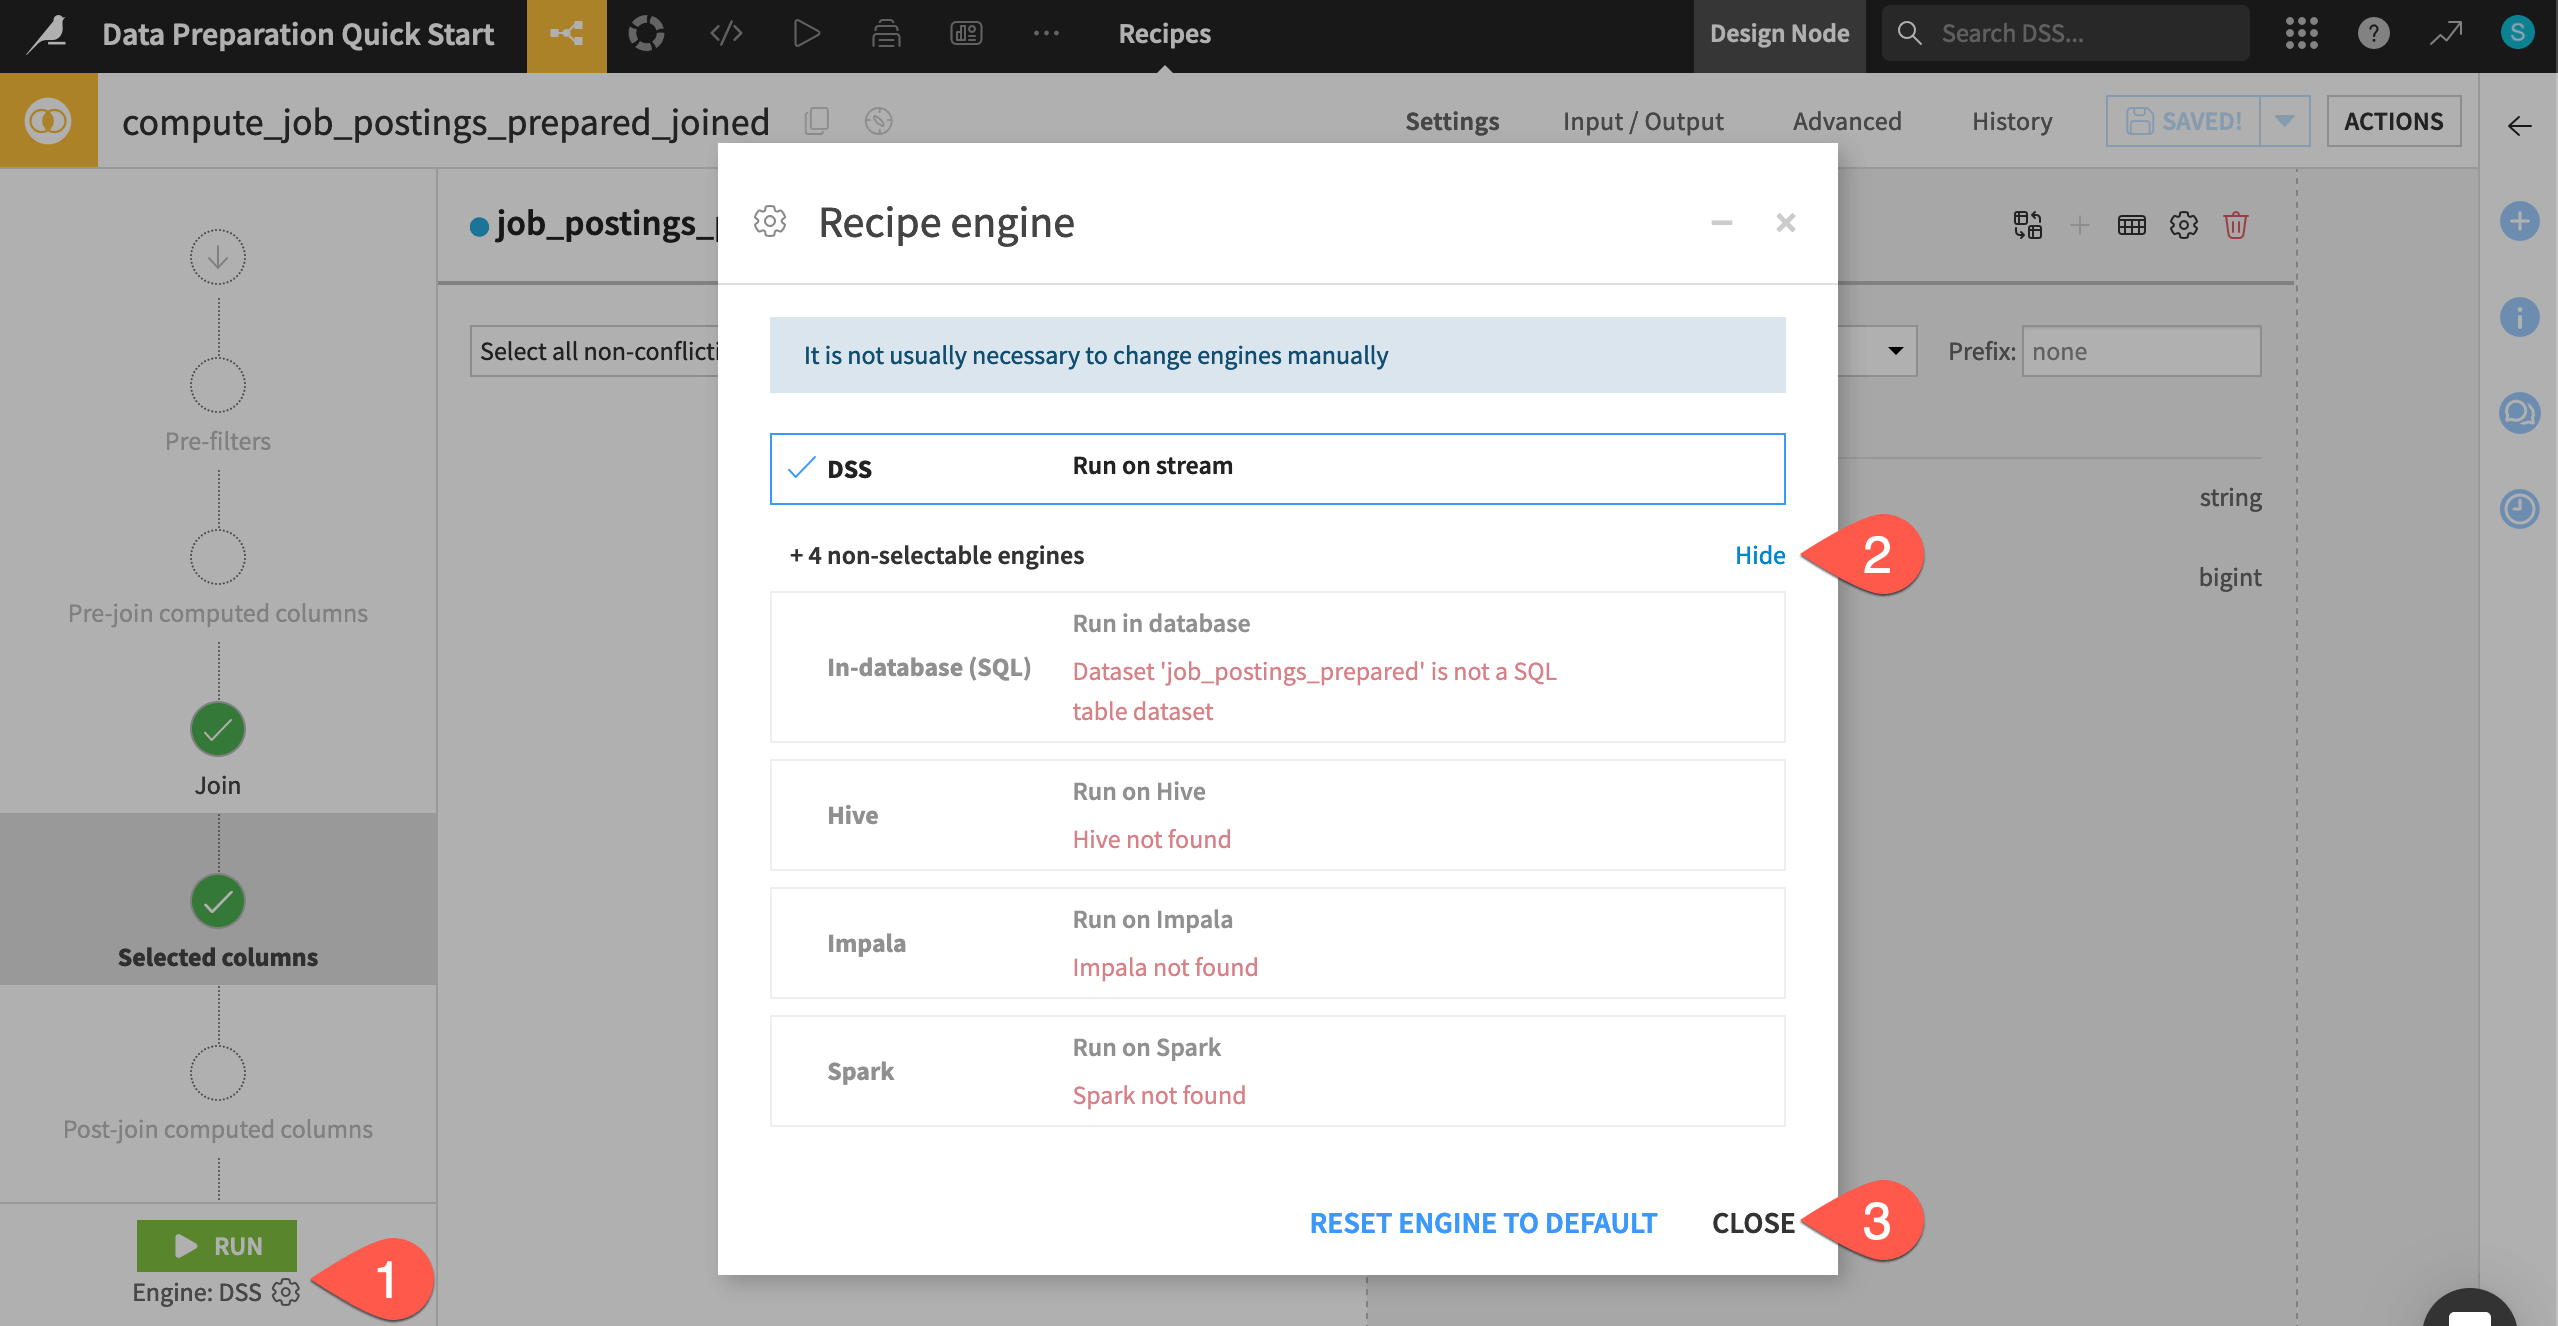
You most often won’t need to adjust the recipe engine setting manually, but it can be helpful to know what’s happening underneath Dataiku.
You can think of Dataiku as an orchestrator on top of your organization’s data infrastructure. Your instance administrator will create connections to this infrastructure. Then, you’ll manipulate data through recipes (visual, code, or even GenAI), but you most often won’t need to move the data into Dataiku.
Tip
For this tutorial, your recipes will use the DSS engine. You could also use a Sync or Prepare recipe to move the data into other storage locations, such as SQL databases or cloud storage. Depending on the storage location, other engine options, such as the in-database SQL or Spark engines, may become available.
Build a dataset from the Flow#
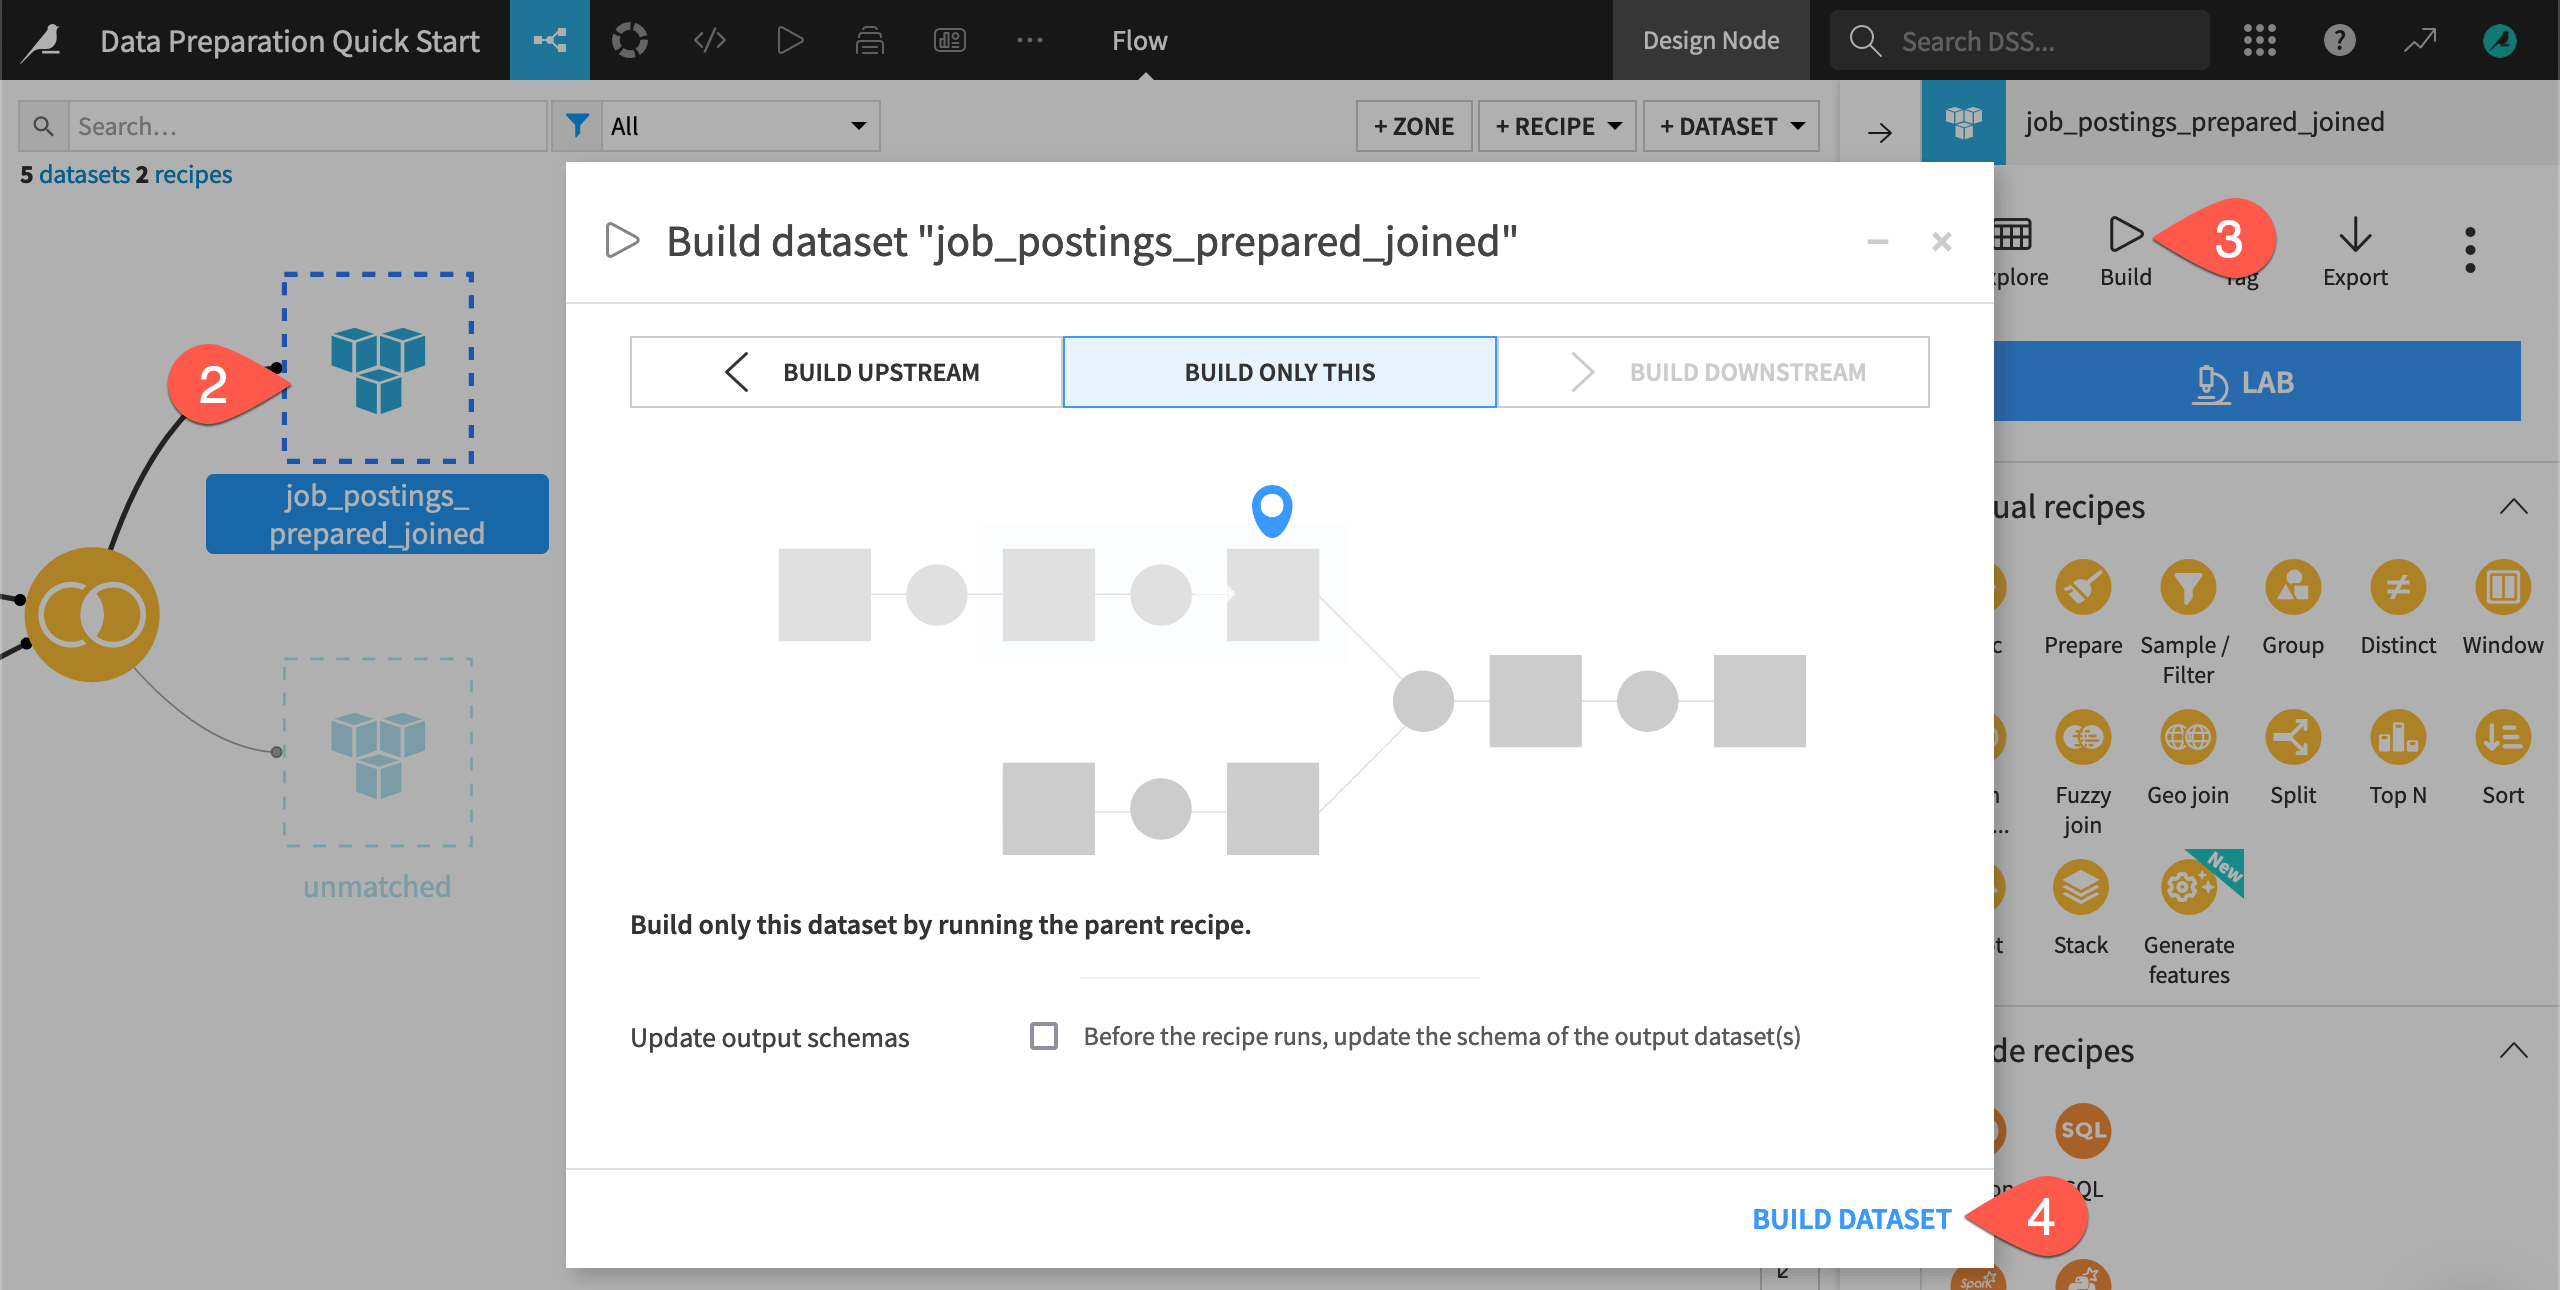
Often you won’t want to open an individual recipe to run it. Instead, you can instruct Dataiku to build a dataset of interest, and Dataiku will run whatever recipes are necessary to make that happen.
Before running the Join recipe, navigate back to the Flow (
g+f).Click once to select the empty (unbuilt) job_postings_prepared_joined dataset.
In the Actions (
) tab, click Build.
Since all build modes are the same in this case, leave the default Build Only This mode, and click Build Dataset.
See also
You’ll learn more about build modes and automating builds with scenarios in the Advanced Designer learning path.
Check unmatched rows#
In addition to the main output dataset, the Join recipe also created a dataset containing any unmatched rows.
When the job finishes, refresh the screen.
From the Flow, double click on the unmatched dataset to open it.

Return to the Flow (
g+f) when finished viewing it.
The value “Some high school coursework” in the earnings_by_education dataset didn’t have an exact match in the job_postings_prepared dataset, and so this row appears here.
Tip
Aside from changing the data values, you could fix this by returning to the join condition in the Join recipe, and checking the option for a Case insensitive match. Feel free to try this out yourself and re-run the Join recipe or move ahead!

