
Manage multiple versions of an API service#
Now that you are comfortable deploying and updating API services, let’s explore how to manage multiple versions of an API endpoint for A/B testing.
Deploy multiple versions of the endpoint for A/B testing#
When you’ve deployed multiple versions of your prediction endpoint, you may decide to run multiple generations of the endpoint at once. This allows the multiple versions of your prediction model to score requests to the API service.
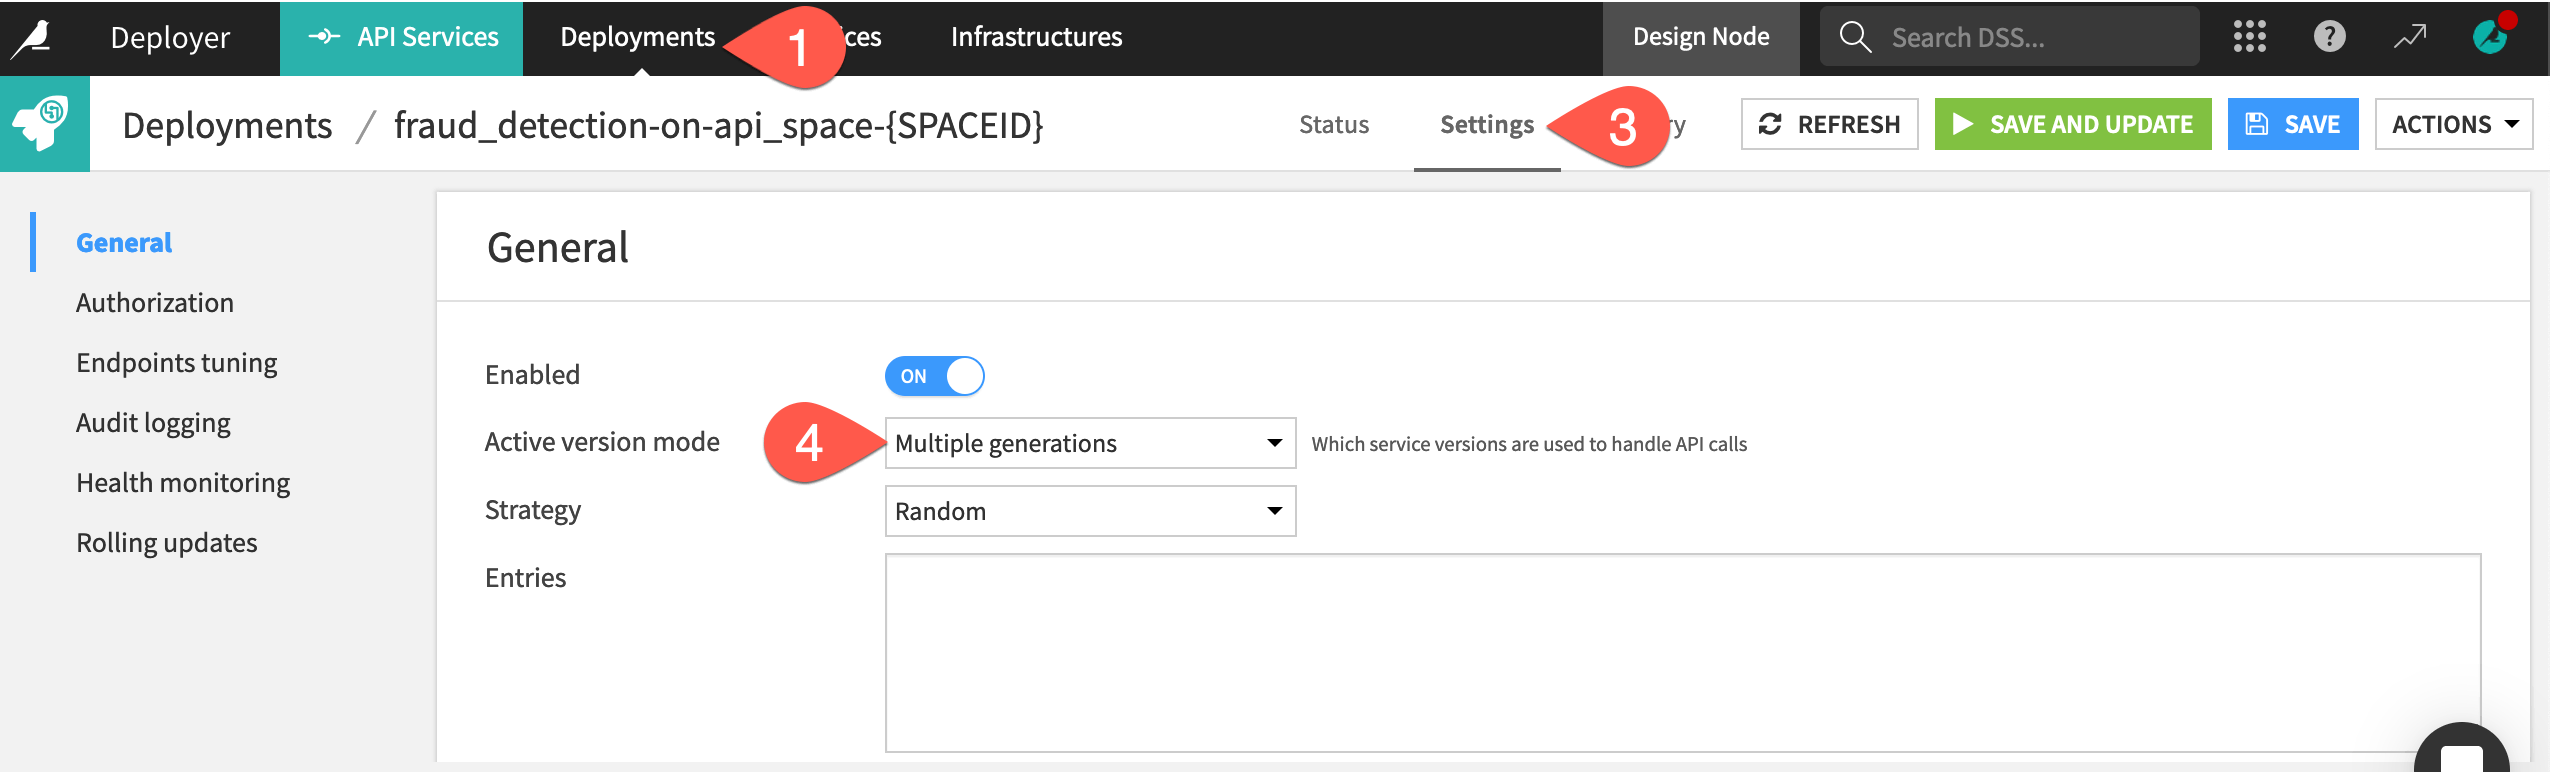
Navigate to the Settings tab of the active fraud_detection deployment.
Within the General panel, change the Active version mode to Multiple generations.
Direct 70% of calls to the v2 version and the remaining 30% to the new v3 version by copy-pasting the JSON array below into the Entries field.
[
   {
      "generation": "v2",
      "proba": 0.7
   },
   {
      "generation": "v3",
      "proba": 0.3
   }
]
Caution
Adjust the generation values to your version names if different from
v2andv3.The probabilities indicate the likelihood that calls to the API node will be served to each of the generations. Therefore, the sum of the probabilities of all generations must equal one.
Click Save and Update for the new settings to take hold.
If deploying on a static infrastructure, select the default Light Update option.
Important
You must set up multiple generations manually. You can’t do it through the automated deployment of API services.
Test multiple generations of the endpoint#
Next, confirm that queries will be sent to different generations of the API endpoint.
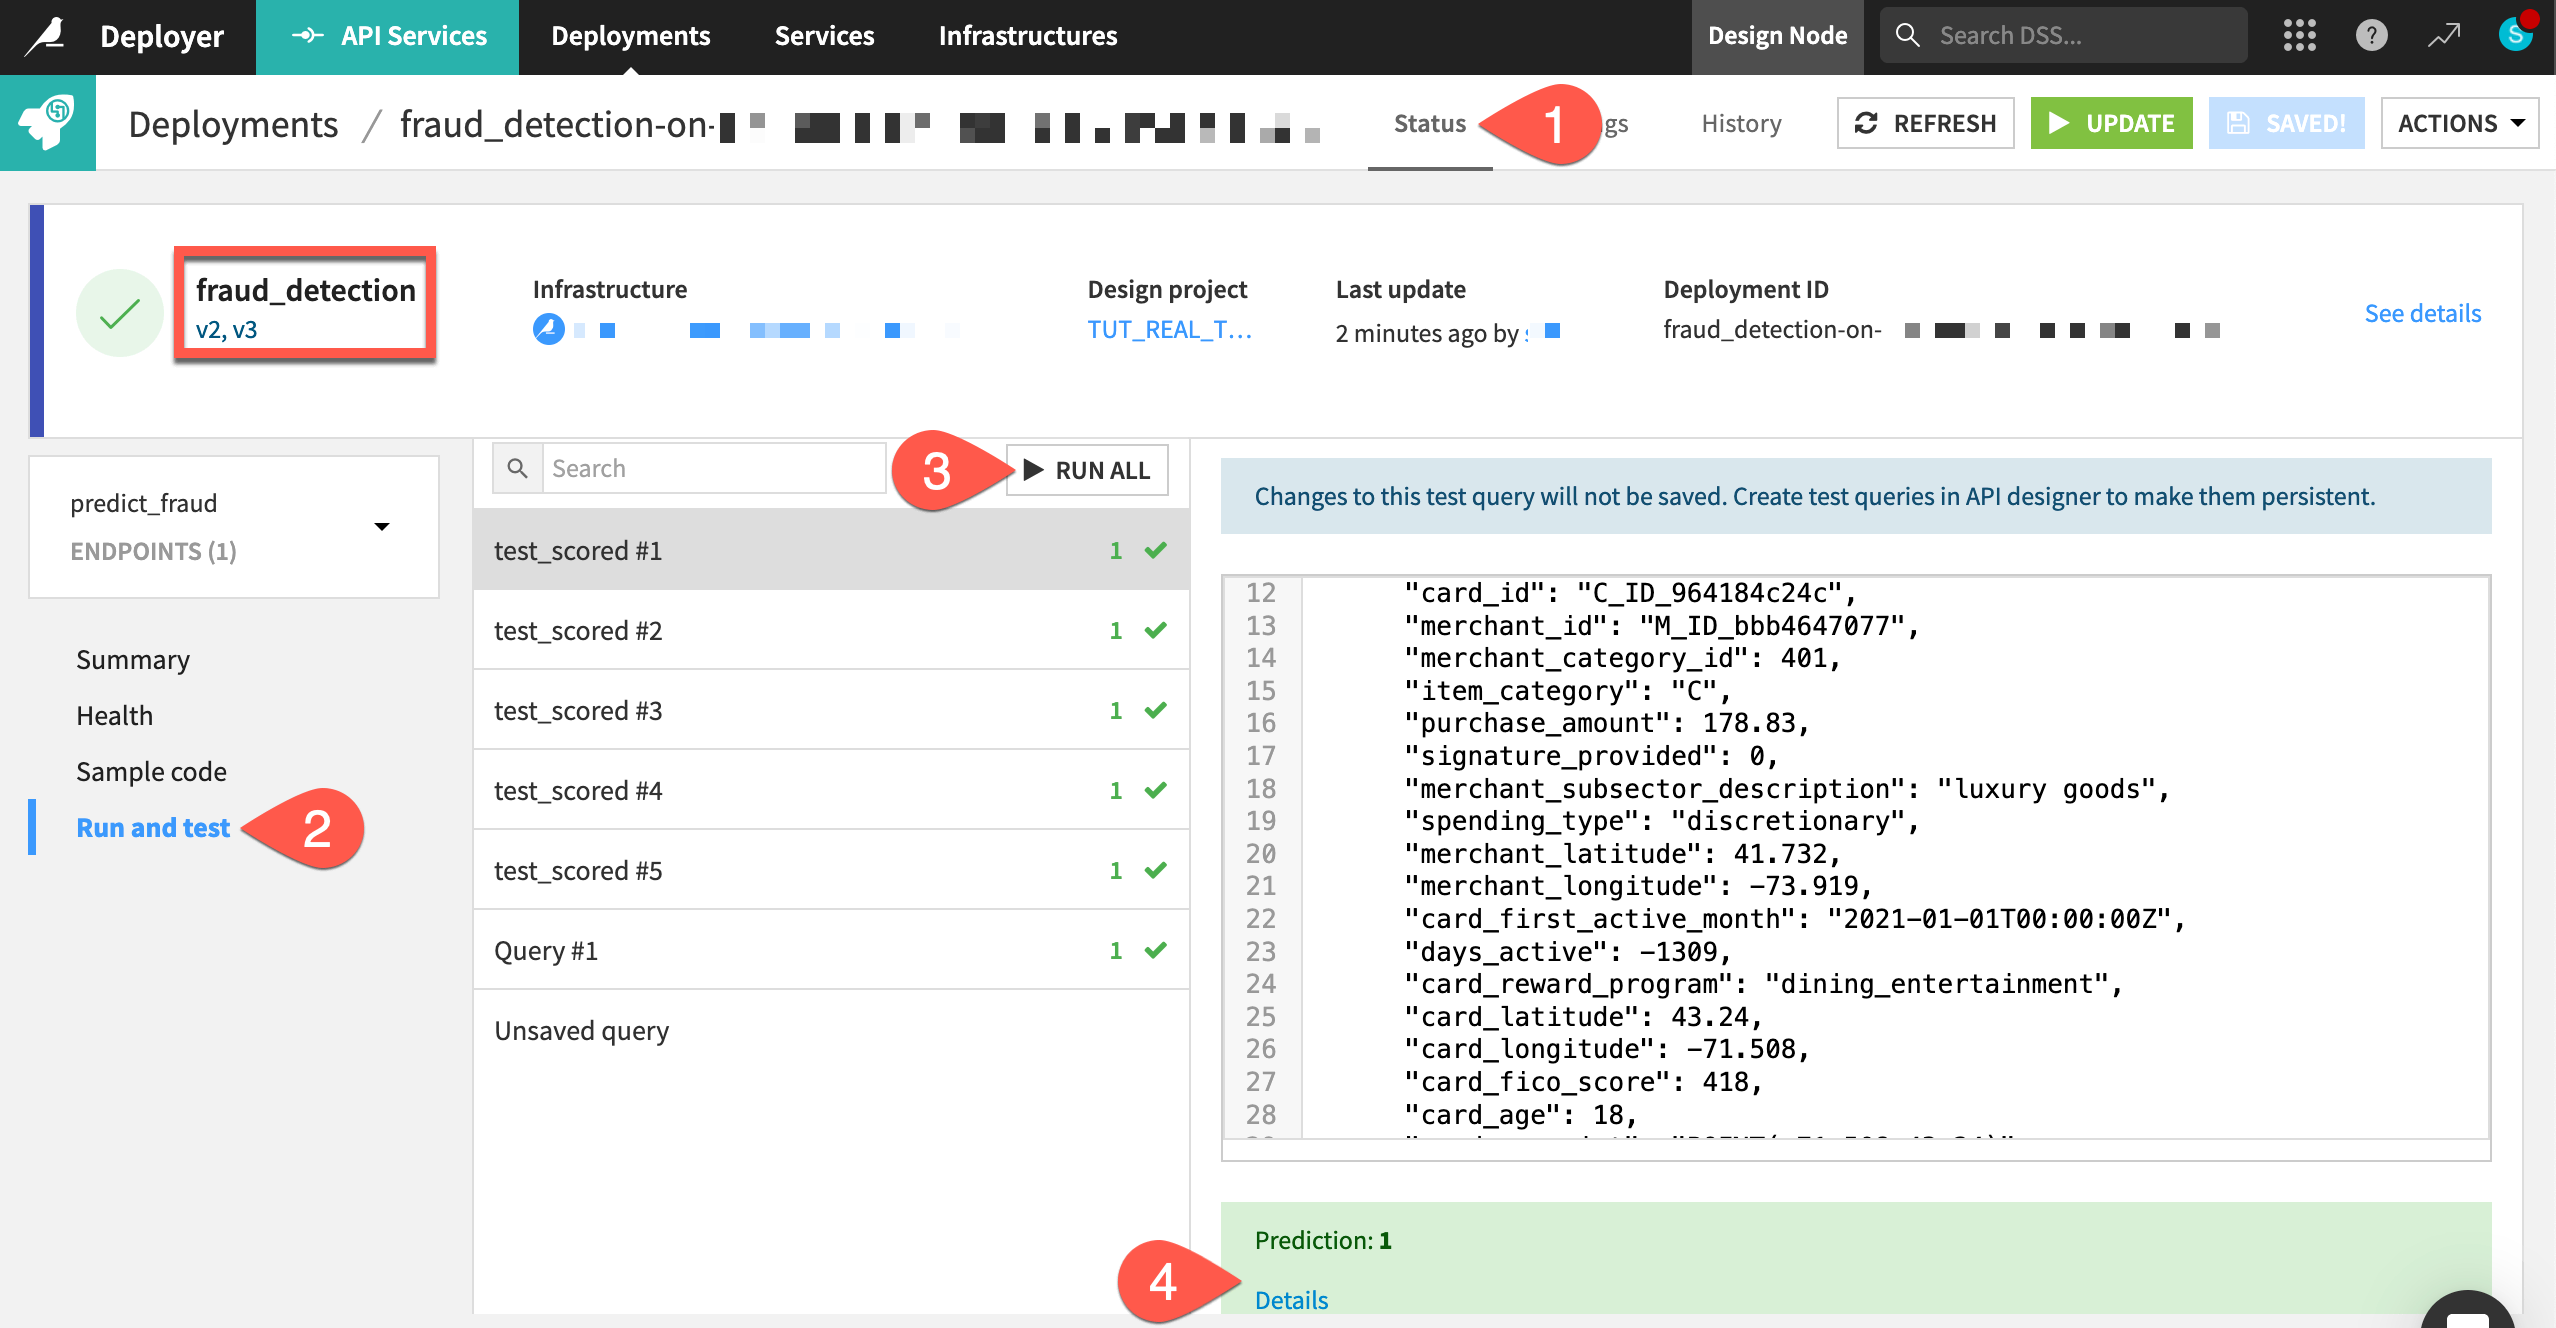
Navigate to the Status tab of the deployment.
Go to the Run and test panel of the predict_fraud endpoint.
Click Run All to run the test queries.
Click the Details of each response to see which version of the endpoint generated the response.
See also
The reference documentation provides more information on Managing versions of your endpoint.
Rollback versions#
The Project Deployer enables you to switch or rollback a deployment to previous project bundles. The API Deployer allows the same for API services. However, the ability to activate multiple generations of an API lets you take this a step further.
Here for example, the current version of the API service is actually deploying v2 and v3 with a certain probability. Still, you can always revert to an earlier version, just like on the Project Deployer.
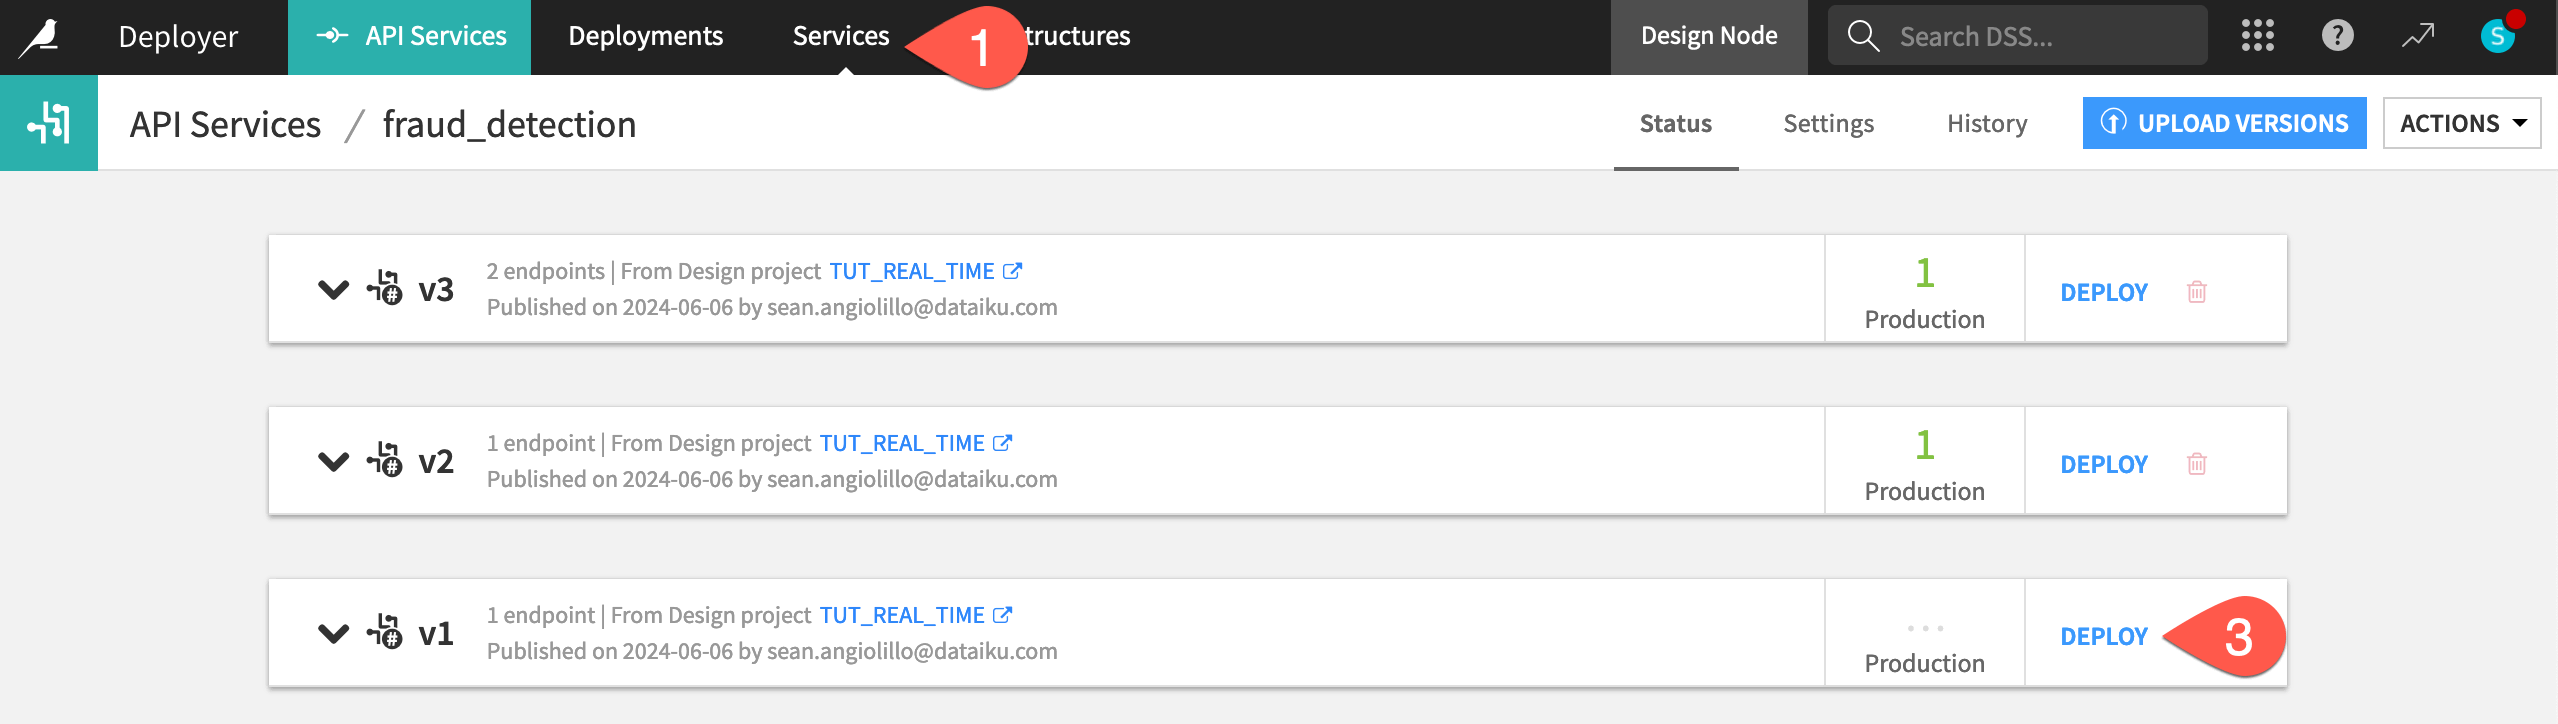
From the API Deployer, select Services from the top navigation bar.
Select the fraud_detection service ID.
Next to the v1 version, click Deploy.
Click OK to confirm the update.
Click OK again.
In the Settings tab of the deployment, click Update.
If deploying to a static infrastructure, select the default Light update.
Confirm the update in the deployment’s Status tab.
Monitor an API service#
Whether you have single or multiple generations of an API service, you’ll need to be able to monitor all API services in production. Monitoring an API service has many facets to it, including model evaluations, model comparisons, and drift analysis. We’ll address this topic in the Production Monitoring course.
For now, you can take a quick peak at the currently deployed API service in the Unified Monitoring page.
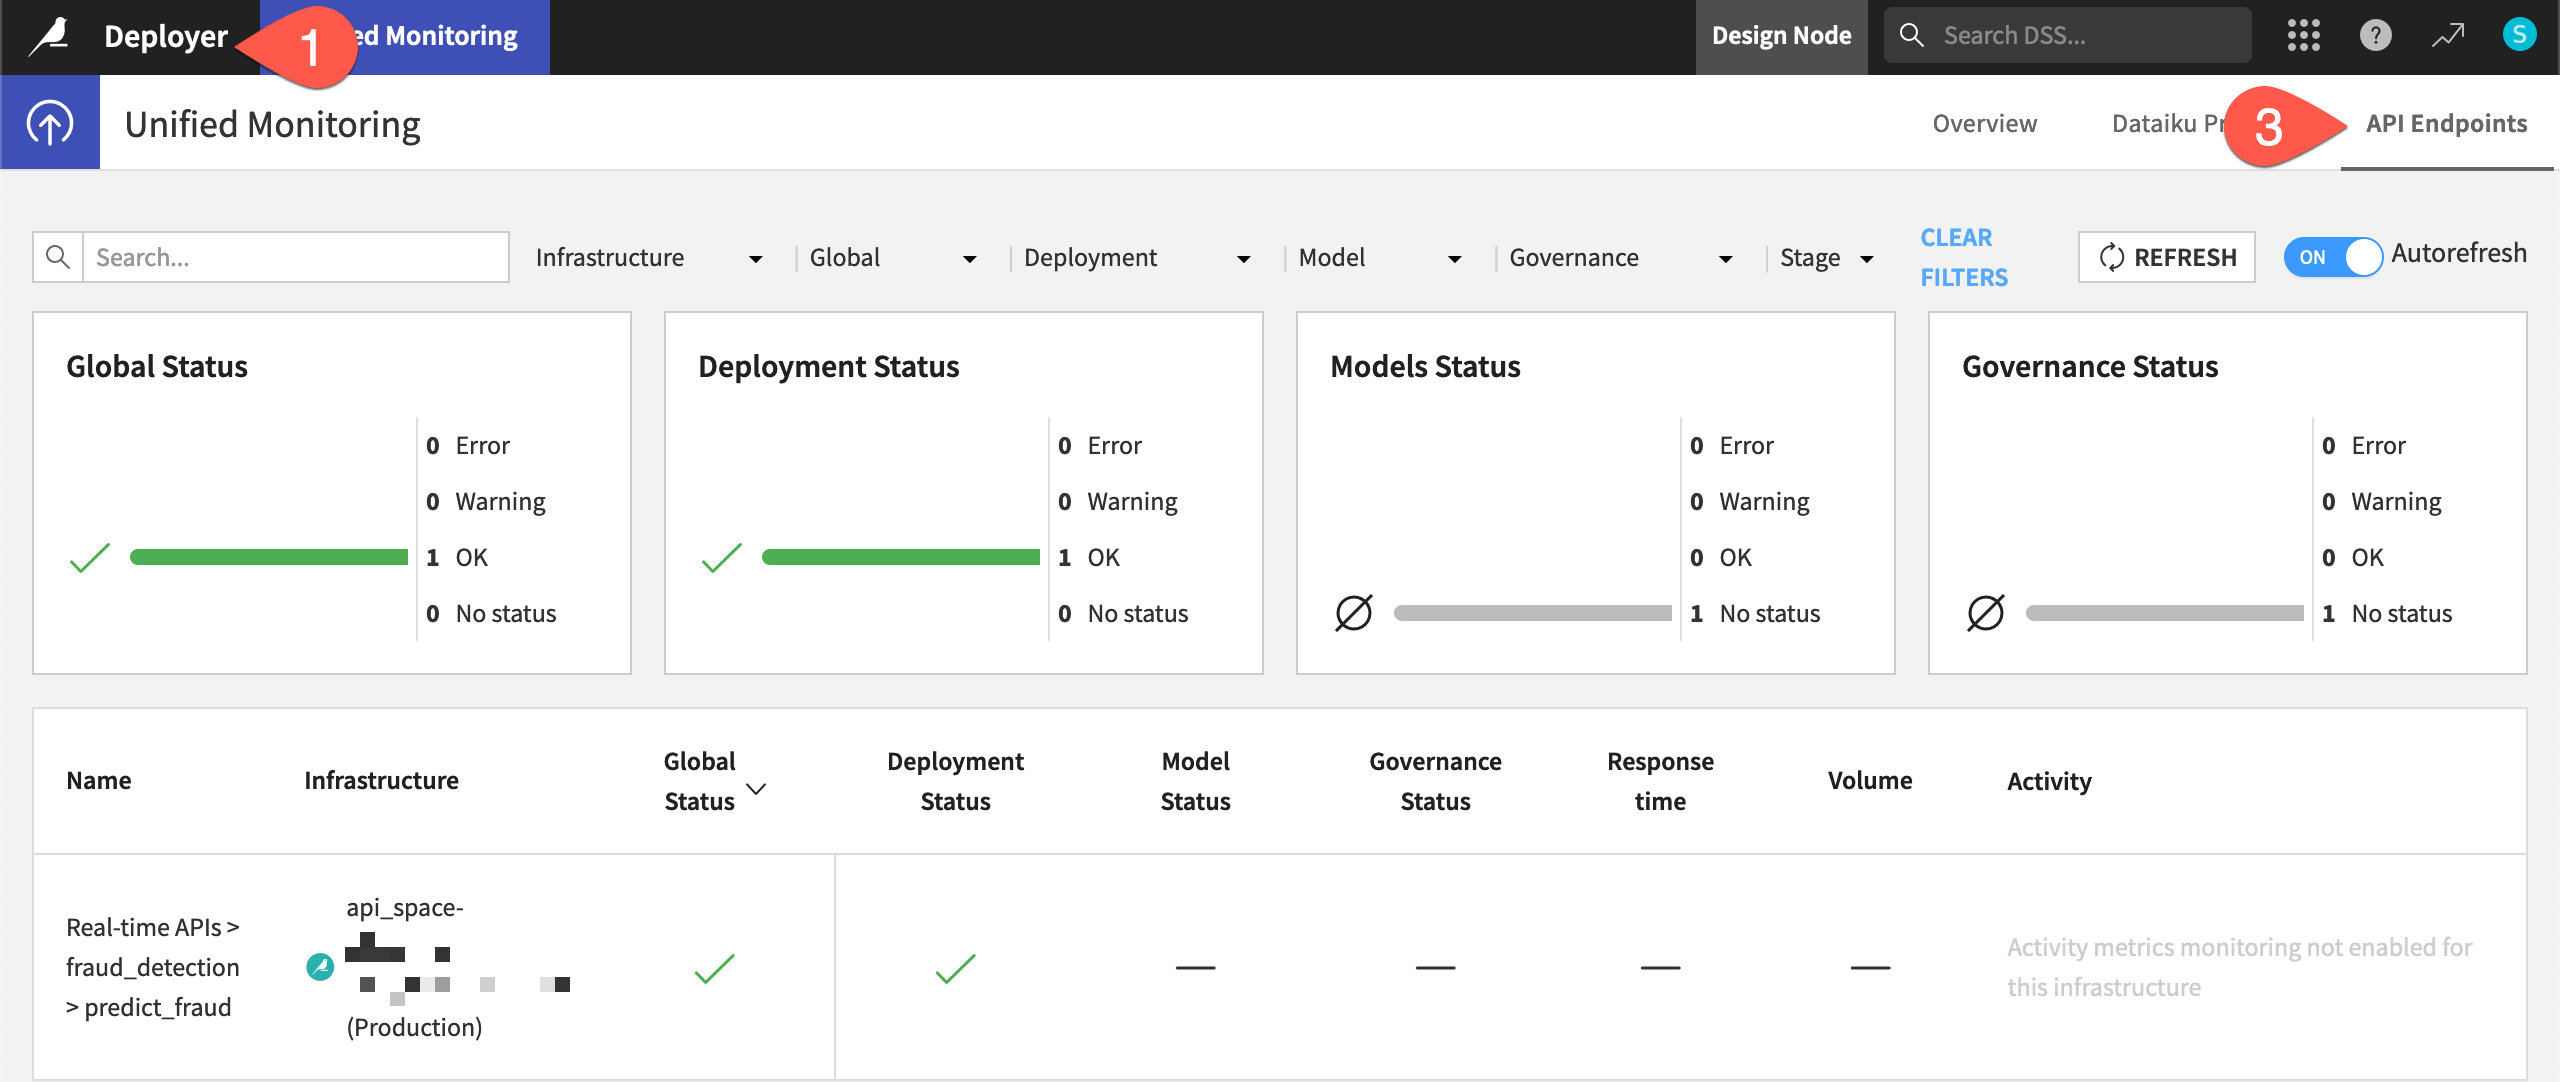
From the API Deployer, click Deployer to go to the Deployer home.
Select Monitoring.
Navigate to the API Endpoints tab.
Find your deployment, using the search box if needed.
If you can’t find it, the infrastructure to which you’ve deployed might not be monitored. Go to the Settings tab of the Unified Monitoring page, and confirm that the infrastructure hosting your deployment is in fact monitored.
Important
Depending on how fast you’ve made it through these steps, you may not yet see a monitored API endpoint. The default synchronization interval is five minutes. Learn more in the reference documentation on Unified Monitoring.
Tip
Why is the model status empty? As explained in the reference documentation on Understanding Model Status, you deployed this model without any checks in the model evaluation store.
Next steps#
Congratulations! Let’s recap all that you’ve accomplished:
You created an API endpoint from a prediction model in the Flow.
You packaged this API endpoint in an API service.
You published the API service on the API Deployer.
You deployed the API service to an API node, where it could answer live requests.
You added a query enrichment to the API endpoint and redeployed the API service.
You added a second endpoint (a dataset lookup) to an API service.
You deployed multiple versions of an API service simultaneously.
Although you’ve deployed an API service into production, it’s not yet monitored. To do so, begin exploring resources in the Production Monitoring course.
See also
See the reference documentation on API Node & API Deployer: Real-time APIs to learn more.