Tutorial | Advanced formula & regular expressions (Advanced Designer part 3)
The Prepare recipe in Dataiku contains 100+ processors for common data preparation tasks. In this hands-on tutorial, you will learn gain more experience using two of these functions:
Dataiku formulas. Dataiku has its own Formula language, similar to what you might find in a spreadsheet tool like Excel. In a Prepare recipe, formulas can be used to create new columns or flag rows.
Regular expressions (Regex). Regex is a commonly used sequence of characters that defines a search pattern and is used to extract and manage sets of strings from text data.
Let’s get started!
Using the same credit card fraud detection project found in other Advanced Designer projects, you will learn how to:
compute new columns and flag rows with a Dataiku formula, and
extract patterns from a text column using a regular expression.
Advanced Designer Prerequisites
This lesson assumes that you have basic knowledge of working with Dataiku datasets and recipes.
Note
If not already on the Advanced Designer learning path, completing the Core Designer Certificate is recommended.
To complete the Advanced Designer learning path, you’ll need access to an instance of Dataiku (version 8.0 or above) with the following plugins installed:
Census USA (minimum version 0.3)
These plugins are available through the Dataiku Plugin store (or for Dataiku Cloud users, the Plugins panel of the Launchpad), and you can find the instructions for installing plugins in the reference documentation. To check whether the plugin is already installed on your instance, go to the Installed tab in the Plugin Store to see a list of all installed plugins.

Note
If your goal is to complete only the tutorials in Visual Recipes 102, the Census USA plugin is not required.
In order to get the most out of this lesson, we recommend completing the Concept: Advanced Formula & Regex lesson beforehand.
Workflow overview
In this tutorial, you’ll add steps to a Prepare recipe using Formulas and Regular Expressions.

Create your project
Click +New Project > DSS Tutorials > Advanced Designer > Visual Recipes & Plugins (Tutorial).
Note
If you’ve already completed one of the Window recipe hands-on tutorials, you can use the same project.
Note
You can also download the starter project from this website and import it as a zip file.
Change dataset connections (optional)
Aside from the input datasets, all of the others are empty managed filesystem datasets.
You are welcome to leave the storage connection of these datasets in place, but you can also use another storage system depending on the infrastructure available to you.
To use another connection, such as a SQL database, follow these steps:
Select the empty datasets from the Flow. (On a Mac, hold Shift to select multiple datasets).
Click Change connection in the “Other actions” section of the Actions sidebar.
Use the dropdown menu to select the new connection.
Click Save.
Note
For a dataset that is already built, changing to a new connection clears the dataset so that it would need to be rebuilt.

Note
Another way to select datasets is from the Datasets page (G+D). There are also programmatic ways of doing operations like this that you’ll learn about in the Developer learning path.
The screenshots below demonstrate using a PostgreSQL database.
Whether starting from an existing or fresh project, ensure that the dataset transactions_known_prepared is built.
See build details here if necessary
From the Flow, select the end dataset required for this tutorial: transactions_known_prepared
Choose Build from the Actions sidebar.
Choose Recursive > Smart reconstruction.
Click Build to start the job, or click Preview to view the suggested job.
If previewing, in the Jobs tab, you can see all the activities that Dataiku will perform.
Click Run, and observe how Dataiku progresses through the list of activities.
Propagate schema changes
If you used either a smart (or even a forced) rebuild of the dataset transactions_known_prepared, you’ll notice that its schema is missing the six columns added upstream in the Window recipe.

This is because the upstream schema changes have not yet been propagated downstream. This topic will be directly addressed in the Flow Views & Actions course, but we’ll provide one solution to this problem here.
Enter the compute_transactions_known_prepared recipe.
Click Run from inside the recipe editor.
Accept the schema change update, dropping and recreating the output.
Confirm the output dataset includes the Window-generated columns.

Understand the use case
Observe that the transactions_known_prepared dataset contains a host of information about credit card transactions, such as the date, purchase amount, card ID, and merchant information.
We will use Dataiku formulas to compare:
the amount of each transaction (purchase_amount),
to the average purchase amount of the credit card the purchase was made with (card_purchase_amount_avg),
and the average purchase amount for the merchant at which the purchase was made (merchant_purchase_amount_avg).
This feature could potentially be useful for fraud detection. For example, if someone makes a disproportionately expensive purchase compared to their usual purchases, or a merchant receives an abnormally expensive order, we may wish to flag the purchase as potentially fraudulent.

Write formulas
The Prepare recipe which generates transactions_known_prepared already has two simple steps. We’ll add to this existing recipe.
Open the Prepare recipe which generates transactions_known_prepared.
Click on +Add a New Step, and select Formula from the processors menu.
Name the output column
high_card_amount
, and then click to open the editor panel.
We want to check whether or not purchase_amount is 50% higher than card_purchase_amount_avg.
Copy-paste and then Apply the following expression:
(purchase_amount - card_purchase_amount_avg)/card_purchase_amount_avg > 0.5
Sample outputs are displayed to the right of the formula. The Formula expression above generates a new boolean column which outputs for each row “true” if the condition that the expression checks is respected, and “false” if the condition is not respected.

Next, we’ll add another Formula step to check whether or not purchase_amount is 50% larger than merchant_purchase_amount_avg.
Add a new step, select the Formula processor, and name the output column
high_merchant_amount
.Open the editor panel, and copy-paste and Apply the following expression:
(purchase_amount - merchant_purchase_amount_avg)/merchant_purchase_amount_avg > 0.5

Now that we have created the two conditions, we will add a third Formula step to categorize each row as suspicious or not based on the results from the two conditions. We want this step to return one of four values:
“suspicious” if both conditions are true,
“potentially_suspicious” if only high_card_amount is true,
“possibly_suspicious” if only high_merchant_amount is true, and
“not_suspicious” if both conditions are false.
Using a series of “if” conditions, we can write nested statements to check for multiple conditions.
Add a new formula step, and name the output column
suspicion_level
.Open the editor panel, and copy-paste the following expression below.
Then Apply, and run the recipe.
if(high_card_amount=="true" && high_merchant_amount=="true", "suspicious",
if(high_card_amount=="true" && high_merchant_amount=="false", "potentially_suspicious",
if(high_card_amount=="false" && high_merchant_amount=="true", "possibly_suspicious",
"not_suspicious")))

Finally, explore the output dataset to verify that the three new columns generated by the Formula steps (high_card_amount, high_merchant_amount, and suspicion_level) have been computed.

Note
You can find out more about the Dataiku Formula language in the reference documentation.
Extract patterns from text data with regular expressions
Imagine we want to get information about all PlayStation purchases. However, we don’t have this information organized neatly in a column. The product_title column includes different spellings, capitalization, and spacing.
For example, we want to identify entries like “PlayStation”, “playstation”, “PlayStation 4”, and “Playstation 3D” as one entity. We can use regular expressions to do just this.
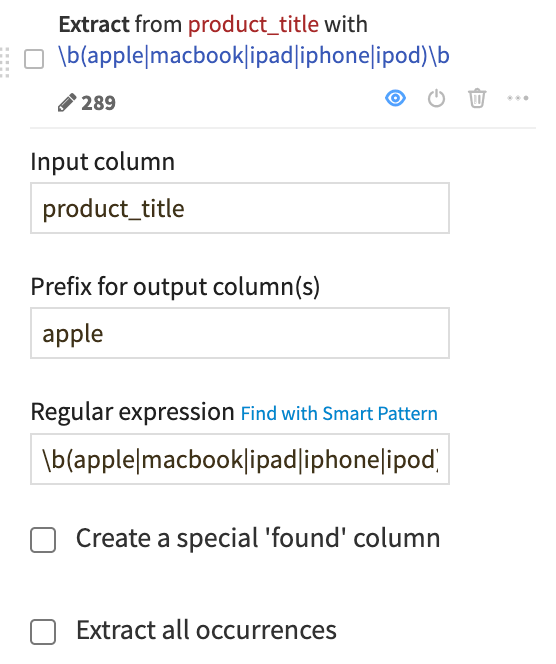
In the parent recipe of the transactions_known_prepared dataset, add a new step, Extract with regular expression.
Select product_title as the input column.
Store the occurrences in an output column with the prefix
playstation
.Copy-paste the following regular expression:
([pP]lay[sS]tation\ *[0-9]*[dD]*)
To capture each occurrence of a reference to PlayStation in the data, and not just the first one in each row, check the Extract all occurrences box. Note how this changes the meaning of the output column from text to an array.
Run the recipe, updating the schema.

Note
Here we’ve provided the exact regular expression required, but writing them from scratch can be tricky. As of Dataiku 9, there is a Smart Pattern Builder to help create regular expressions like the one used here.
Finally, explore the output dataset to validate the regex and view the results, by filtering the playstation1 column on valid values. Depending on the size of the current sample, you may see different results.

Note
You’ll find that regular expressions can also be used in other parts of Dataiku, including processors such as Filter rows/cells on value.
What’s Next?
To learn more about advanced ways to use the Prepare recipe, check out this selection of articles on the Dataiku Knowledge Base.