
Tutorial | Join recipe#
Get started#
The Join recipe allows you to enrich your data with columns from one or more datasets.
Objectives#
In this tutorial, you will:
Use a Join recipe to join three datasets into one output dataset.
Prerequisites#
To complete this tutorial, you’ll need the following:
Dataiku 14.0 or later.
Create the project#
From the Dataiku Design homepage, click + New Project.
Select Learning projects.
Search for and select Join Recipe.
If needed, change the folder into which the project will be installed, and click Create.
From the project homepage, click Go to Flow (or type
g+f).
Note
You can also download the starter project from this website and import it as a ZIP file.
Use case summary#
Let’s say we’re a financial company that uses data to detect fraudulent transactions.
The project comes with three datasets, described in the table below.
Dataset |
Description |
|---|---|
tx |
Each row is a unique credit card transaction with information such as the card that was used and the merchant where the transaction was made. It also indicates whether the transaction has either been:
|
merchants |
Each row is a unique merchant with information such as the merchant’s location and category. |
cards |
Each row is a unique credit card ID with information such as the card’s activation month or the cardholder’s FICO score (a common measure of creditworthiness in the US). |
In this tutorial, we want to enrich the tx dataset with:
The merchants data coming from merchants.
The cards data coming from cards.
Preview the datasets#
Let’s explore the data at hand and which columns could be used as the join key.
To do so:
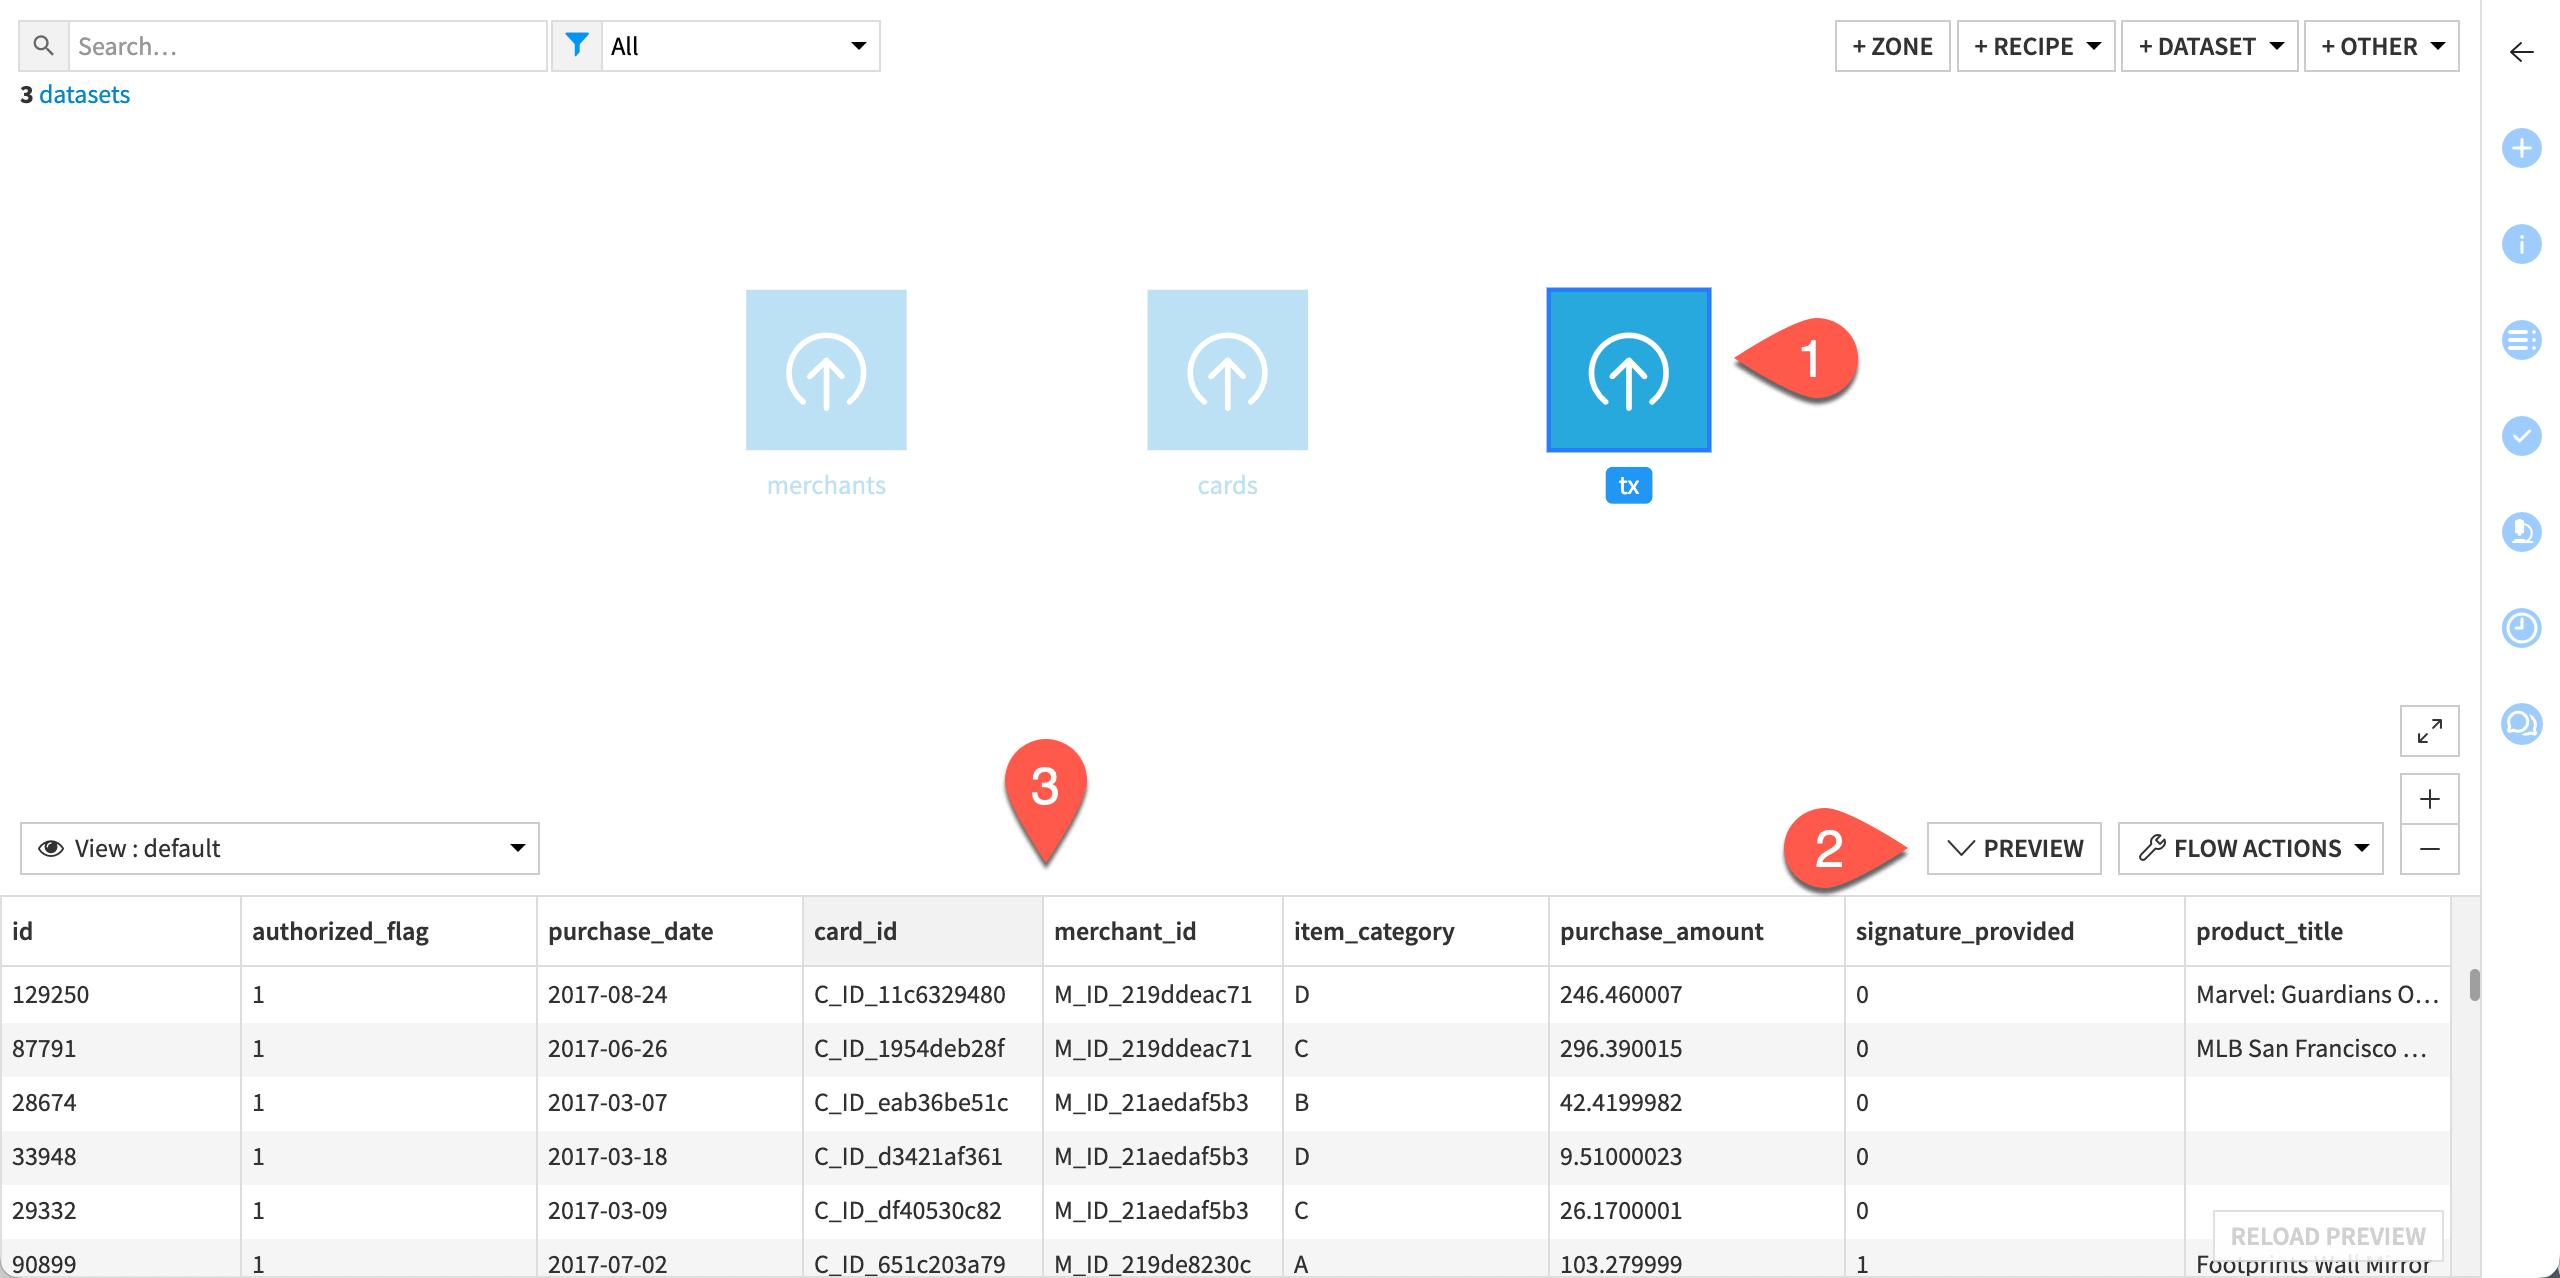
From the Flow, click on the tx dataset to select it.
Click the Preview at the bottom of the Flow (or use the keyboard shortcut
Shift+P) to see a preview of the dataset.Explore its columns to determine which column could serve as the join key.
With the Preview panel still open, select the cards and merchants to preview them as well.
As you can see:
To join tx with … |
Use the following columns as join keys: |
|---|---|
cards |
|
merchants |
|
Join the datasets#
You can use the Join recipe to enrich the tx dataset with the information on:
Cards from the cards dataset.
Merchants from the merchants dataset.
Create a Join recipe#
First, create the recipe.
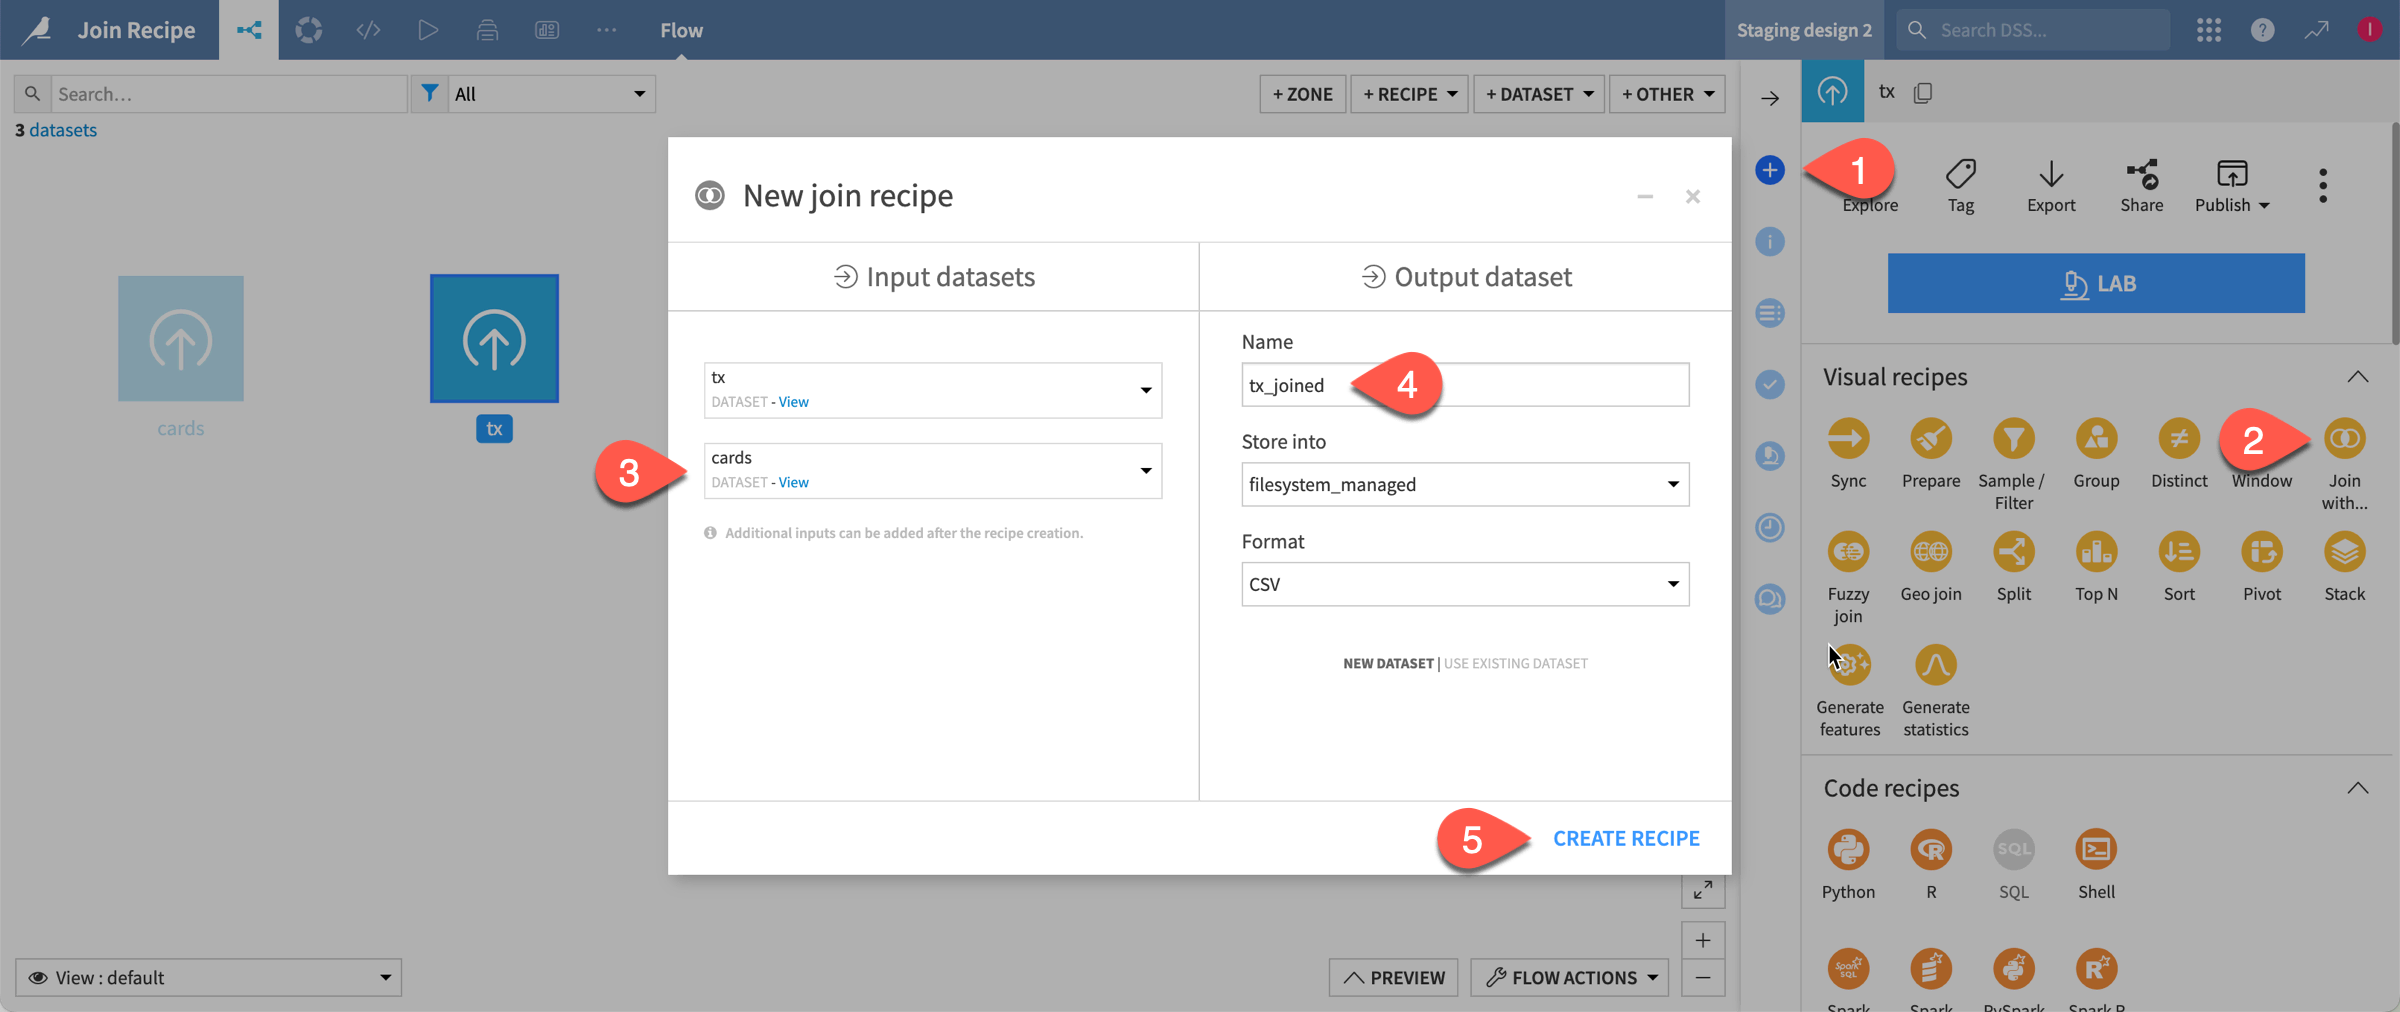
From the Flow, select the tx dataset, and click the Actions (
 ) icon from the right panel.
Under Visual recipes, choose Join.
Select cards as the second input dataset.
Note
Although you can add only two datasets in the Join recipe creation dialog, you can add more datasets at the Join step after creating the recipe.
Ensure that the name of the output dataset is
tx_joined.Click Create Recipe.
Join tx and cards#
The core step of this recipe is the Join step, where you choose how to match rows between the datasets.
Define the join condition#
In this first join, you want to match rows from the tx and cards datasets that have the same value of card_id and id, respectively.
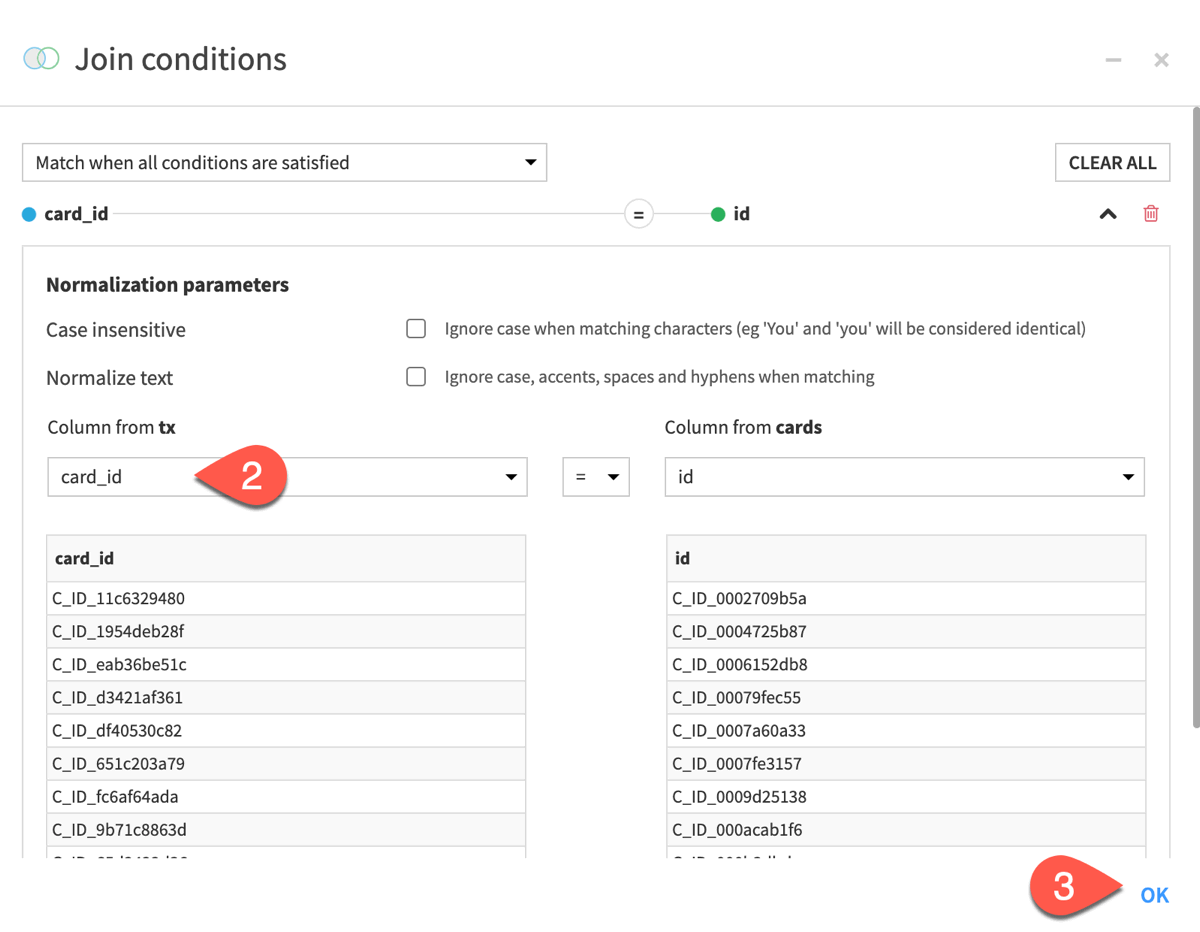
Click on Add a Condition to tell Dataiku which columns to match.
The Join conditions dialog opens, where Dataiku automatically defines that the ID columns are the join key. Yet, you have to change the condition as you want to use the card_id column from the tx dataset (the id column in the tx dataset stores the transaction ID, not the card ID).
Under Column from tx, select card_id.
Select OK and return to the Join recipe.
Tip
By default, the recipe will drop unmatched rows, but you can also configure the recipe to send unmatched rows to another output dataset. This can be helpful to confirm your expectations of the output.
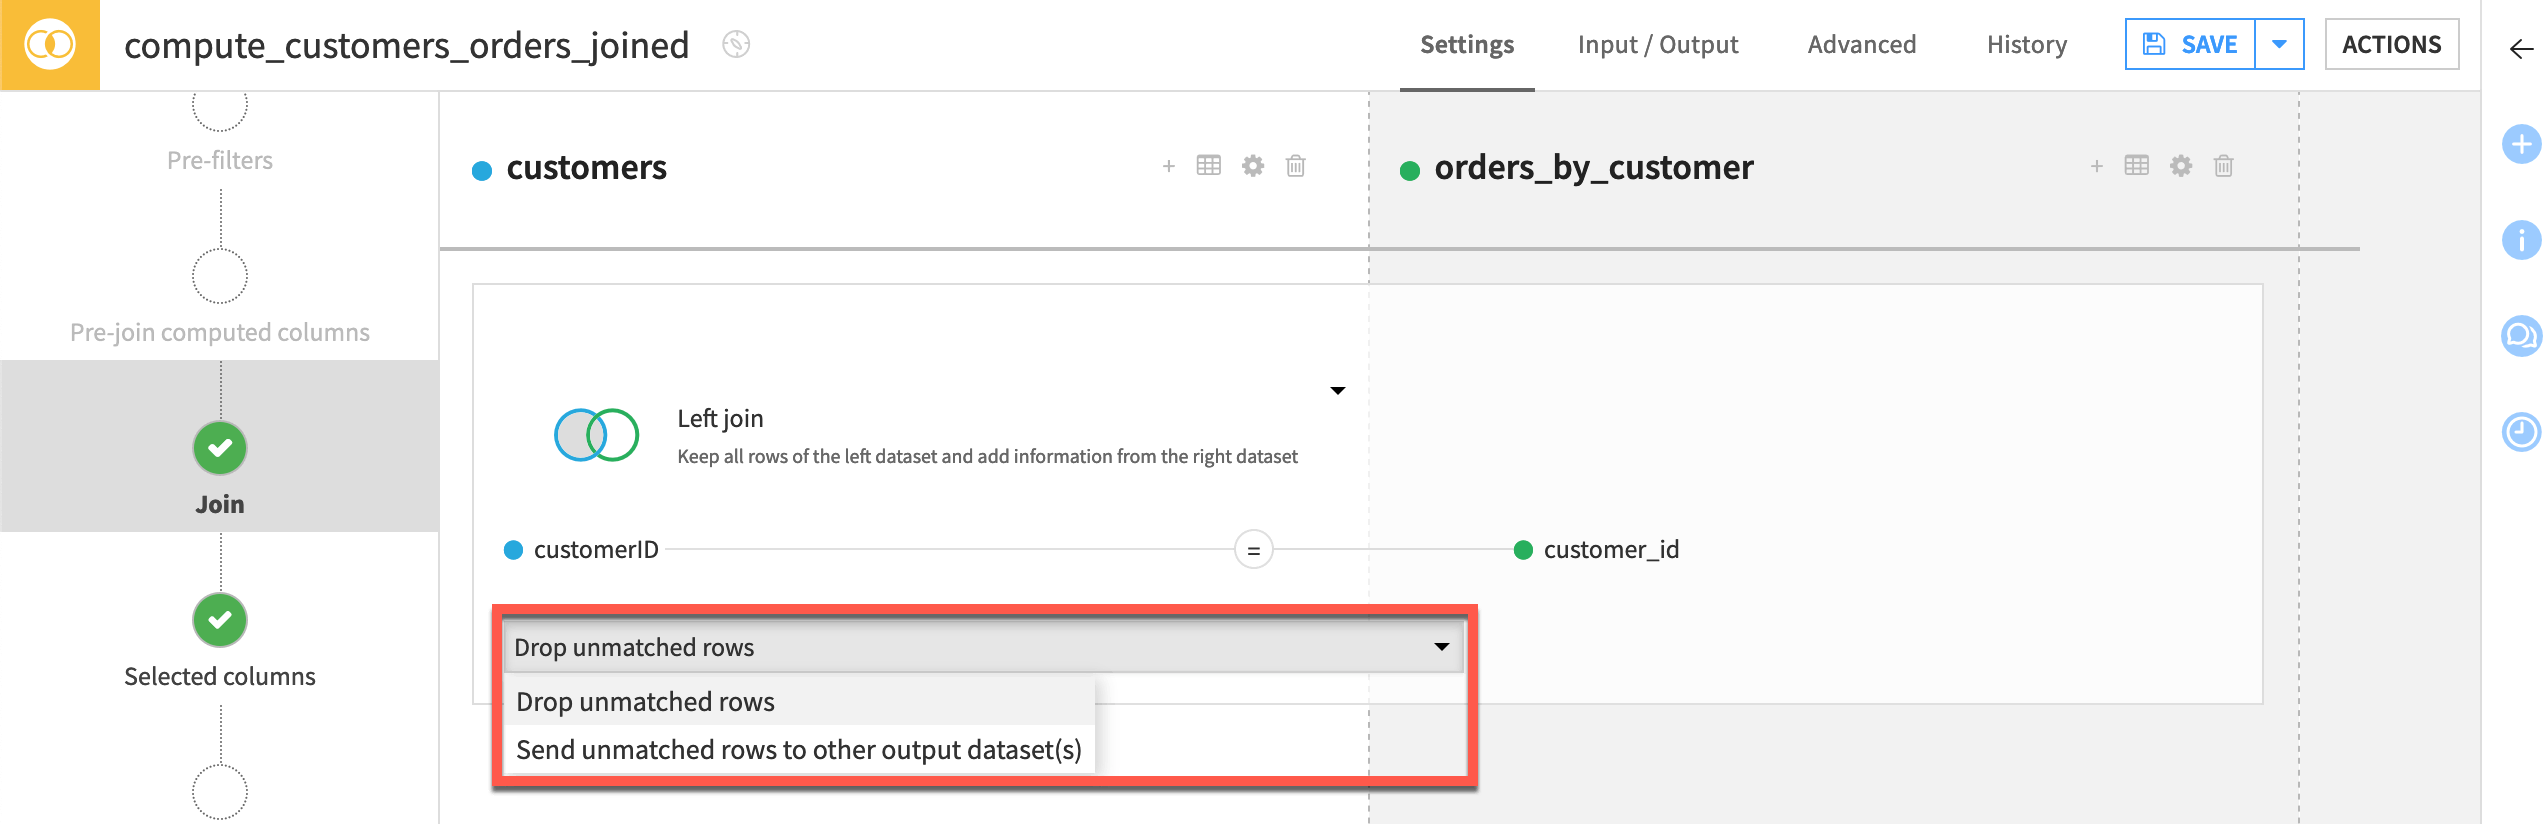
Set the join type#
By default, the Join recipe performs a left join, which retains all rows in the left dataset, even if there is no matching information in the right.
Let’s keep this join type.
Execute the recipe and explore the output#
Now, let’s run the recipe and view the output.
Click Run to execute the recipe.
When the recipe has finished running, click Explore dataset tx_joined at the bottom of the screen to explore the tx_joined dataset.
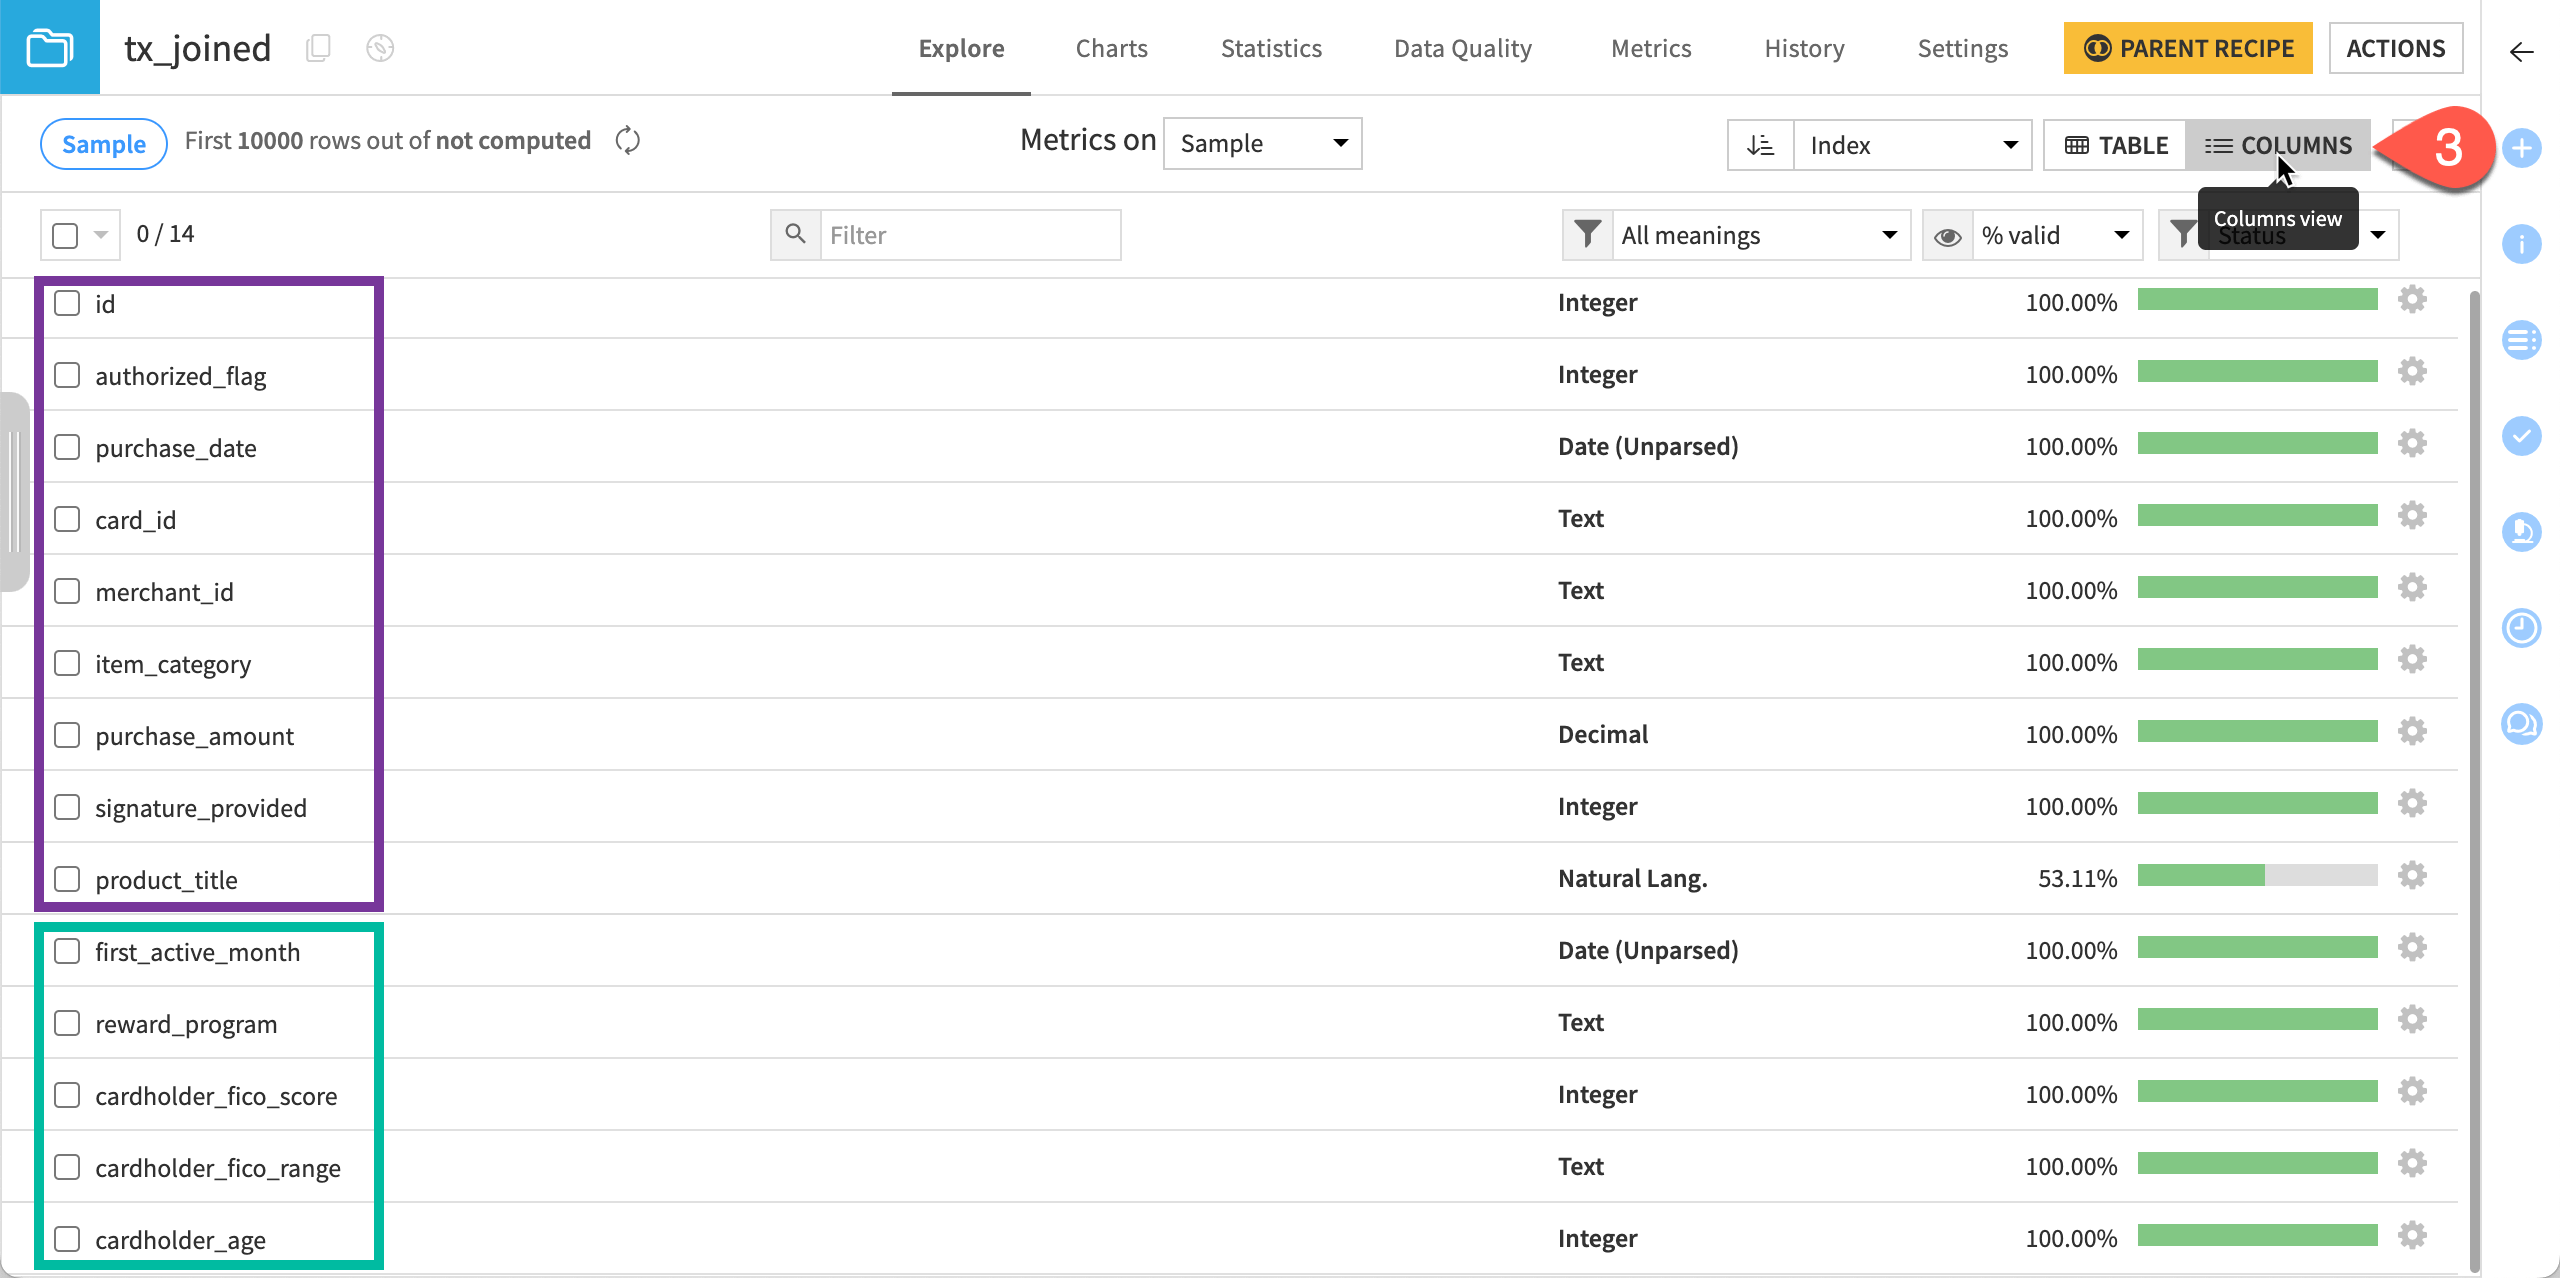
Switch to the Columns view to confirm the tx_joined dataset has the original columns of tx (in purple below), plus new columns from cards like first_active_month (in green below).
Join tx and merchants#
At this stage, you’ve only joined tx and cards.
Now, configure the join condition between tx and merchants. You can achieve this in the same Join recipe.
Edit the Join step#
From the output dataset, click the Parent Recipe button at the top right of the Explore tab.
This takes you back to the Join step of the Join recipe.
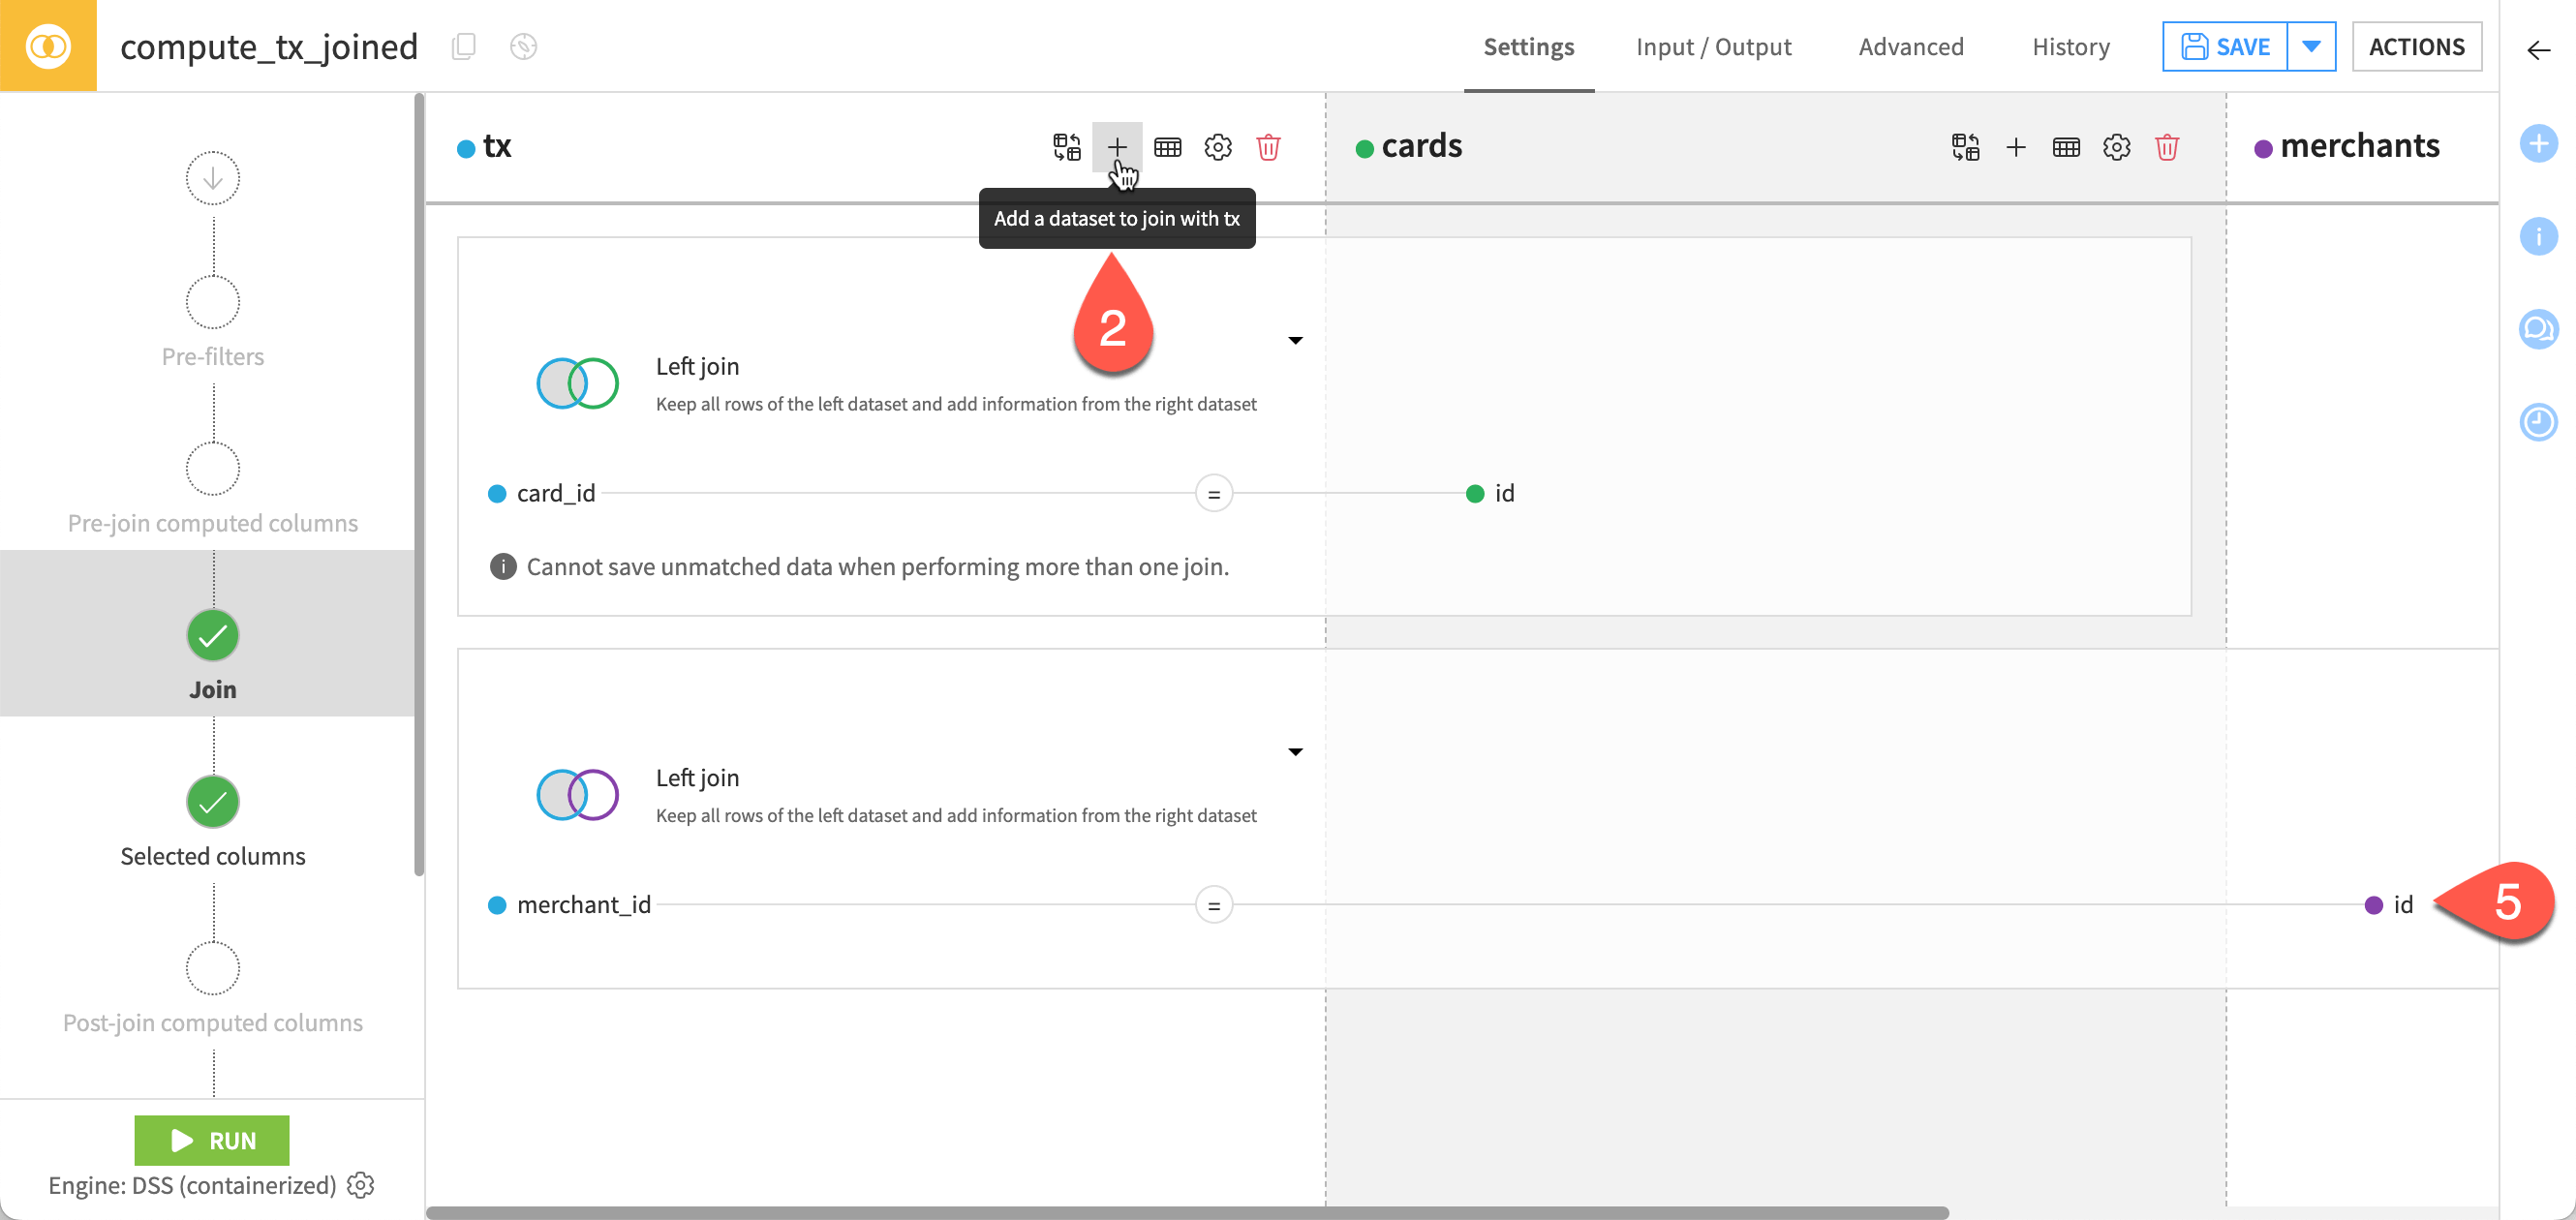
Click the
 icon at the top right of the tx dataset in the Join step. It allows adding more datasets to join with the tx and the cards datasets.
In the Add a dataset to join with tx dialog, select merchants.
Click Add. Merchants is added to the Join step.
Now, define the join condition between tx and merchants, like you did before when joining tx and cards. This time though use the merchant_id column from tx.
Define output columns#
The Selected columns step of the Join recipe allows you to:
Choose which columns to retain from the input datasets. By default, Dataiku keeps all non-conflicting columns in the output dataset, which means it excludes columns that would have the same name as a column from another dataset in the join. It also means that new, non-conflicting columns added upstream will be automatically added to the output.
Add a prefix to the name of all columns from a dataset of the join to avoid conflicts.
This recipe joins three datasets. To avoid conflicts and confusion in the column names of the output dataset, use this step to add a prefix to all columns from the merchants dataset.
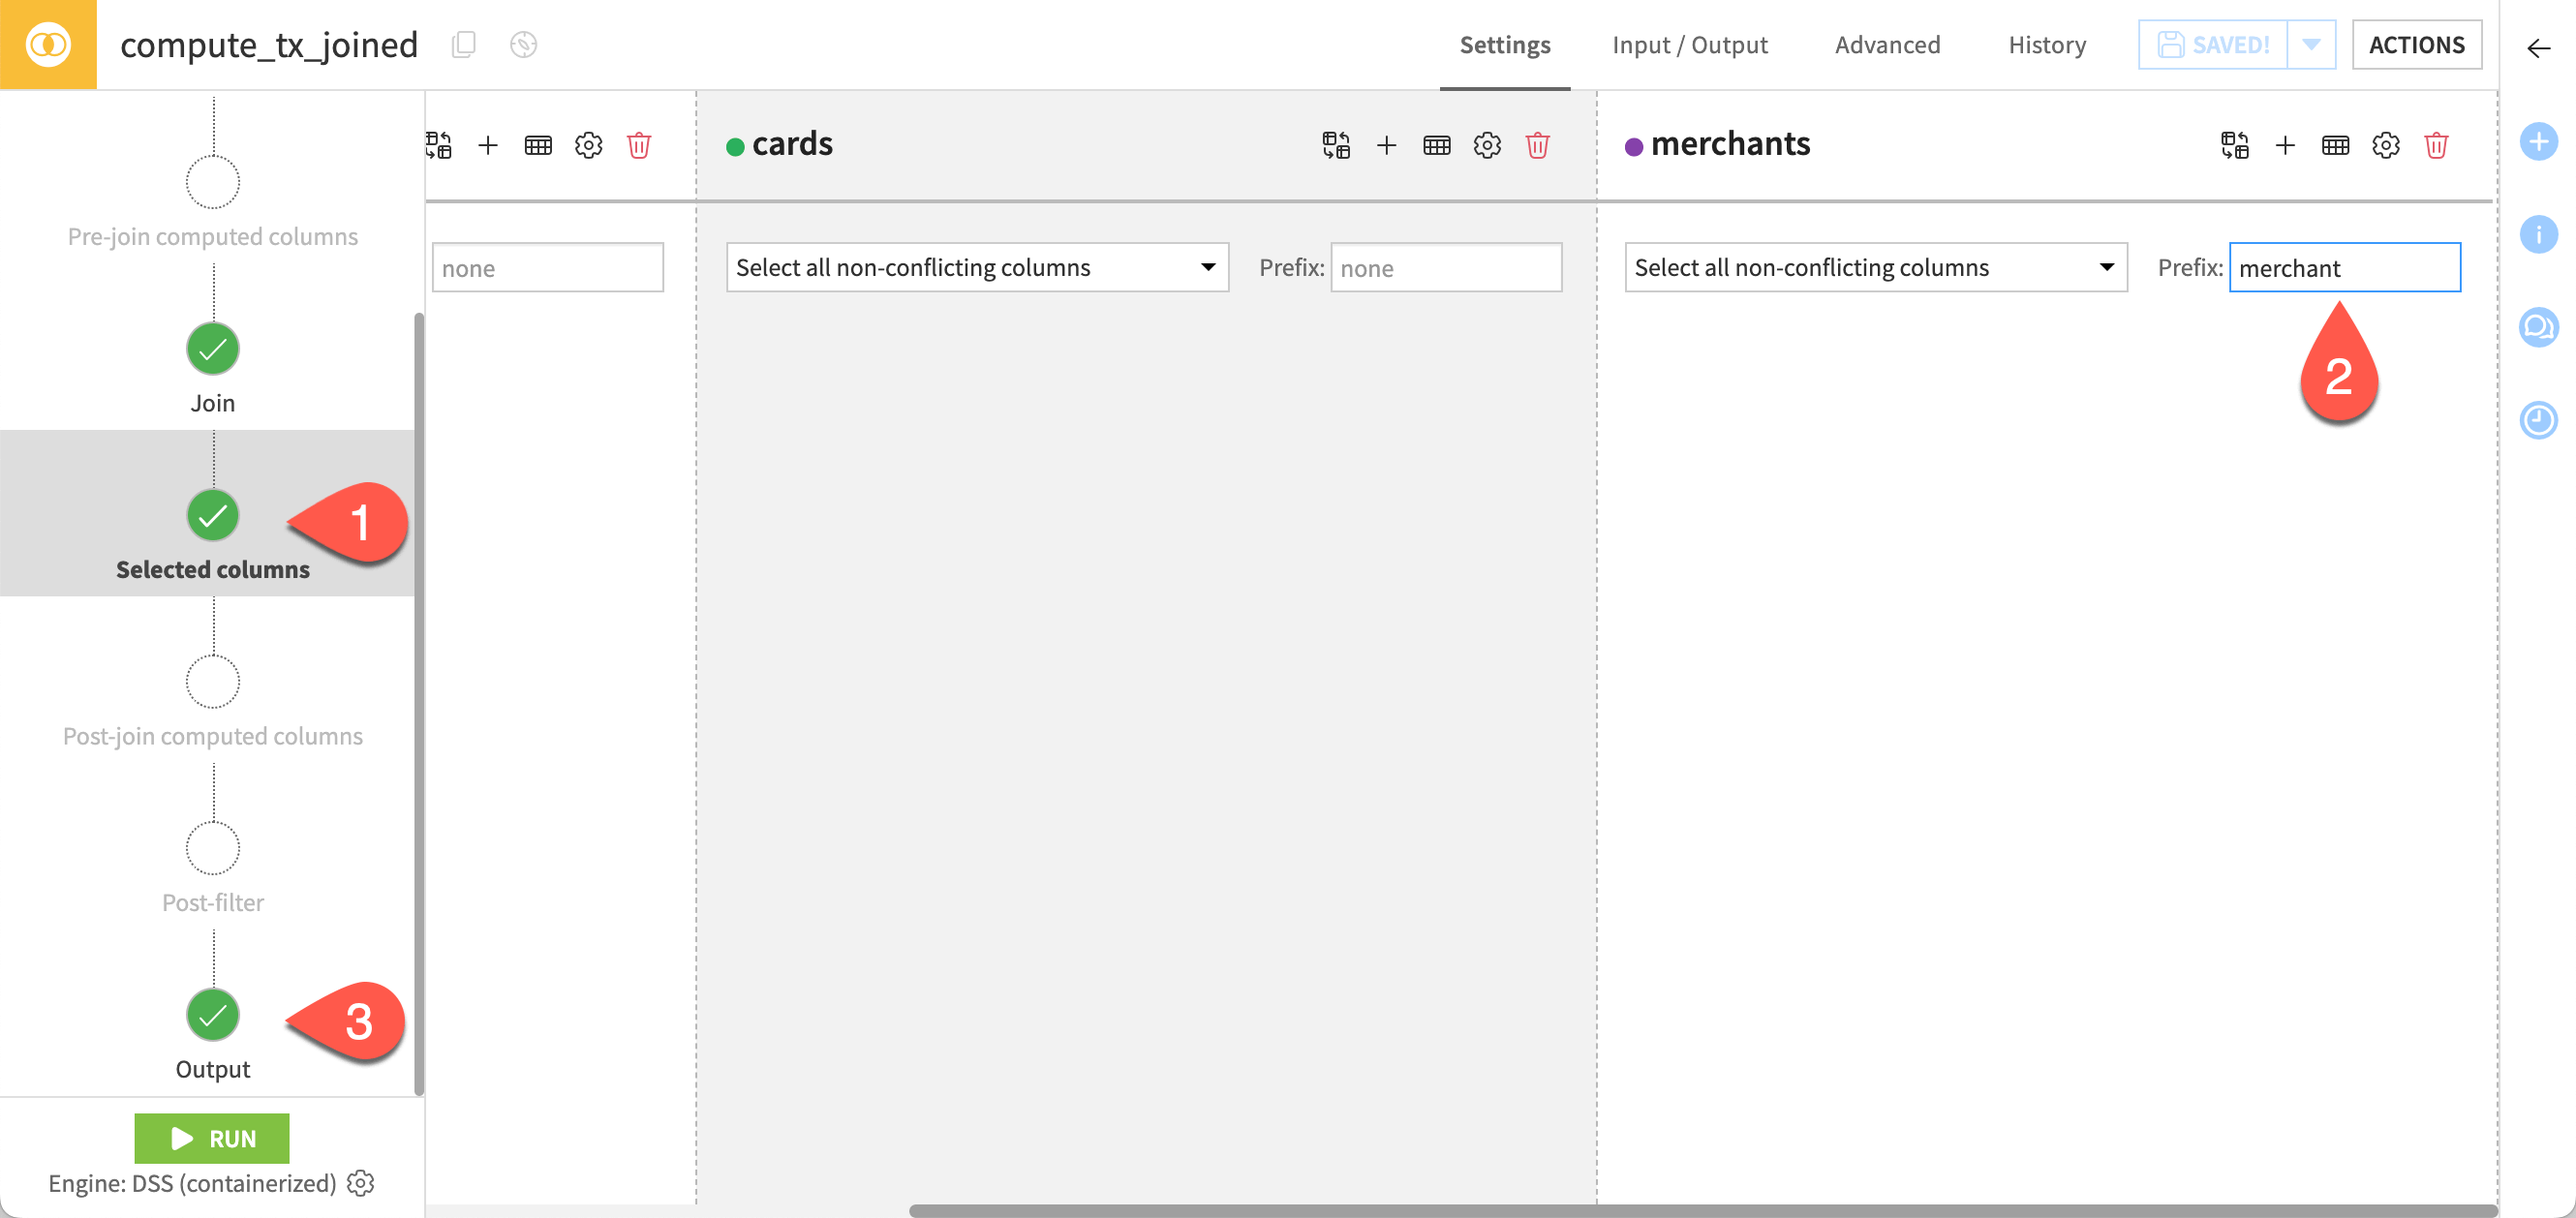
Go to the Selected columns step.
Under the merchants column, enter
merchantin the Prefix field.Go to the Output step to check the name of the new merchant columns in the schema.
Execute the recipe again and explore the output#
Now, run the recipe once more and view the output.
Click Run to execute the recipe.
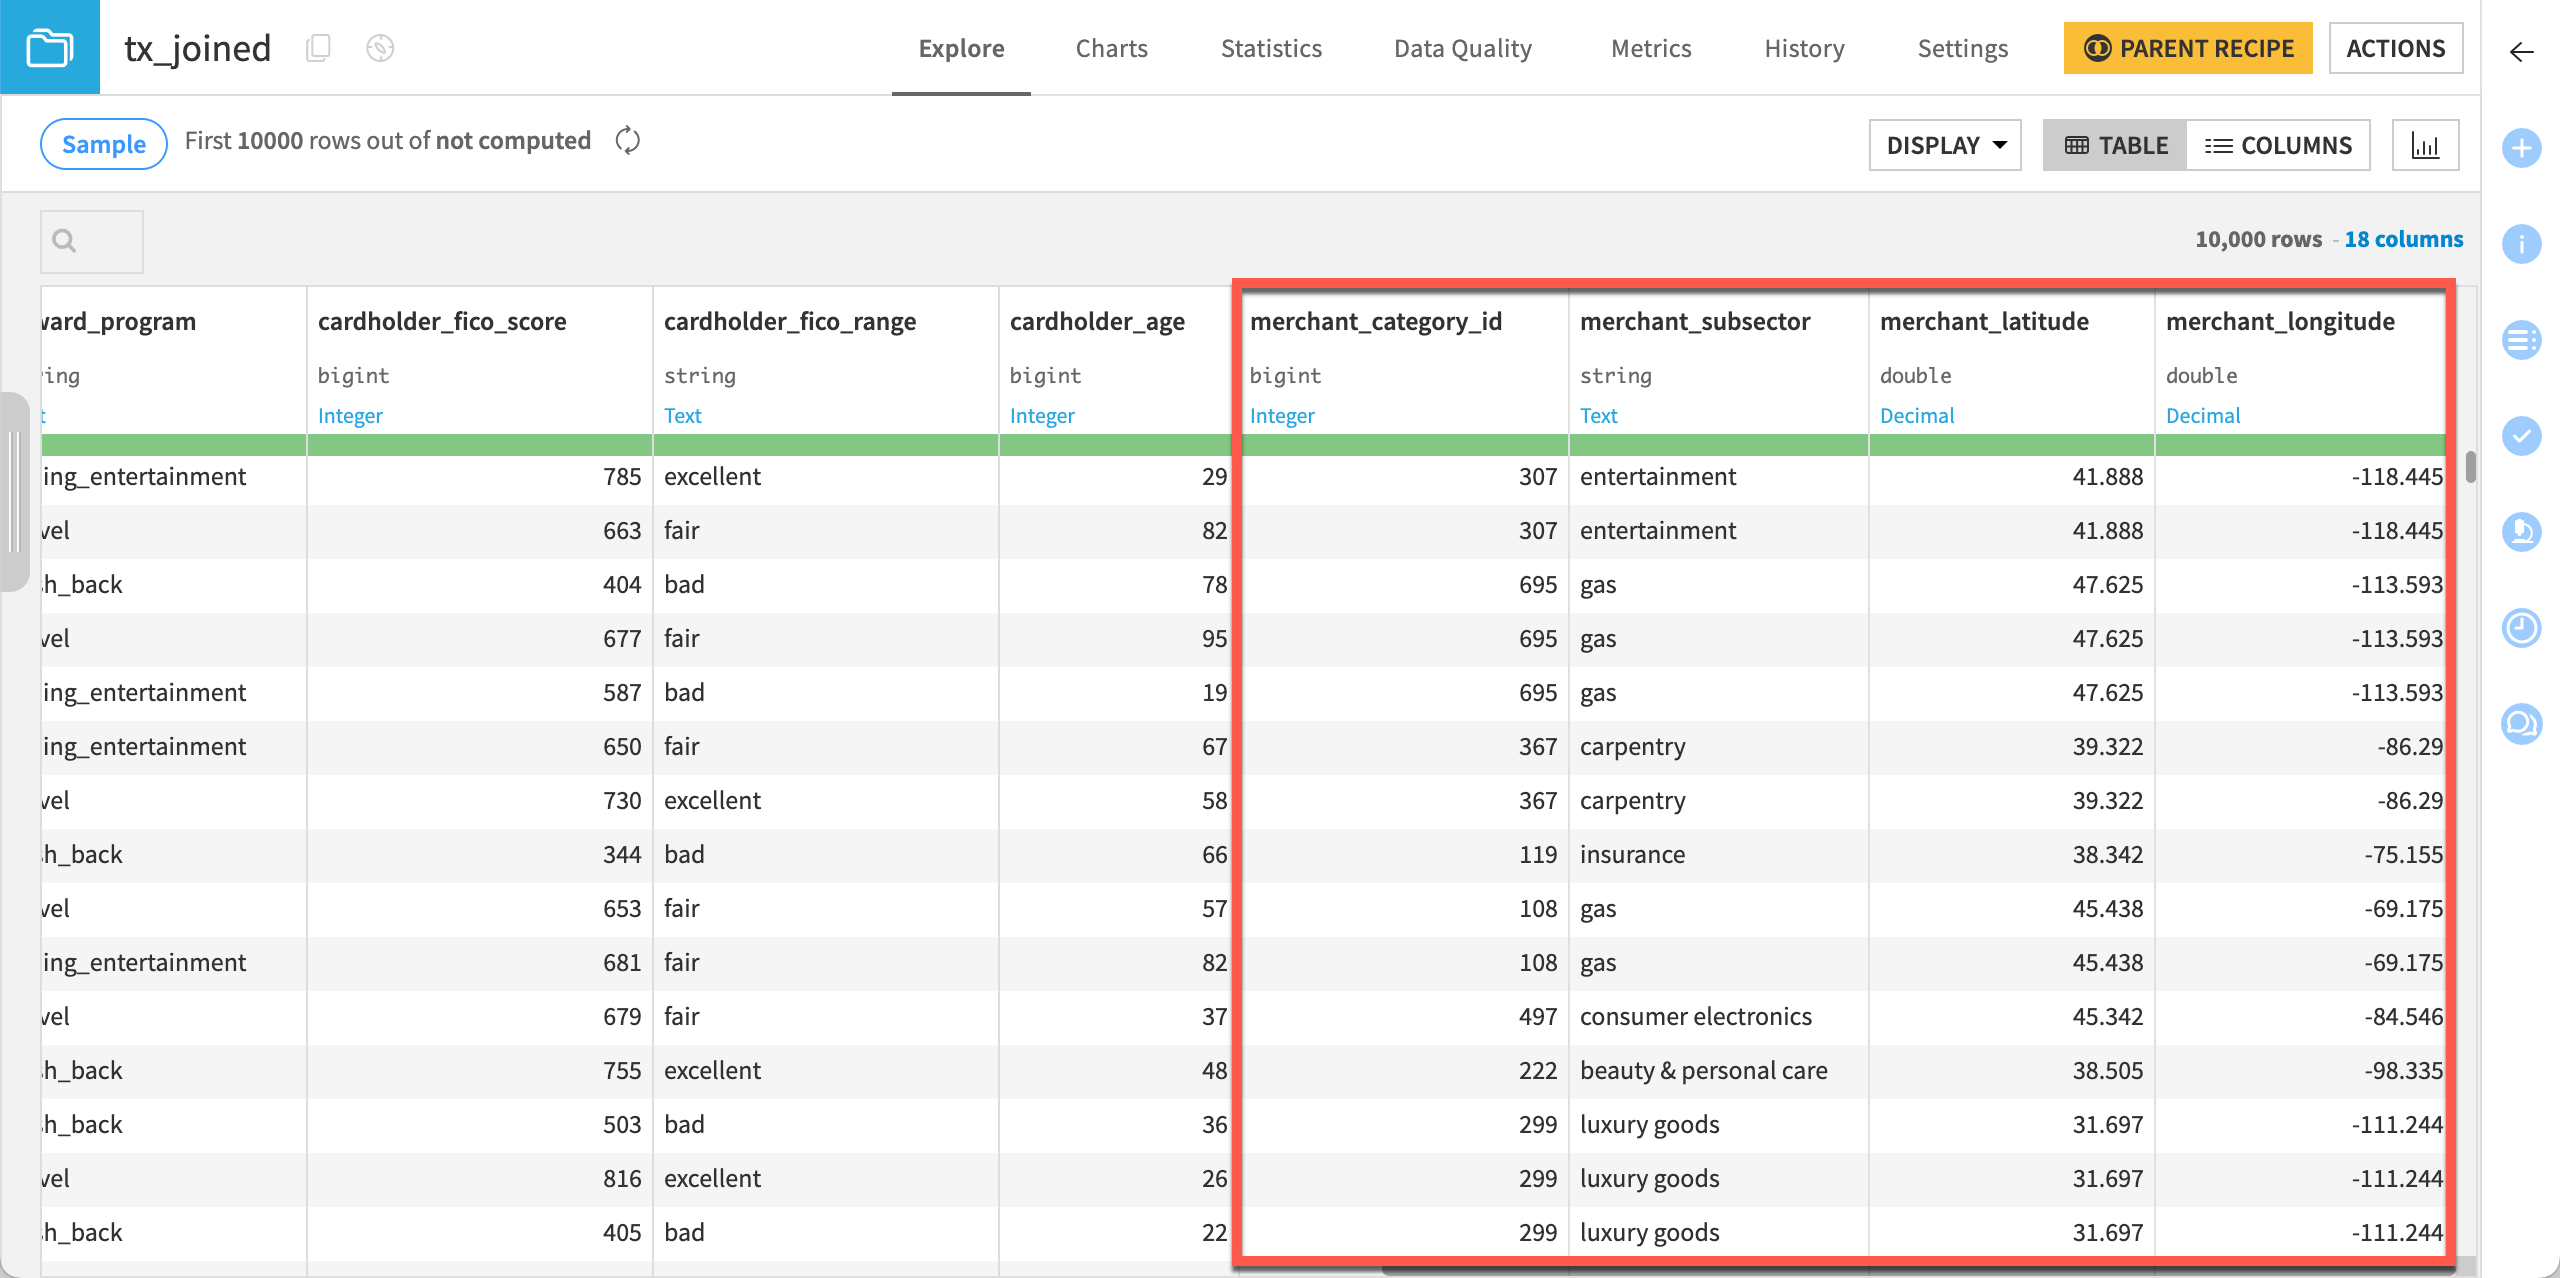
When the recipe has finished running, click Explore dataset tx_joined at the bottom of the screen to explore the tx_joined dataset.
As you can see, Dataiku has added the merchant prefix to all the relevant columns.
Go back to the Flow to check your progress.
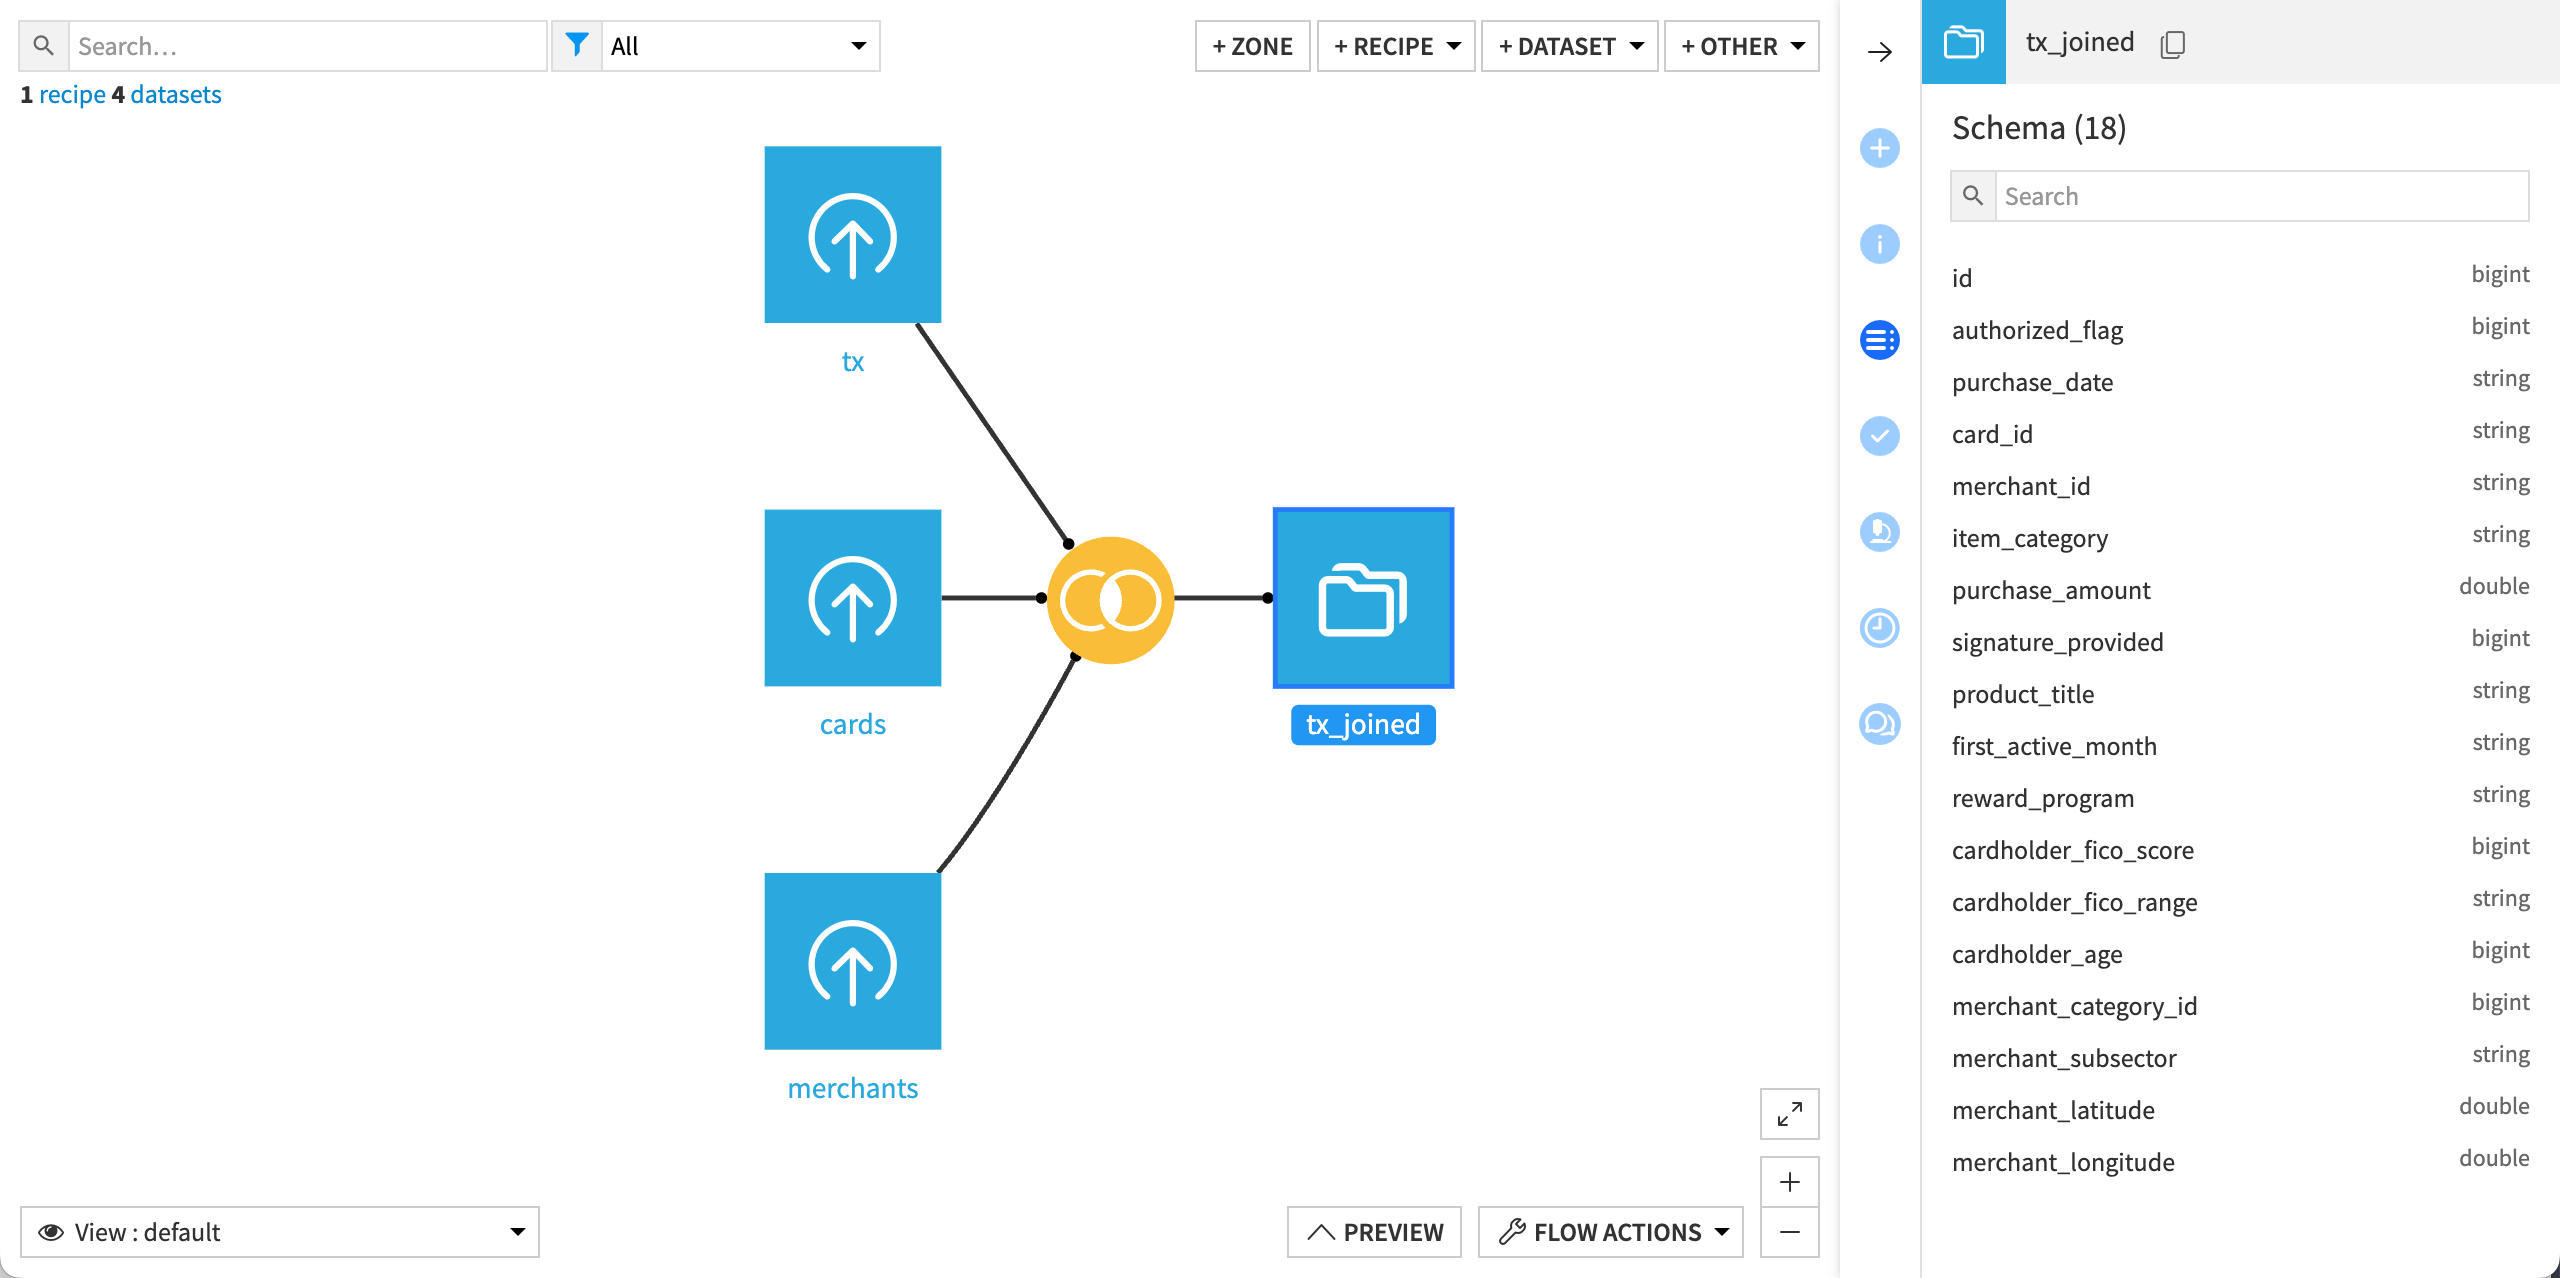
The yellow circle icon represents the Join recipe. At any time, you can double-click on it to open it and edit its configuration.
Each time you run the recipe, it updates the output dataset, tx_joined.
Next steps#
See also
For more information on the Join recipe, see Join: joining datasets in the reference documentation.
Now that you’ve joined three datasets into a consolidated one, we recommend that you follow the Tutorial | Prepare recipe article to learn how to prepare the data.