

Introduction#
In this tutorial, you will learn how to use Dataiku’s provided deep learning model to detect and classify objects within a provided set of images. Specifically, you will:
Use a pre-trained model to find and classify microcontrollers in images.
Learn how to evaluate and fine-tune the model.
Feed test images to the model to test its performance.
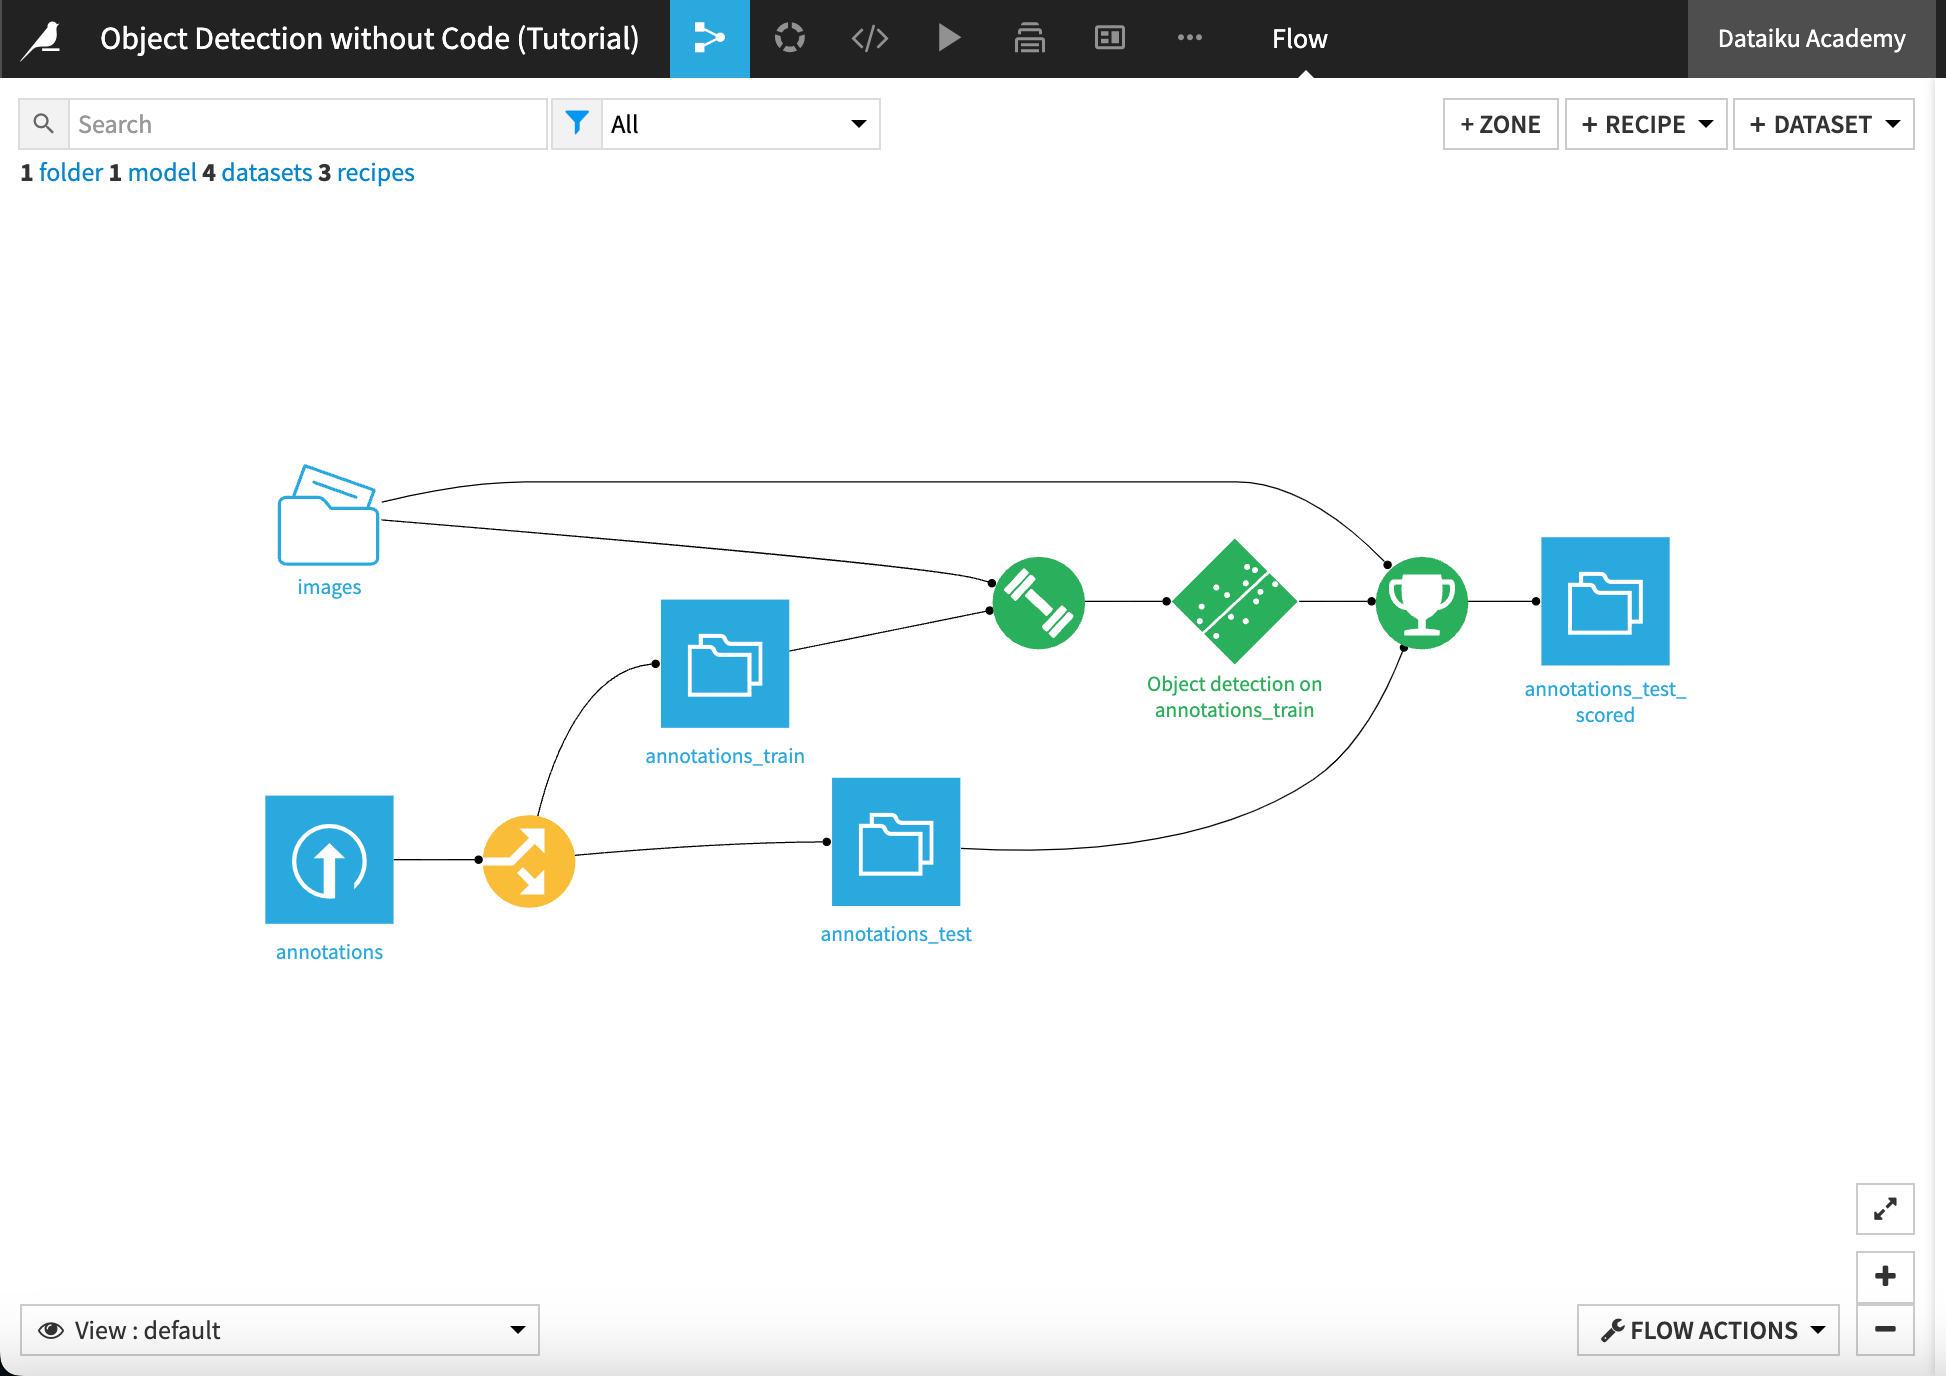
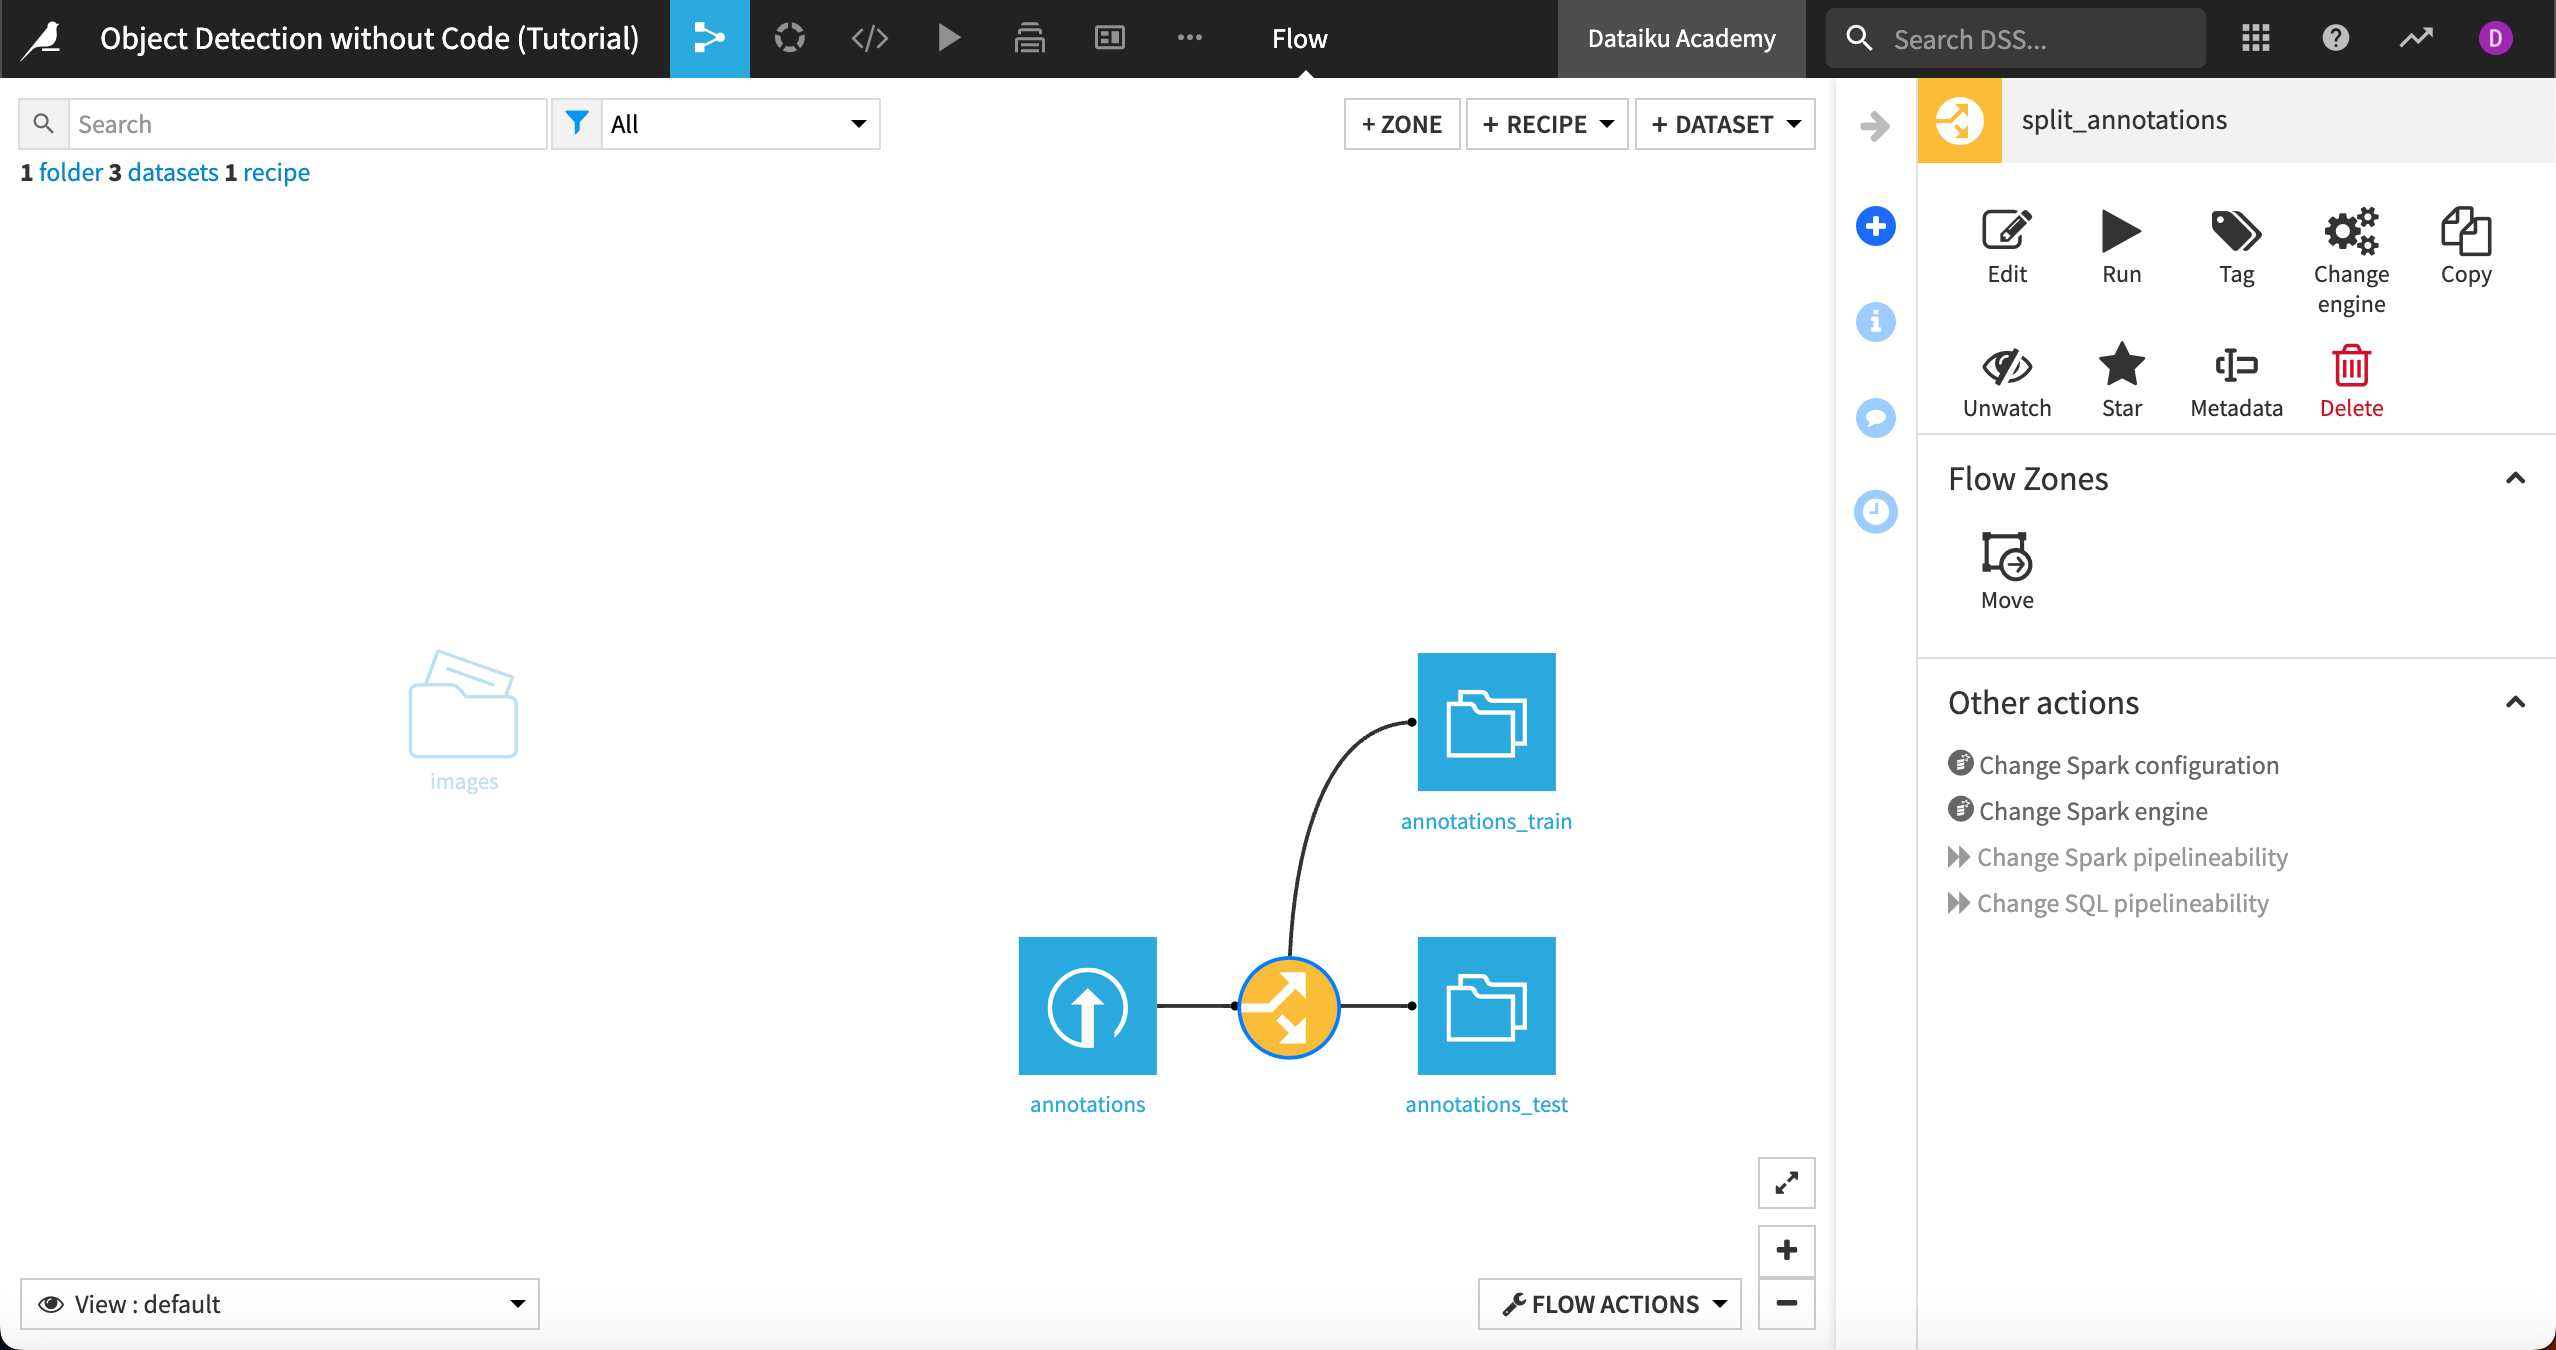
When finished, you’ll have built the Flow below:
Prerequisites#
A Dataiku instance (version 11.3 or above). Free edition is enough; Dataiku Online is not compatible.
An object detection code environment, which you can set up in the Applications menu of Dataiku under Administration > Settings > Misc.
Create the project#
To import this project, go to the Dataiku homepage and select +New Project > DSS tutorials > ML Practitioner > Object Detection without Code.
This tutorial uses the Microcontroller Object Detection dataset, which includes images with four models of microcontrollers — ESP8266, Arduino Nano, Heltec ESP32 Lora, and Raspberry Pi 3. We will build a model that detects whether and where these objects are present in the images, and then labels which microcontrollers are present.
Explore the data#
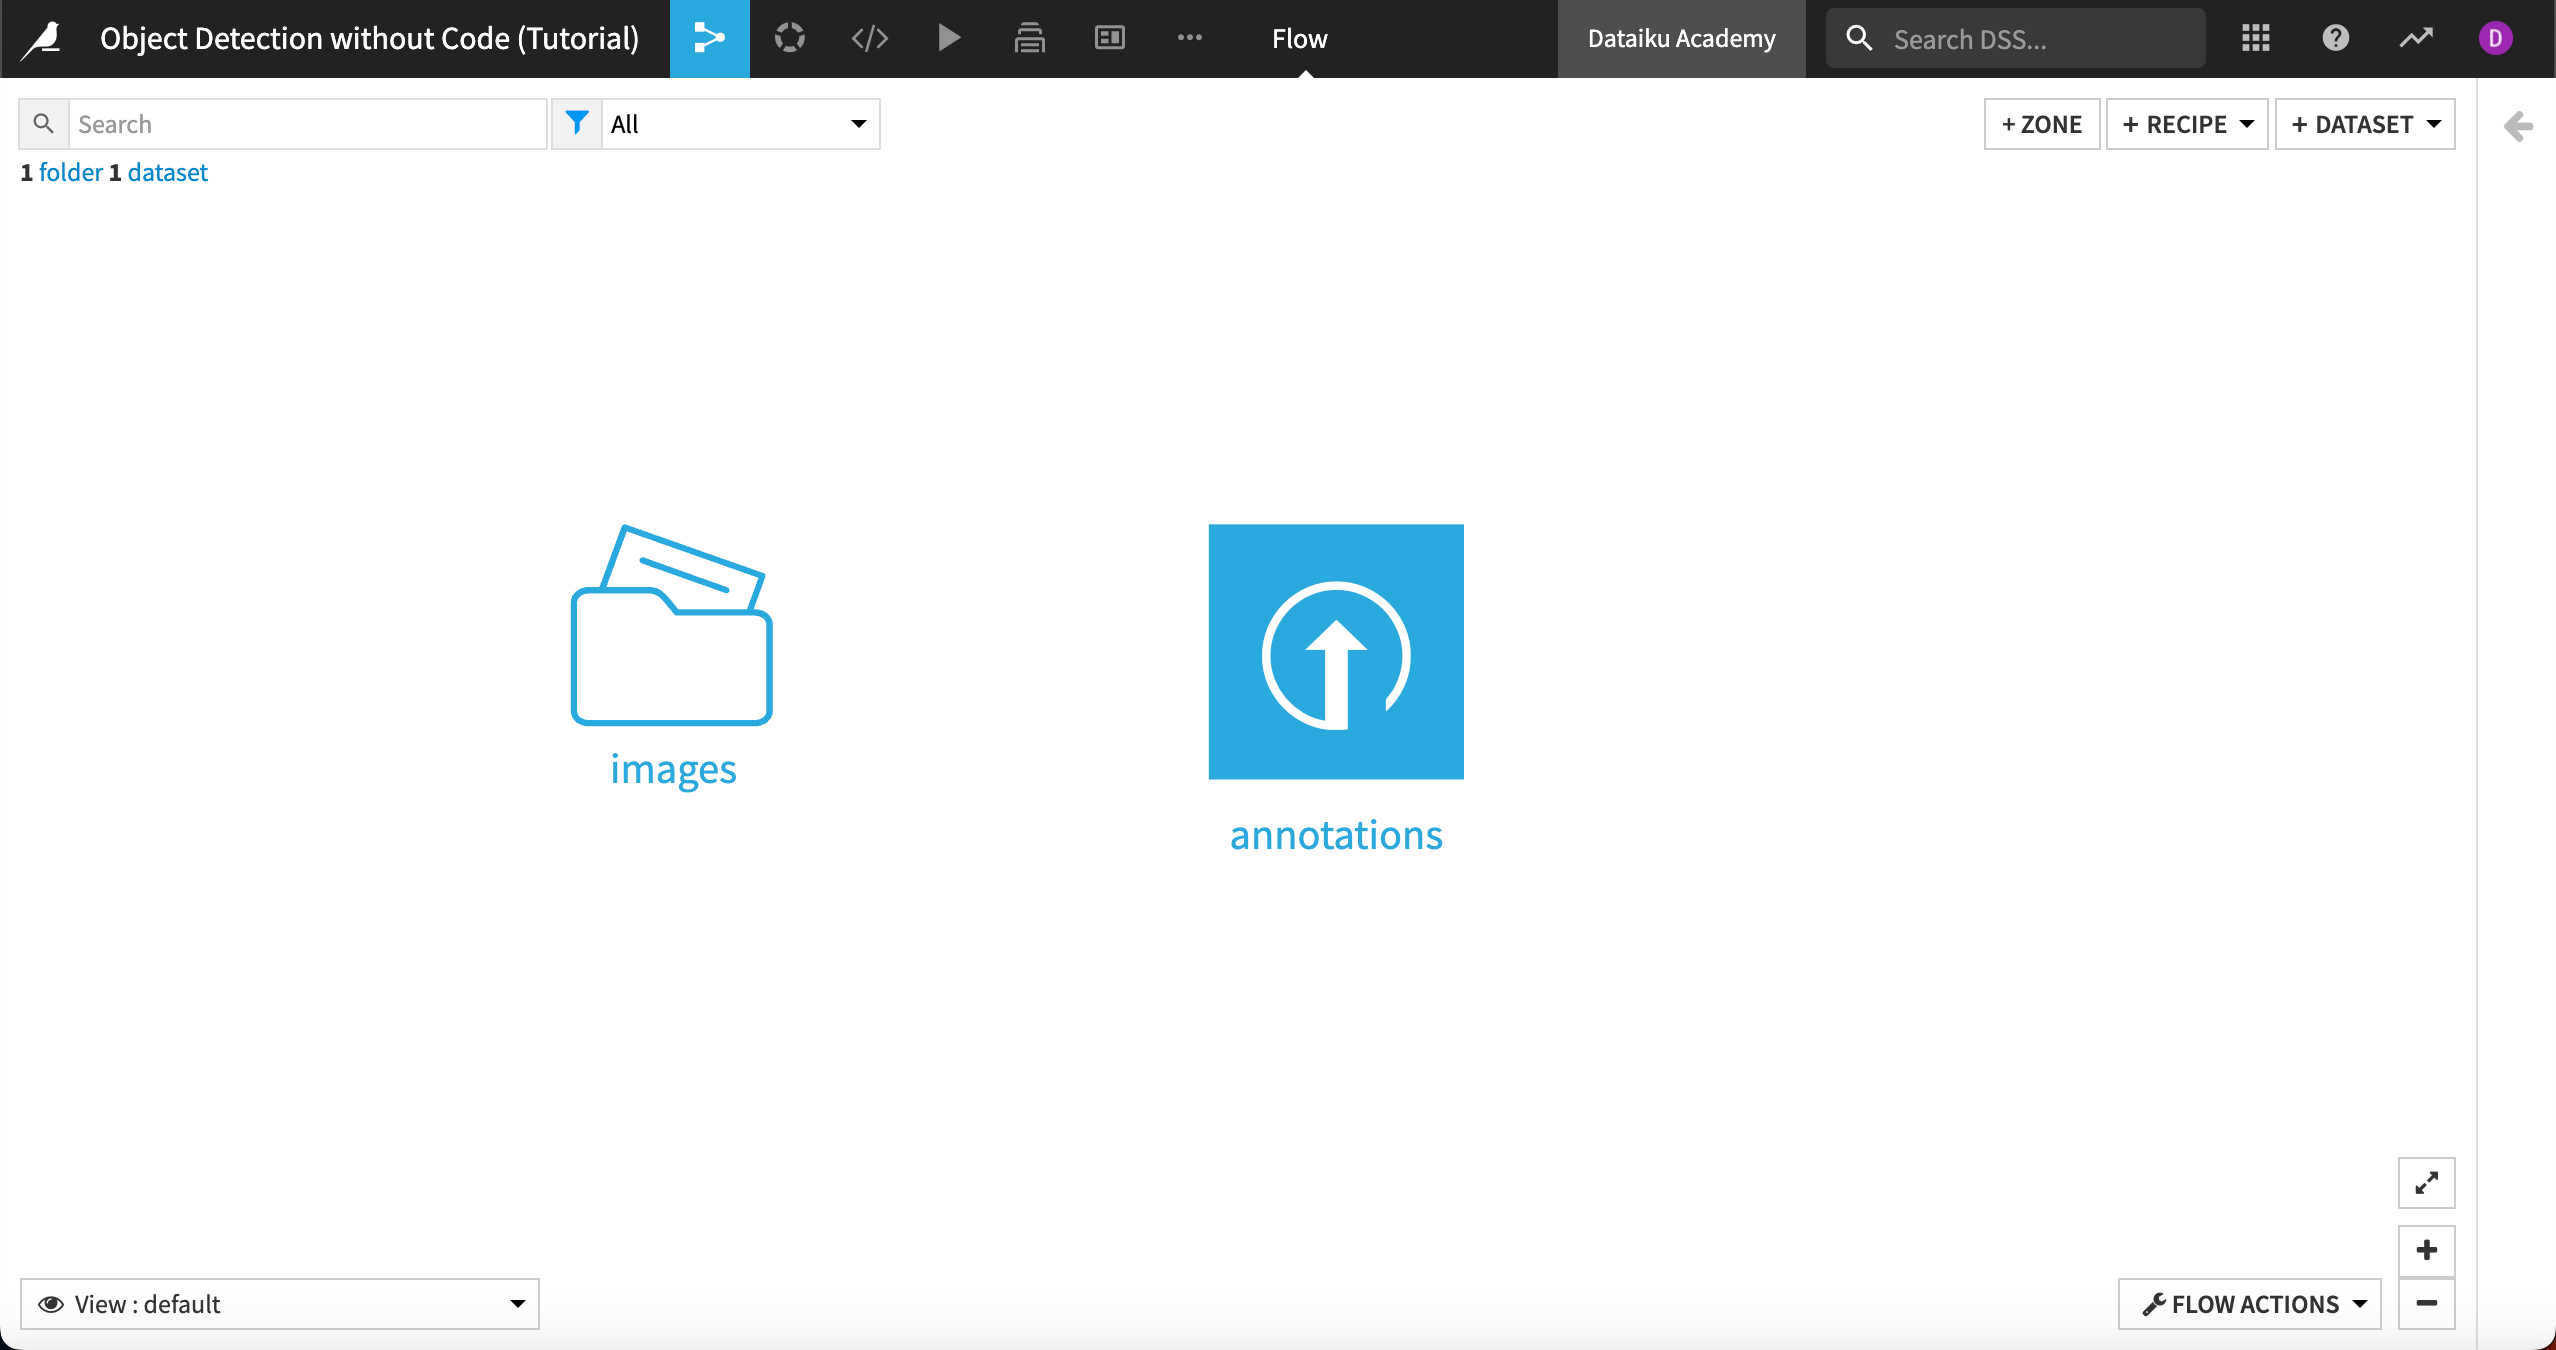
In the Object Detection without Code project, you’ll see one folder, images, which contains 148 images, and a dataset, annotations, which contains object labels for our model. As with image classification in Dataiku, the images must be stored in managed folders.
To create an object detection model, the images also must be labeled with bounding boxes around the objects of interest. These bounding boxes are represented in a tabular data file that will be input into the model.
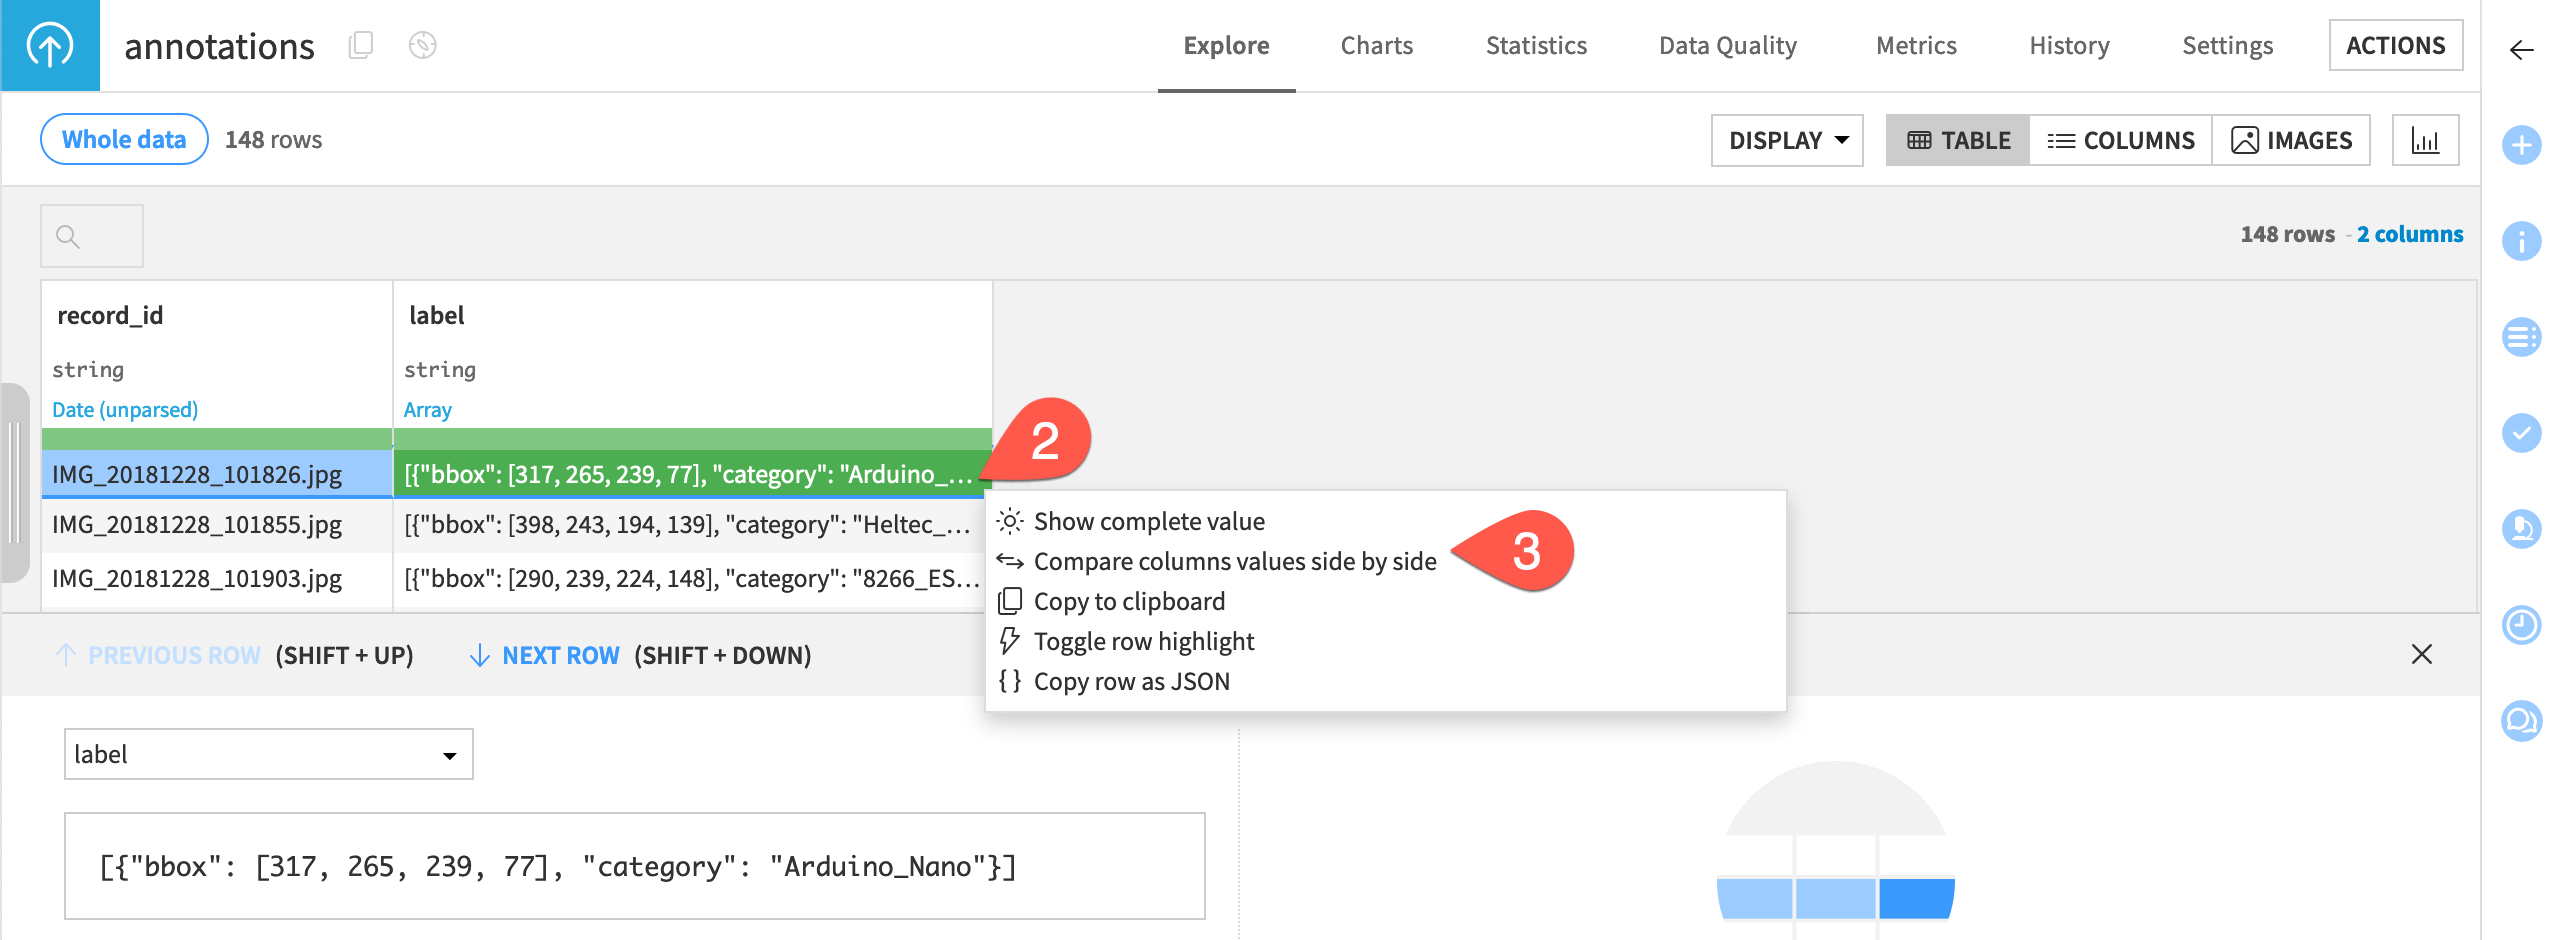
Let’s open the annotations file. As you can see, it has two columns:
The record_id of each image file.
label, which is an array of the bounding boxes for the objects we’re interested in from each image.
Note
See the reference documentation for more detailed information about the correct formats for images and label inputs for object detection. If your images are annotated in Pascal or VOC format you can use the plugin Image Annotations to Dataset to reformat the labels.
Note that images can have multiple bounding boxes for images of the same class or even multiple classes.
It is also helpful to view the images with their bounding boxes, which you can do using the image view toggle in the upper right corner of the dataset. Dataiku uses the record_id in the annotations dataset matched with the images from the image folder to display the images.
To view the dataset as images, you’ll need to turn on image view.
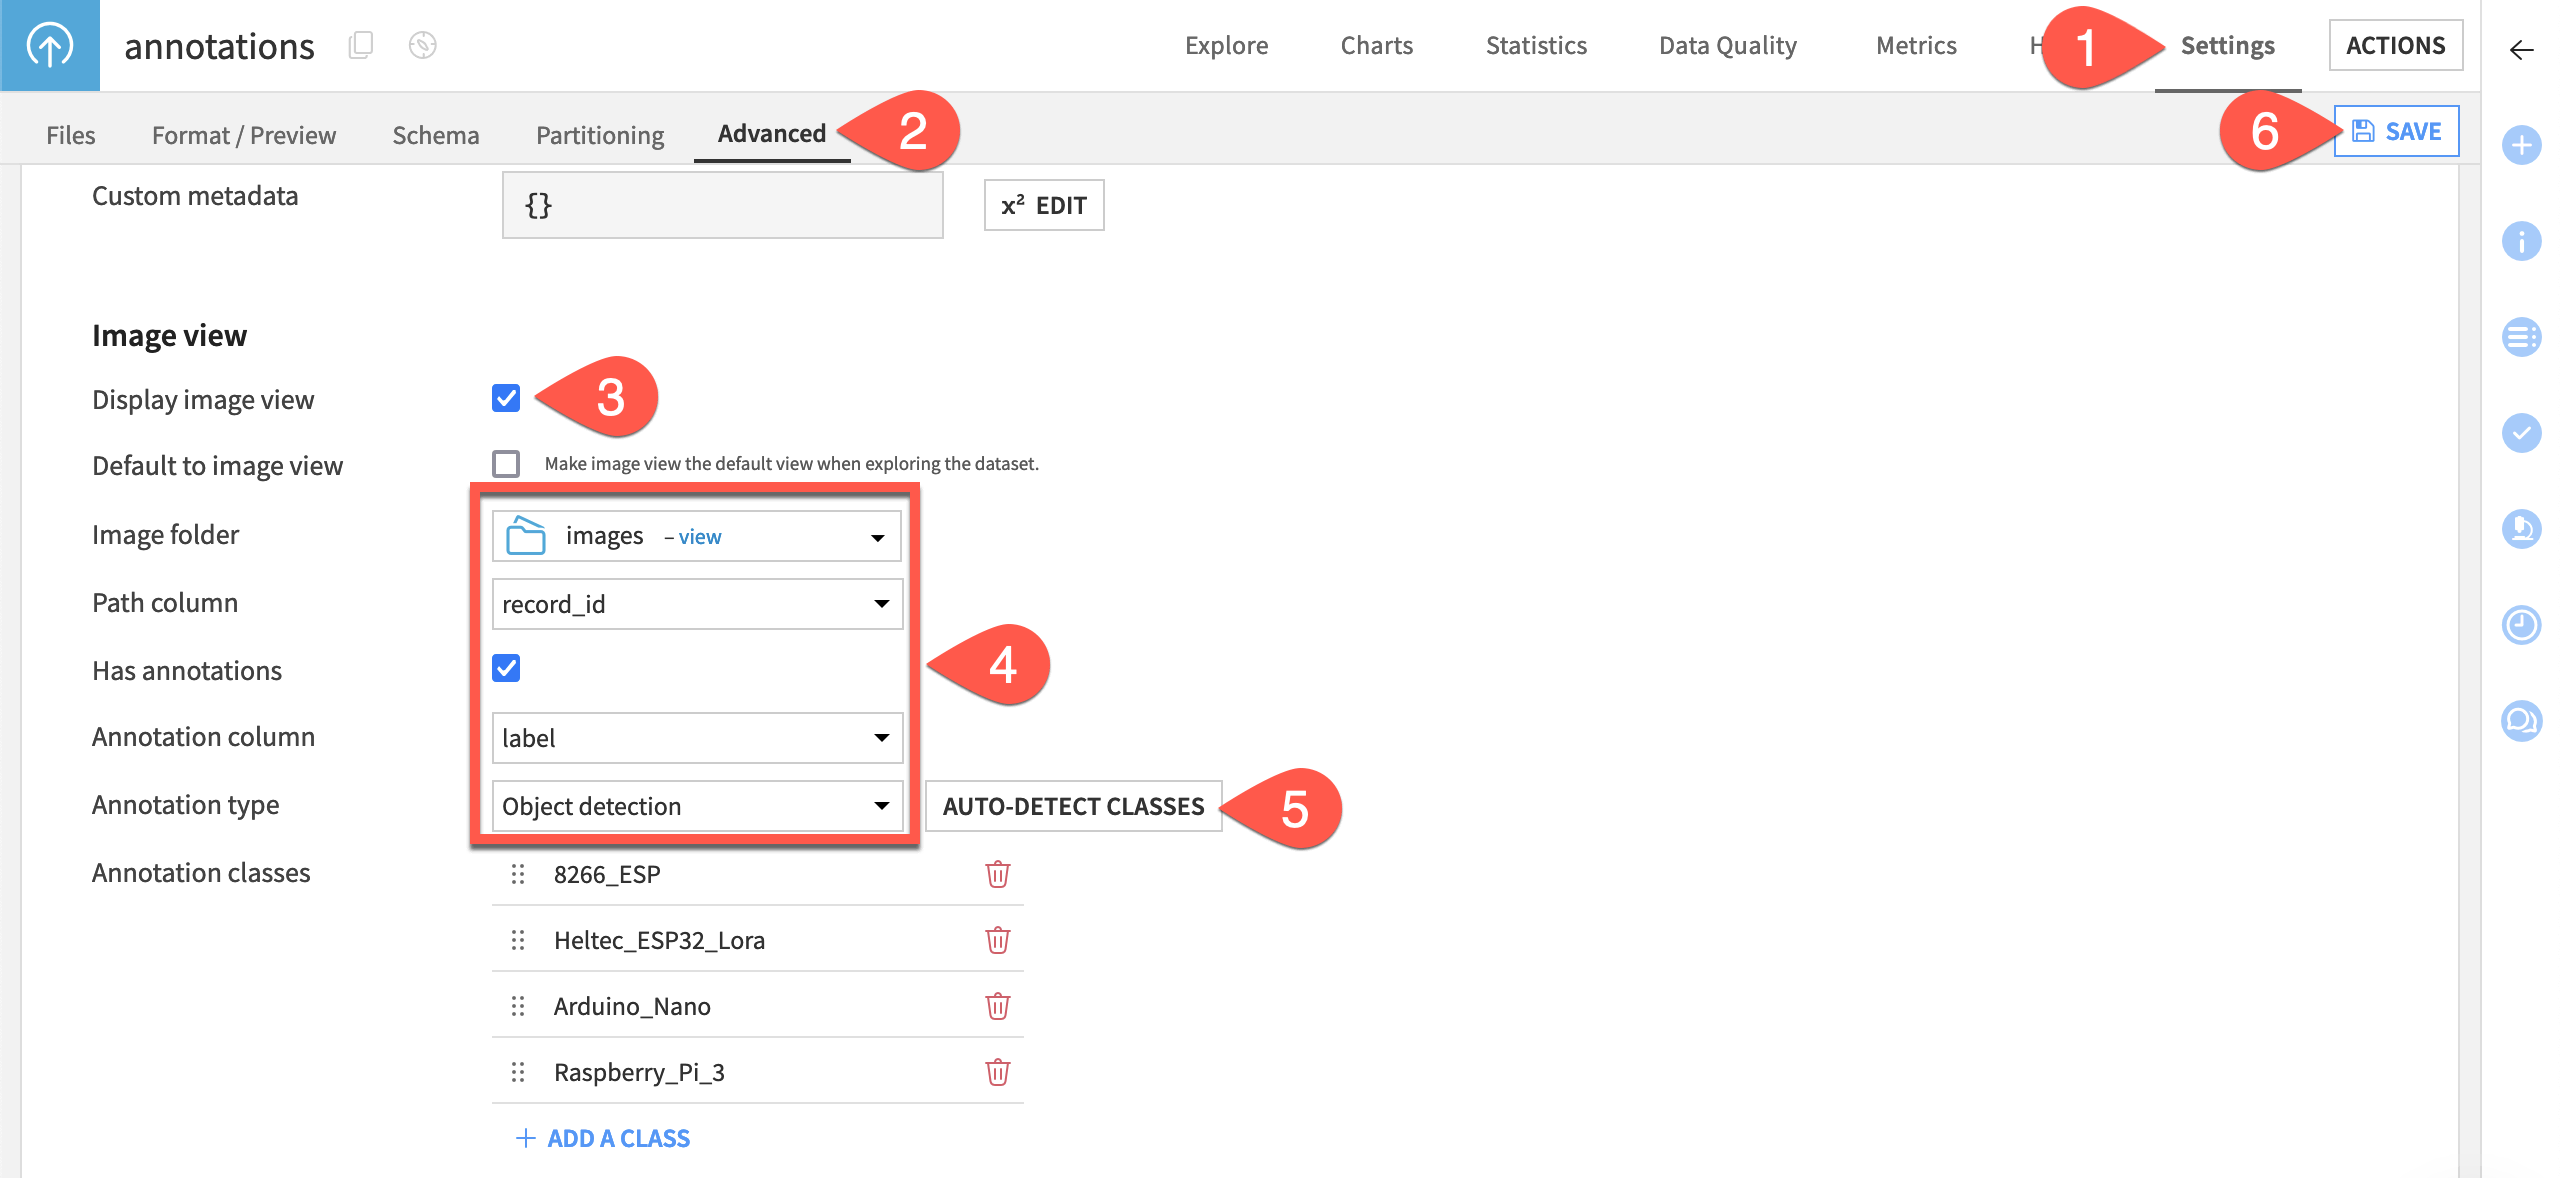
Navigate to the dataset Settings tab, then the Advanced subtab.
Scroll down to Image view and select the checkbox Display image view.
Set the Image folder to images and the Path column to record_id.
To be able to see the bounding boxes, check the box Has annotations, and select label for the Annotation column.
Change the Annotation type to Object detection, then click the Auto detect classes button. You should see all four classes appear.
Click Save.
When you return to the dataset Explore tab, you should now see the image view toggle in the top right.
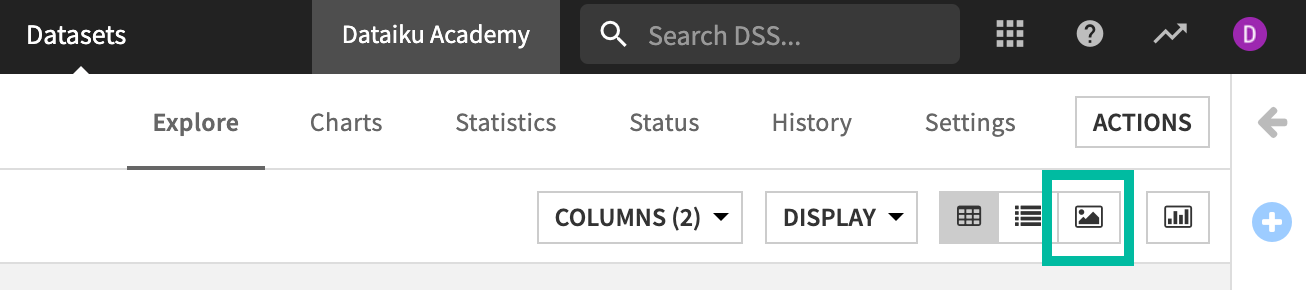
Click the Image view button to bring up the image view.
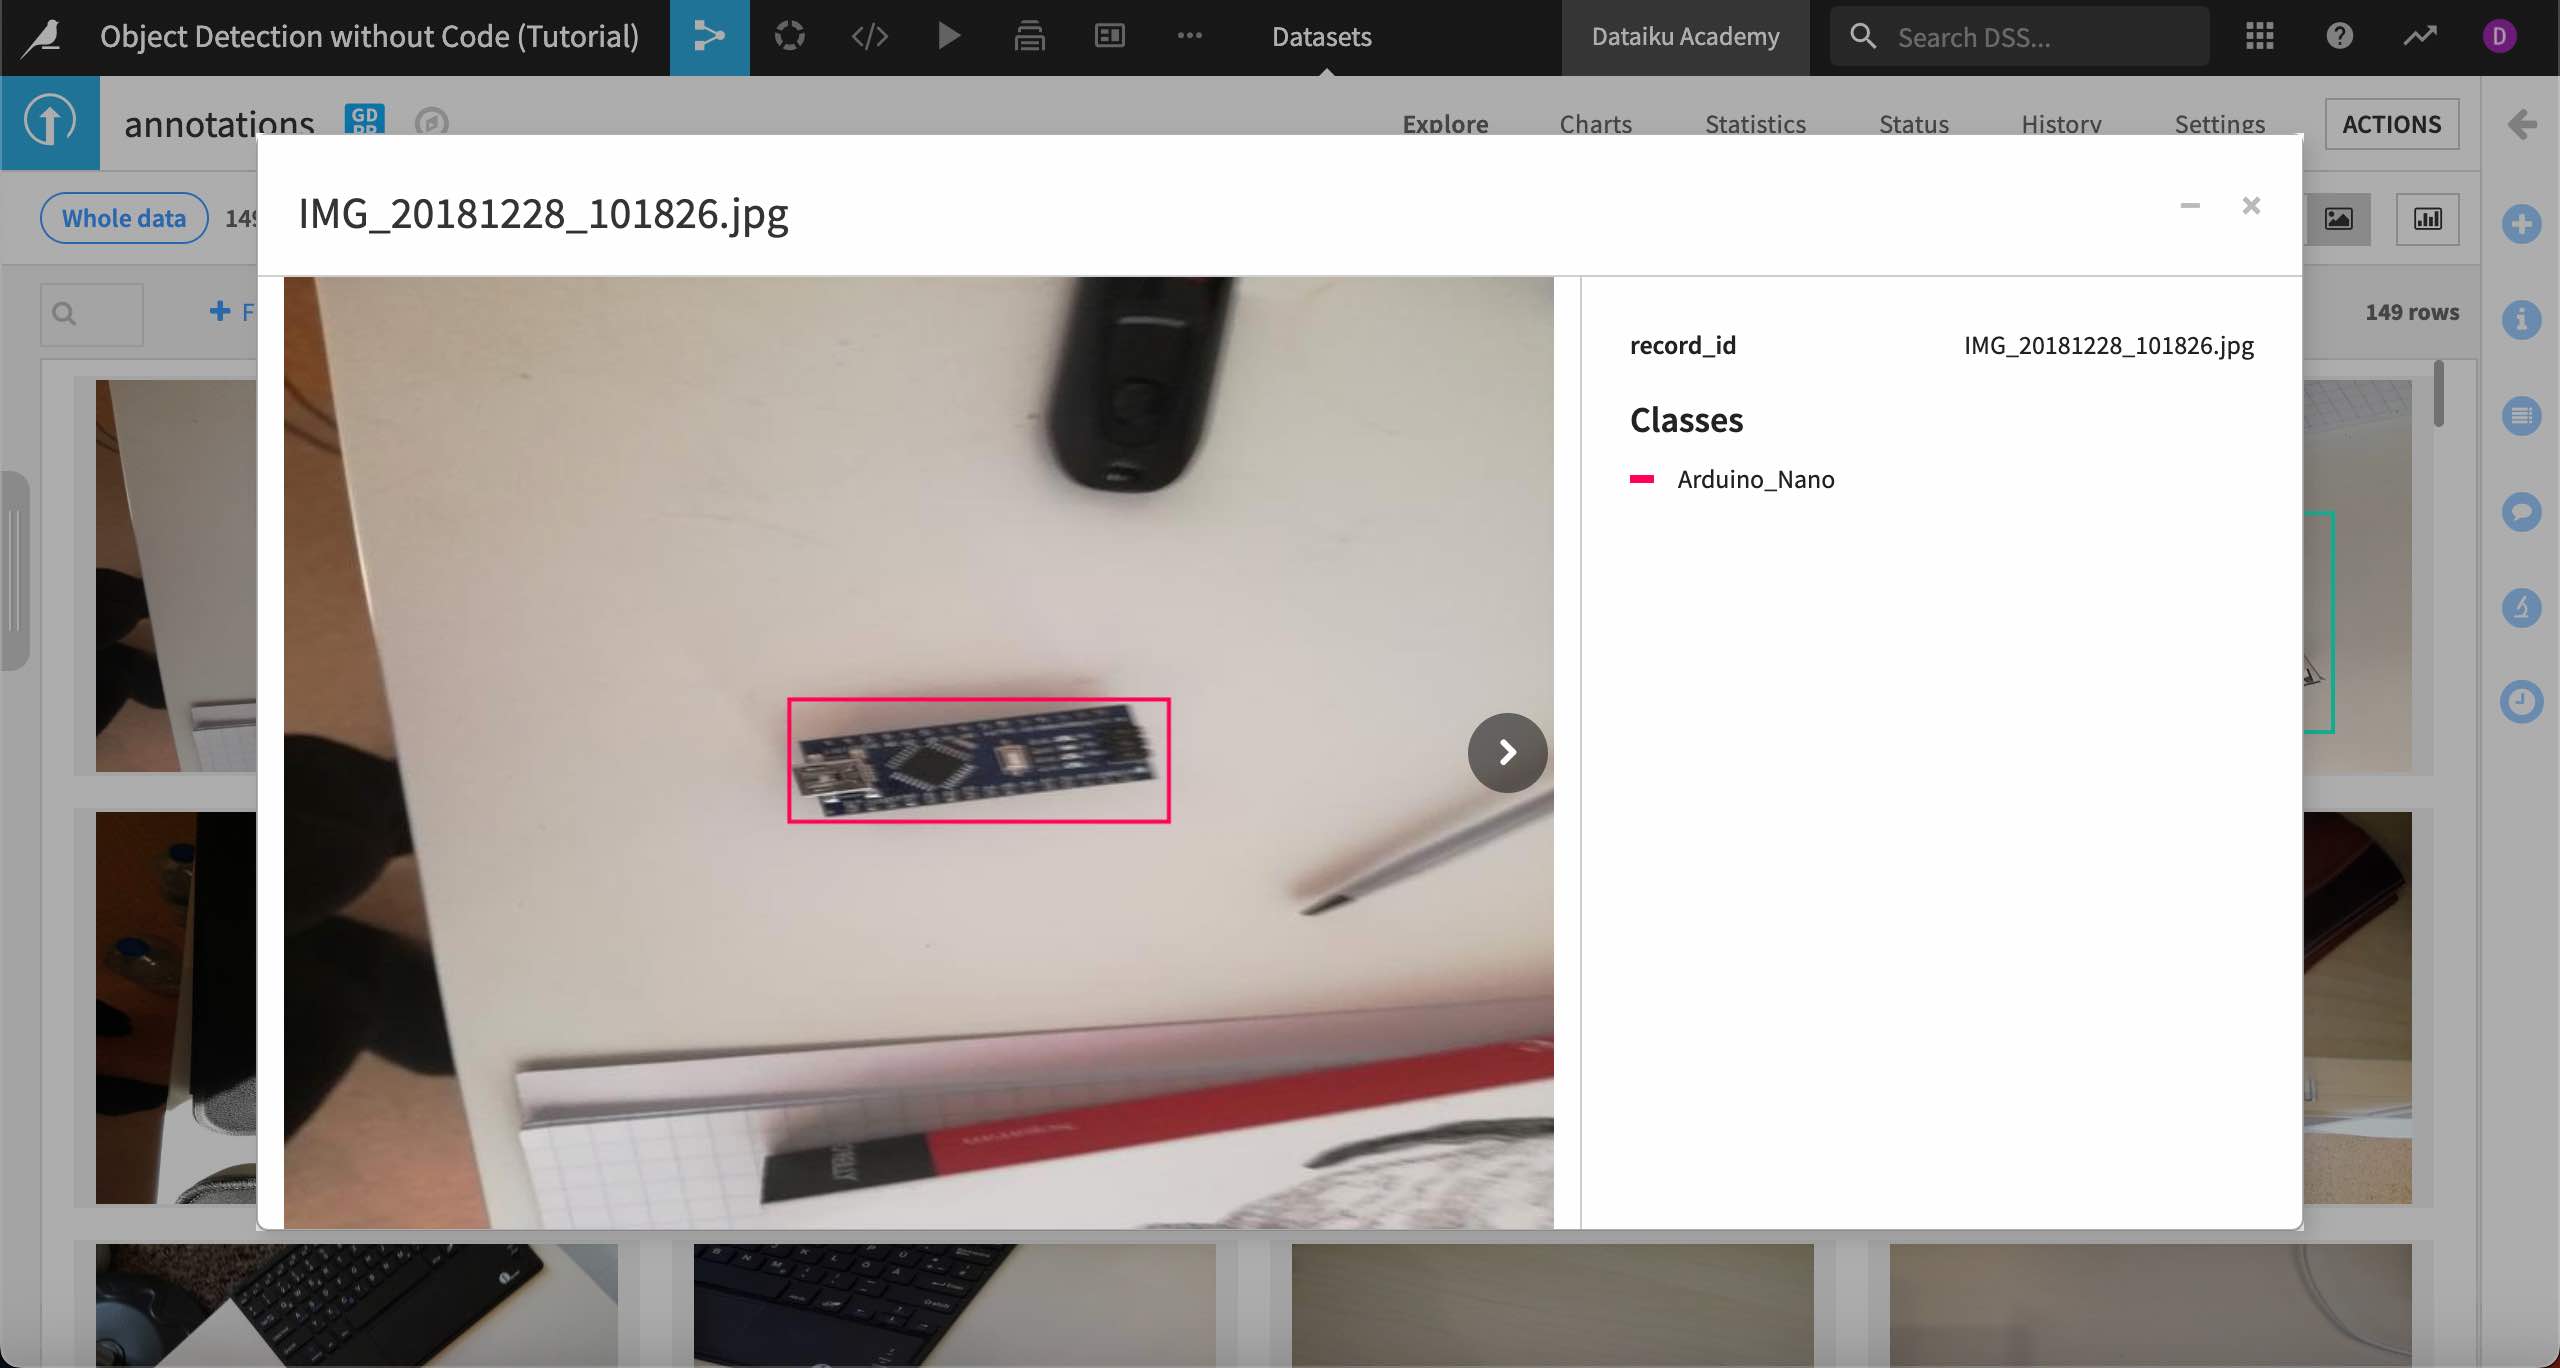
Once in image view, you can click on any image to bring up a detailed view showing the classes and bounding boxes. You can also scroll through the images from here.
Prepare data for the model#
Before creating a model, we’ll split the images into training and testing sets, so we can later test how the model performs on images it has never seen. We’ll do this by splitting the annotations file into training and testing datasets, and each of those will point to different sets of images in the image folder.
From the Flow, select the annotations folder, and click on the Split recipe from Visual recipes in the Actions tab.
In the New Split recipe window, add two output datasets, called annotations_train and annotations_test, then Create the recipe.
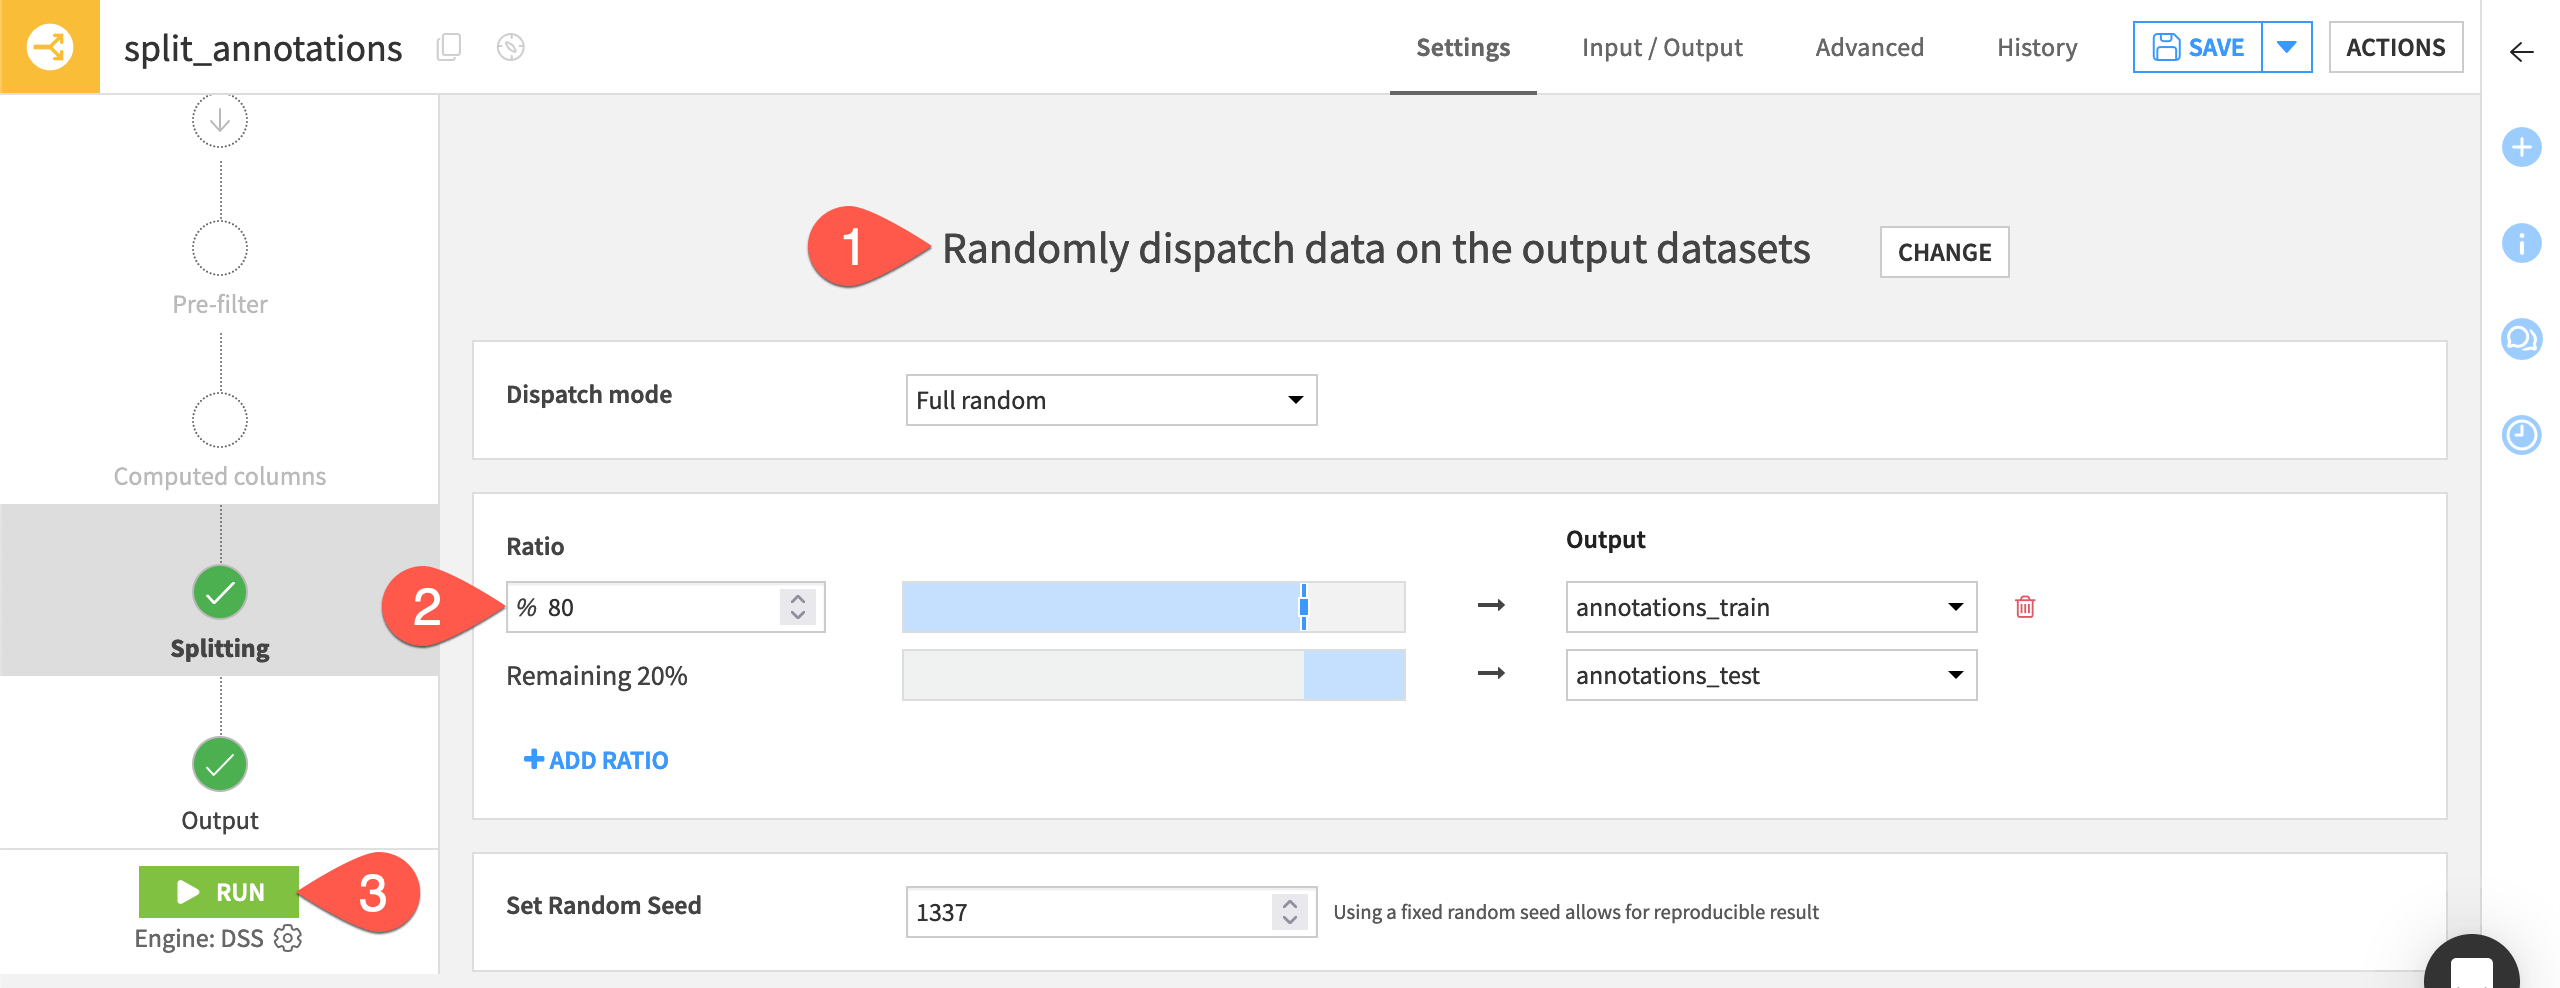
In the recipe settings, choose Randomly dispatch data from the splitting methods.
Put 80% of the data into annotations_train, leaving the other 20% in annotations_test.
Save and Run the recipe.
Back in the Flow, you now have two sets of annotations to use in modeling and testing.
Fine-tune a pre-trained model#
After exploring and splitting the data, we are ready to use the pre-trained object detection model in Dataiku.
Note
Before building an image classification model, you must set up a specific code environment. Go to Administration > Settings > Misc. In the section DSS internal code environment, create an Image classification code environment by selecting your Python interpreter and clicking on Create the environment. Dataiku will install all the required packages for image classification and add the new code environment to the Code Envs tab.
Create the model#
In this section, we’ll create a model in the Lab, and later we’ll deploy it in the Flow to test it on new images.
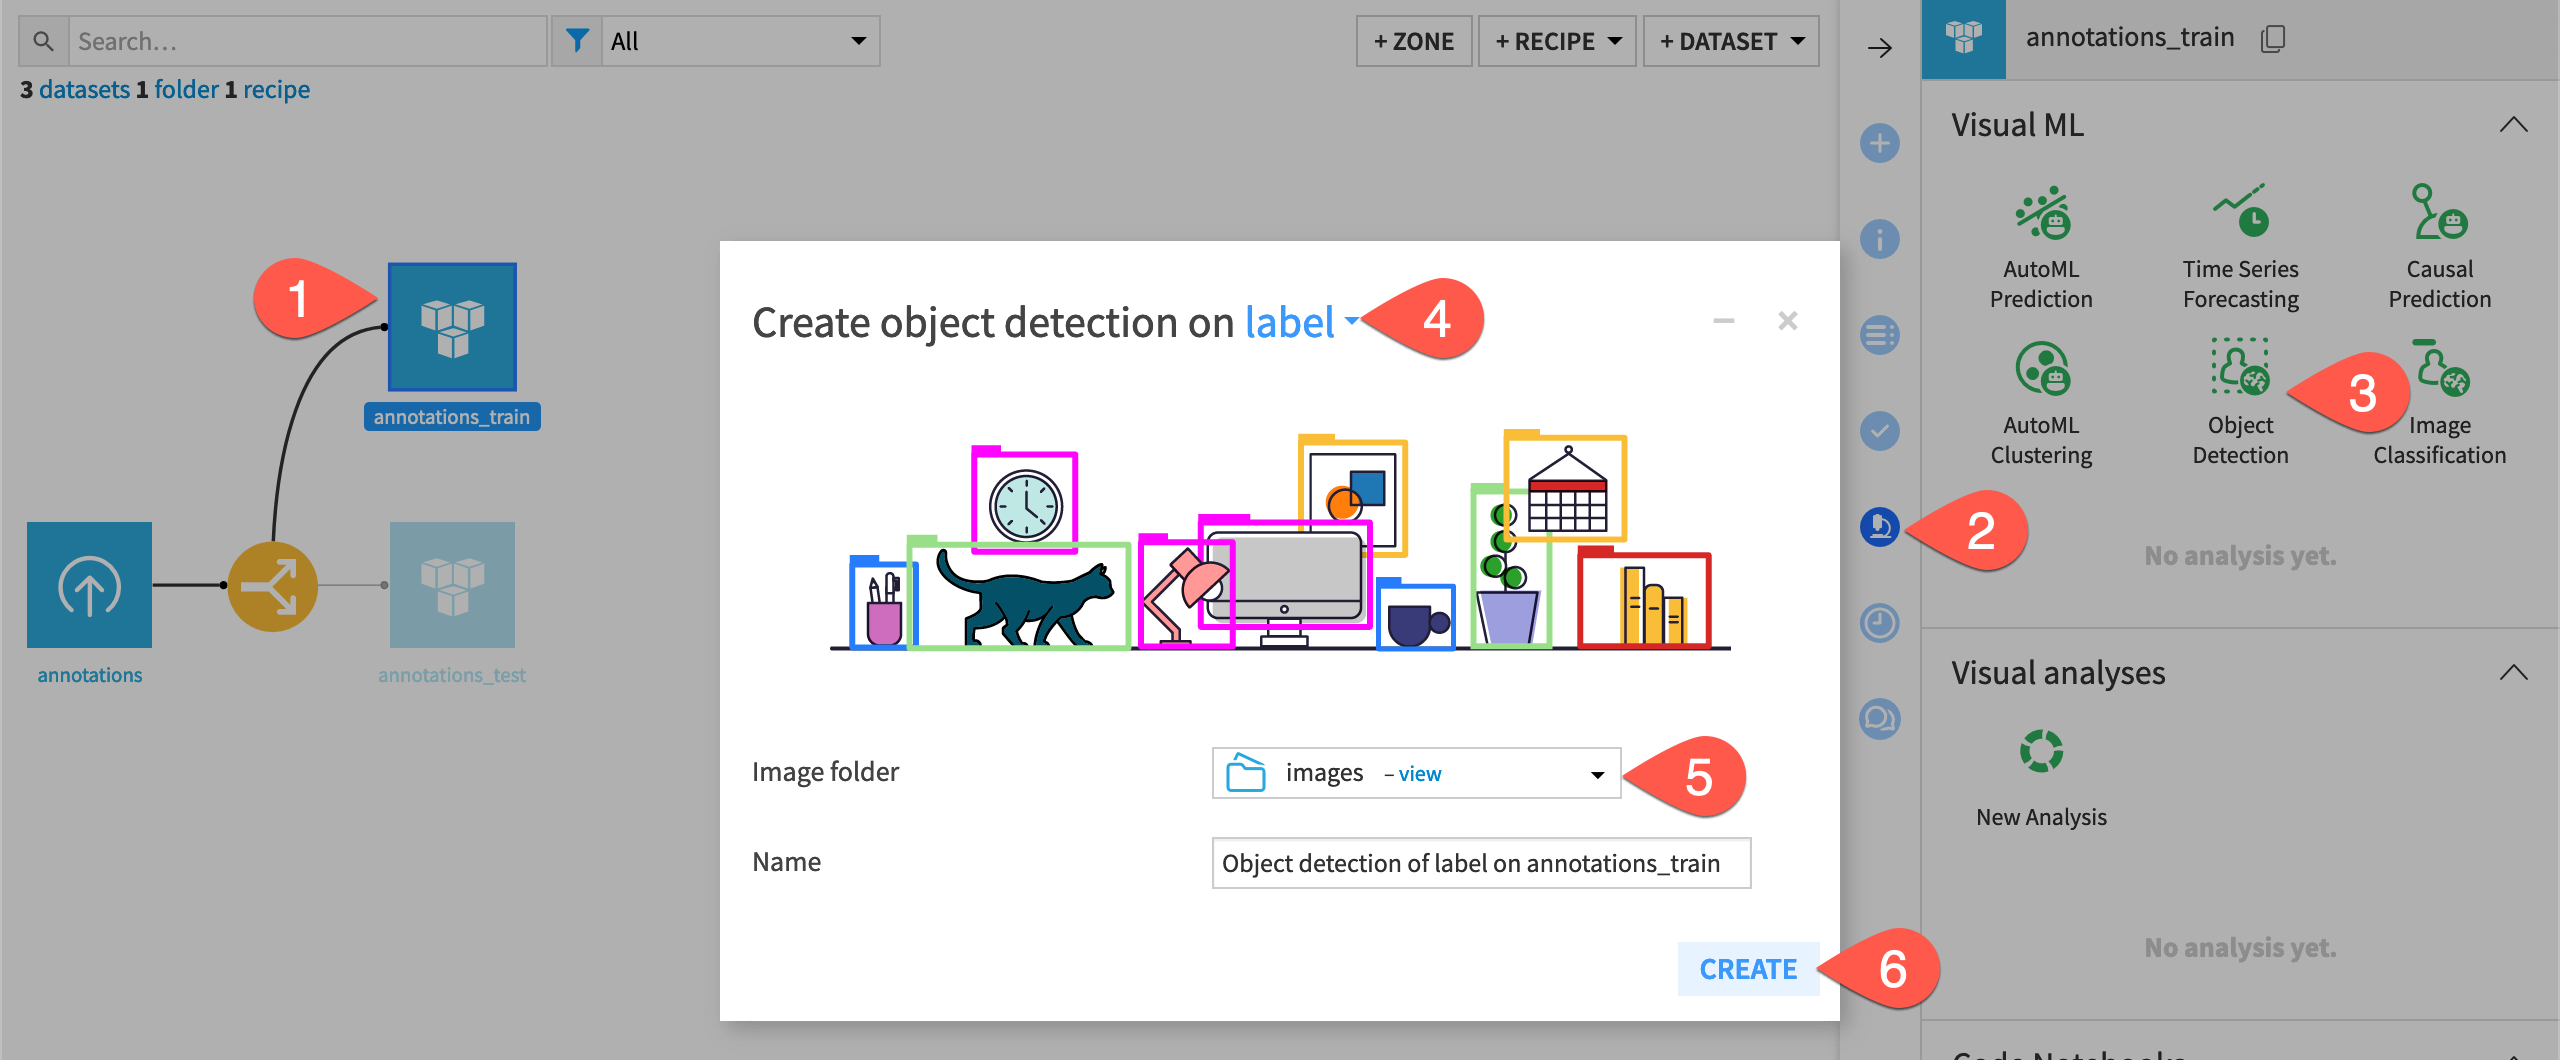
In the Flow, highlight the annotations_train dataset and go to Lab, then choose Object Detection.
The next window asks you to define the model’s target, or what objects it will detect and classes it will predict. Choose the label column.
For the Image folder, choose the images folder to tell the model where to find the images for training.
Name your model or leave the default name and select Create.
Dataiku creates the object detection model, adds it to the Lab, and opens the model Design tab where you can preview images and settings. Before training the model, let’s review the input and settings. With a training ratio of 80%, our model will have 98 training images and 22 test images.
Check the model settings#
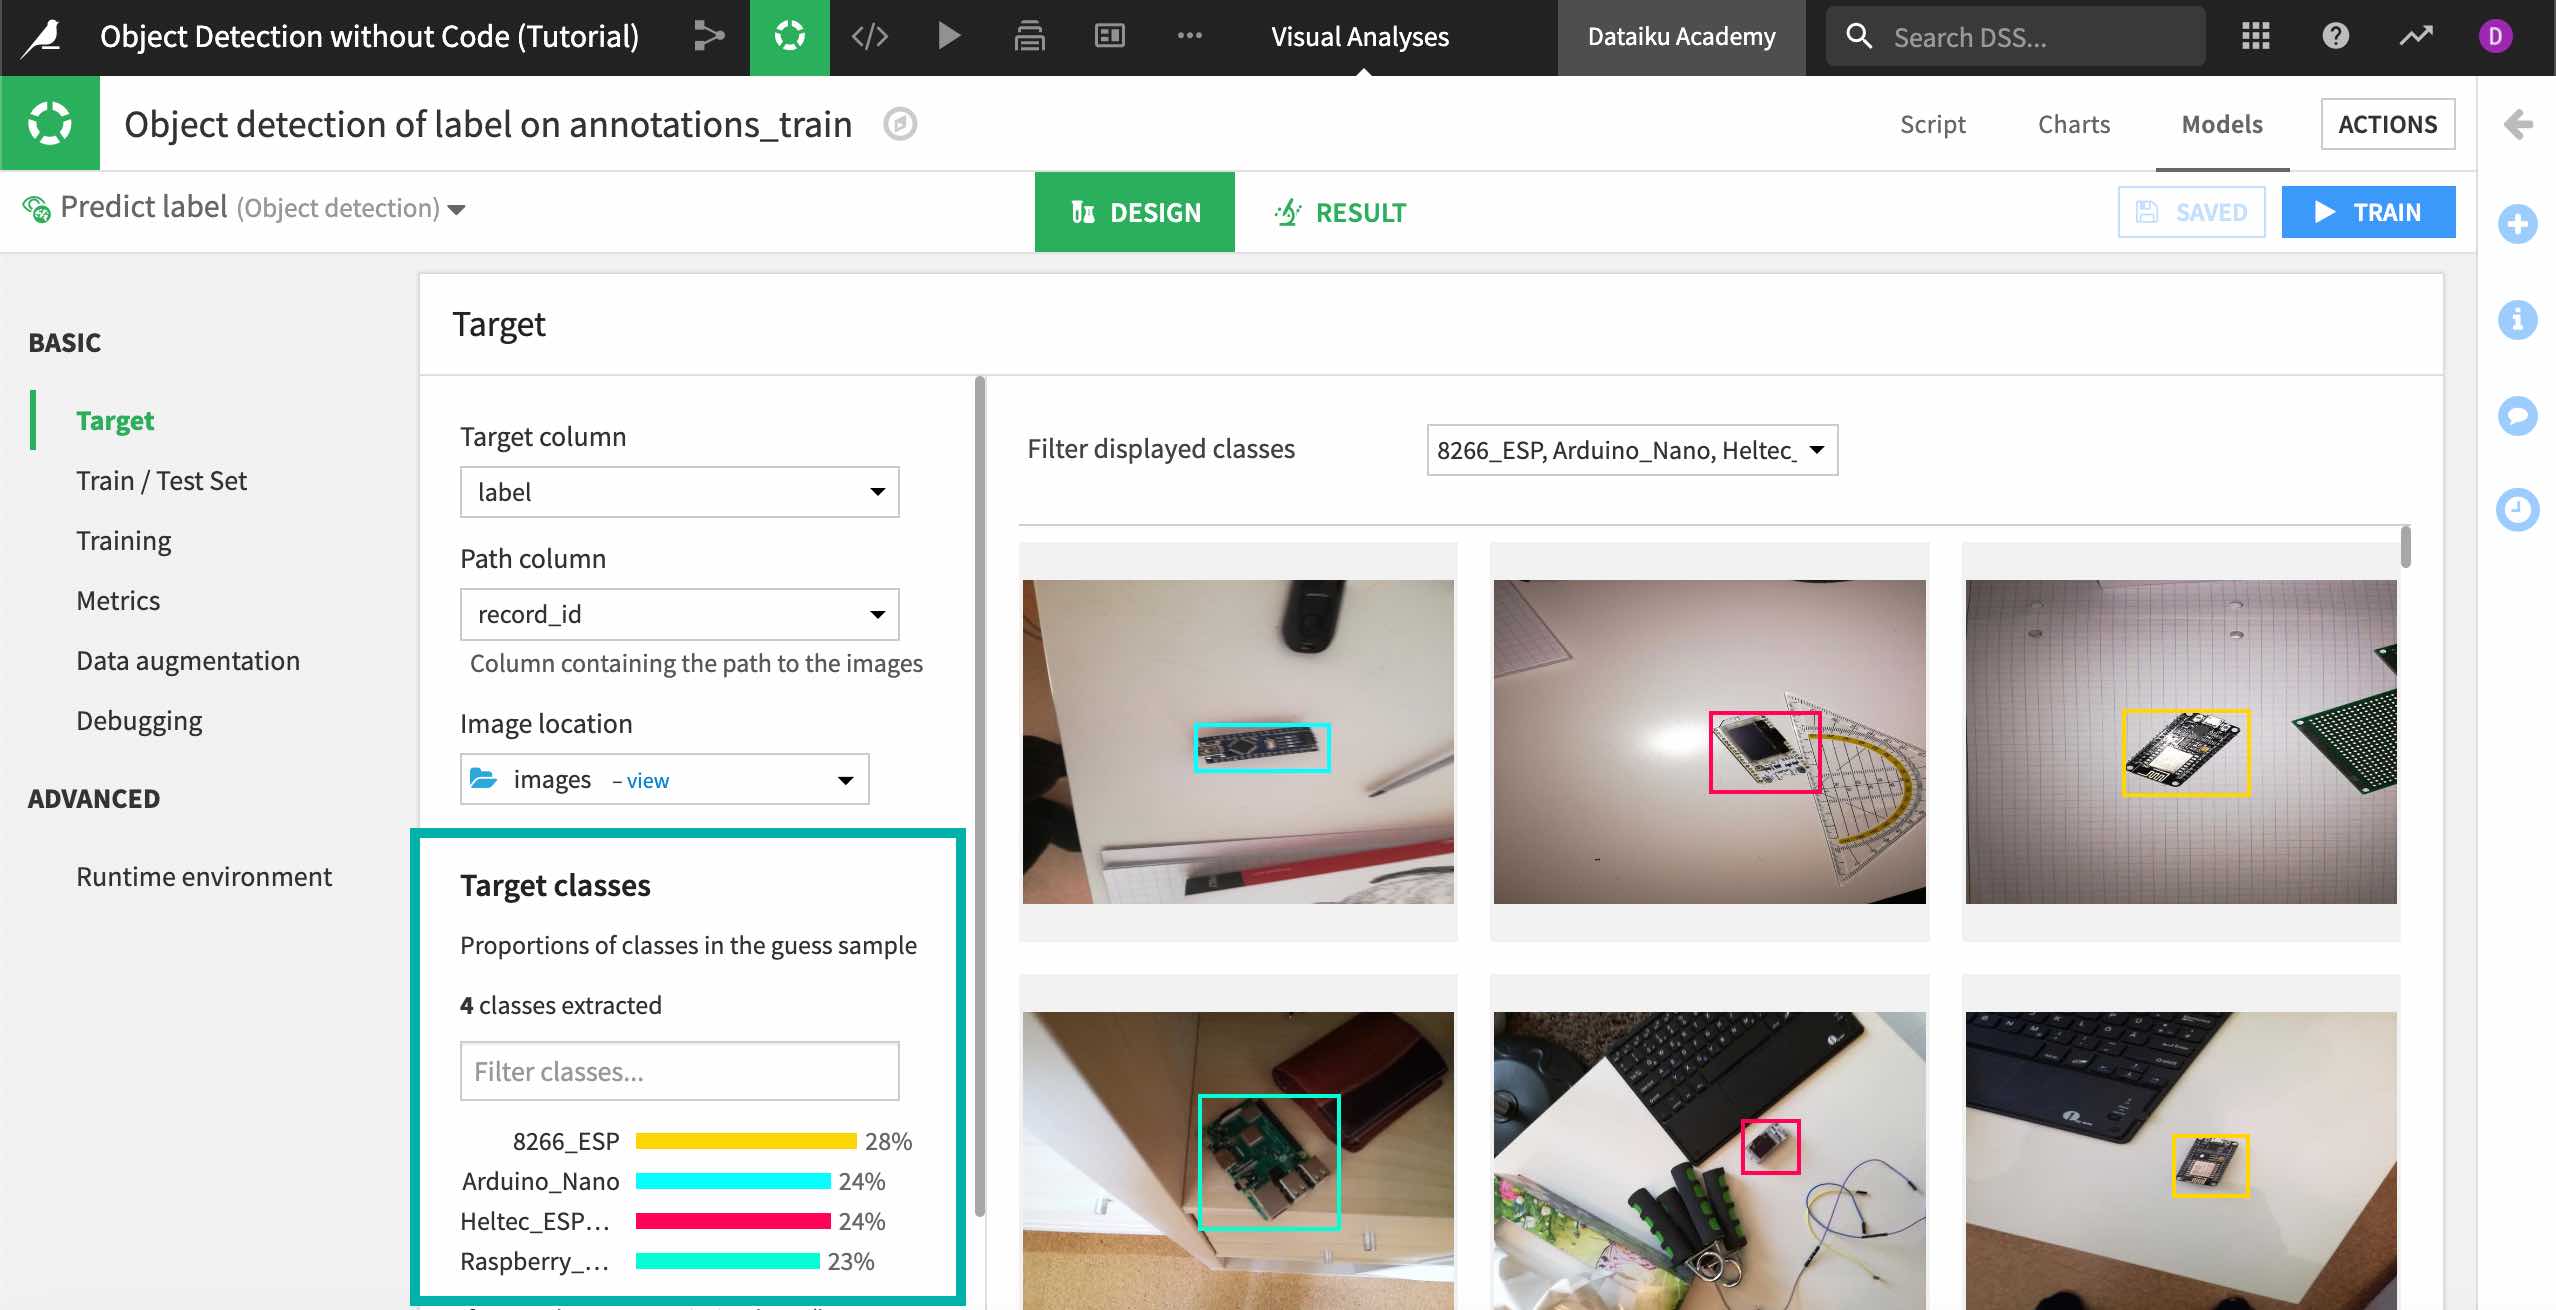
The Basic > Target panel shows the Target column and Image location we input when creating the model. It also recognizes the Path column so the model can find each image. Double-check that these settings are correct.
Under Target classes, the model automatically recognizes that we have created an object detection task with four classes of potential objects in our images. You can preview the images and filter them by selecting each class in the bar chart or the filter above the images.
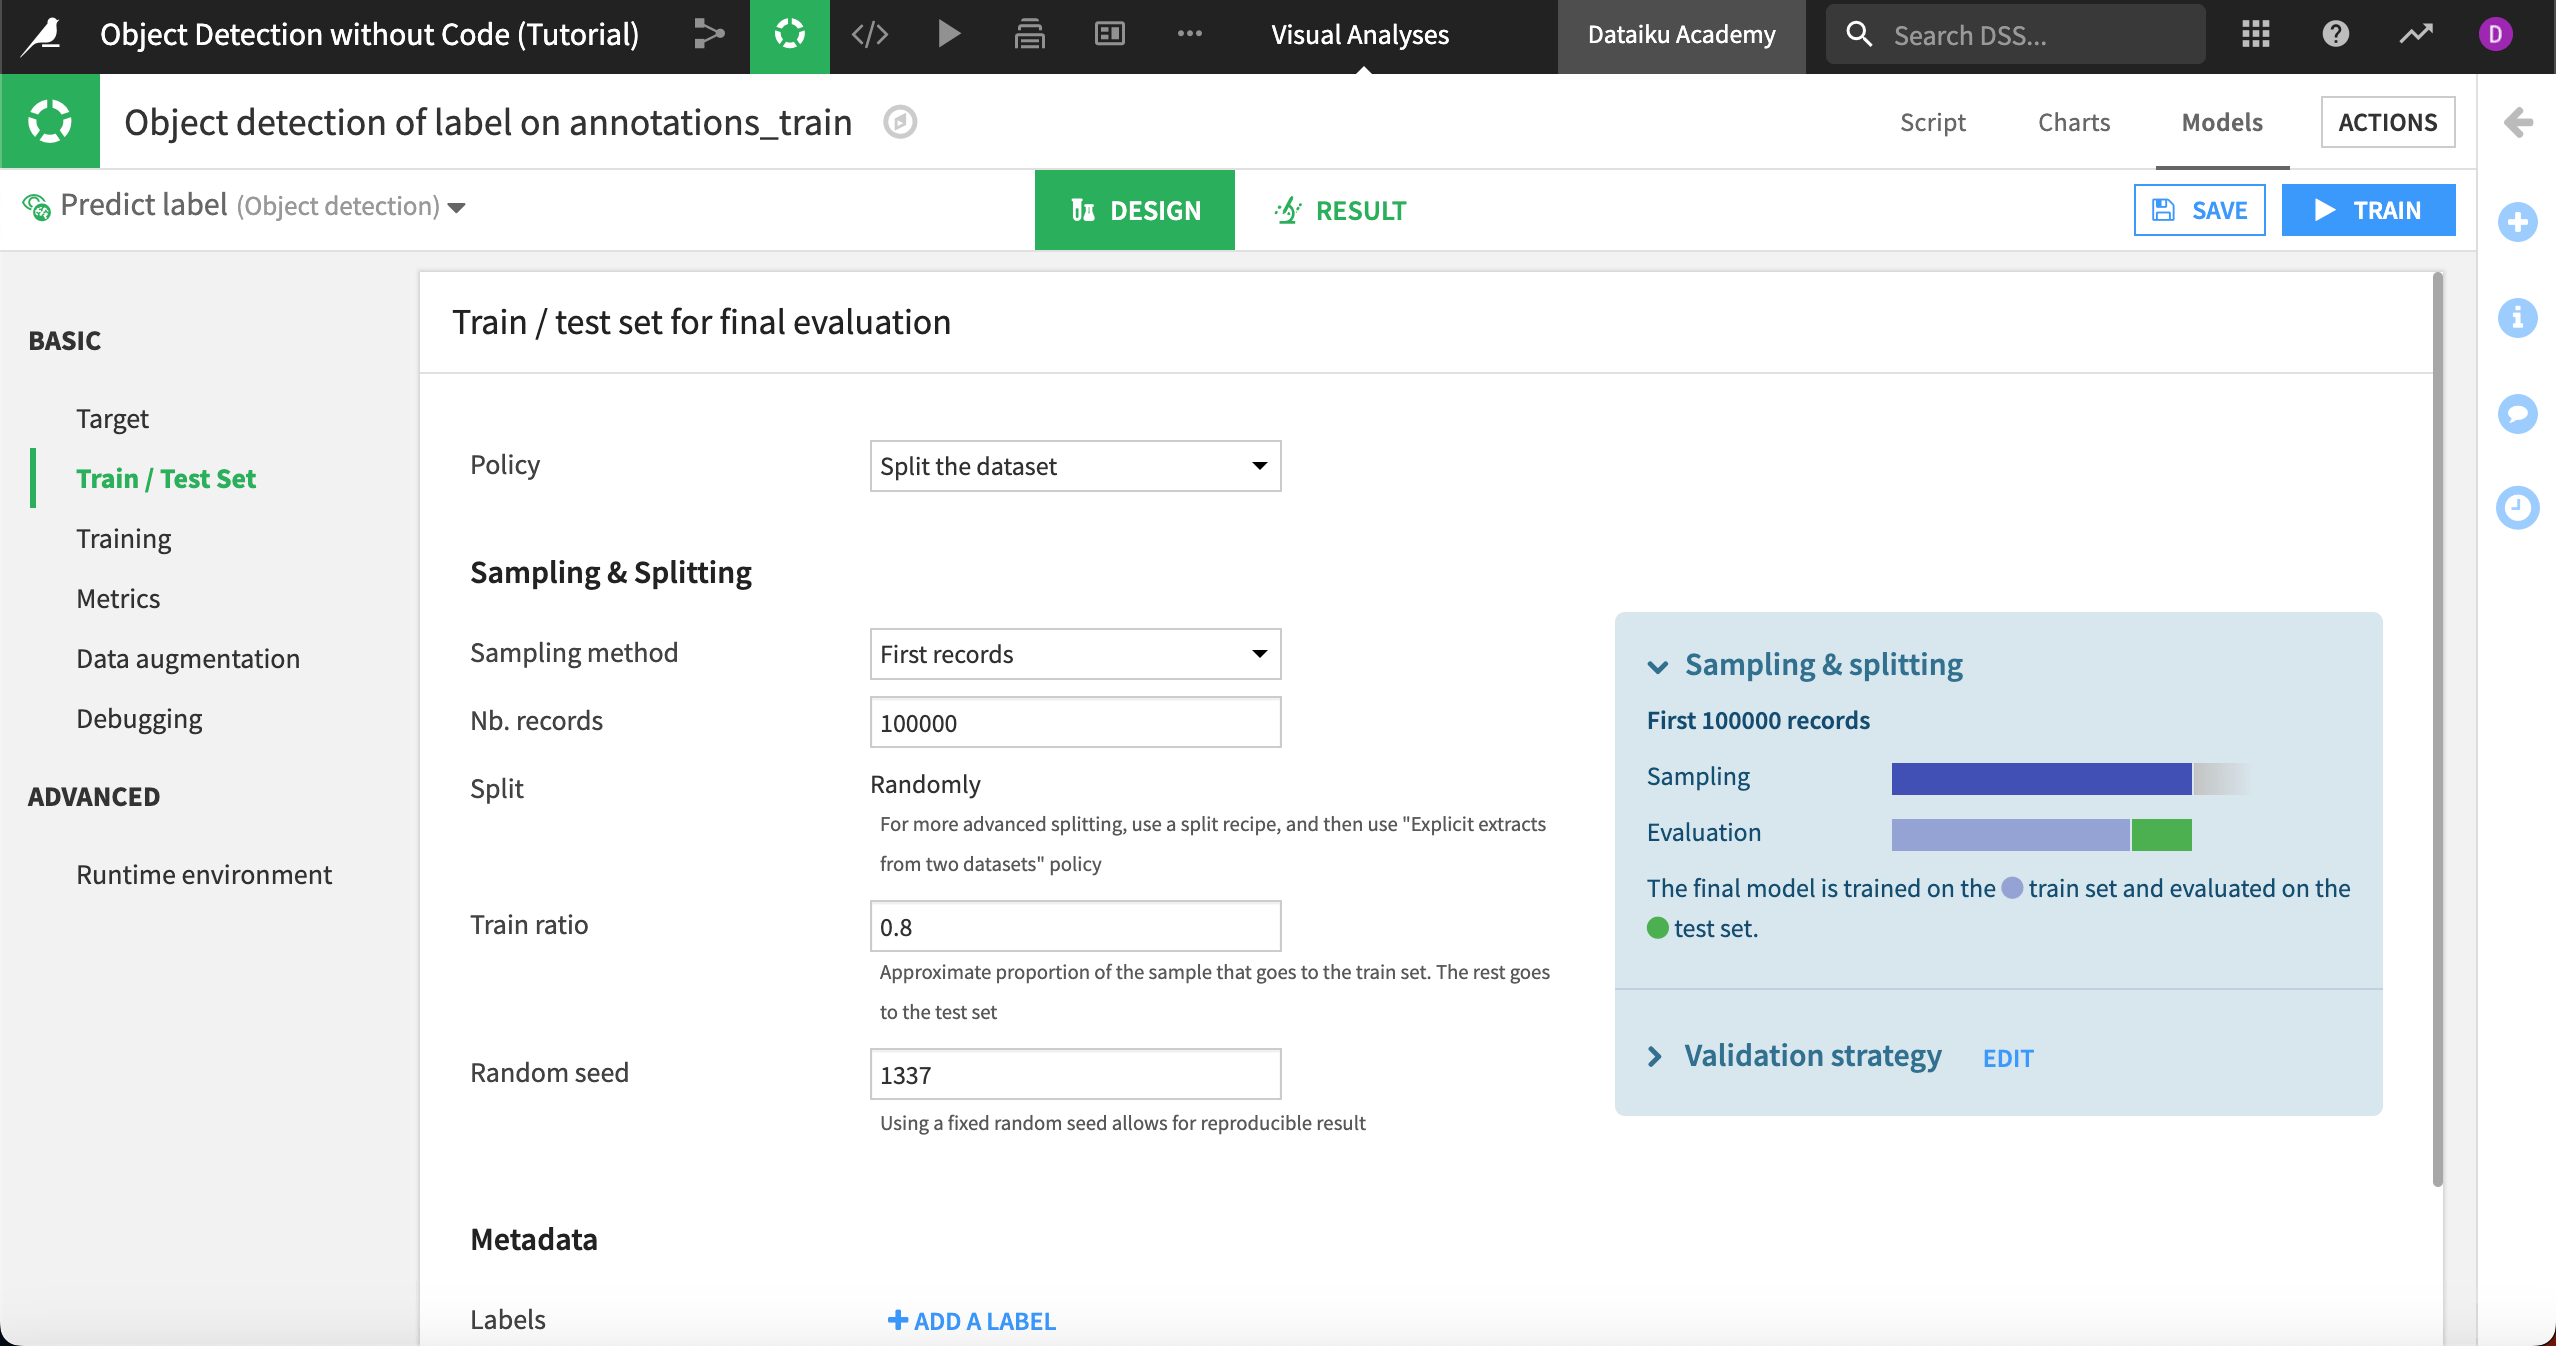
As with image classification, Dataiku automatically splits the images into training and validation sets so the model can continually test its performance during the training phase. You can see these settings under Basic > Train/Test Set.
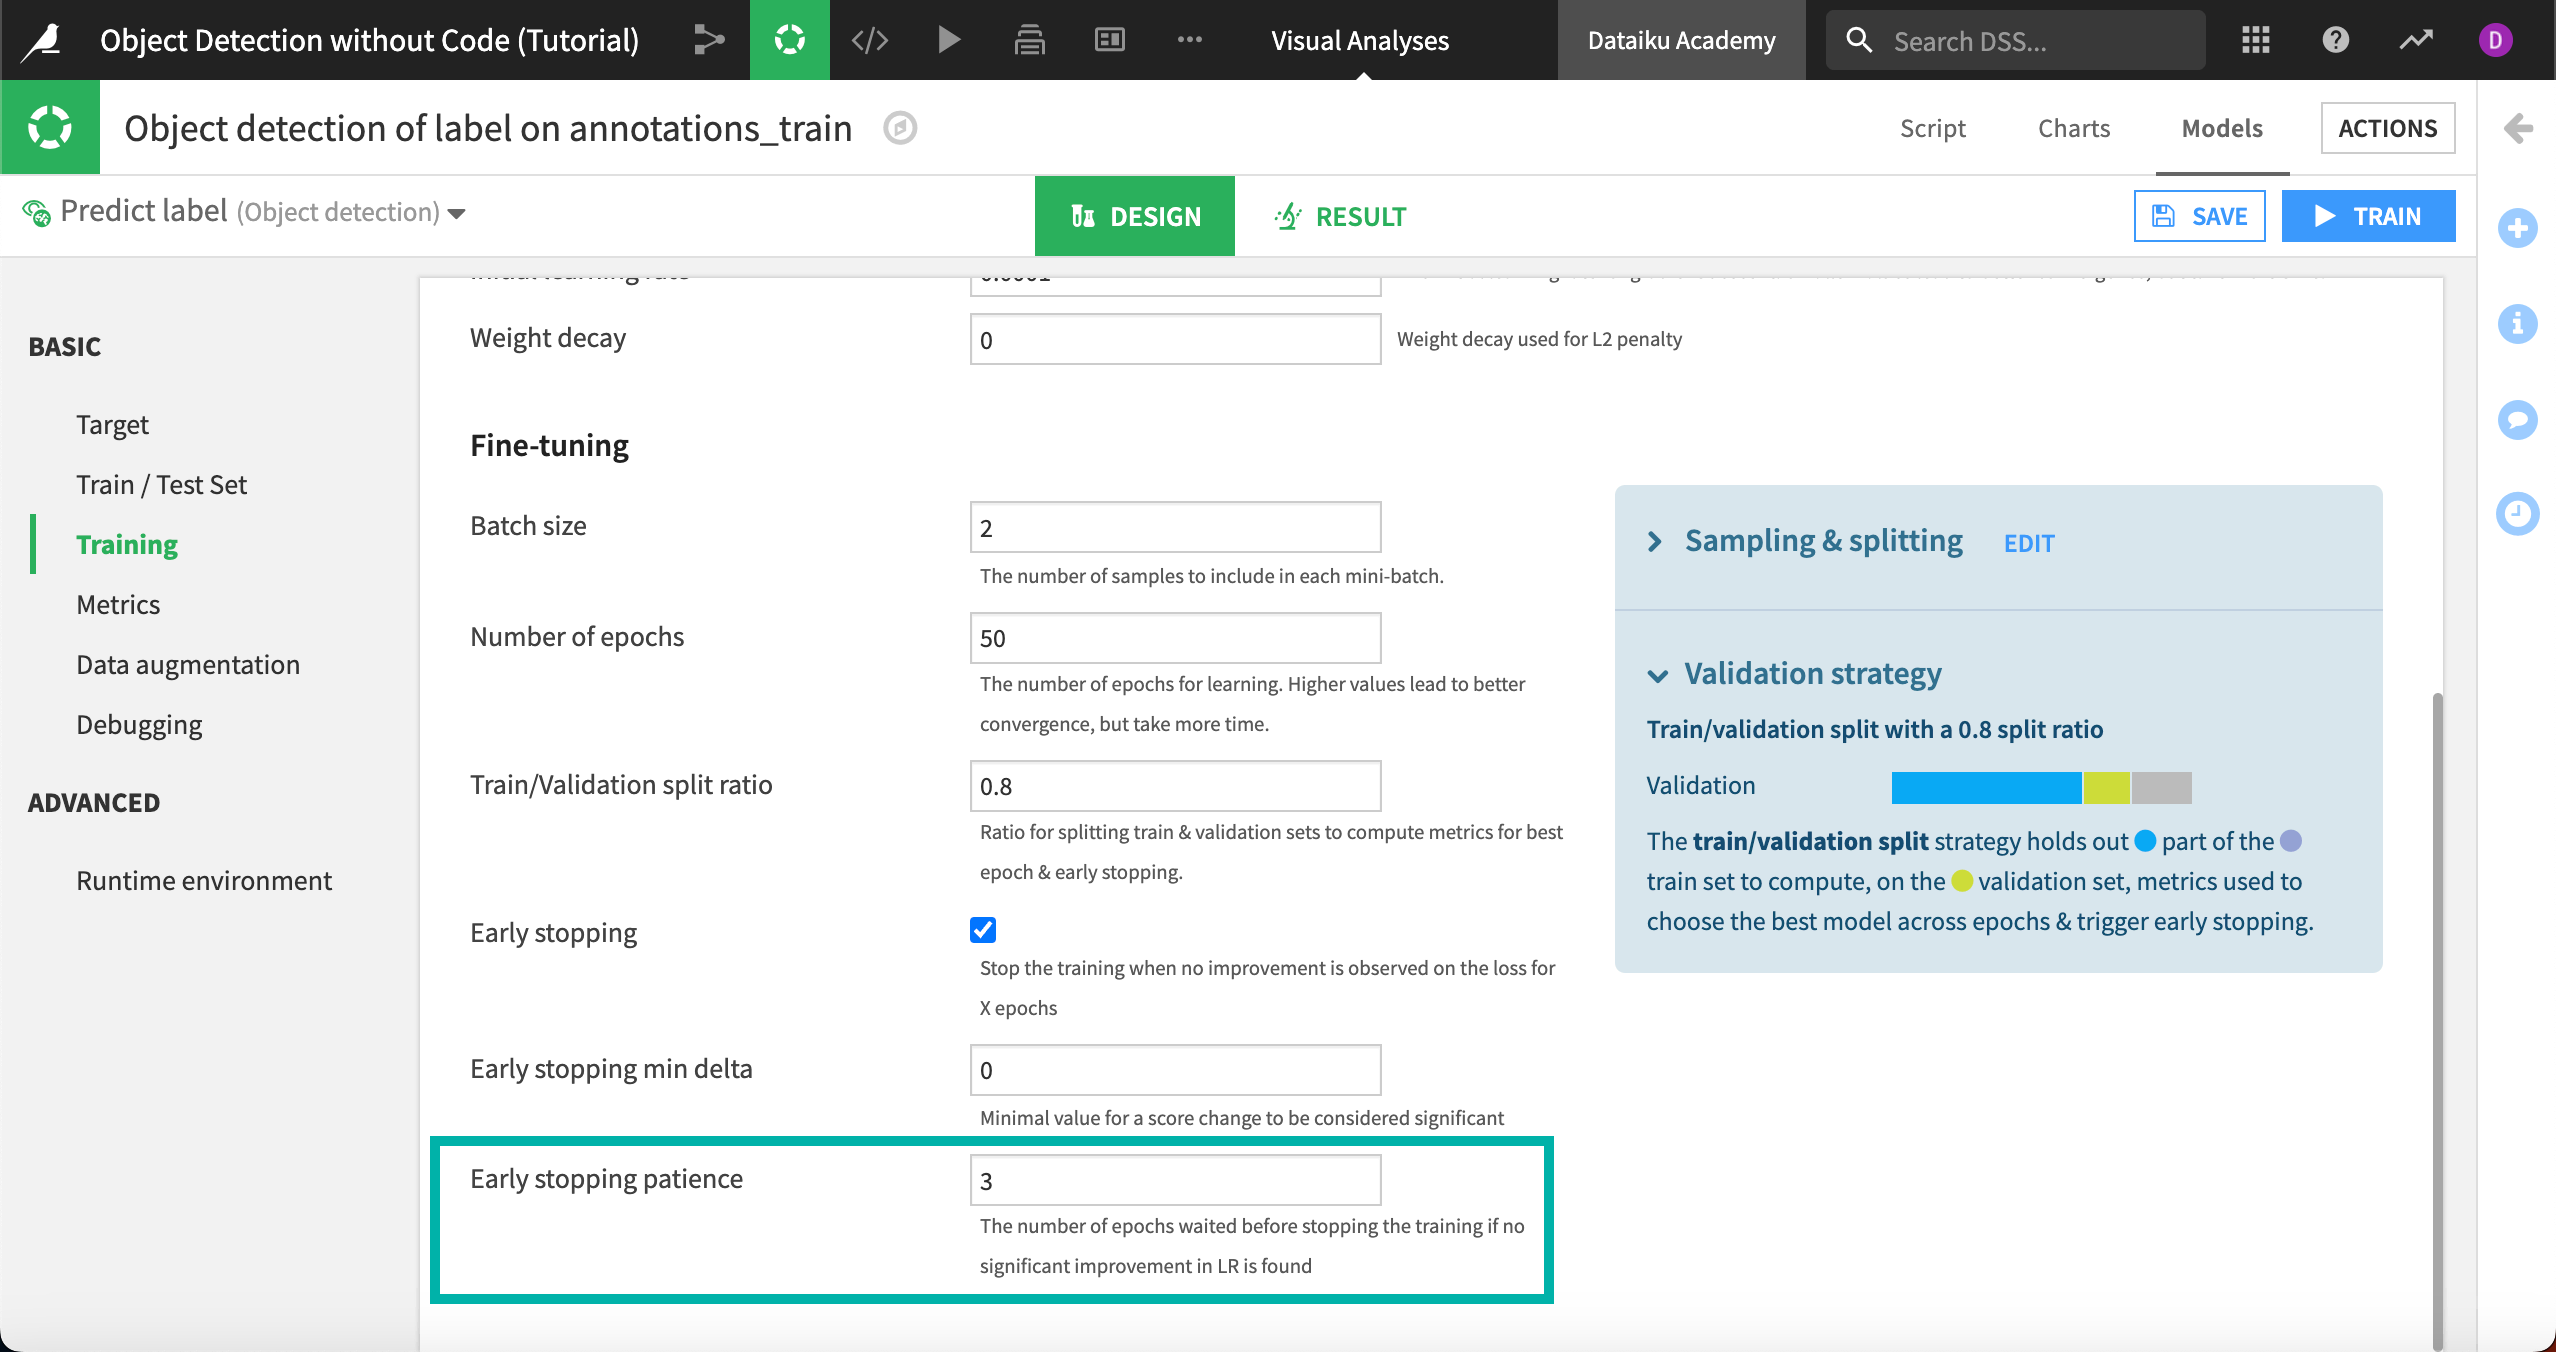
In the Training panel you’ll find the settings for fine-tuning the pretrained model. There is only one potential model to use — the Faster R-CNN, which is a faster-performing iteration of a neural network model that divides images into regions to detect objects more quickly.
Also in the Model section, you can specify how many layers of the model to retrain on your images. The R-CNN model contains multiple layers pre-trained on millions of images, and the more layers you retrain, the more specialized your model will be on your images. But the model will also take much longer to train.
We’ll use the default setting of 0 under Number of fine-tuned layers. Because Dataiku’s models always retrain the final layer, this means one layer will be fine-tuned.
In the Optimization and Fine-tuning sections, values are set to industry standards, and in most cases you will not change these.
Using Early stopping, or stopping the training after the model shows no improvement after cycling through the images a number of times, is recommended to cut down on processing time. For purposes of this tutorial, if you want the model to finish training more quickly, change the Early stopping patience to 3 epochs, or three cycles through the images.
Train the model#
When you are finished viewing the settings, select Save, then Train at the top right to begin training the model. In the window, give your model a name or use the default and select Train.
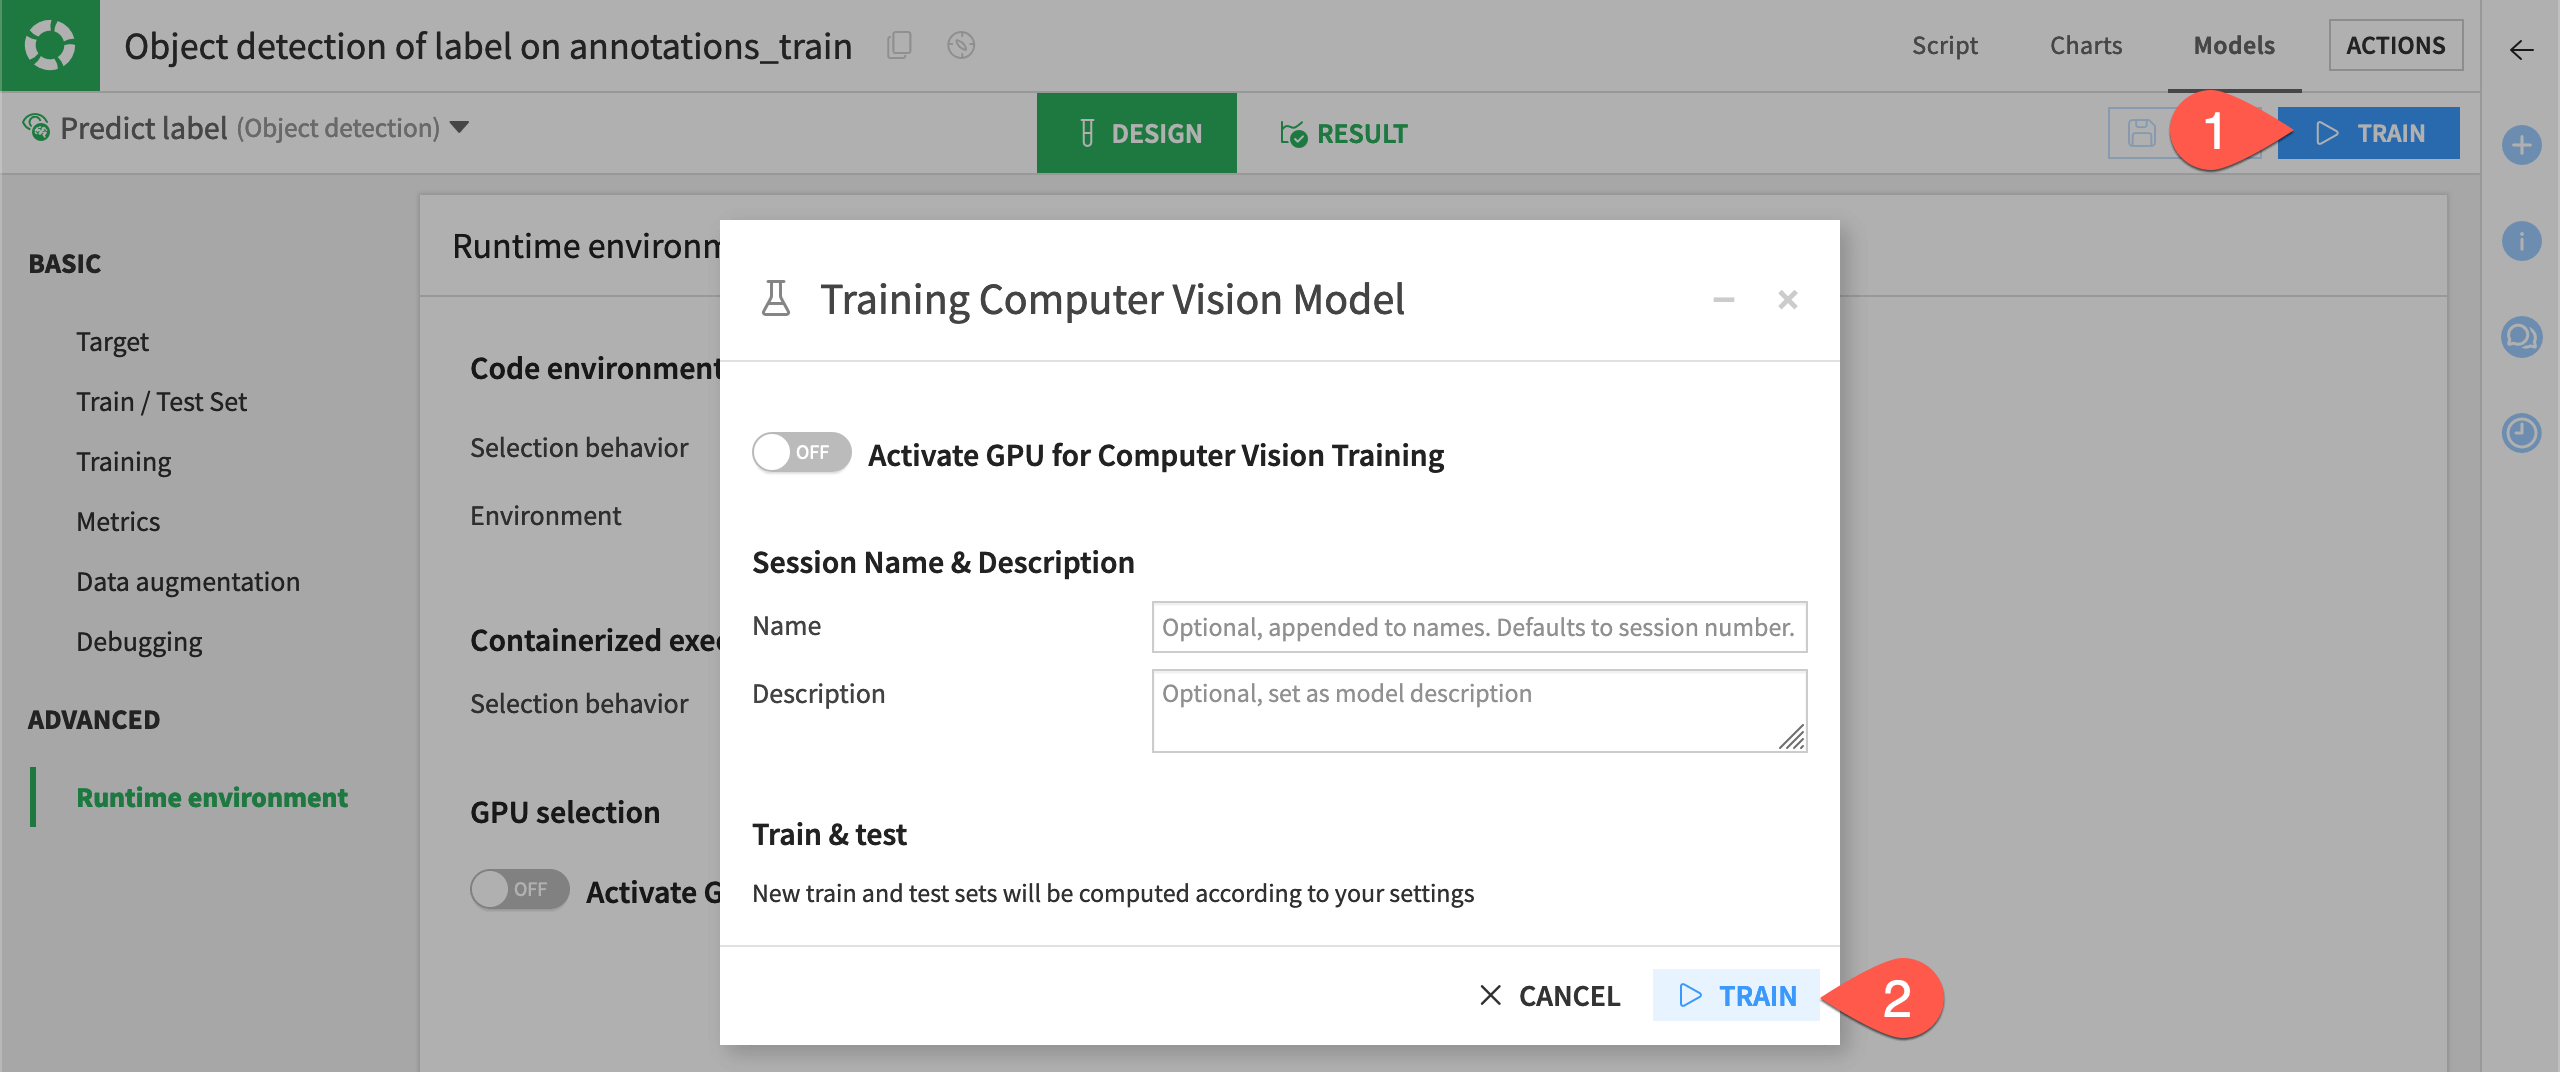
Note
If your Dataiku instance is running on a server with a GPU, you can activate the GPU for training so the model can process much more quickly. Otherwise, the model will run on CPU and the training will take longer, perhaps more than an hour.