
Tutorial | Project variables in visual recipes#
Get started#
Project variables enable you to replace hard-coded values in many places throughout the Flow of a Dataiku project.
Objectives#
In this tutorial, you will:
Define project variables.
Insert them into formulas and visual recipes using both the
variables["variable_name"]and${variable_name}syntax.
Prerequisites#
To reproduce the steps in this tutorial, you’ll need:
Dataiku 12.6 or later.
Basic knowledge of Dataiku (Core Designer level or equivalent).
Create the project#
From the Dataiku Design homepage, click + New Project.
Select Learning projects.
Search for and select Project Variables.
If needed, change the folder into which the project will be installed, and click Create.
From the project homepage, click Go to Flow (or type
g+f).
Note
You can also download the starter project from this website and import it as a ZIP file.
You’ll next want to build the Flow.
Click Flow Actions at the bottom right of the Flow.
Click Build all.
Keep the default settings and click Build.
Use case summary#
The project has three data sources:
Dataset |
Description |
|---|---|
tx |
Each row is a unique credit card transaction with information such as the card that was used and the merchant where the transaction was made. It also indicates whether the transaction has either been:
|
merchants |
Each row is a unique merchant with information such as the merchant’s location and category. |
cards |
Each row is a unique credit card ID with information such as the card’s activation month or the cardholder’s FICO score (a common measure of creditworthiness in the US). |
Define project variables#
The first step is actually defining variables in JSON format so that they will be accessible throughout the project.
In the More Options (
 ) menu of the top navigation bar, select Variables.
In the Global variables section, copy-paste the following JSON object.
{
  "mean_purchase_amount" : 232,
  "chosen_category" : "B",
  "tx_month" : "2017-01"
}
Click Save.
Discover the two syntaxes for retrieving variables#
The reference documentation on variables details two syntaxes for retrieving variables. There are two important questions to consider when choosing a variable type:
How does Dataiku evaluate the variable expression?
What does Dataiku return when there is no variable with the supplied name?
Syntax |
Evaluation |
Variable not found |
|---|---|---|
|
JSON |
Empty cell |
|
Verbatim replacement |
Error |
Retrieve a variable in a formula#
First look at how you can use these two syntaxes within formulas.
Return to a visual analysis#
This project has a working Flow that you may not wish to disturb. You can experiment with adding variables to the Prepare recipe script by using the existing visual analysis attached to the Prepare recipe.
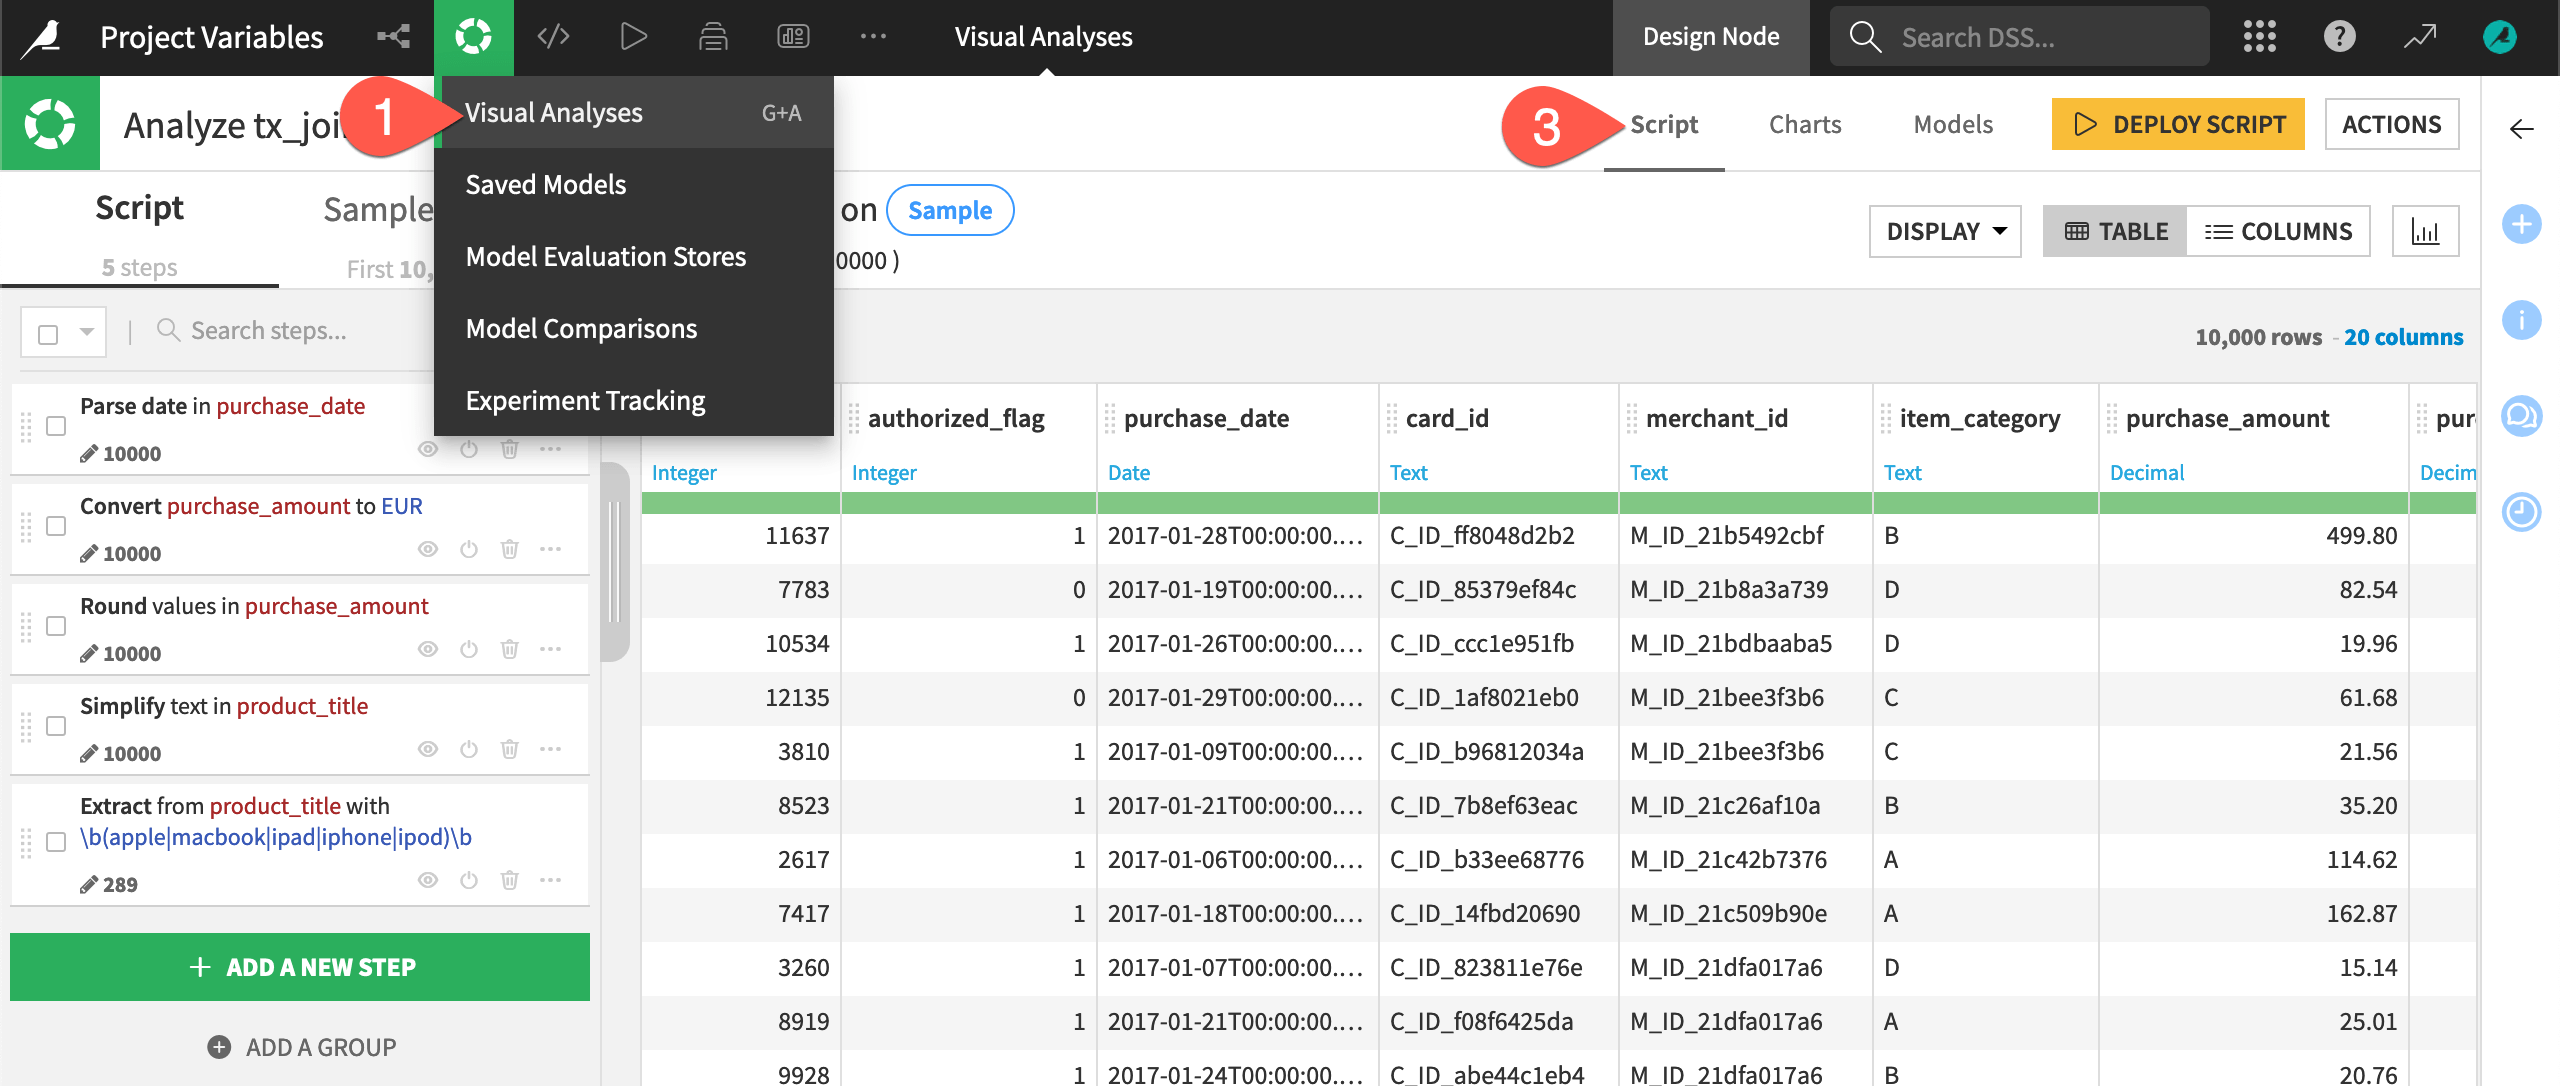
From the ML (
 ) menu of the top navigation bar, open the Visual ML (Analysis) page (or use the shortcut
 g+a).Open the visual analysis named Analyze tx_joined.
Navigate to the Script tab to find the same steps found in the Prepare recipe of the Flow.
Retrieve an integer variable#
Start with an integer example.
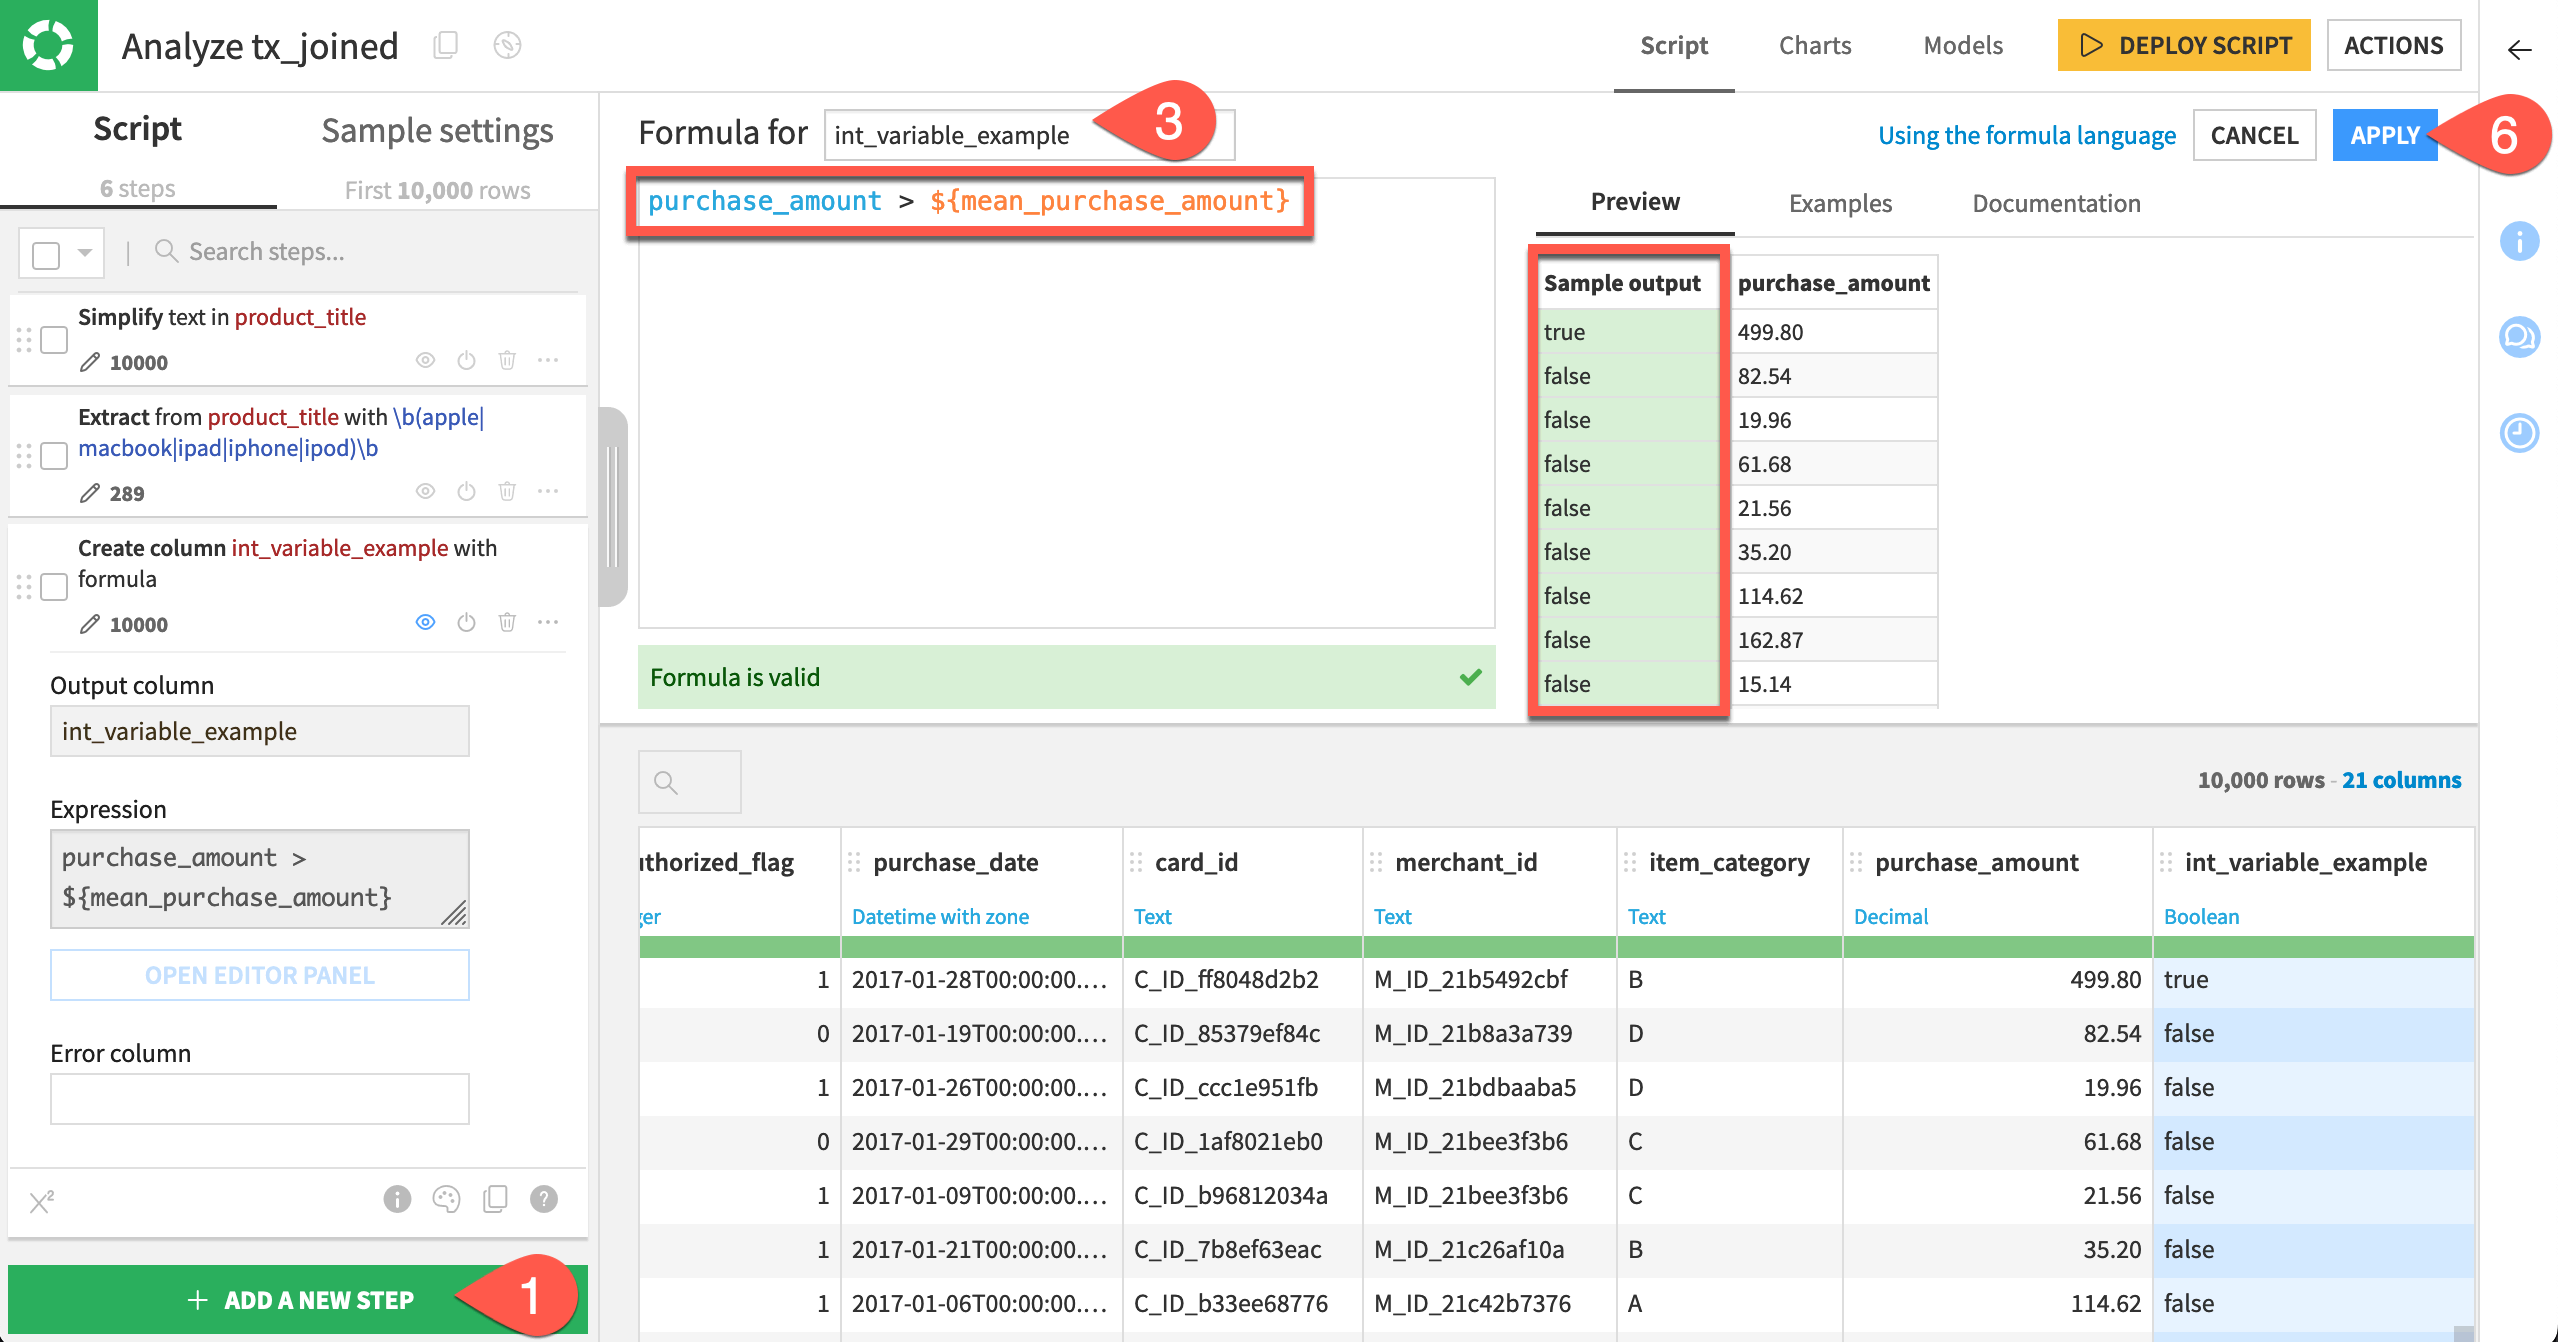
In the script, click + Add a New Step.
Choose a Formula.
Name the output column
int_variable_example.Provide the formula
purchase_amount > variables["mean_purchase_amount"], and view the sample output in the preview.Now to demonstrate the difference between variable syntaxes, switch to the formula
purchase_amount > ${mean_purchase_amount}, and compare the sample output.Click Apply, and recognize no discernible difference between the output of these two syntaxes in this example.
Retrieve a variable that doesn’t exist#
Now try to retrieve a variable that doesn’t exist.
Click Open Editor Panel to reopen the step that creates the int_variable_example column.
Change the formula to reference a variable that doesn’t exist, for example:
purchase_amount > ${avg_purchase}.Note how Dataiku warns the formula is invalid, and click Apply. The entire step will return an error.
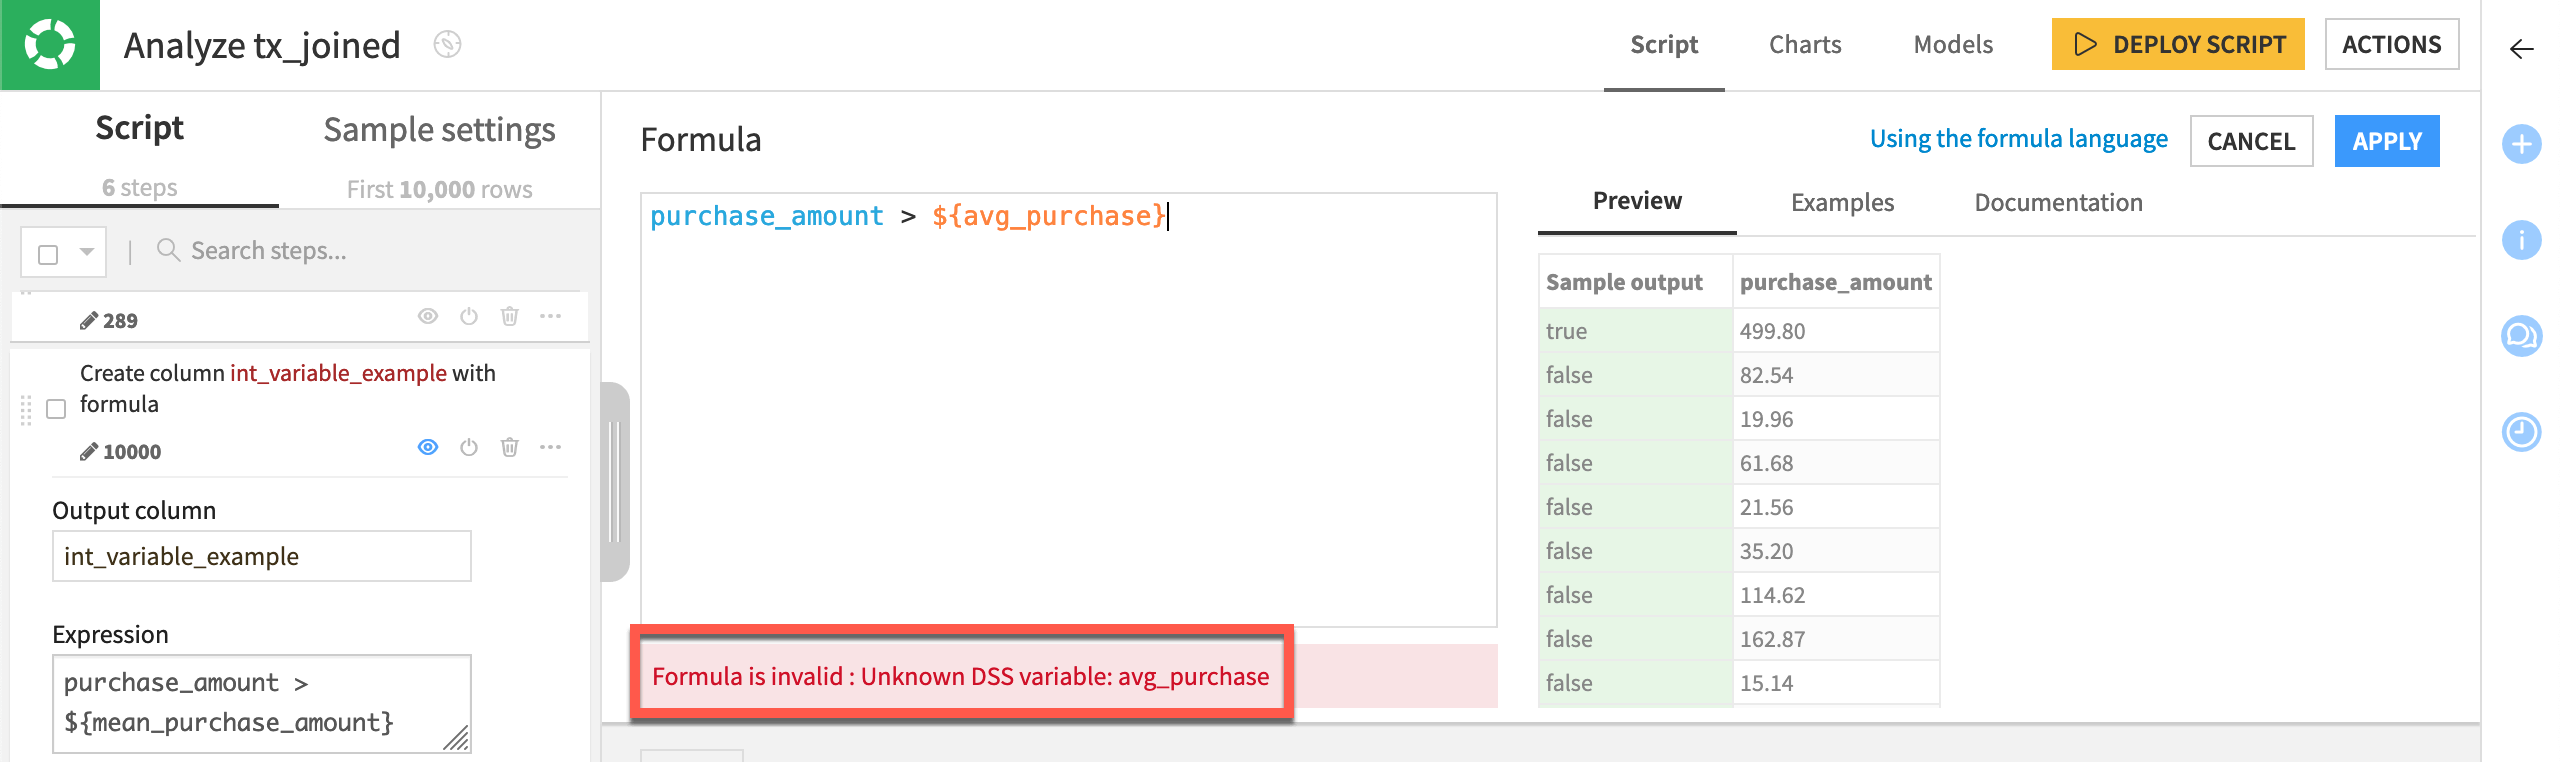
Using this syntax, the entire step returns an error. Now try the other syntax.
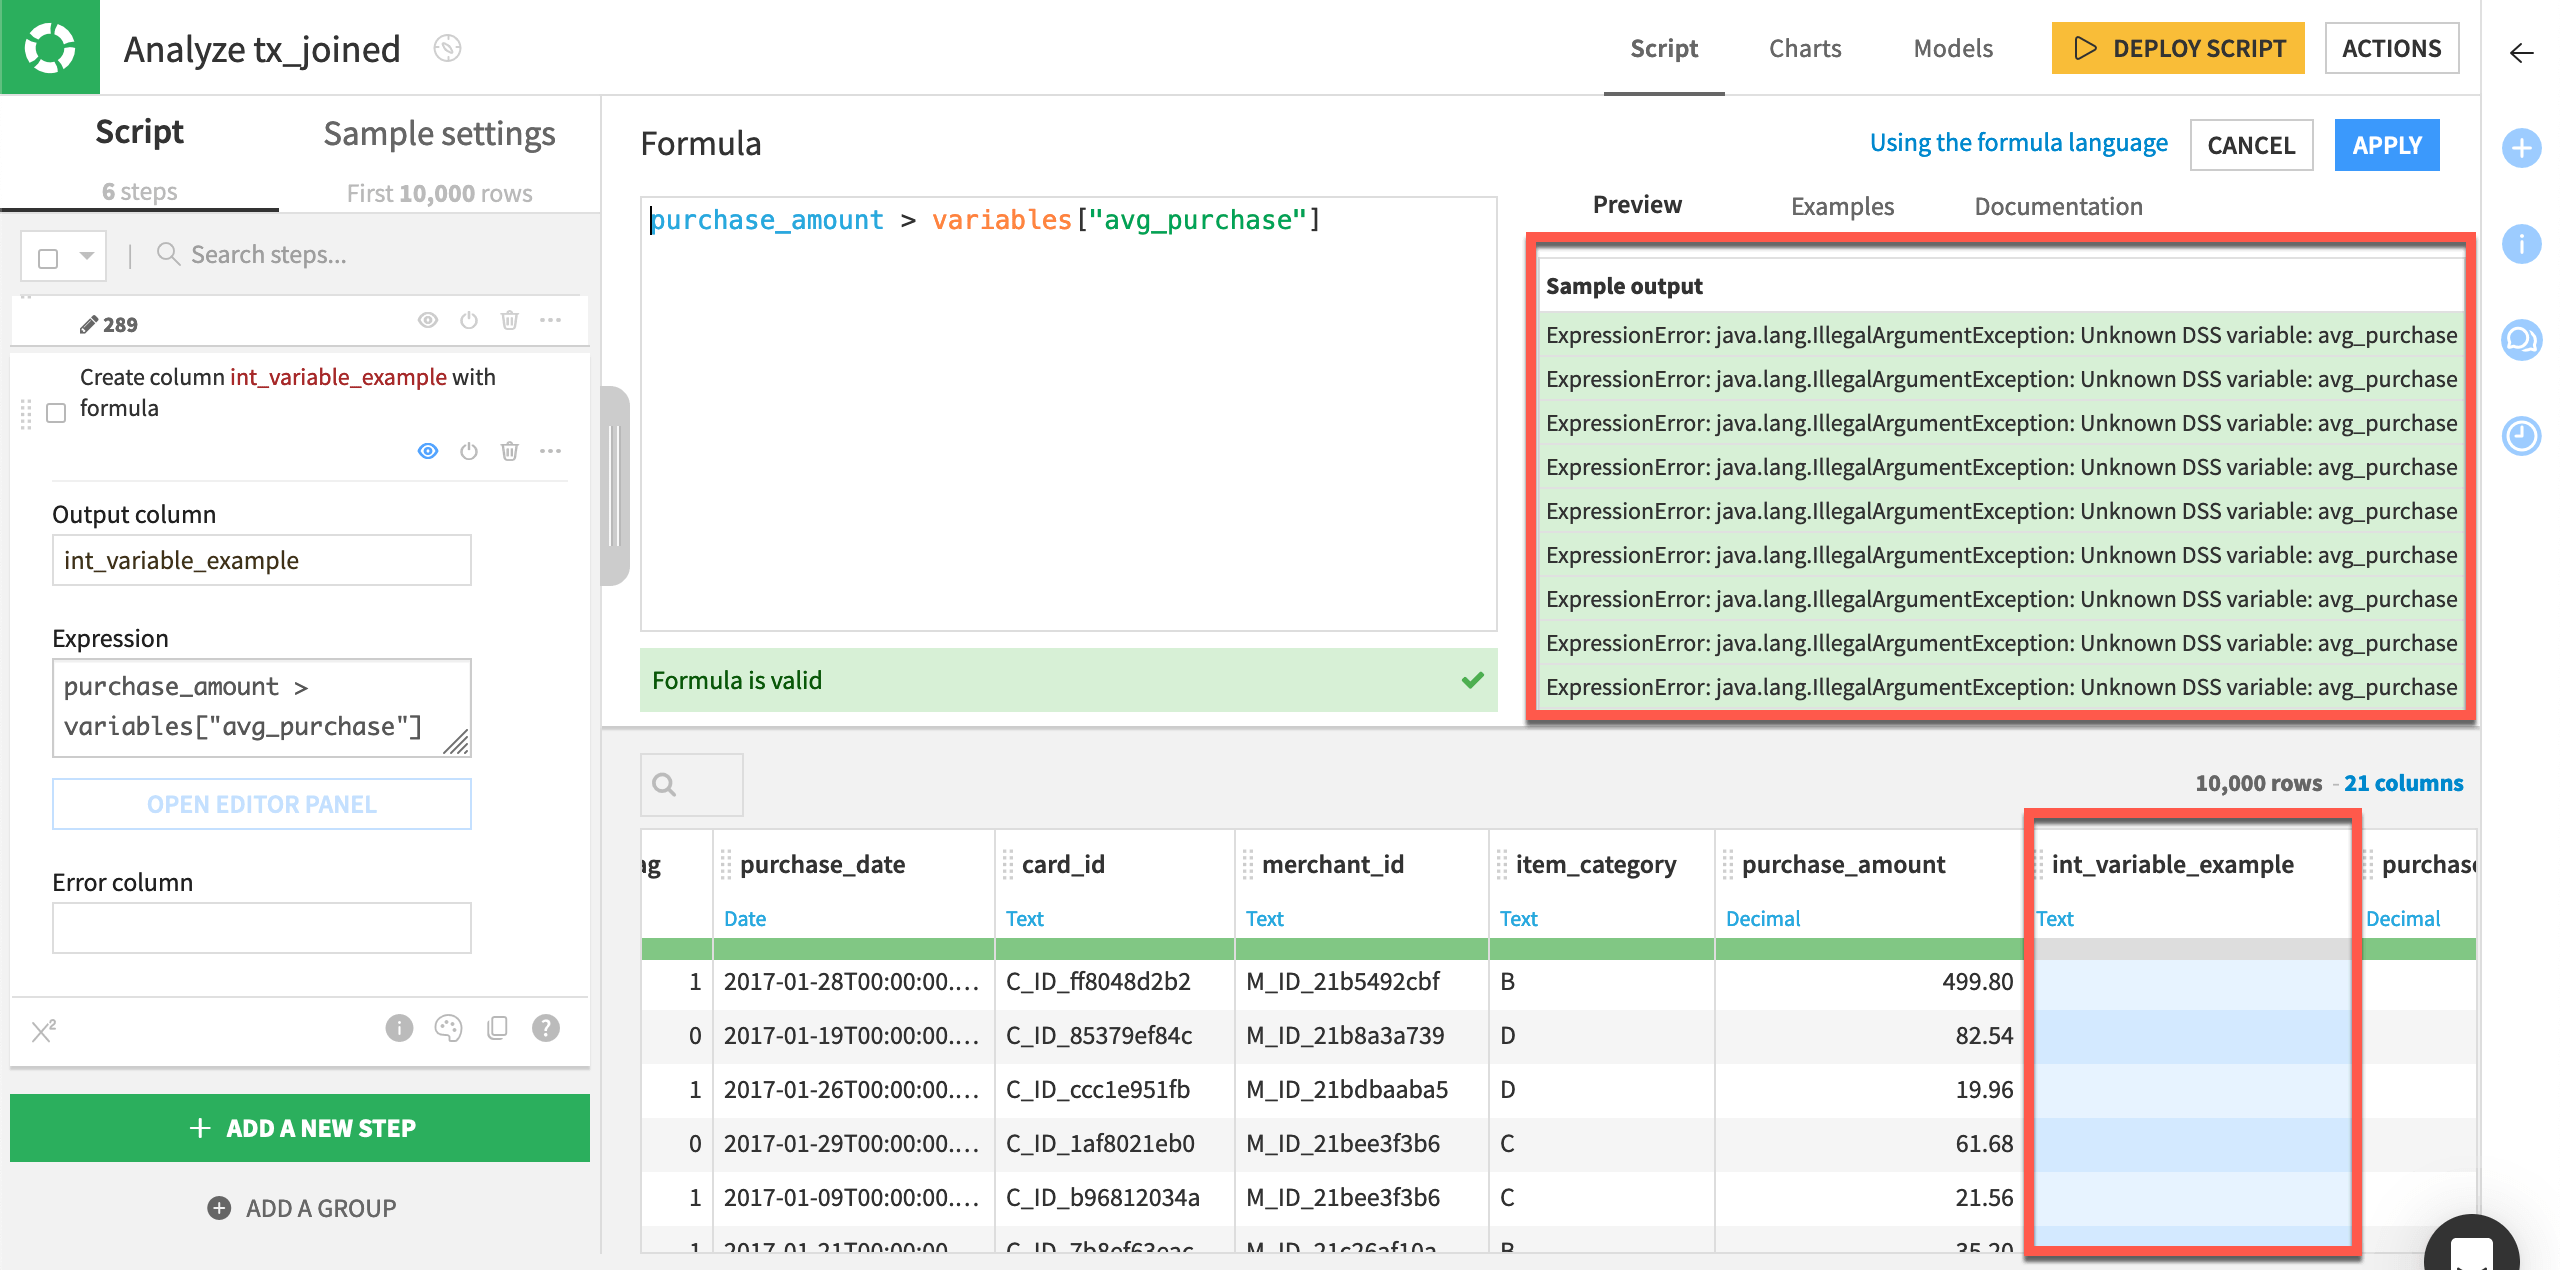
Once again, click Open Editor Panel to reopen the step that creates the int_variable_example column.
Try the other syntax with a variable that doesn’t exist, for example:
purchase_amount > variables["avg_purchase"].Note how the formula is valid, but the sample output displays errors.
Click Apply, and observe that there is an empty int_variable_example column instead of an error in the script.
Retrieve a string variable#
Now try retrieving a string variable in a formula.
In the script, click + Add a New Step.
Choose a Formula.
Name the output column
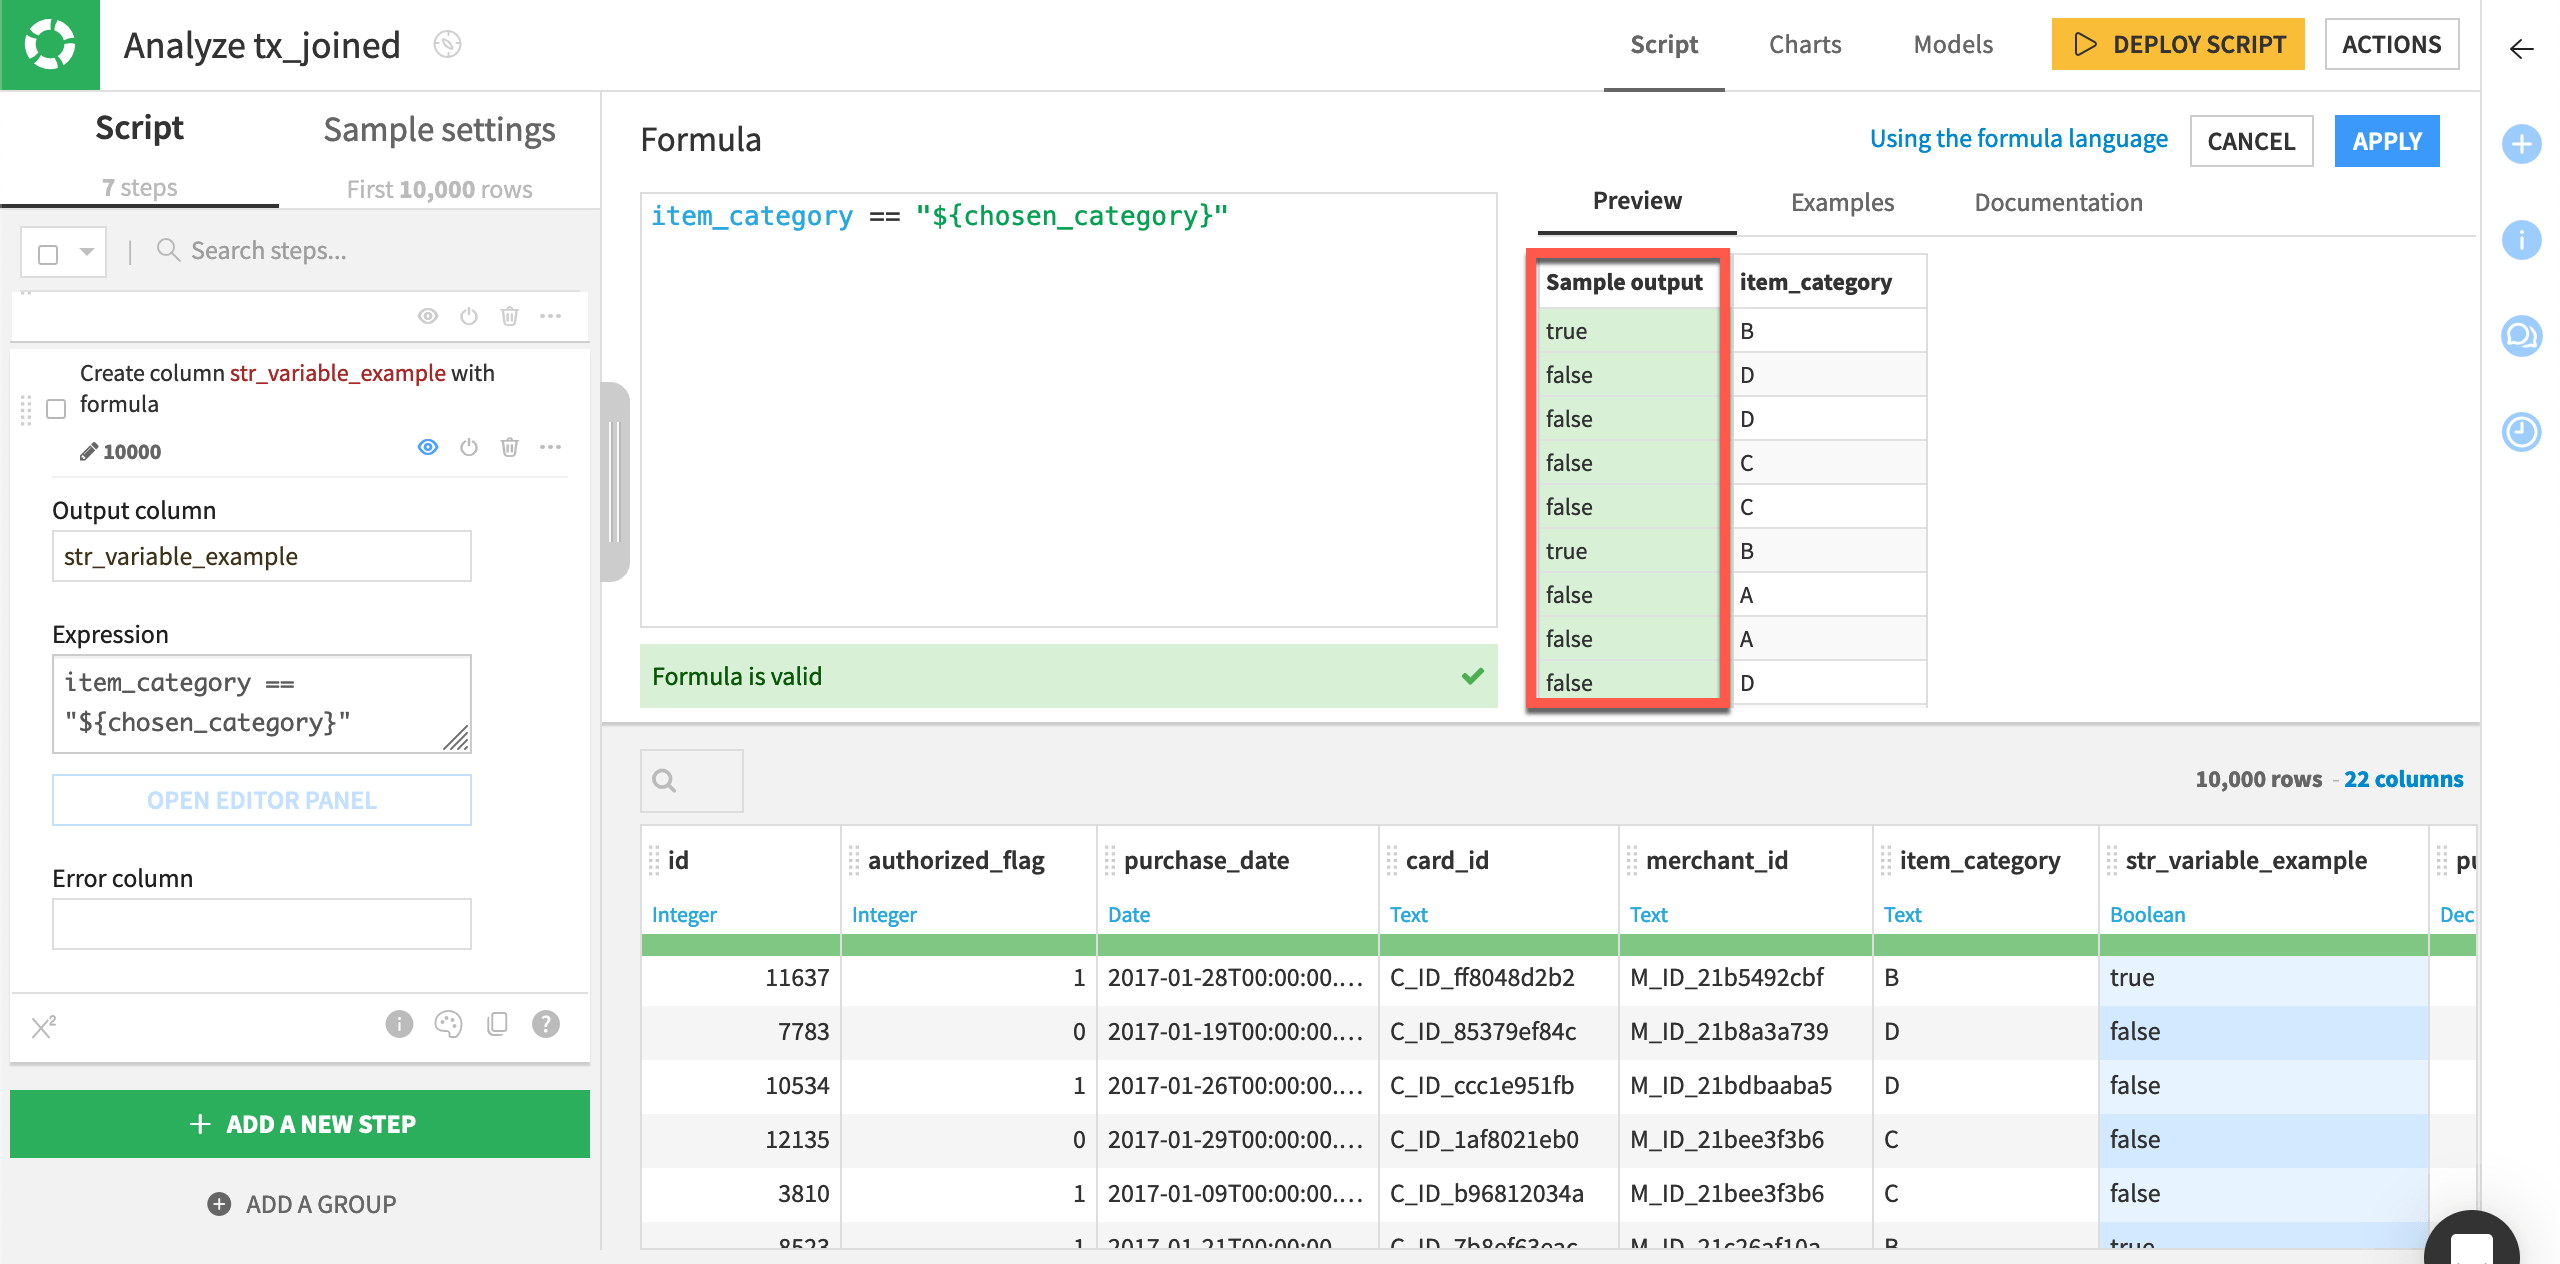
str_variable_example.Provide the formula
item_category == variables["chosen_category"], and view the sample output of true and false values in the preview.Now to demonstrate the difference between variable syntaxes, switch to the formula
item_category == ${chosen_category}, and compare the sample output.

This is a valid formula, but all output values are false. What happened to the true values?
Recall that this syntax performs a verbatim replacement. Therefore, it gets evaluated as item_category == B. What you actually need though is item_category == "B". You need to provide these quotes yourself.
Edit the formula to
item_category == "${chosen_category}".Observe the return of true values in the sample output, and click Apply.
Retrieve a variable in a visual recipe condition#
Formulas aren’t the only location where you can use variables. For example, many visual recipes have pre-filter and post-filter steps, and variables are often helpful here.
Take the Join recipe in this Flow for example. Before the Join step executes, the Join recipe pre-filters the tx dataset on a particular month. In the current project, this value is hard-coded so let’s replace it with a variable.
Variables inside a conditional filter#
These kinds of pre-filtering and post-filtering conditions lend themselves to a verbatim replacement offered by the ${variable_name} syntax.
Go back to the Flow, and open the Join recipe.
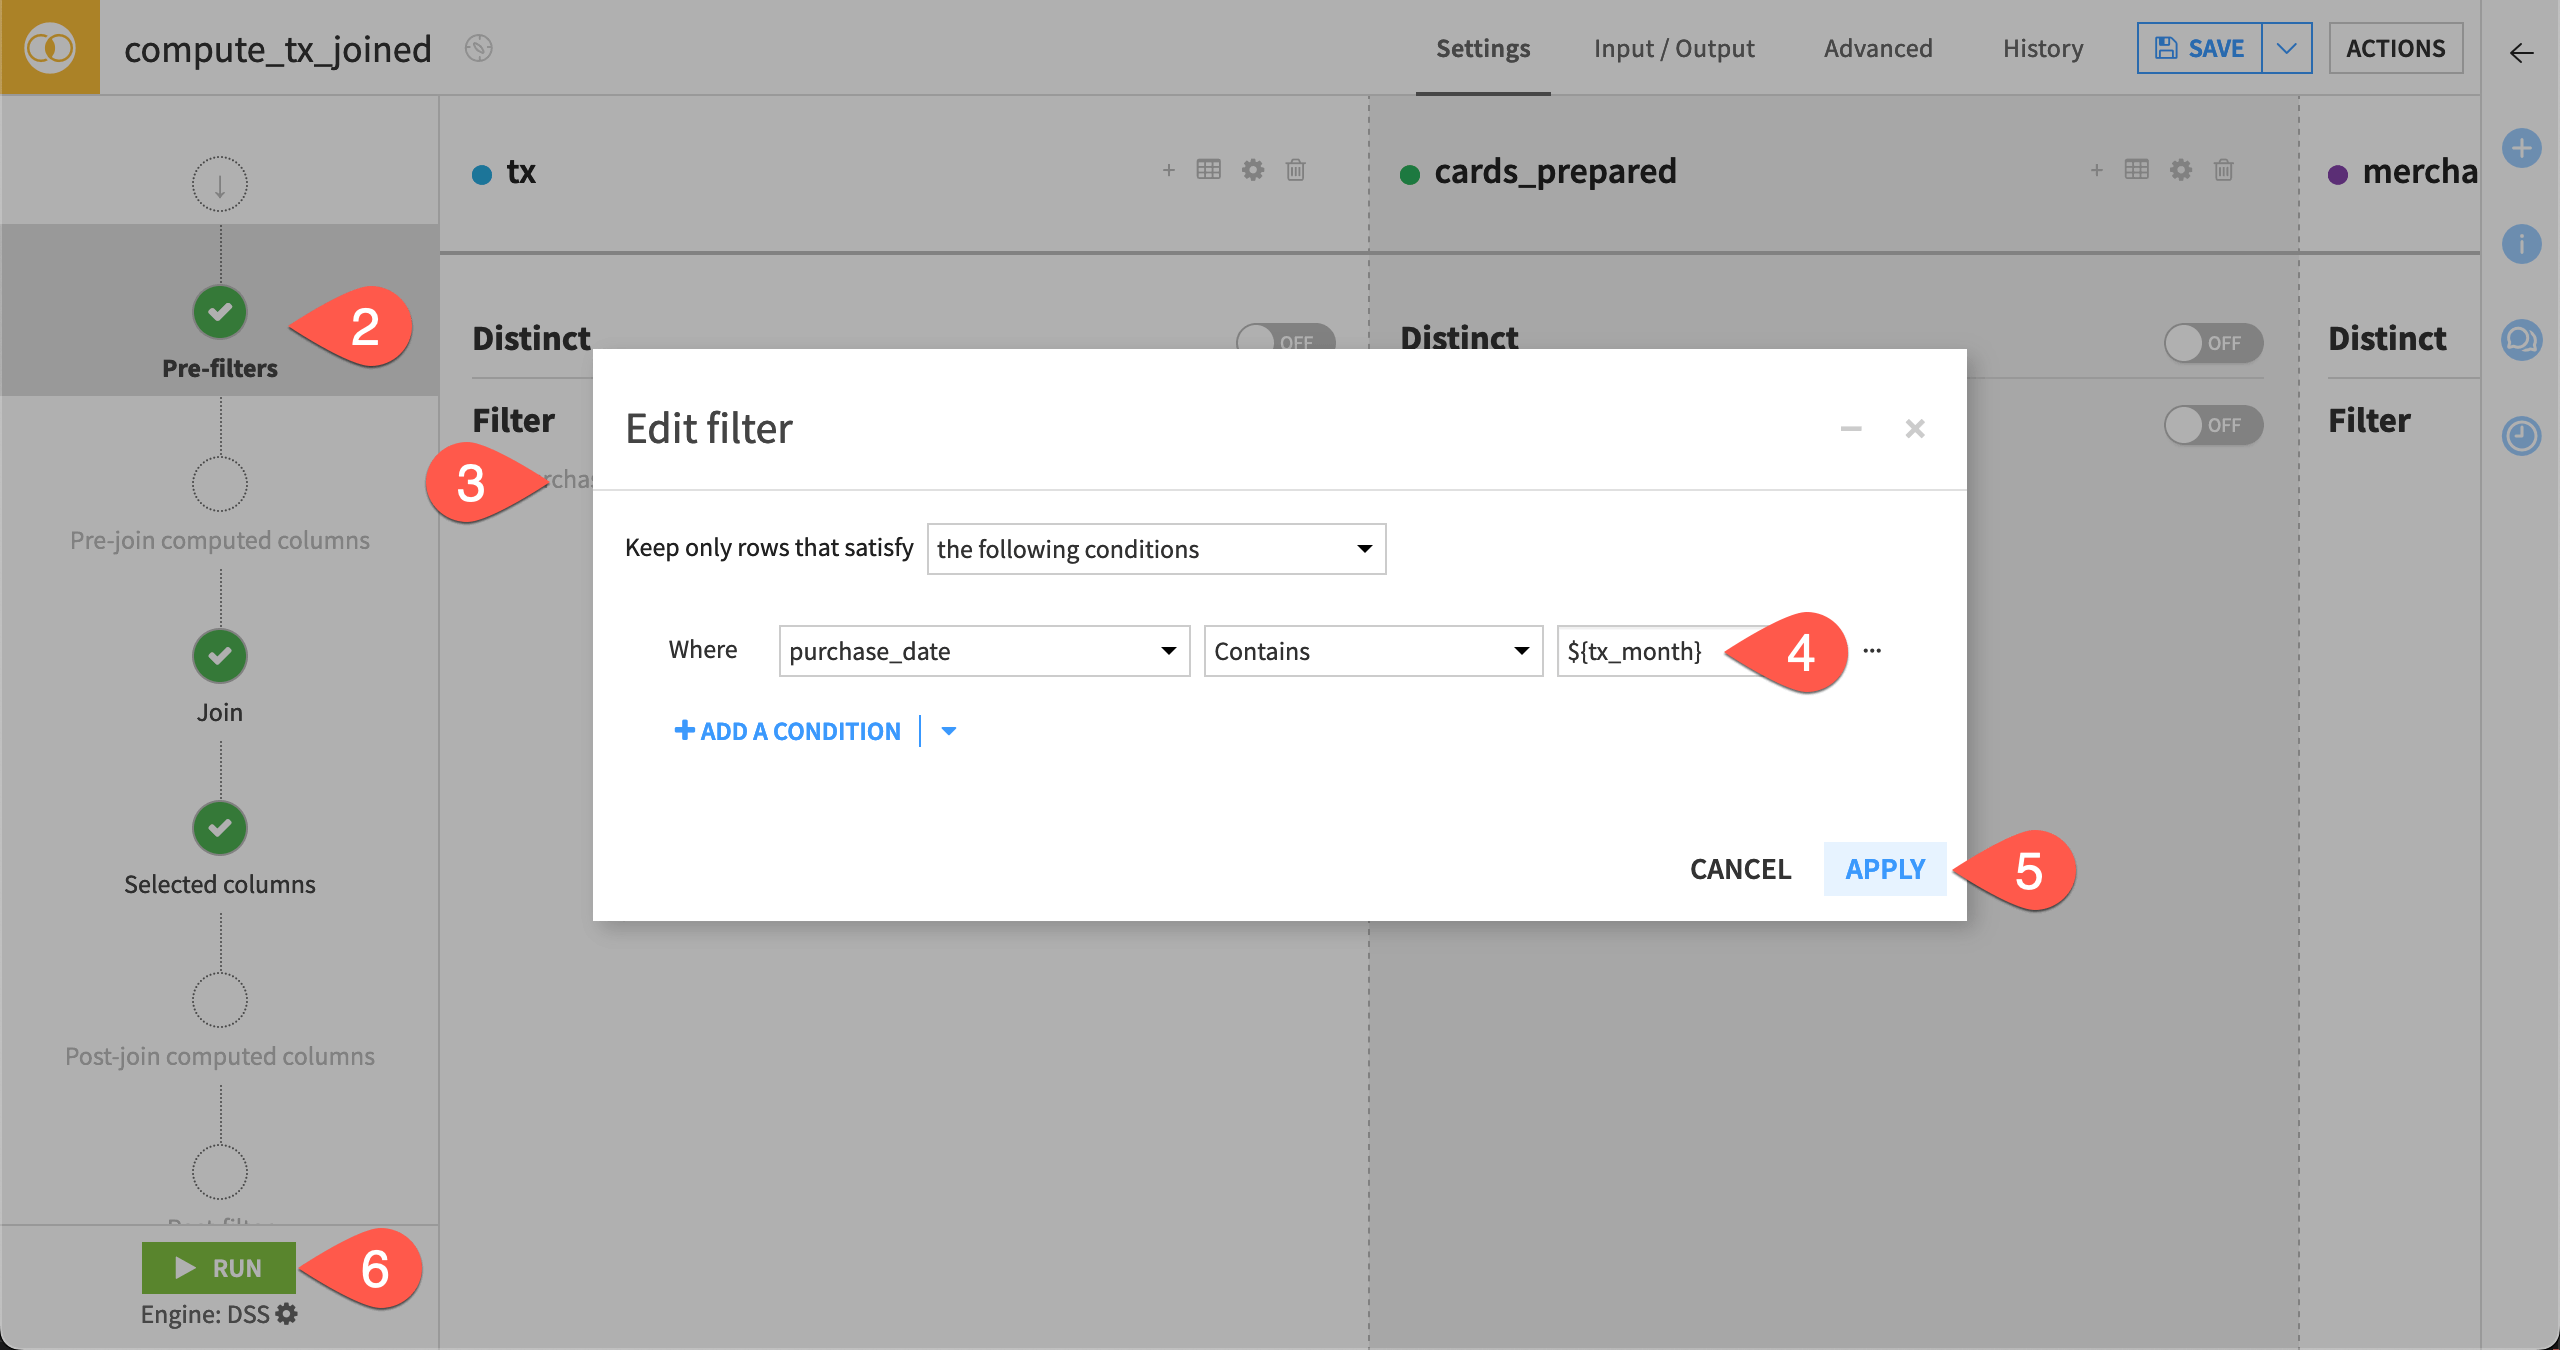
Navigate to the Pre-filters step.
Click on the filter name to edit the filter on the tx dataset.
Delete
2017-01, and replace it with${tx_month}.Click Apply.
Click Run to observe that the variable still applies the same rule. (The Run Only This option is sufficient for all builds in this tutorial).
Variables inside a formula#
You may want the freedom to filter using a formula instead of a GUI-based condition. In this case, both syntaxes are again available, following the same set of rules established above.
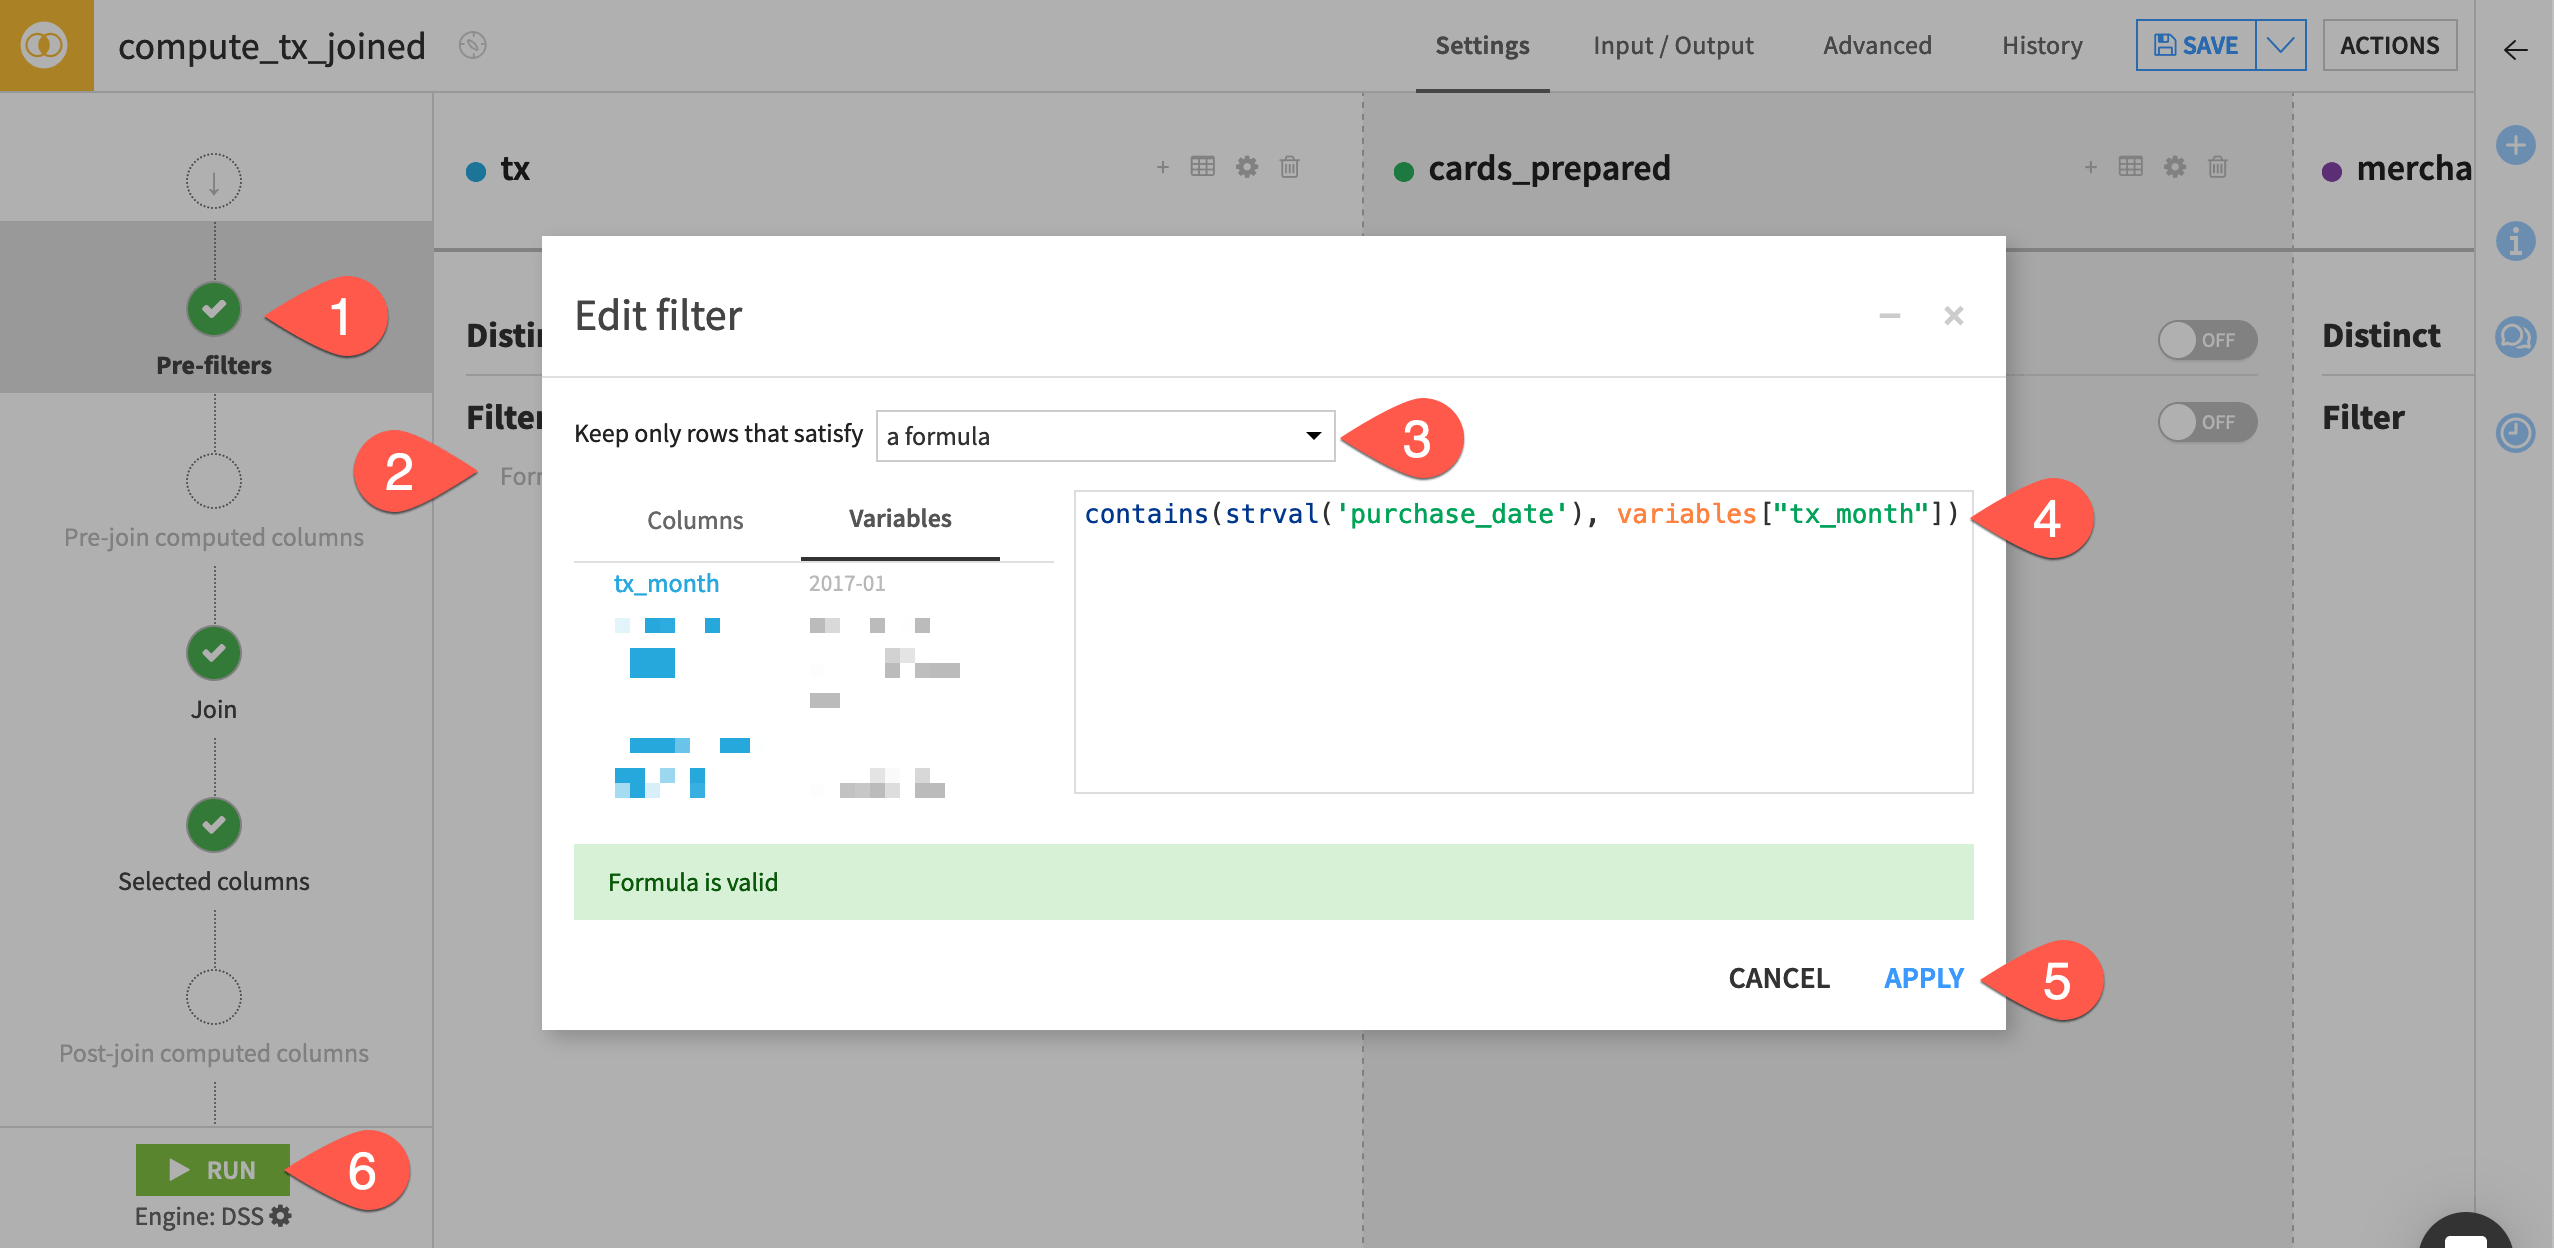
Return to the Pre-filters step of the Join recipe.
Click the filter name again to edit the filter on the tx dataset.
Switch from a condition to a formula.
For the second argument of the
containsfunction, provide eithervariables["tx_month"]or"${tx_month}". Remember to wrap the latter option in quotes so it’s read as a string.Click Apply.
Run the recipe once more to confirm it also works.
Tip
To gain further practice, try replacing the hard-coded pre-filter in the Pivot recipe found in this Flow with a variable!
Next steps#
In this tutorial, you learned how to define project variables as JSON objects and insert them into visual recipes, demonstrating both available syntaxes.
If you are working with variables, you’re likely getting closer to a production workflow. The next Dataiku feature you may wish to explore is Flow zones.
See also
See the reference documentation to learn more about Custom variables expansion.