
Concept | Prompt Studios and Prompt recipe#
Prompts are the input to a Generative AI model such as a large language model (LLM). You can modify and craft prompts to achieve a desired outcome — a process known as prompt engineering.
Prompts guide the model’s behavior and output, but they don’t modify the underlying model.
Prompt engineering in Dataiku#
In Dataiku, Prompt Studios and the Prompt recipe work together to test and iterate on LLM prompts, then operationalize them in your data pipeline.
Prompt Studios and the Prompt recipe allow you to securely connect to LLMs either through a Generative AI service or a private model, including open-source models. You can first experiment with different prompt designs in Prompt Studios, before deploying a desired prompt in your data pipeline with the Prompt recipe.
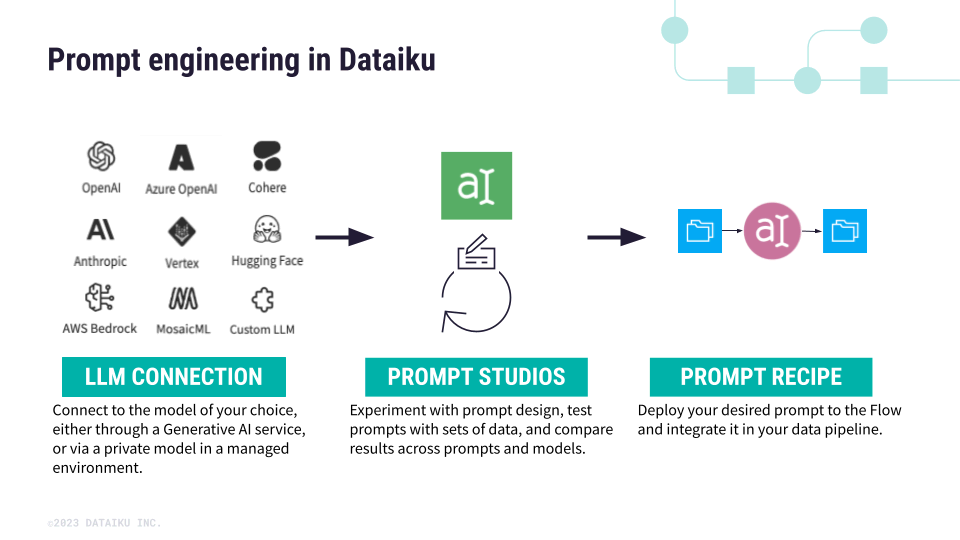
Prompt Studios#
Use Prompt Studios to experiment, test, and fine-tune prompts and models for your specific use case. You can find Prompt Studios in the top navigation bar under the Visual Analyses menu.
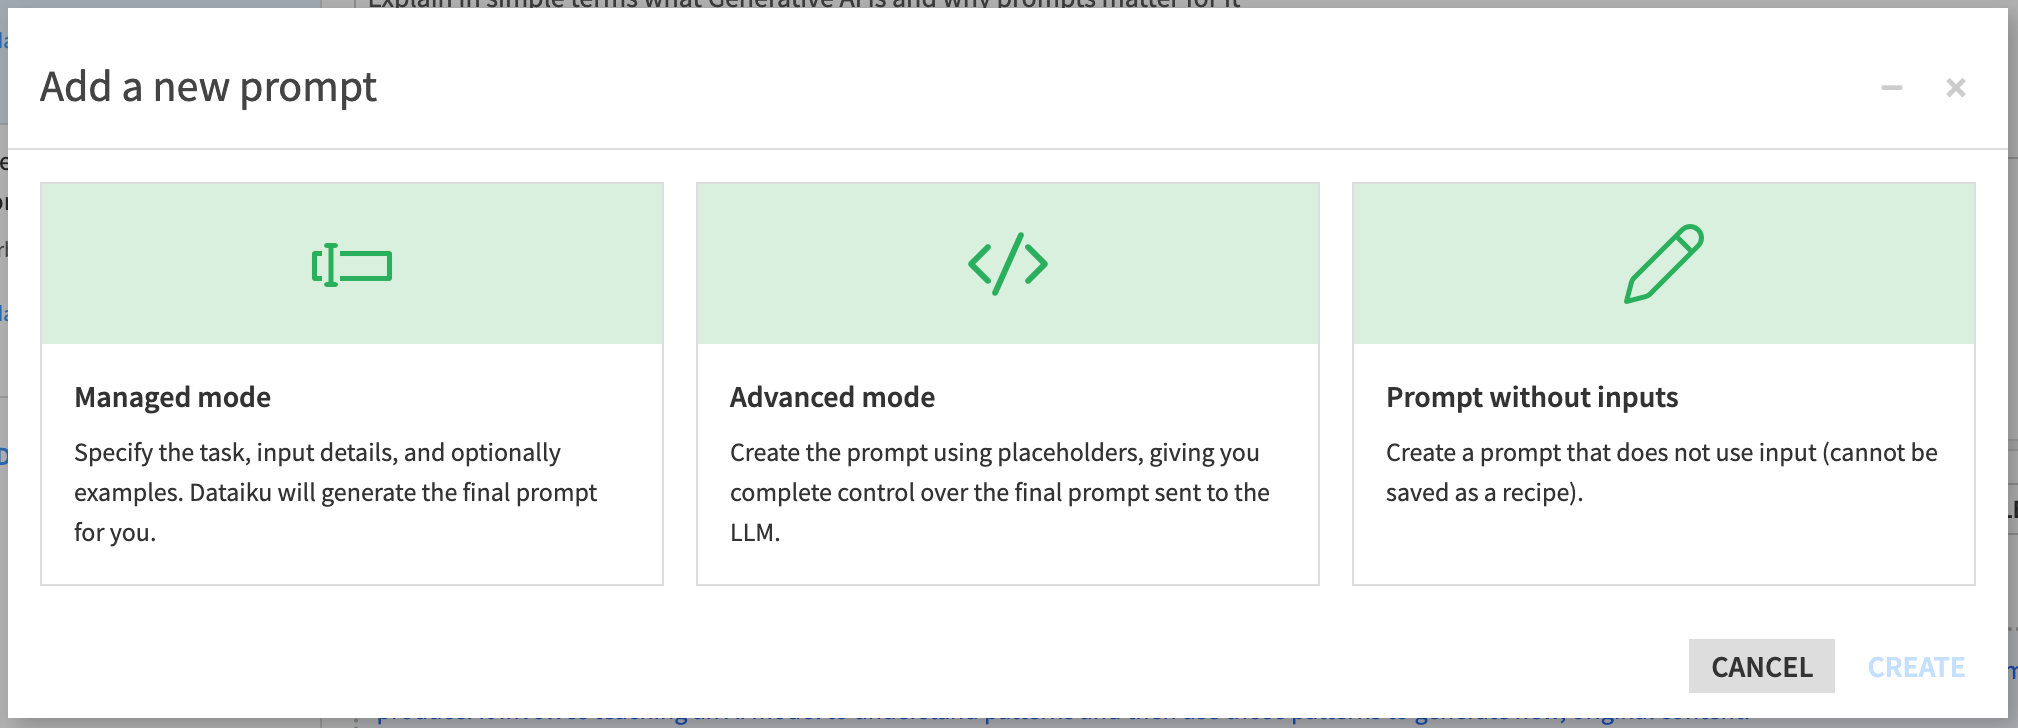
Within a Prompt Studio, you can create multiple prompts and iterations, and even compare them. For each new prompt, you can choose from four modes:
Mode |
Description |
|---|---|
Managed mode |
Specify the task using plain language, and Dataiku generates the final prompt for you. You can use templates for common tasks. |
Advanced mode |
Create the prompt and examples using placeholders, giving you more control over the final prompt sent to the LLM. |
Chat |
Run chat sessions with an LLM to experiment in a multi-turn setting before deployment (such as a conversational agent). |
Prompt without inputs |
Create a one-off prompt that queries the LLM and is designed for quick experimenting. These prompts can’t be converted into a Prompt recipe and their results can’t be compared in Prompt Studio. |
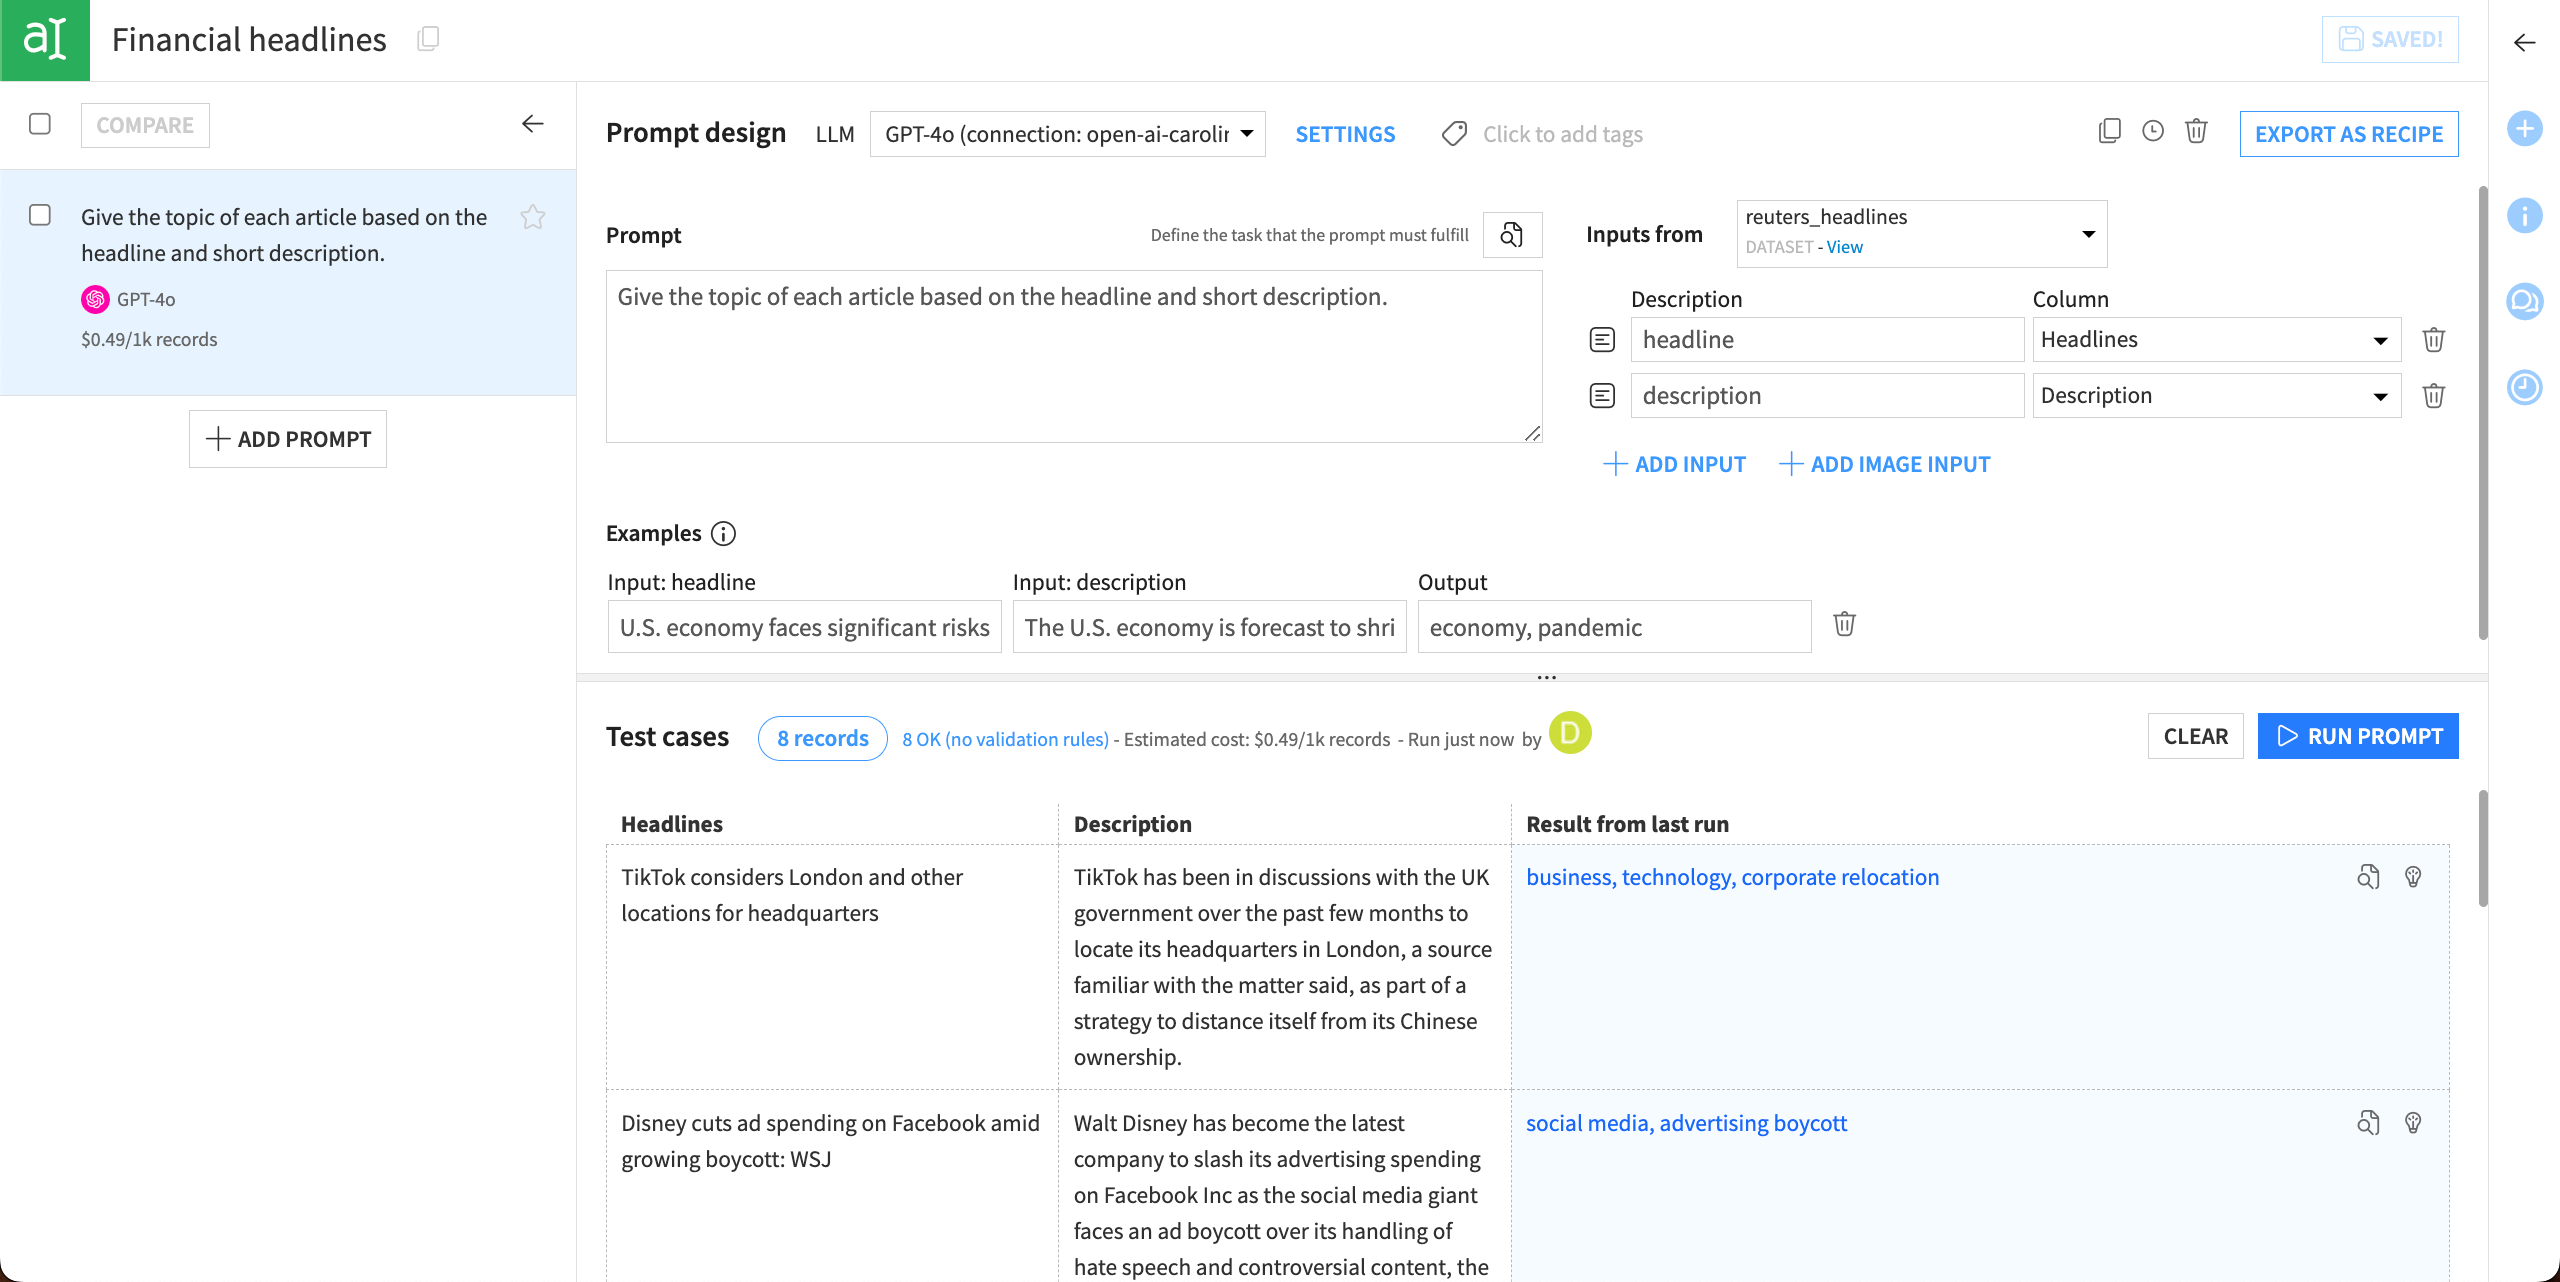
Designing prompts#
The Prompt design steps will differ depending on the mode you’re using. In general, this process includes the elements described below.
Element |
Description |
|---|---|
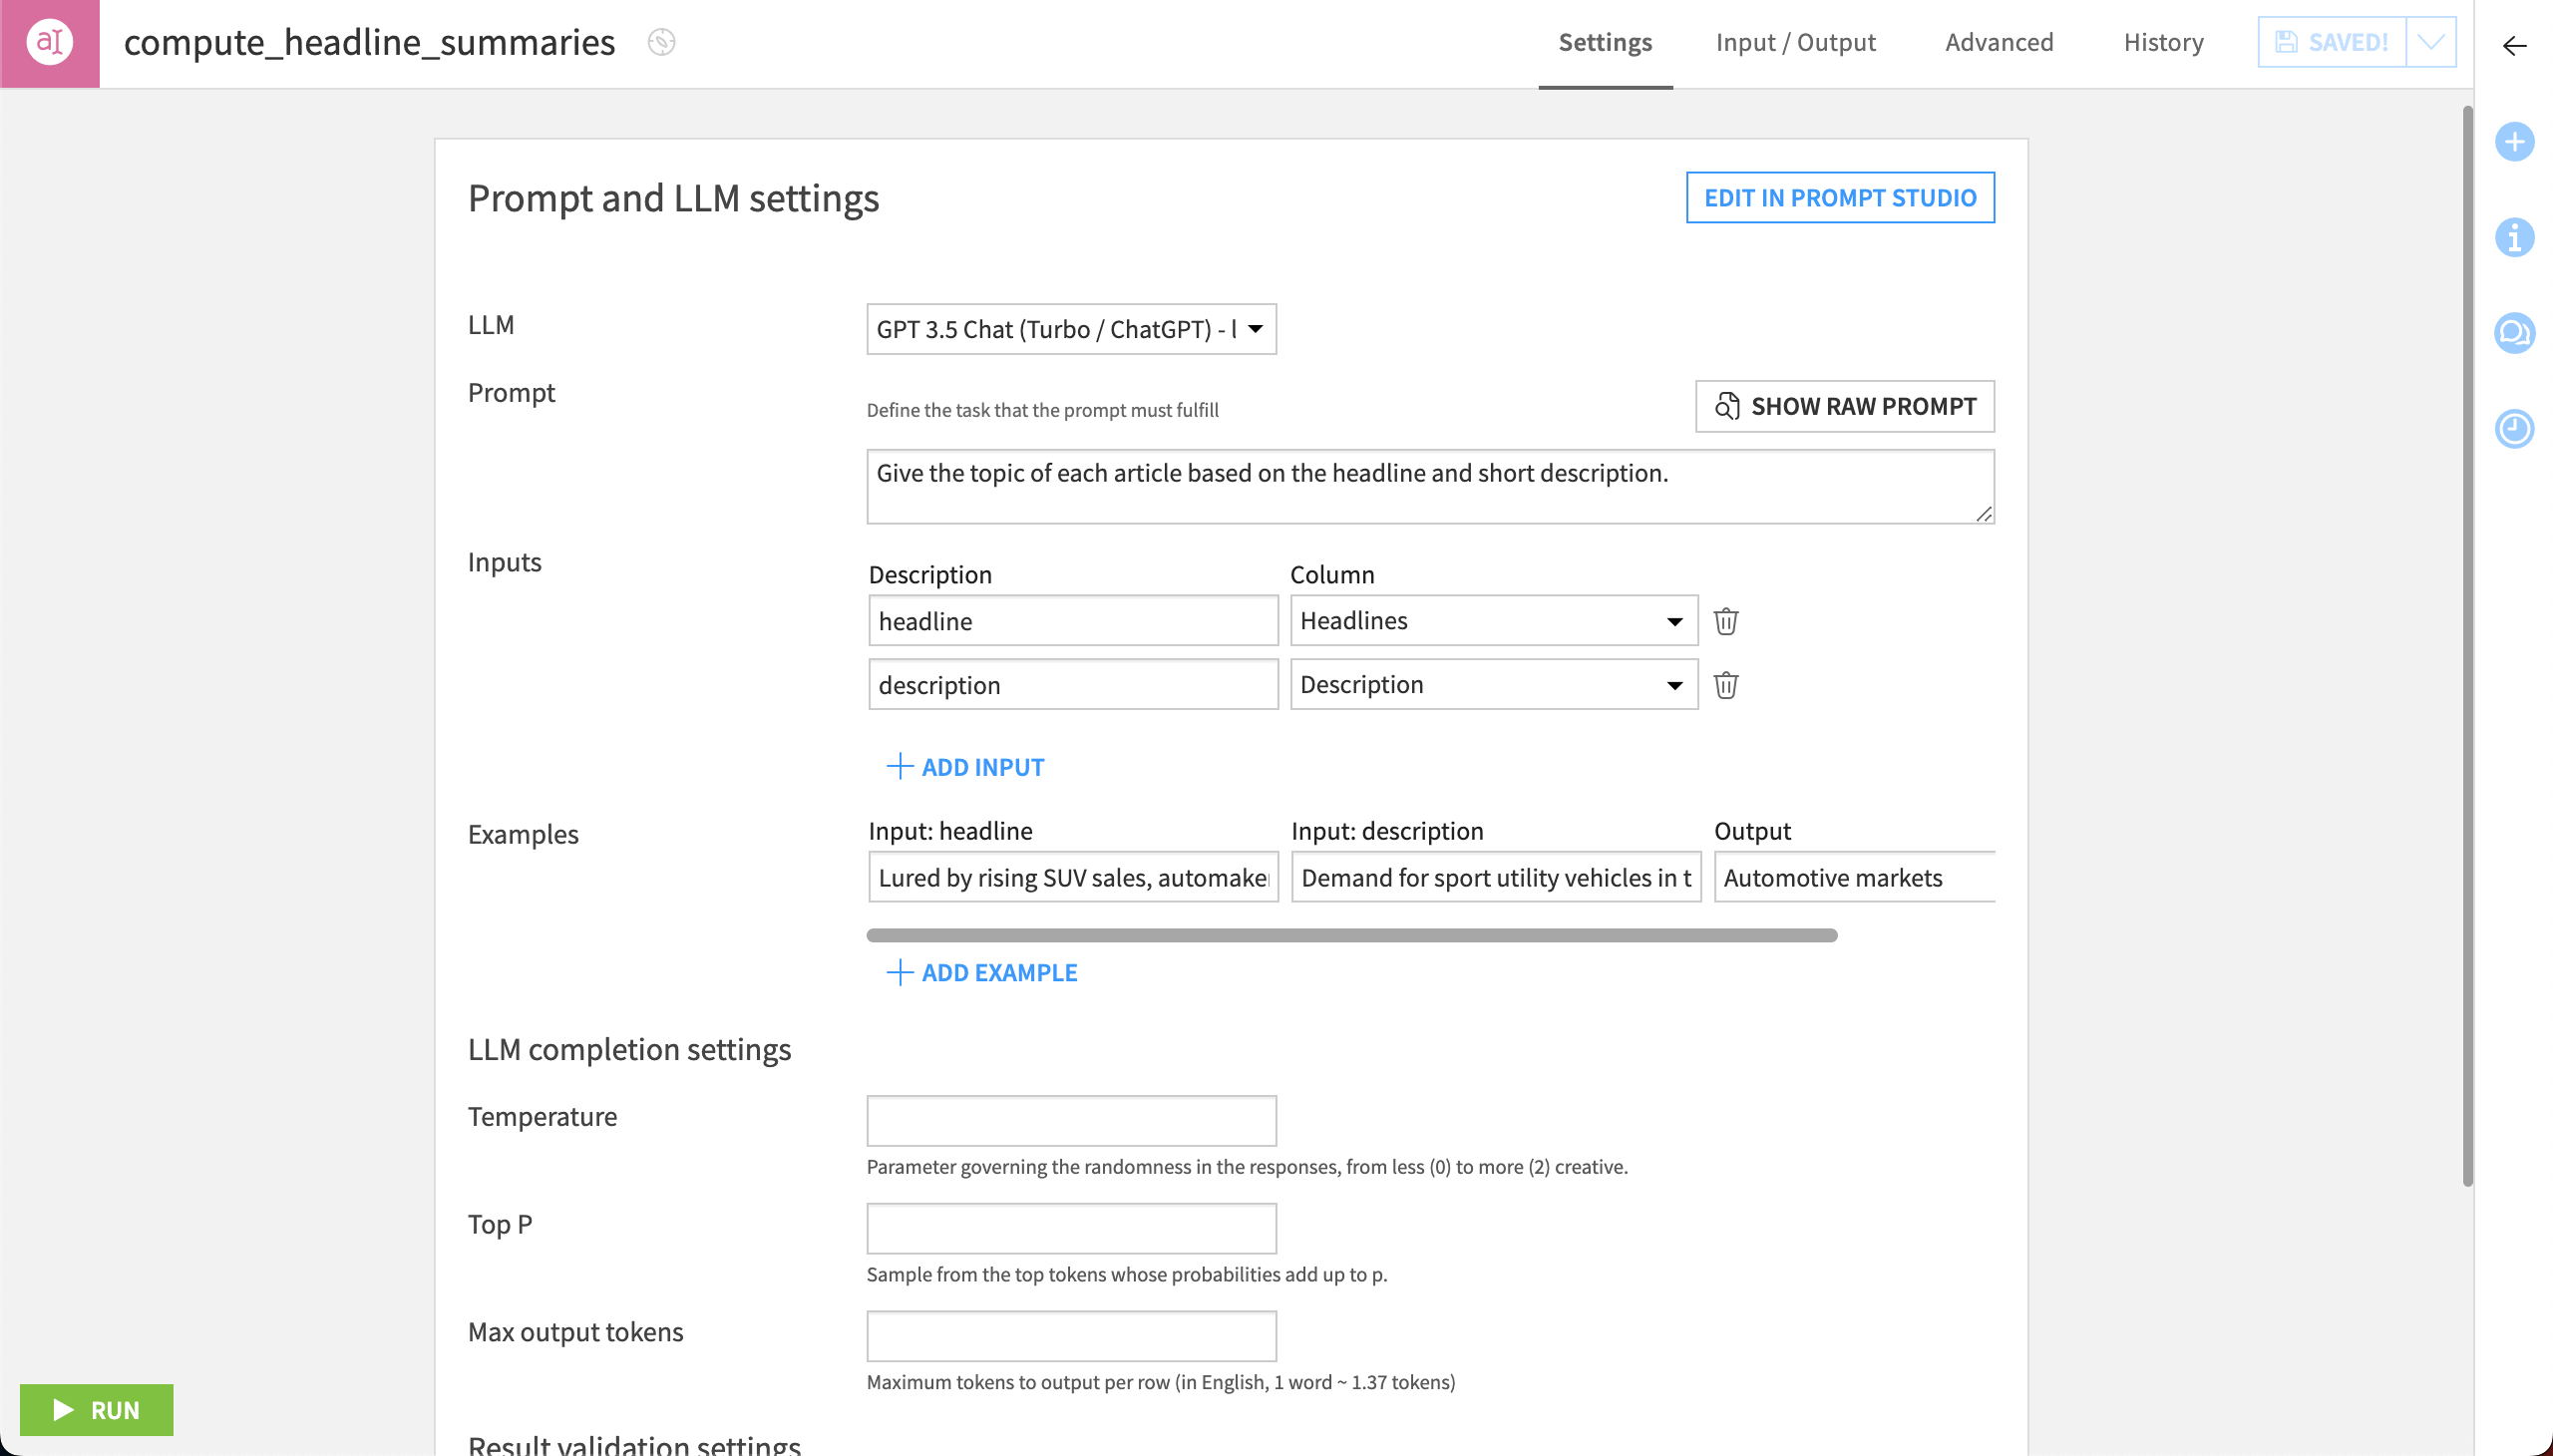
Prompt |
Includes the main instructions to the LLM. |
Inputs |
Lists the variables inserted into the prompt. You can map the inputs to columns from a dataset and use values from the dataset as test cases to check the prompt’s output. You can also choose to manually write test cases. |
Examples |
Provides sample input-output pairs to guide the model’s expected results. |
Test cases |
Evaluates prompt performance using either dataset rows or manually written examples. |
You can quickly iterate on your prompt design, including updating the task or adding new inputs, examples, and test cases, before deploying your prompt.
Each time you run inference on your prompt and test cases, the model will also return an estimated cost for 1,000 records, helping you manage costs associated with LLM usage.
Tip
You can access pre-written prompts that are built into Dataiku or shared in your company’s Enterprise Asset Library by clicking on the book icon (![]() ) in the Prompt window.
) in the Prompt window.
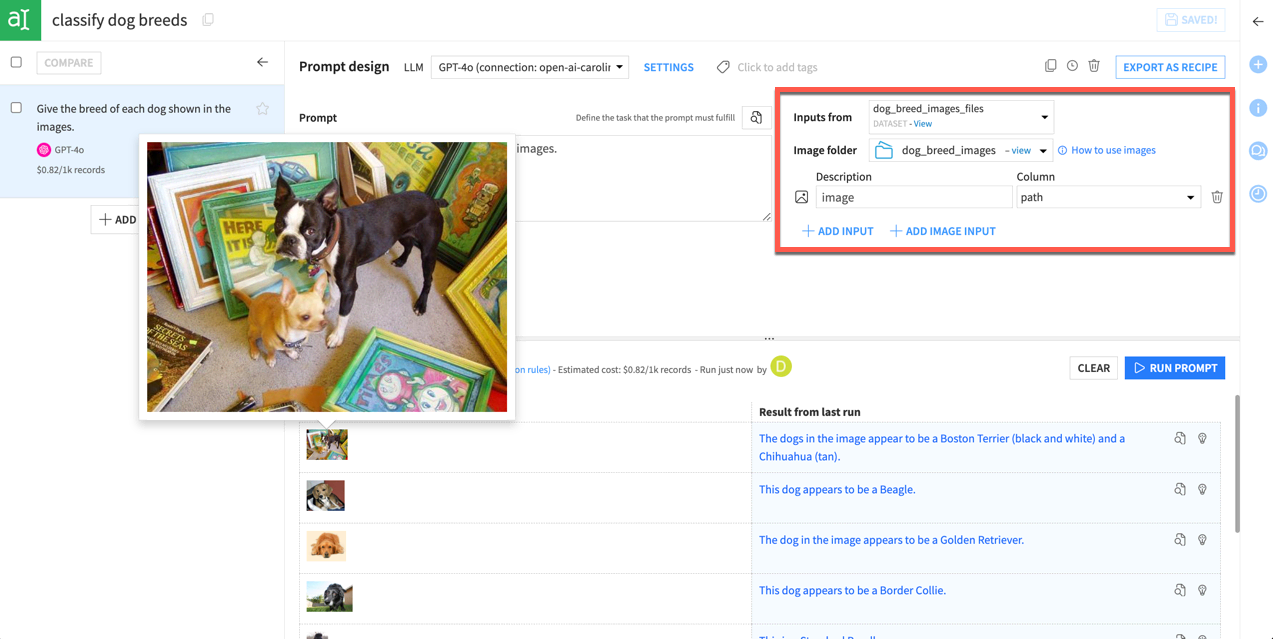
Using images in prompts#
You can also process images within Prompt Studios for use cases where visual input is useful. To do this, you will need:
Dataiku version 13.2 or above.
A connection to an LLM that supports images as inputs.
Images stored in a managed folder, which you can connect to within Prompt Studios. (See How-to | Prepare images for use in a model for instructions.)
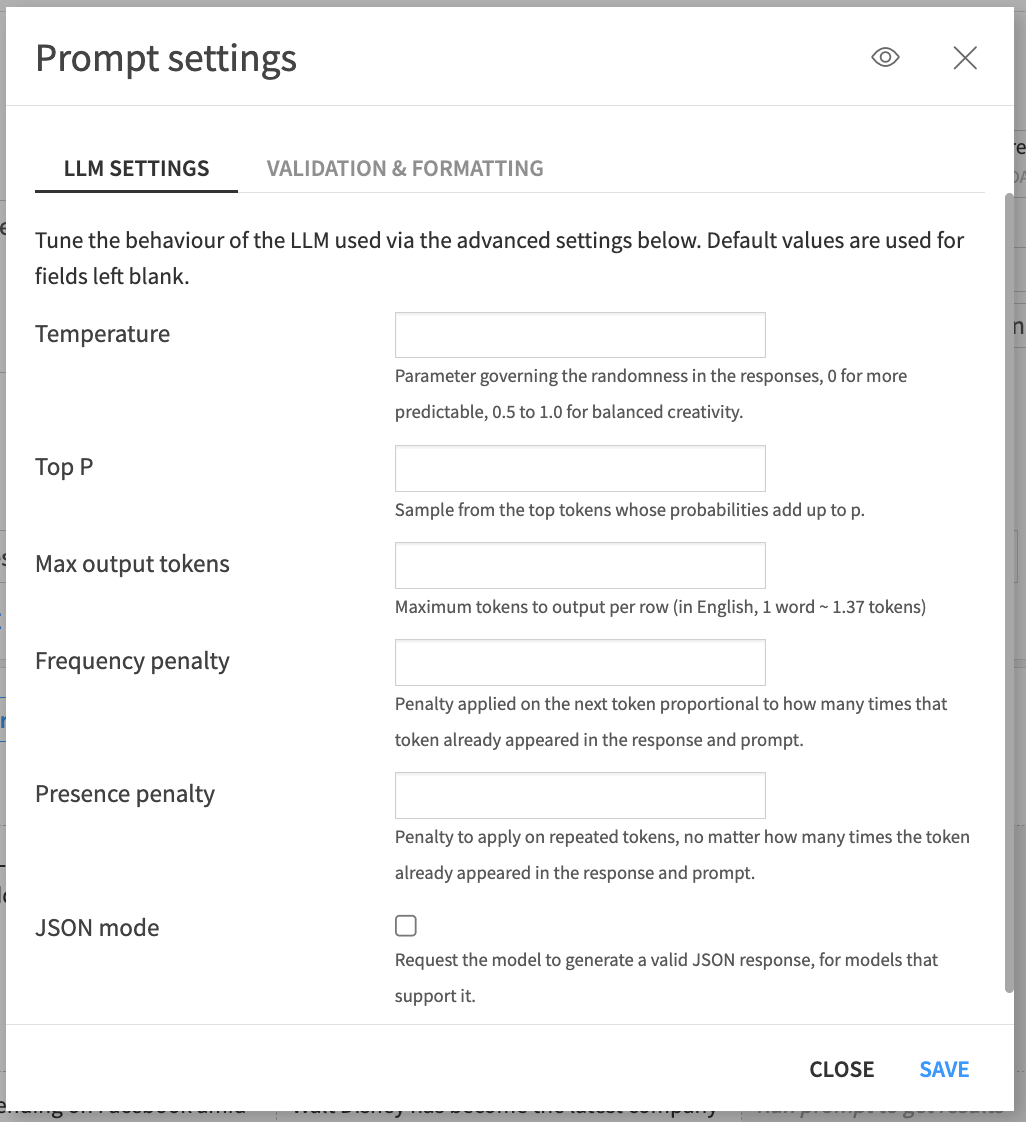
Settings#
You can change several hyperparameters or set validation rules for the prompt.
Tab |
Description |
|---|---|
LLM settings |
Changes hyperparameters such as temperature or the maximum output tokens, that control the behavior of the LLM. |
Validation & formatting |
Sets rules such as validating the expected output format as a JSON object or forbidding certain words from the output. You will receive a warning if the output isn’t validated. |
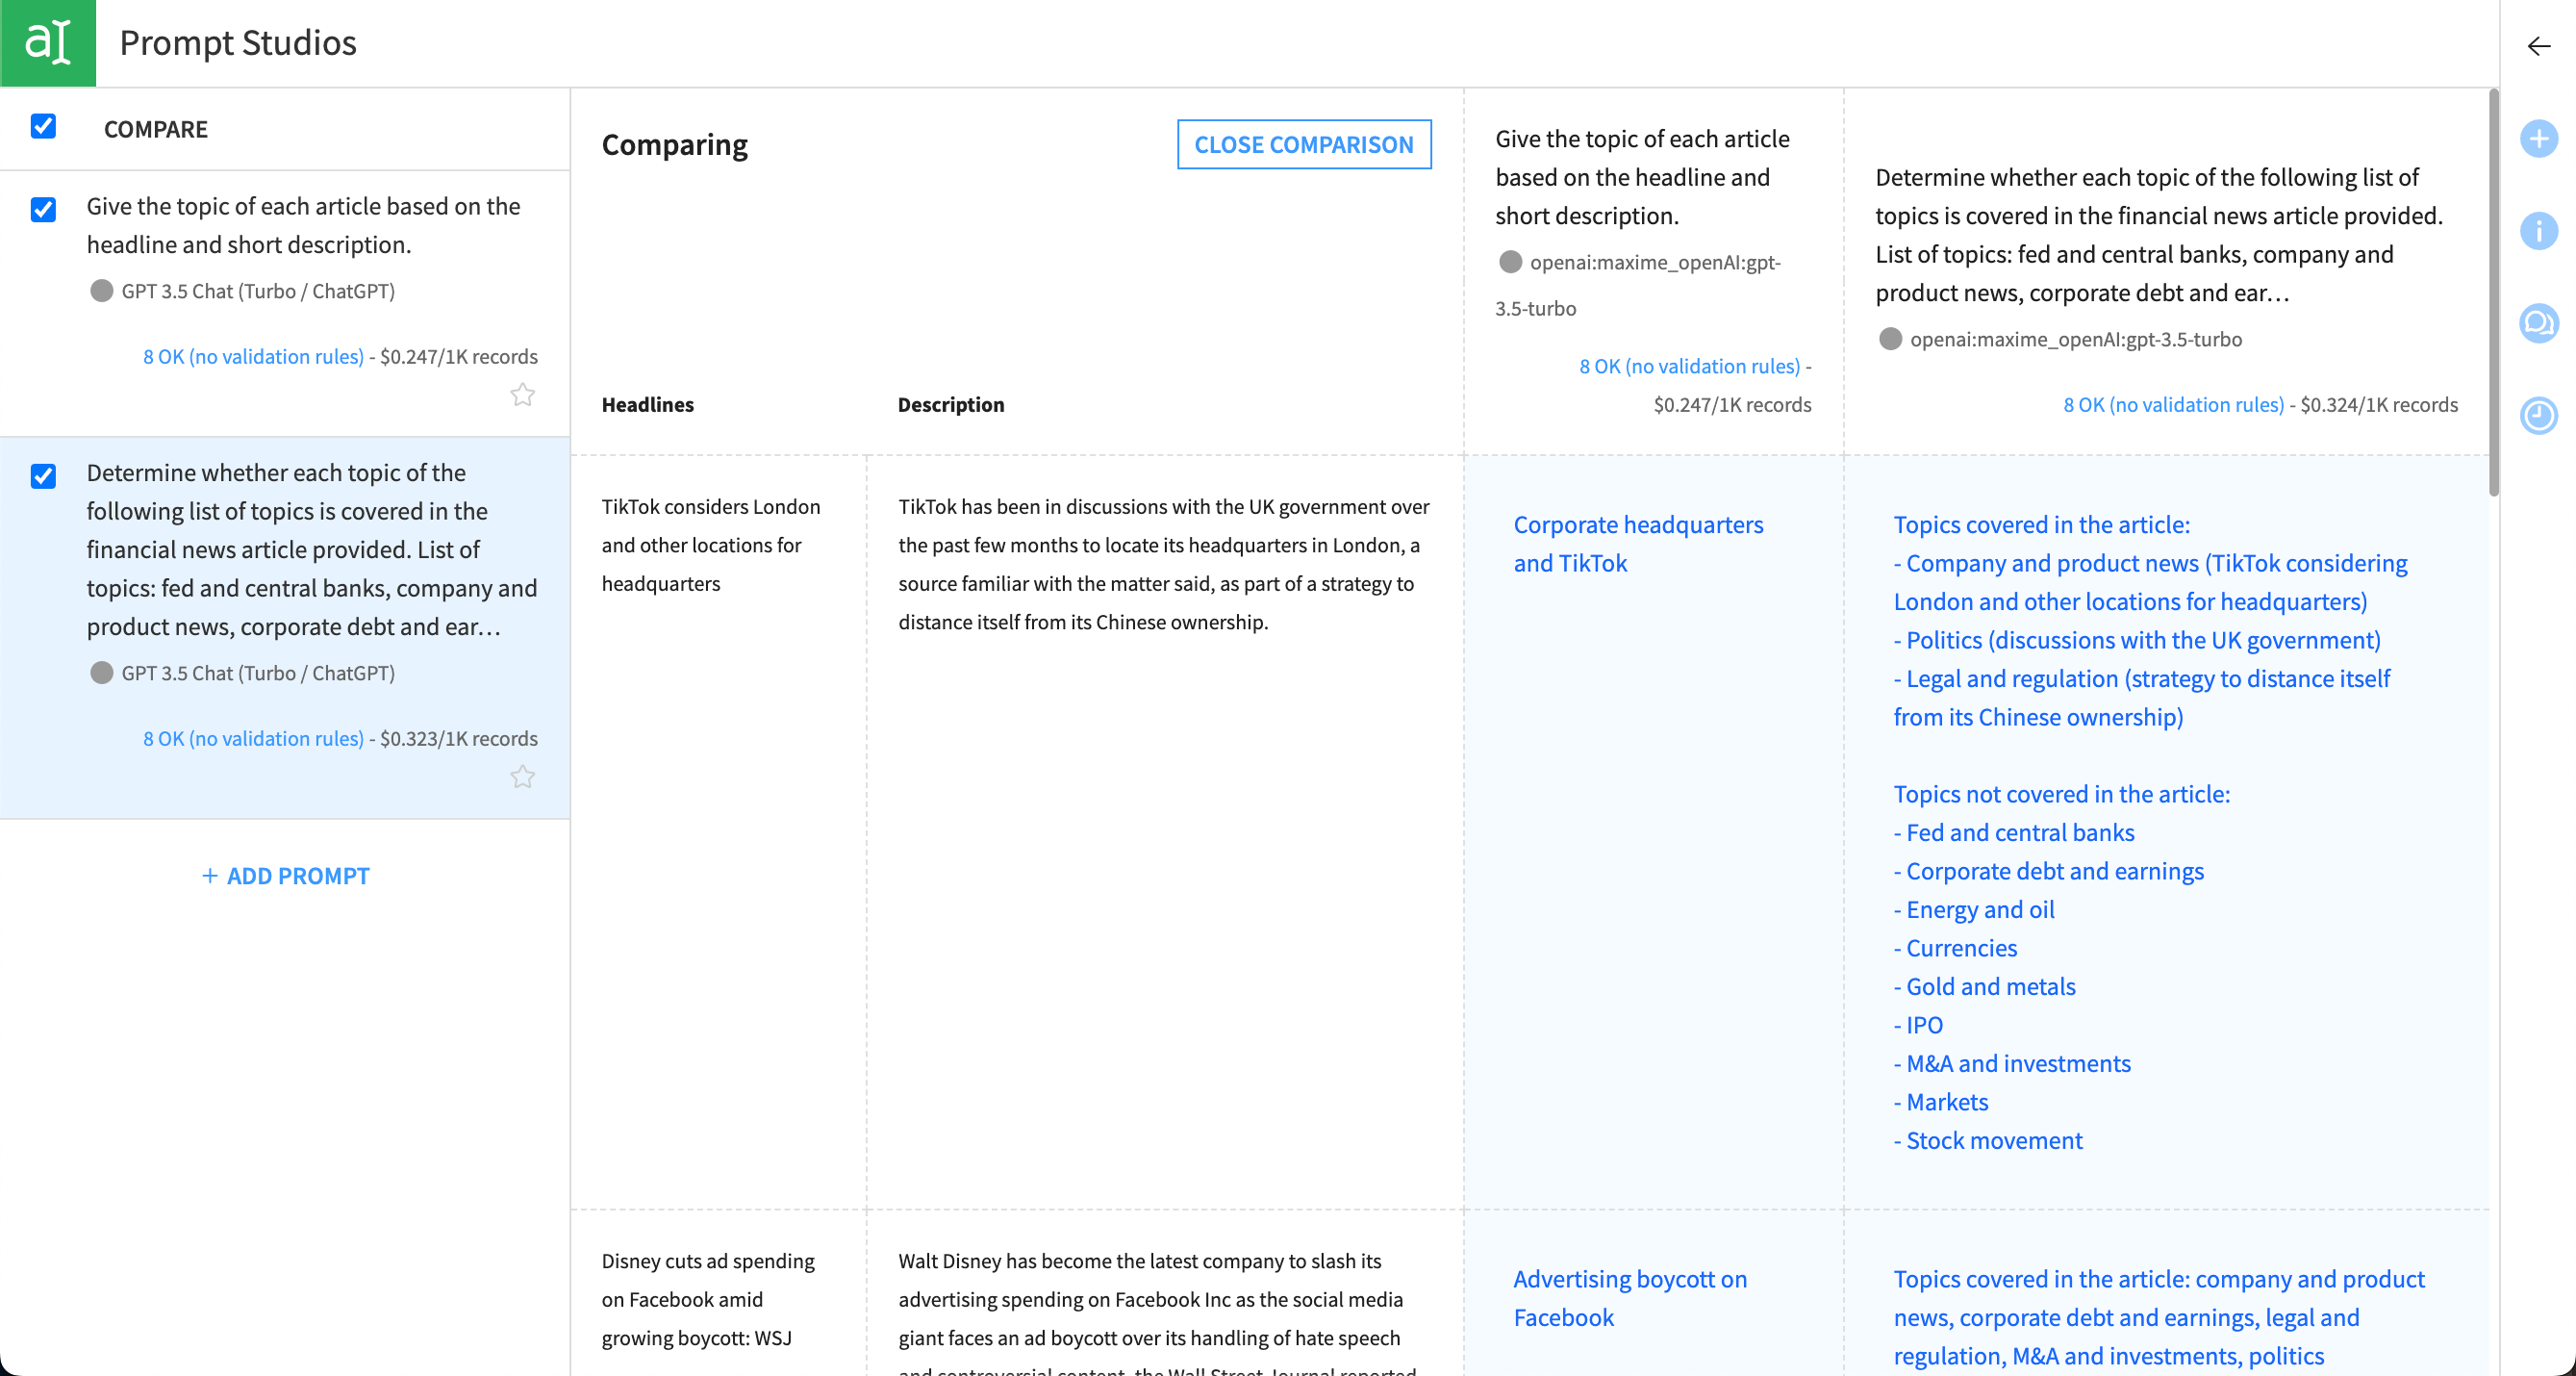
Comparing prompts#
Prompt Studios track your prompts in the left panel. You can navigate between prompts, view each prompt’s history, restore previous versions, and duplicate prompts.
When using managed or advanced modes, you can also compare the output of multiple prompts by selecting them in the left panel and clicking Compare. Prompt Studios will build a table comparing the outputs and costs of the selected prompts.
Tip
Prompt Studios also tracks each run of a prompt as you iterate. To view the version history of a prompt and revert back to any version, click on the clock icon in the top right of the Prompt design screen.
Prompt recipe#
The Prompt recipe puts your prompt into action on a dataset. It generates an output dataset and appears in the Flow.
You can create a new Prompt recipe directly from Prompt Studios by saving a prompt template that’s mapped to a dataset as a recipe. This allows you to experiment with your prompts before operationalizing them with the recipe.
You can also create a new Prompt recipe directly from the Flow or from the Actions panel of a dataset. With this method, you can write a managed prompt or an advanced prompt directly in the recipe.
Next steps#
Continue learning about prompt engineering with LLMs by working through the Tutorial | Prompt engineering with LLMs article.