
Tutorial | Classify text with Generative AI#
Get started#
Dataiku allows you to use large language models (LLMs) to classify your data using a visual recipe named Classify text. This automates the process so you don’t have to manually label the rows of your dataset like in supervised learning. Depending on your use case, you can use preset classes or define your own, and the LLM will automatically classify each row in your dataset.
As classification can use either task-based classes or classes specified by the user, this tutorial will guide you through two use cases:
Analyzing the sentiments in some product reviews using sentiment analysis.
Classifying news articles using user-specified classes.
Objectives#
In this tutorial, you will use an LLM classification with:
Model-defined classes to classify product reviews into three classes: positive, negative or neutral.
User-defined classes to classify some news articles into custom classes, based on the headlines.
Prerequisites#
To complete this tutorial, you’ll need:
Dataiku 12.3 or later.
An Advanced Analytics Designer or Full Designer user profile.
A connection to at least one supported Generative AI model. Your administrator must configure them beforehand in the Administration panel > Connections > New connection > LLM Mesh. Supported model connections include models such as OpenAI, Hugging Face, Cohere, etc.
Important
Using an LLM has a cost that depends on the selected model. This tutorial minimizes cost by using OpenAI’s Chat GPT-3.5 and small datasets. Feel free to choose another LLM as you can follow this tutorial regardless of your LLM choice.
Tip
You don’t need previous experience with large language models (LLMs), though it would be useful to read the article Concept | Classify text recipe before completing this tutorial.
Create the project#
From the Dataiku Design homepage, click + New Project.
Select Learning projects.
Search for and select Classify Text.
If needed, change the folder into which the project will be installed, and click Create.
From the project homepage, click Go to Flow (or type
g+f).
Note
You can also download the starter project from this website and import it as a ZIP file.
This tutorial uses two Flow zones, one for each use case.
News articles that are publicly available on Kaggle.
Product reviews from Amazon.
To reduce computation costs, you’ll work with a subset of 100 news articles and 21 product reviews.
Analyze the sentiments in product reviews#
This section explains how to classify product reviews using a sentiment analysis. In the end, all reviews will be tagged as positive, negative, or neutral.
Create the classification recipe#
The first step is to create the classification recipe from your dataset.
To do so:
From the Flow, in the Product reviews Flow zone (in green), select the product_reviews dataset.
In the Actions tab of the right panel, under the GenAI recipes section, click the Classify text recipe. It opens the text classification use case dialog.
Click on Sentiment analysis.
In the New classification with model-defined classes recipe dialog:
Keep the input dataset.
Name the output dataset
product_review_sentiment_analysis.Store it in the location of your choice.
Click Create recipe. This opens the settings page of the classification recipe.
Configure the sentiment analysis recipe#
Now, you must configure the recipe.
In the LLM dropdown, select the LLM you want to use for sentiment analysis.
Note
This tutorial uses the Chat GPT 3.5 model. However, feel free to use any other available LLMs from the list configured by your administrator. Remember that the dropdown only lists connections that your administrator has previously set in the Administration panel > Connections > New connection > LLM Mesh.
In the Input column field, select the text column. It includes the clients’ reviews to analyze.
In the Task field, ensure that Sentiment analysis (+/=/-) is selected.
Leave the output mode as is.
Note
If you select an LLM other than Chat GPT 3.5, the options may vary.
Run the recipe and explore the output#
Now that you’re all set, it’s time to run the recipe and explore the output dataset.
Still in the recipe settings page, click Run.
Once finished, click the Explore dataset product_review_sentiment_analysis link at the bottom of the page to open the output dataset.
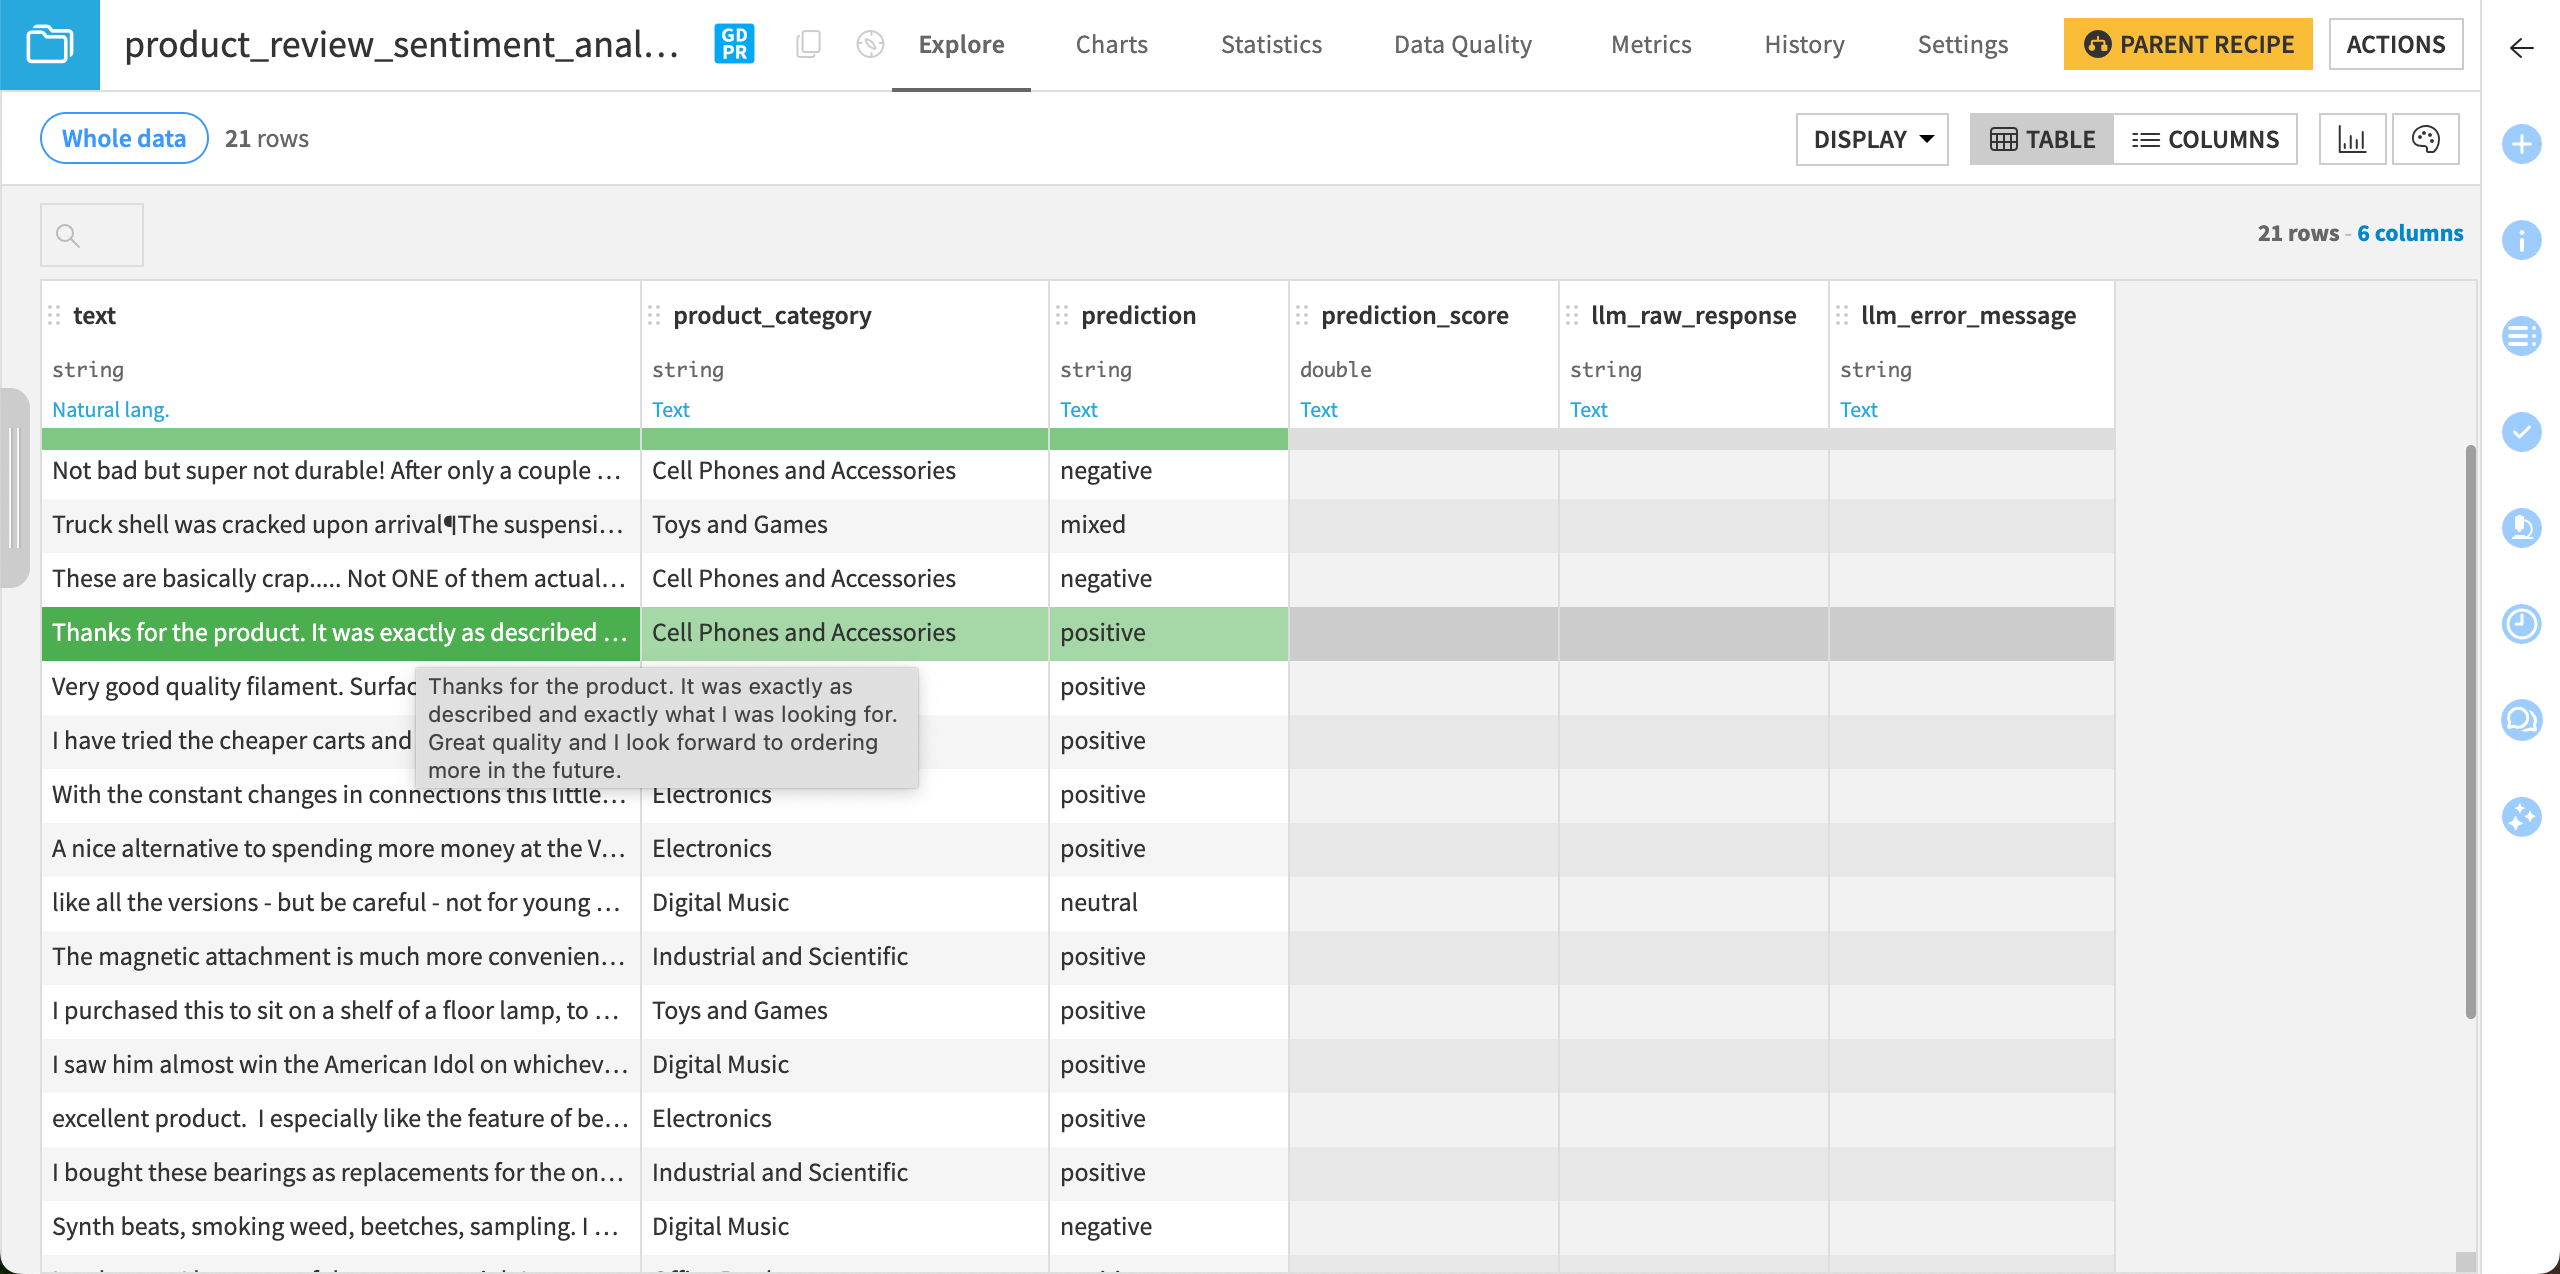
Dataiku stores the prediction in the prediction column. As you kept the default output mode (Output the most likely class), the column only shows the class with the highest score for each row.
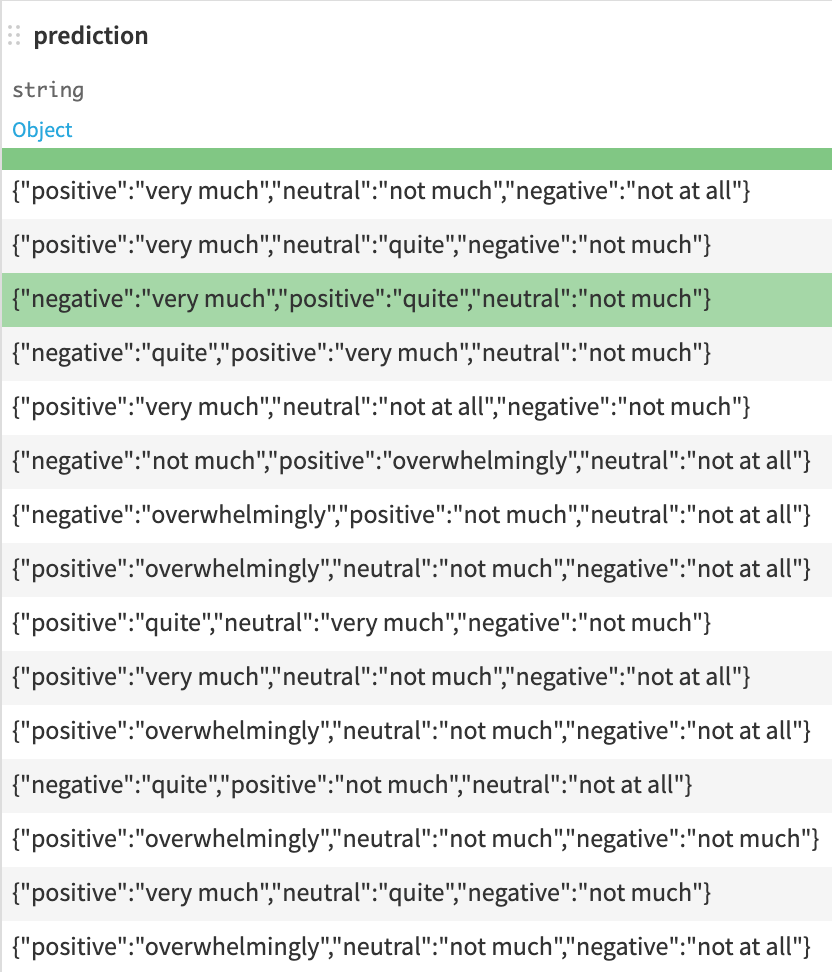
If you had set the output mode to Output all classes, the prediction column would include some JSON with the score for each class.
Classify news articles using your own classes#
Now, this tutorial shows how to classify news articles using classes you’ll provide to the model.
Create the classification recipe#
The first step is to create the classification recipe from your dataset.
To do so:
From the Flow, in the News articles Flow zone (in gray), select the articles_test_filtered dataset.
In the Actions tab of the right panel, under the GenAI recipes section, click the Classify text recipe. It opens the text classification use case dialog.
Click on LLM classification.
In the New classification with user-defined classes recipe dialog:
Keep the input dataset.
Name the output dataset
articles_classified.Store it in the location of your choice.
Click Create recipe. This opens the settings page of the classification recipe.
Configure the classification recipe#
Now, you must configure the recipe.
In the LLM dropdown, select the LLM you want to use for classification. Remember that the dropdown only lists connections that your administrator has previously set in the Administration panel > Connections > New connection > LLM Mesh.
In the Input column field, select the Article column.
In the Classes section, enter the following classes:
Sport
Business
Leave the rest as is.
Note
If you select an LLM other than Chat GPT 3.5, the options may vary.
Run the recipe and explore the output#
Now that you’re all set, it’s time to run the recipe and explore the output dataset.
Still in the recipe settings page, click Run.
Once finished, click the Explore dataset articles_classified link at the bottom of the page to open the output dataset.
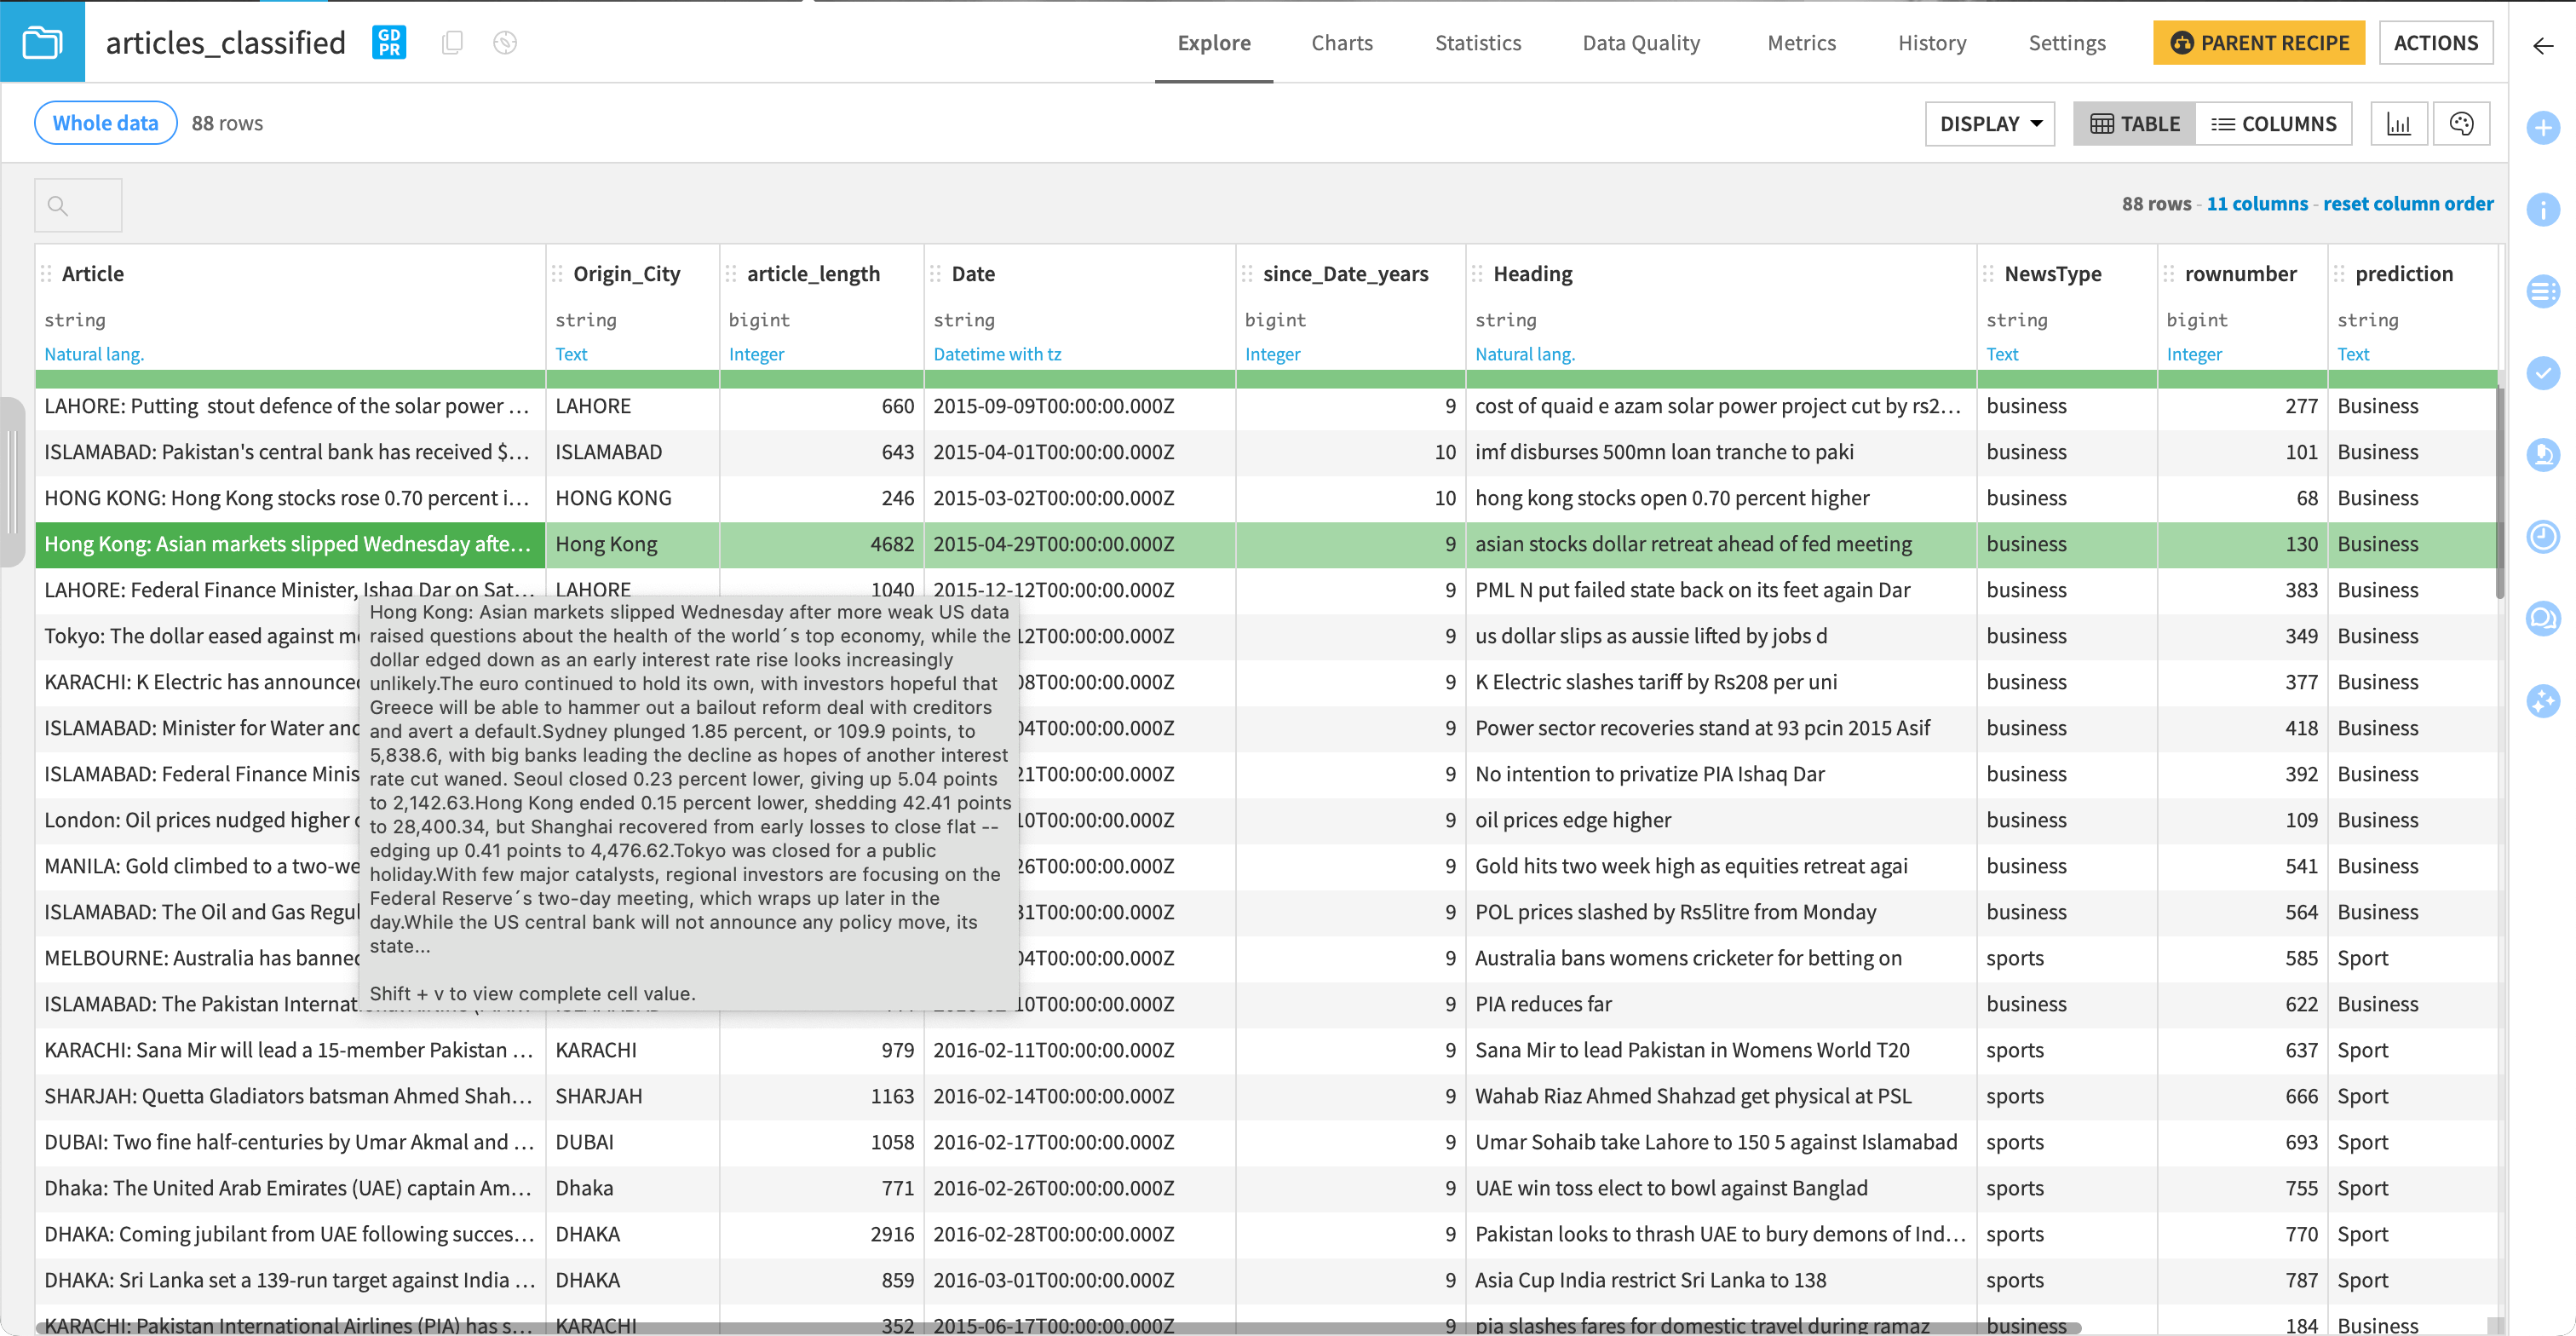
Dataiku stores the prediction in the prediction column.
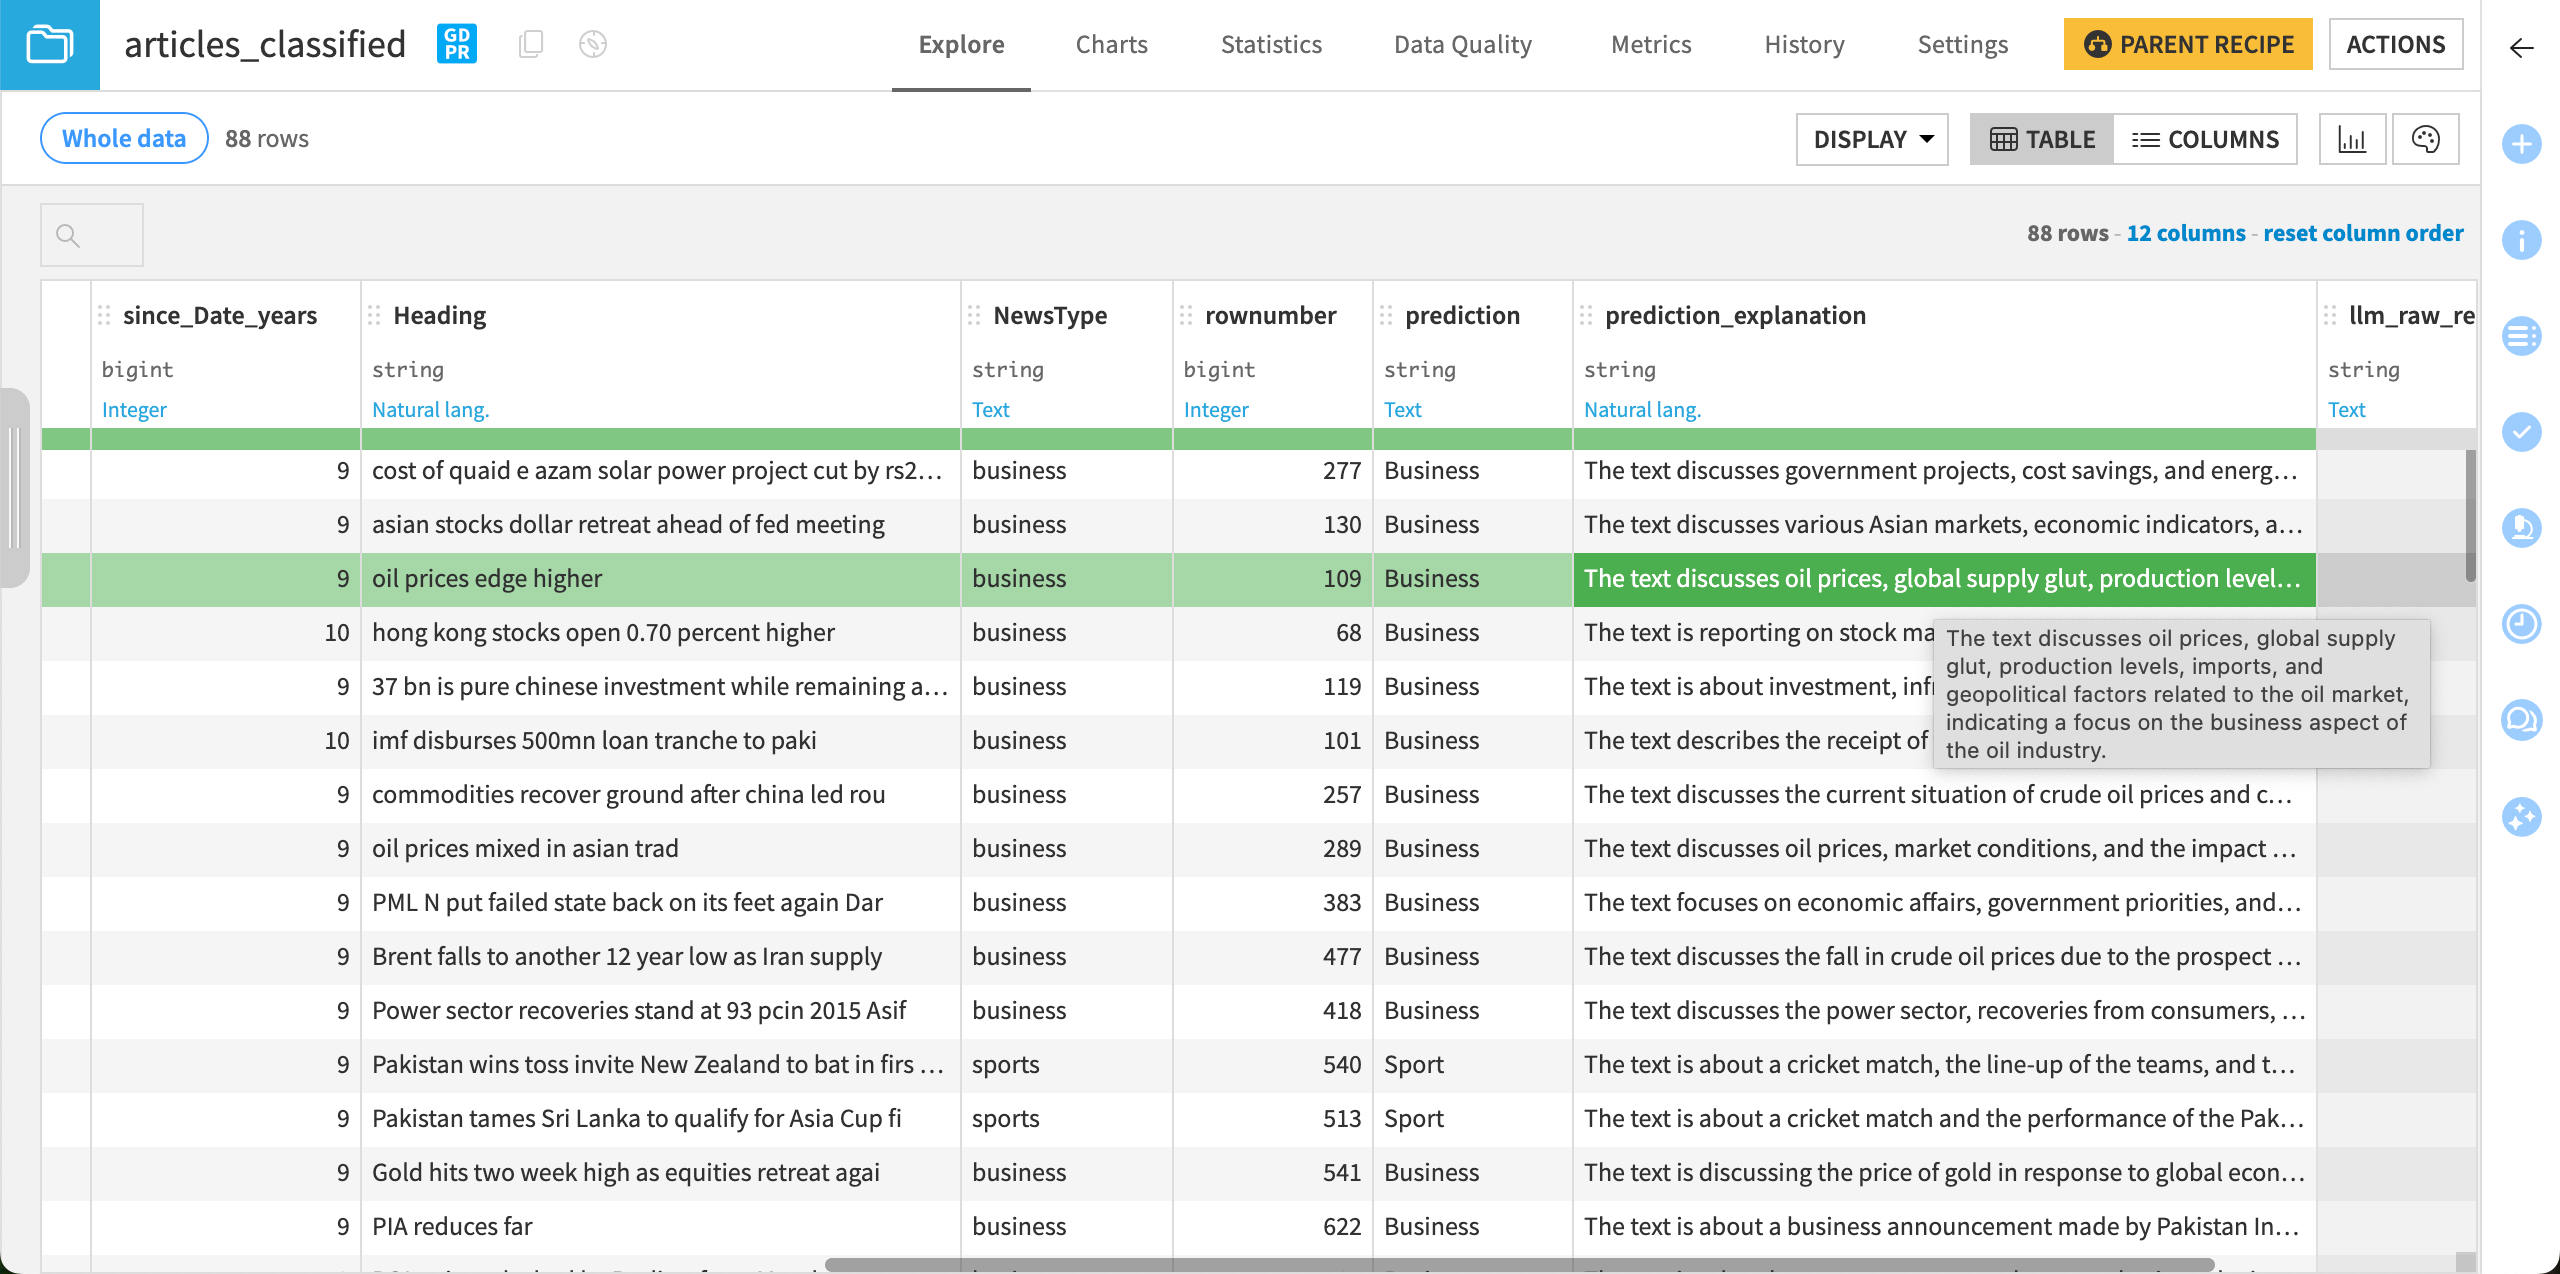
Upon configuring the recipe, if you had enabled the Explain class choice option, the prediction_explanation column would describe why the model has selected the predicted class.
Next steps#
Congratulations! You have classified some product reviews and news articles using the Classify text recipe.
You can explore other LLM features such as the Summarize text recipe to summarize long articles into shorter ones.