
Concept | Classify text recipe#
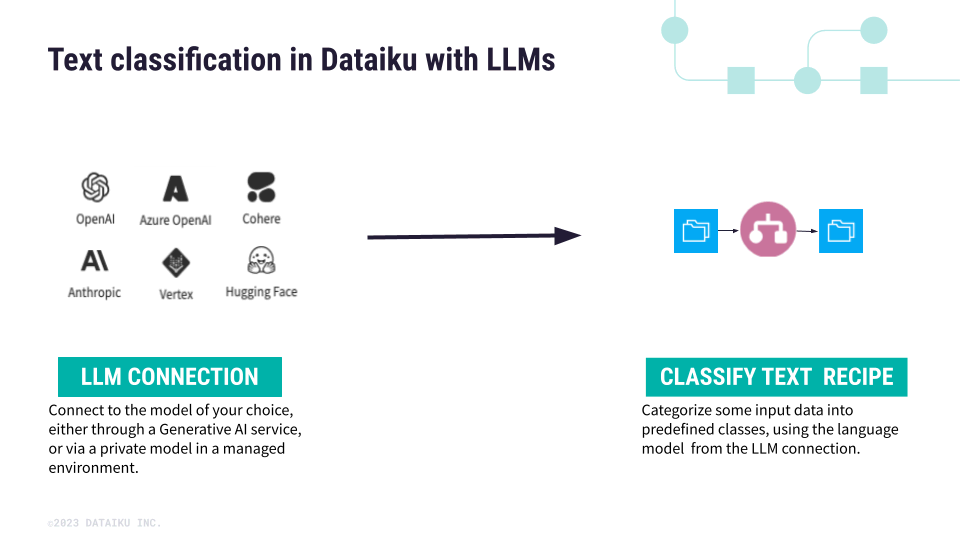
The Classify text recipe enables you to categorize some input data into predefined classes or categories. It leverages large language models (LLMs), which means that manual data labeling, as required in standard supervised learning models, isn’t necessary.
The recipe works with many languages.
Use case#
The Classify text recipe allows several classification use cases, whether the classes are:
predefined in the LLM to perform a specific task, or
specified by the users when configuring the Classify text recipe.
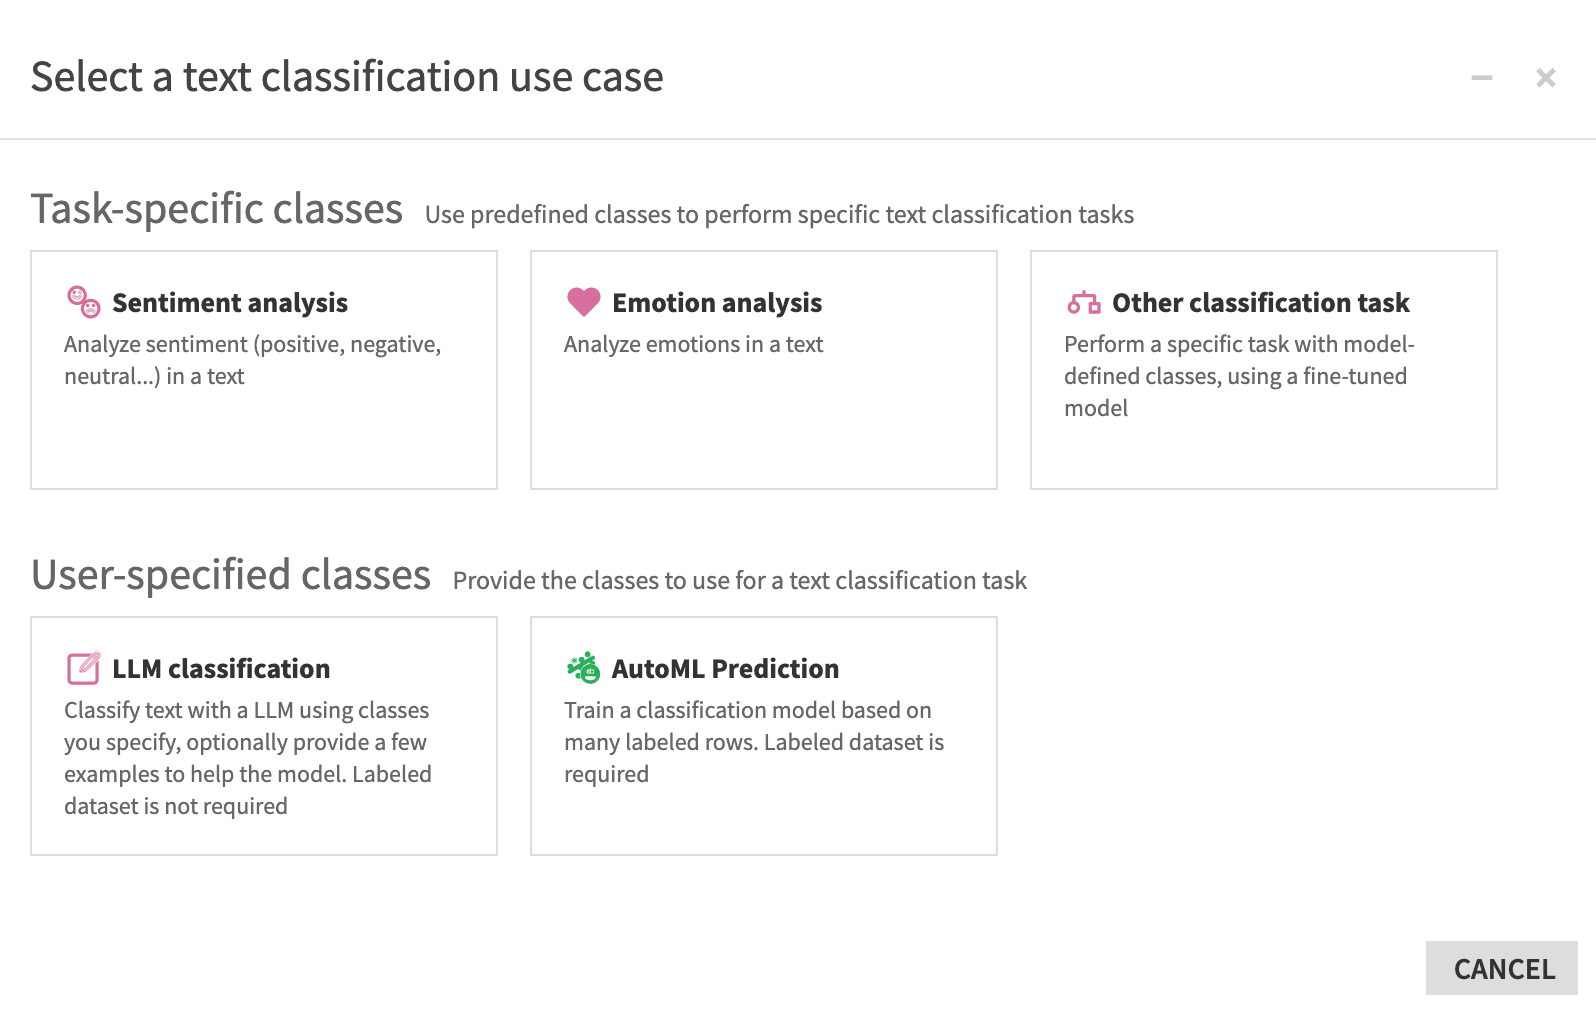
The choice between task-specific and user-specified classes depends on the flexibility you need in defining categories for your classification project. Task-specific classes are common when the classification task aligns with well-defined categories preset by the models (for example, sentiment or emotion analysis), while user-specified classes provide more flexibility for customized classification.
Classification with task-specific classes#
A classification using task-specific classes lets you use an LLM designed to categorize the input data with some classes that are predefined based on the nature of the task to perform. For example, if you use an LLM for sentiment analysis, task-specific classes could include positive, negative, and neutral sentiments.
The Classify text recipe with task-specific classes allows you to perform the following tasks:
Sentiment analysis to analyze the sentiments in the input data, whether the data is positive, negative or neutral.
Emotion analysis to analyze the different emotions in the input data.
Classification with user-specified classes#
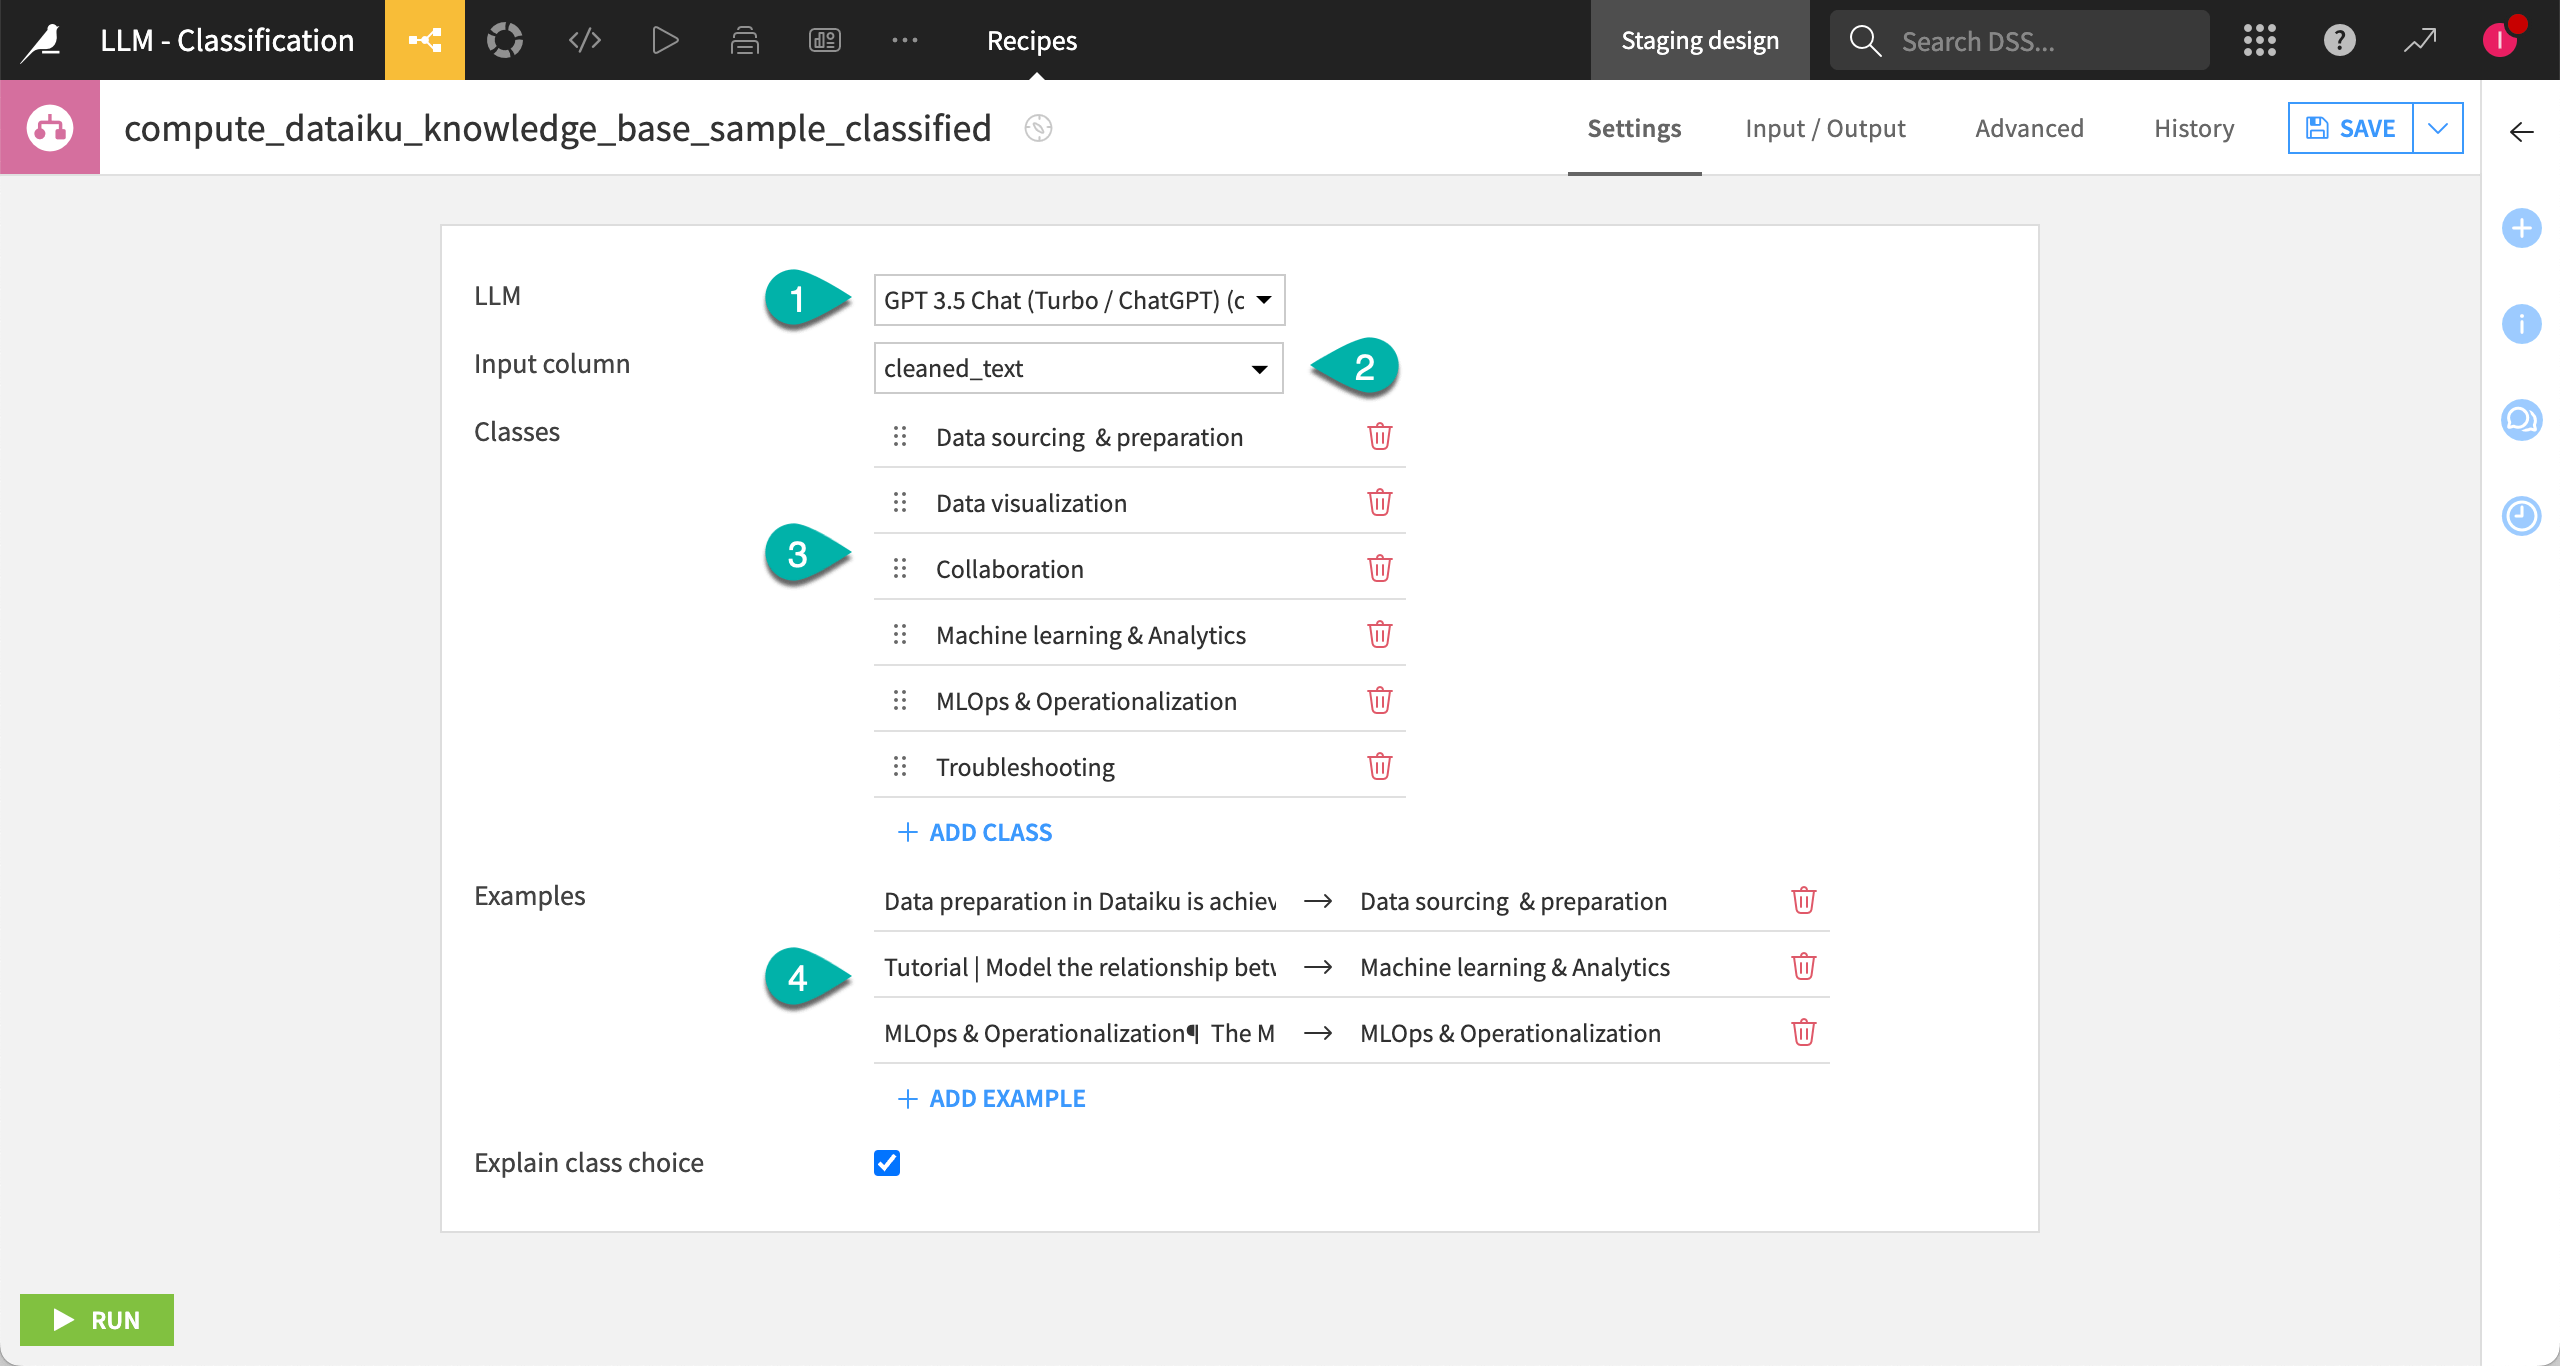
User-specified classes are categories that you define based on your needs. It offers more flexibility as you set the classes directly in the recipe settings page.
In fact, in the recipe settings page, you:
Select which LLM to use.
Assign the correct text column as input.
Enter the labels for the classes you want to use to classify your data.
Optionally, provide some examples to provide the LLM with some context and help it categorize your input data.
A zero-shot classification is when you provide no example at all.
A single-shot classification is when you provide one example for each category.
A few-shot classification is when you provide a few examples for each categories.
Important
Keep in mind that the cost increases with the number of examples you provide.
Output dataset#
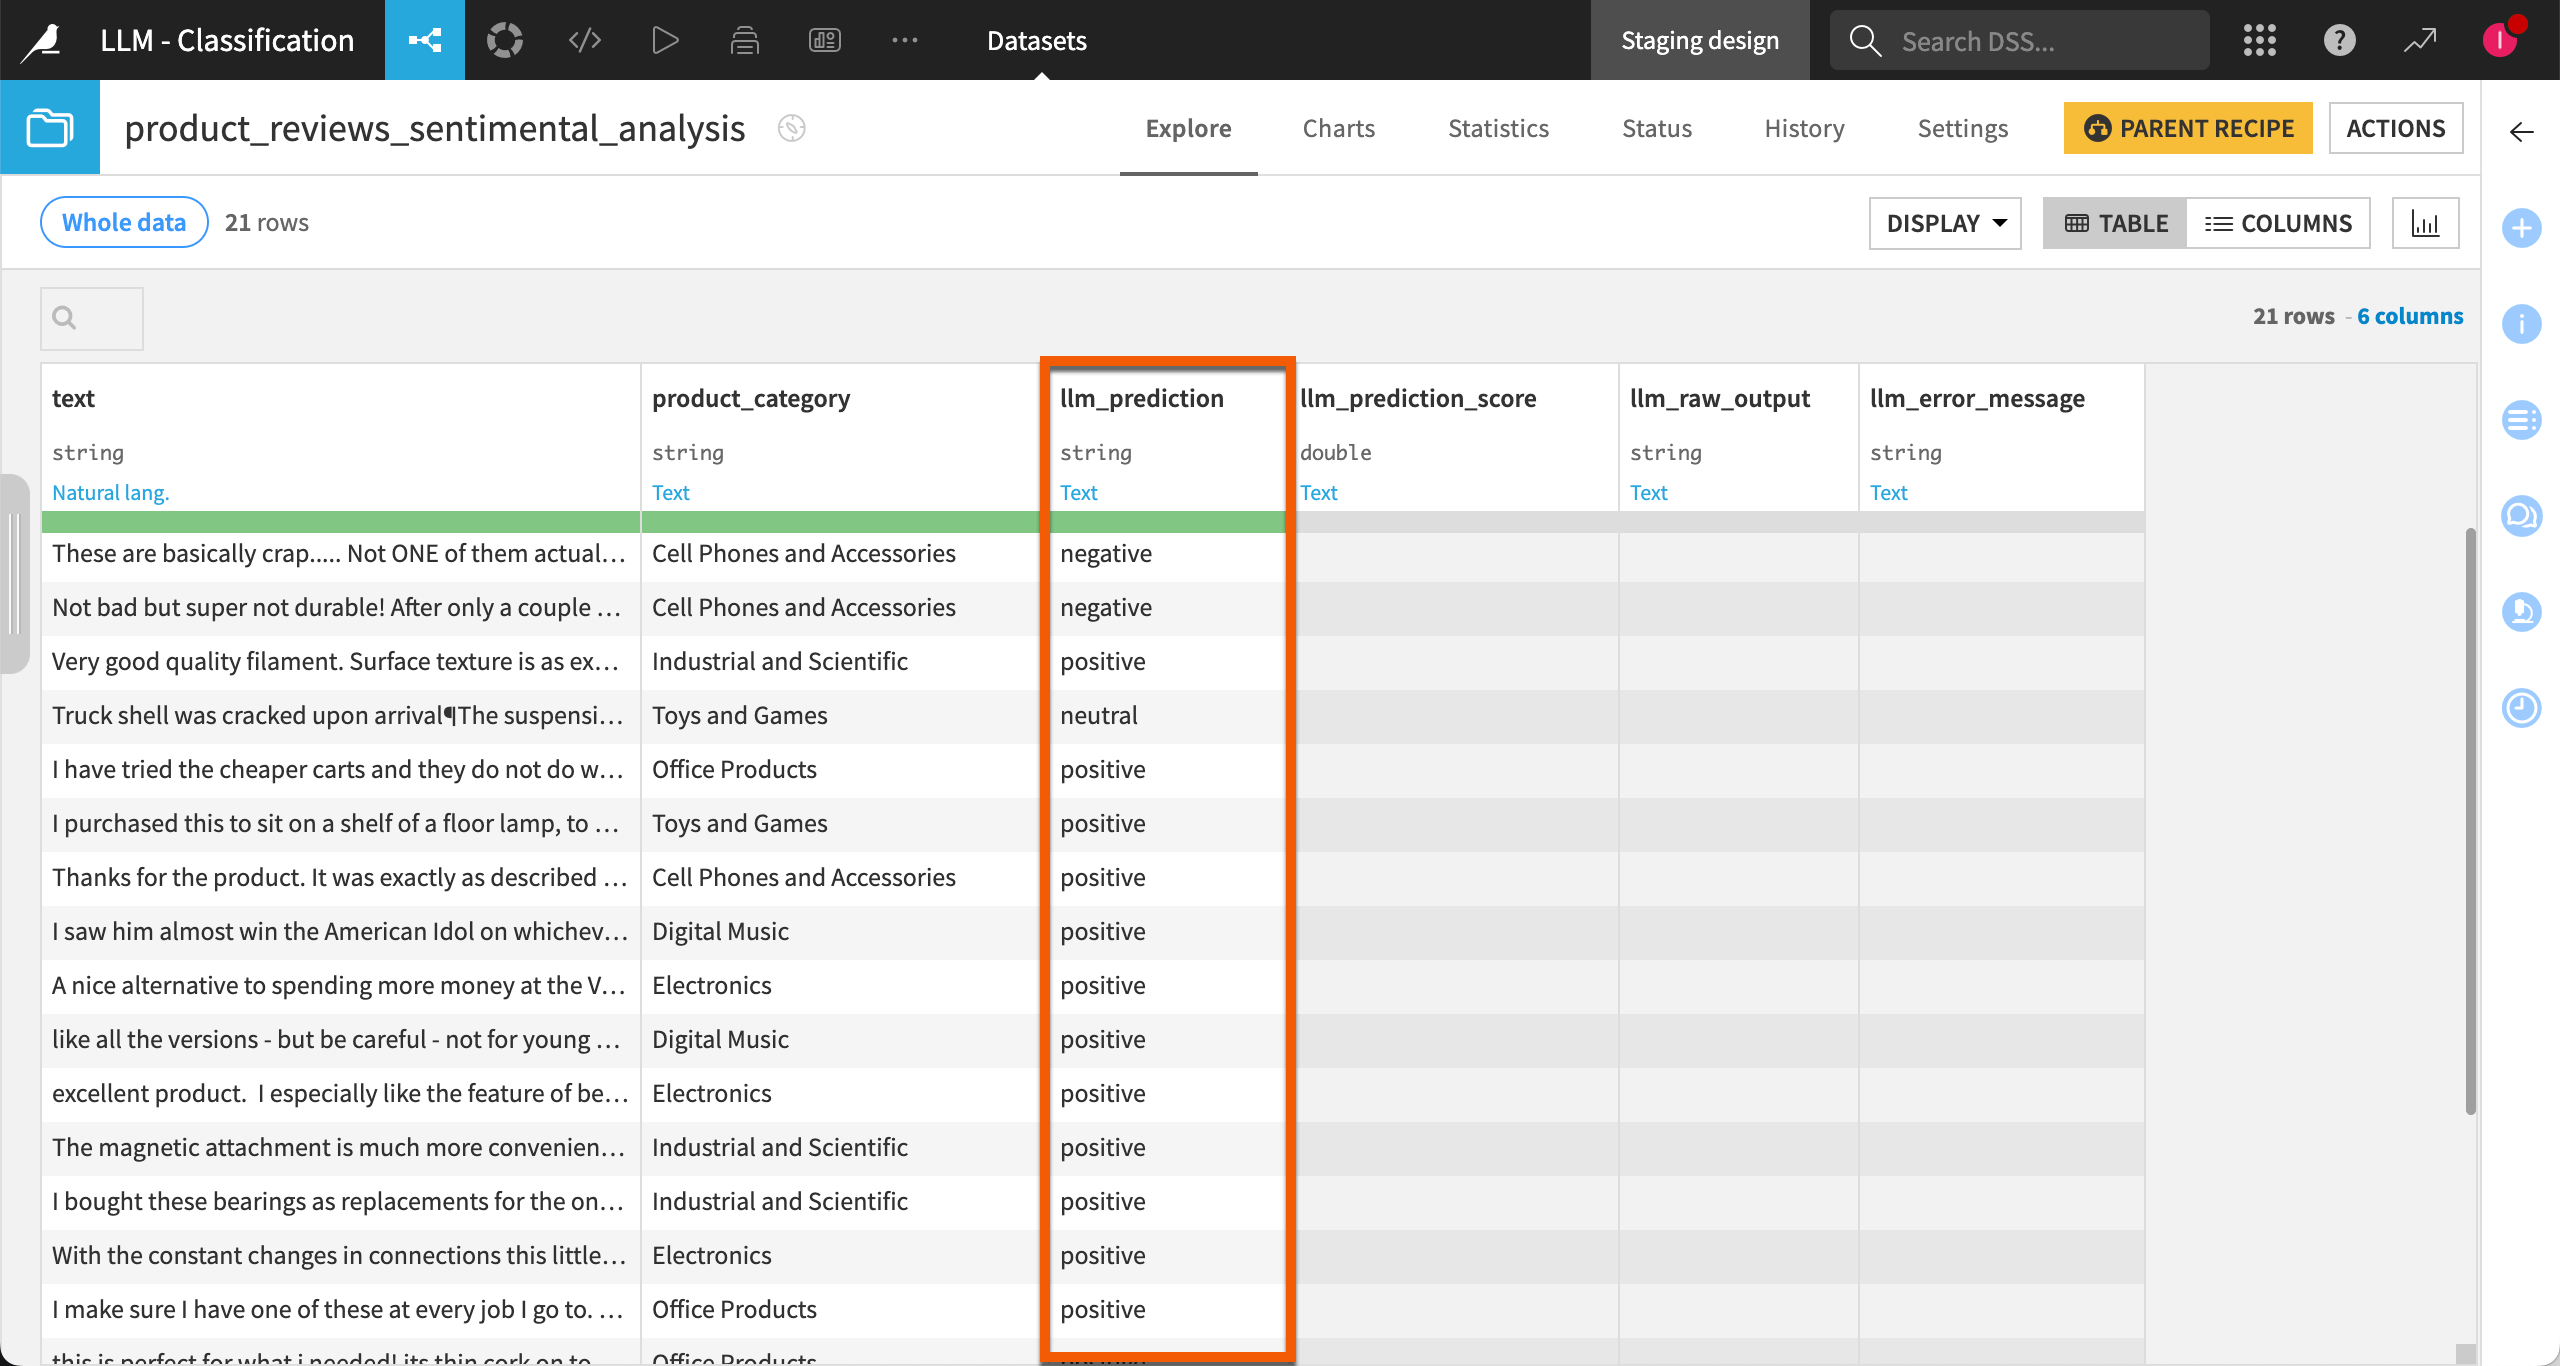
After running the recipe, you can see the prediction for each row of your dataset:
In the llm_prediction column when using task-specific classes.
In the predicted_class column when using user-specified classes.
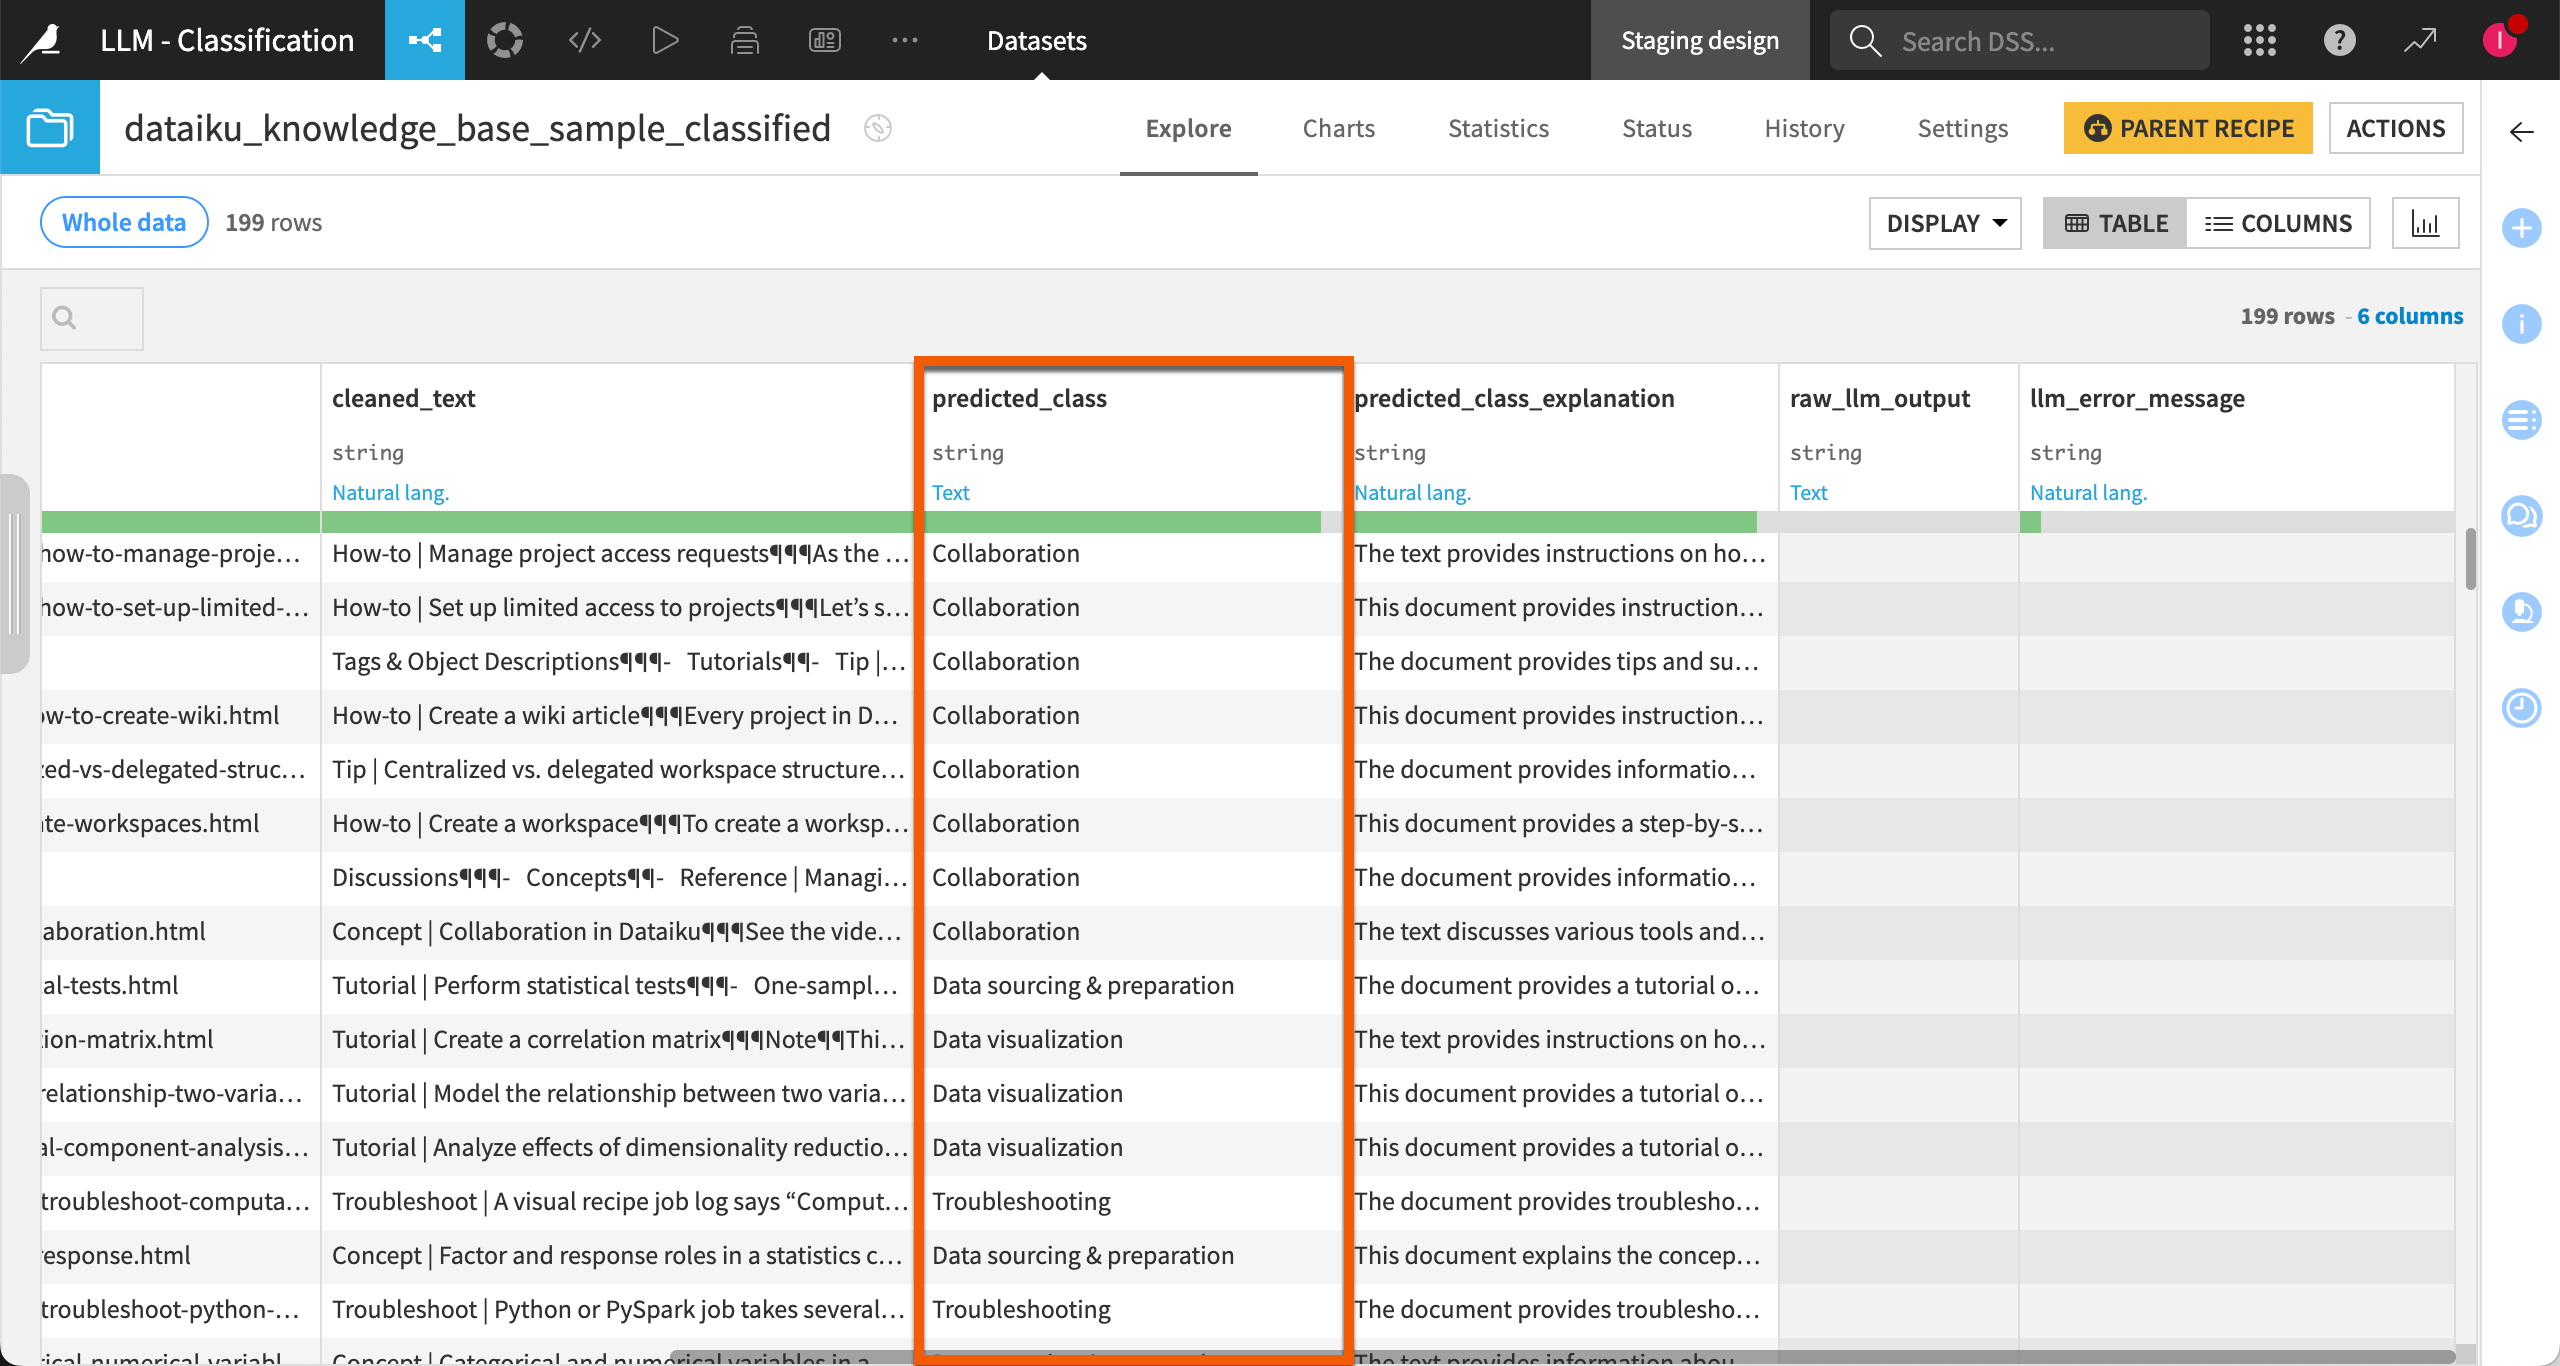
Depending on the options you set when configuring the recipe, you may get some additional explanation on the prediction that was given.
Next steps#
Continue learning about classification by working through the Tutorial | Classify text with Generative AI article.