Deploy a real-time API service#
You’ve successfully designed and tested an API service including a prediction endpoint. The next step is to actually deploy this API service from the Design node into a production environment!
Publish the API service on the API Deployer#
Recall that the Flow has a prediction model to classify credit card transactions as fraudulent or not. You’ve packaged this model as a prediction endpoint in an API service, but this service only exists on the Design node (the development environment).
Important
The remaining steps require an active connection between the Design node and the API Deployer. Dataiku Cloud users can follow instructions for adding the API node extension. Administrators of self-managed Dataiku instances should follow API Node & API Deployer: Real-time APIs in the reference documentation.
The next step is to publish the API service from the Design node to the API Deployer.
If not already open, in the top navigation bar of the Design node, navigate to More Options (
 ) > API Designer. Select the fraud_detection API service.
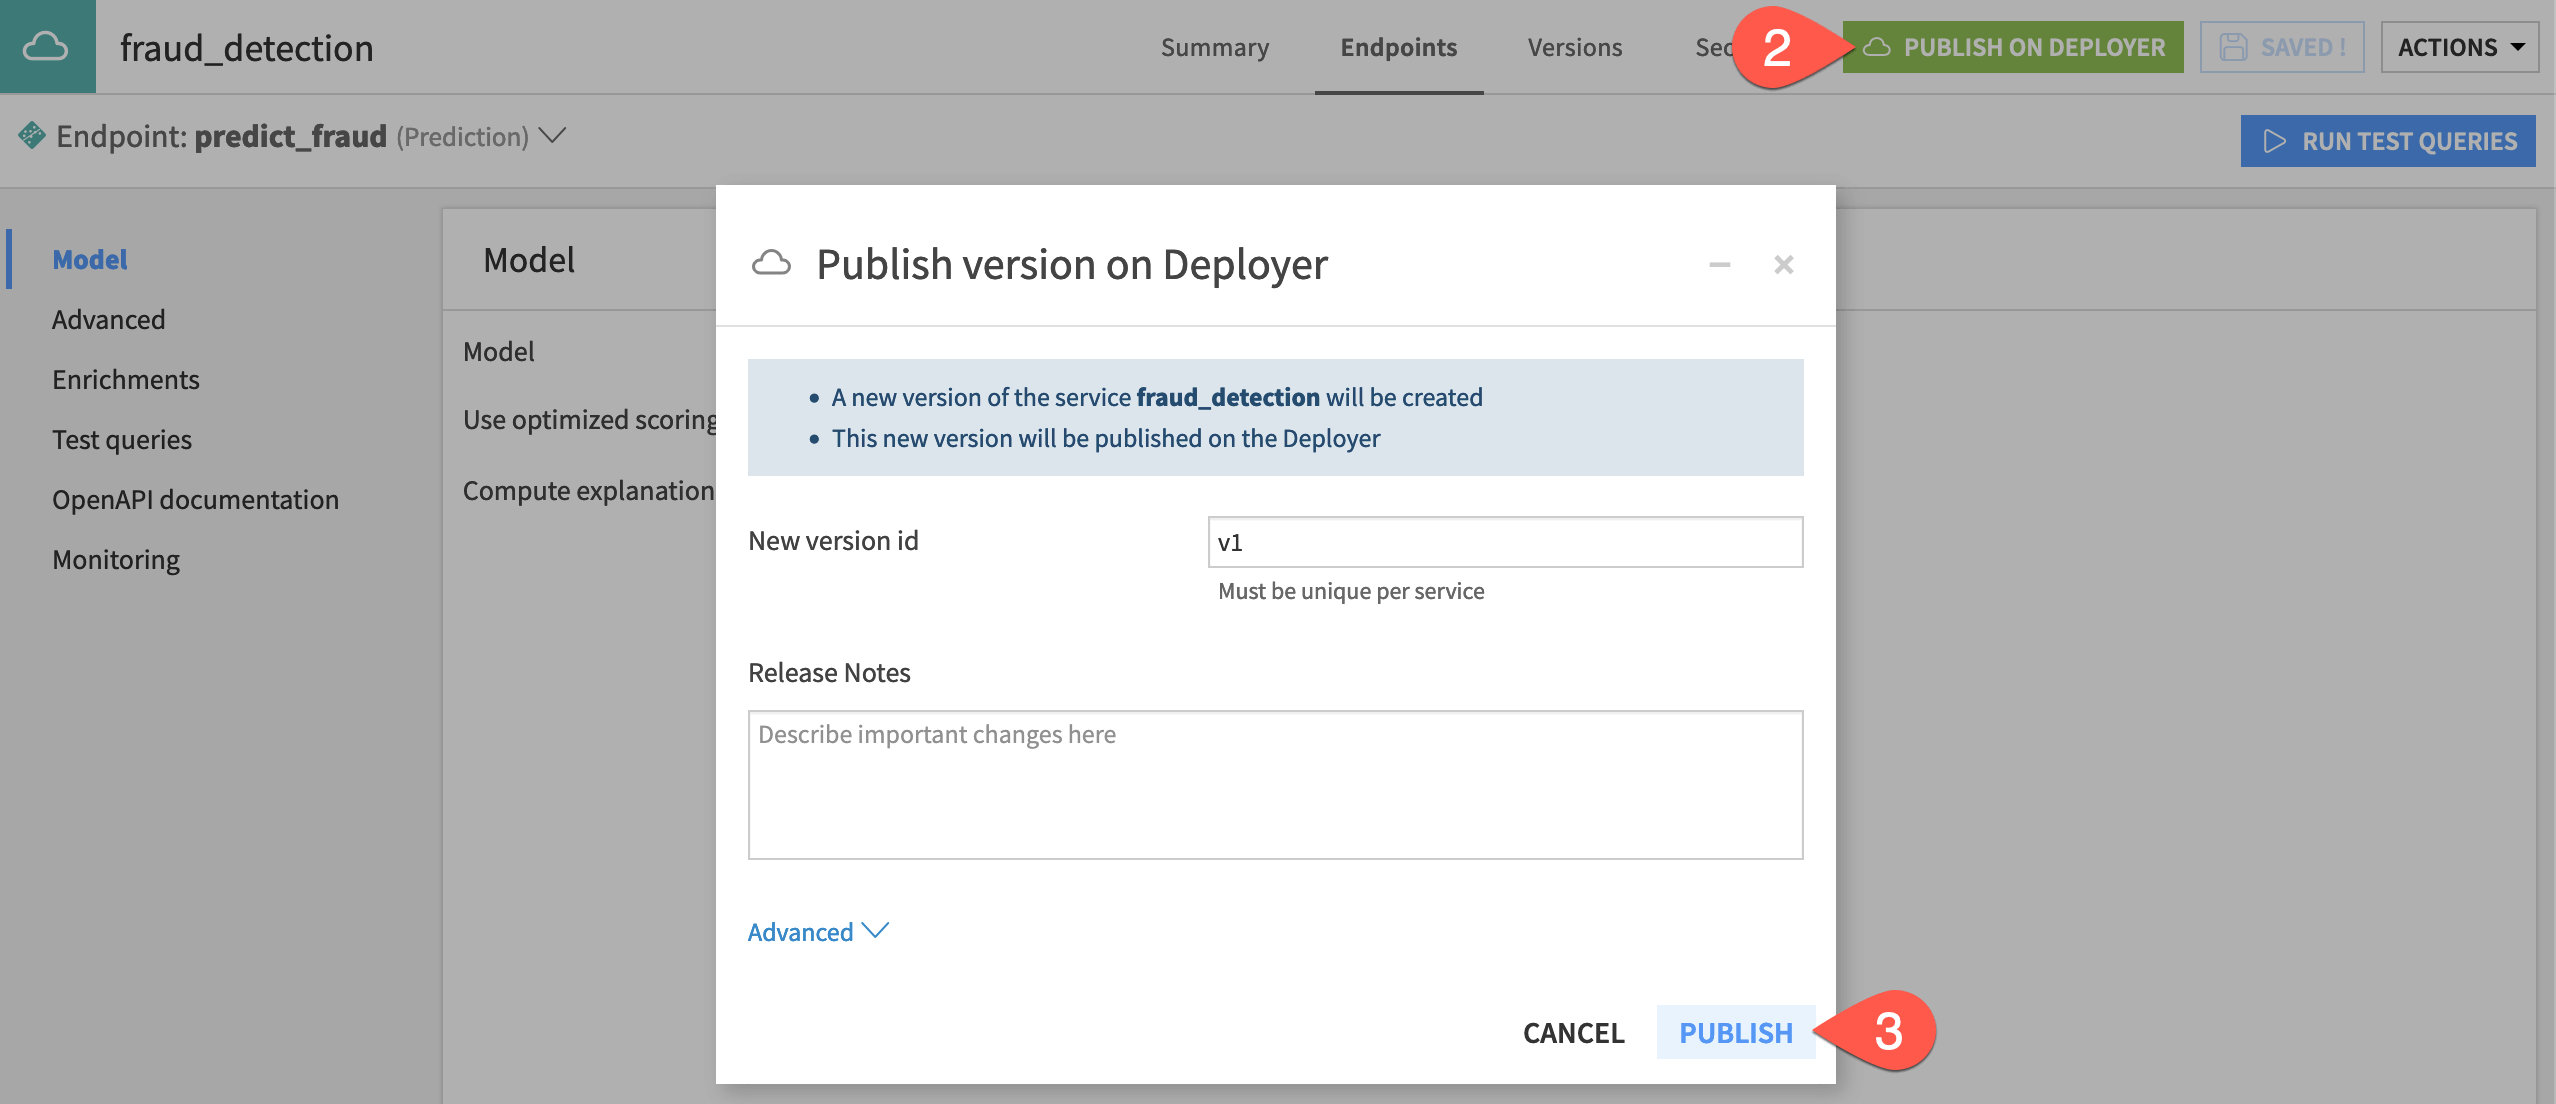
Click Publish on Deployer.
Click Publish, keeping the default version ID name.
Deploy the API service to the deployment infrastructure#
You now have the API service including the prediction endpoint on the API Deployer. However, to query the endpoint, you still need to deploy the API service to an infrastructure.
First get to the Deployer. From the waffle (
 ) menu in the top navigation bar of the Design node, select Local (or Remote) Deployer.
On the Deployer homepage, select Deploying API Services.
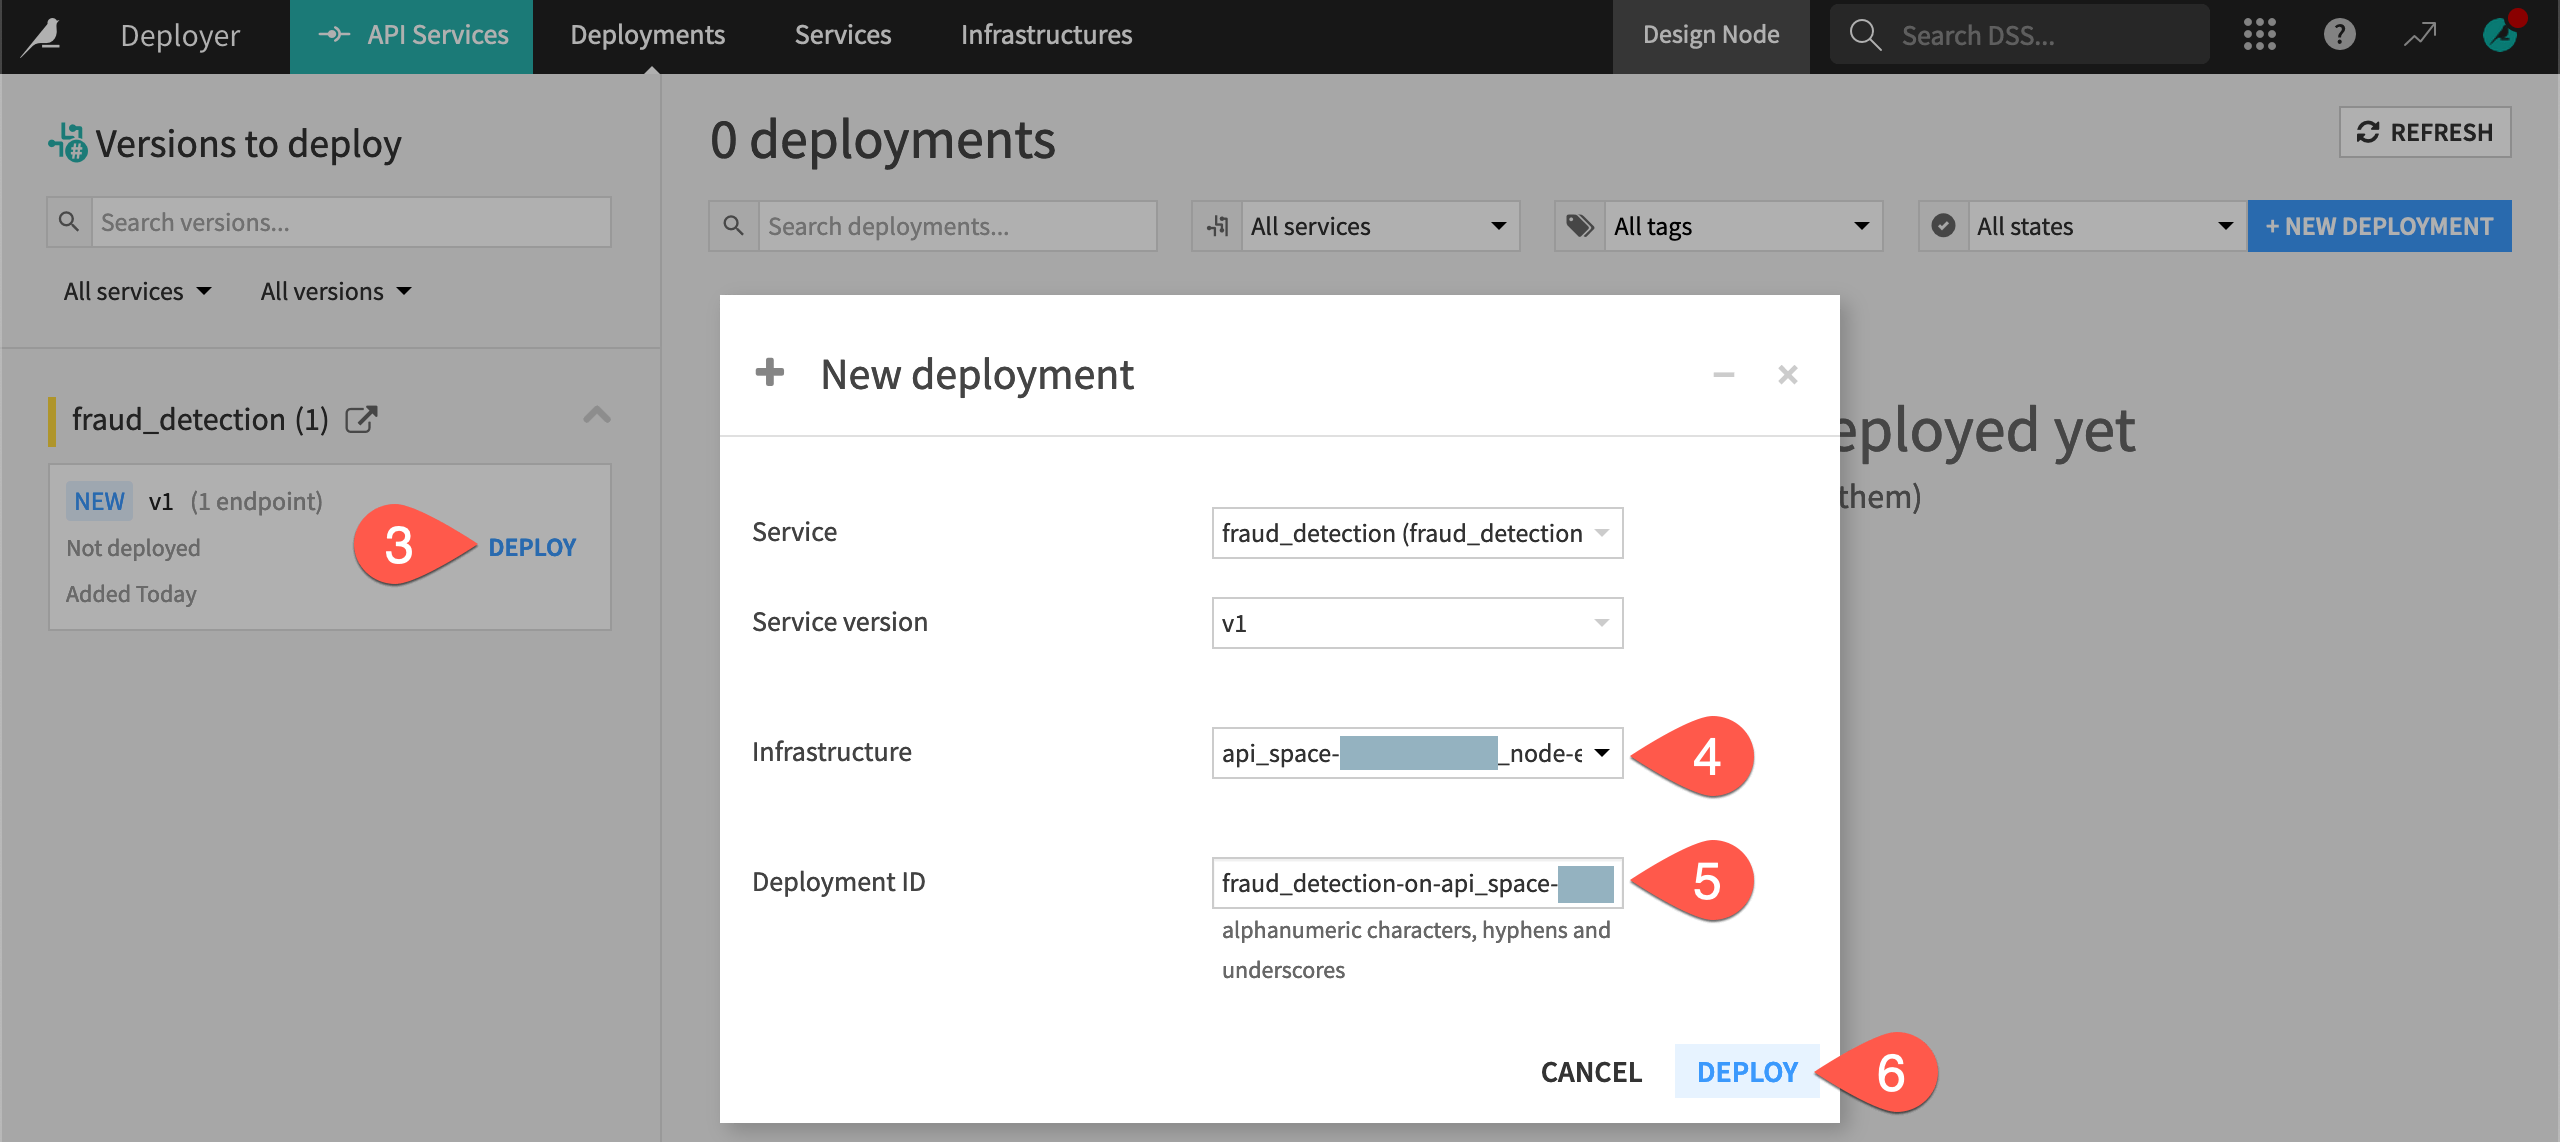
On the Deployments tab of the API Deployer, find the fraud_detection API service on the left, and click Deploy.
If not already selected in the dialog, choose an infrastructure for the new deployment. If you have multiple options, choose one at the earliest lifecycle stage, which might be named Development, for example.
Note the default Deployment ID (which takes the form
<api-service-name>-on-<infrastructure-name>).Click Deploy.
On the Status tab of the new deployment, click Deploy once again.
Important
Depending on the Govern deployment policy of your chosen infrastructure, it’s possible you receive a warning or an error for a missing approval in the Govern node. If you see a warning, you can ignore it. If you encounter an error, you’ll need to choose another infrastructure or obtain an approval for the saved model version. See resources on Implement AI Governance to learn more.
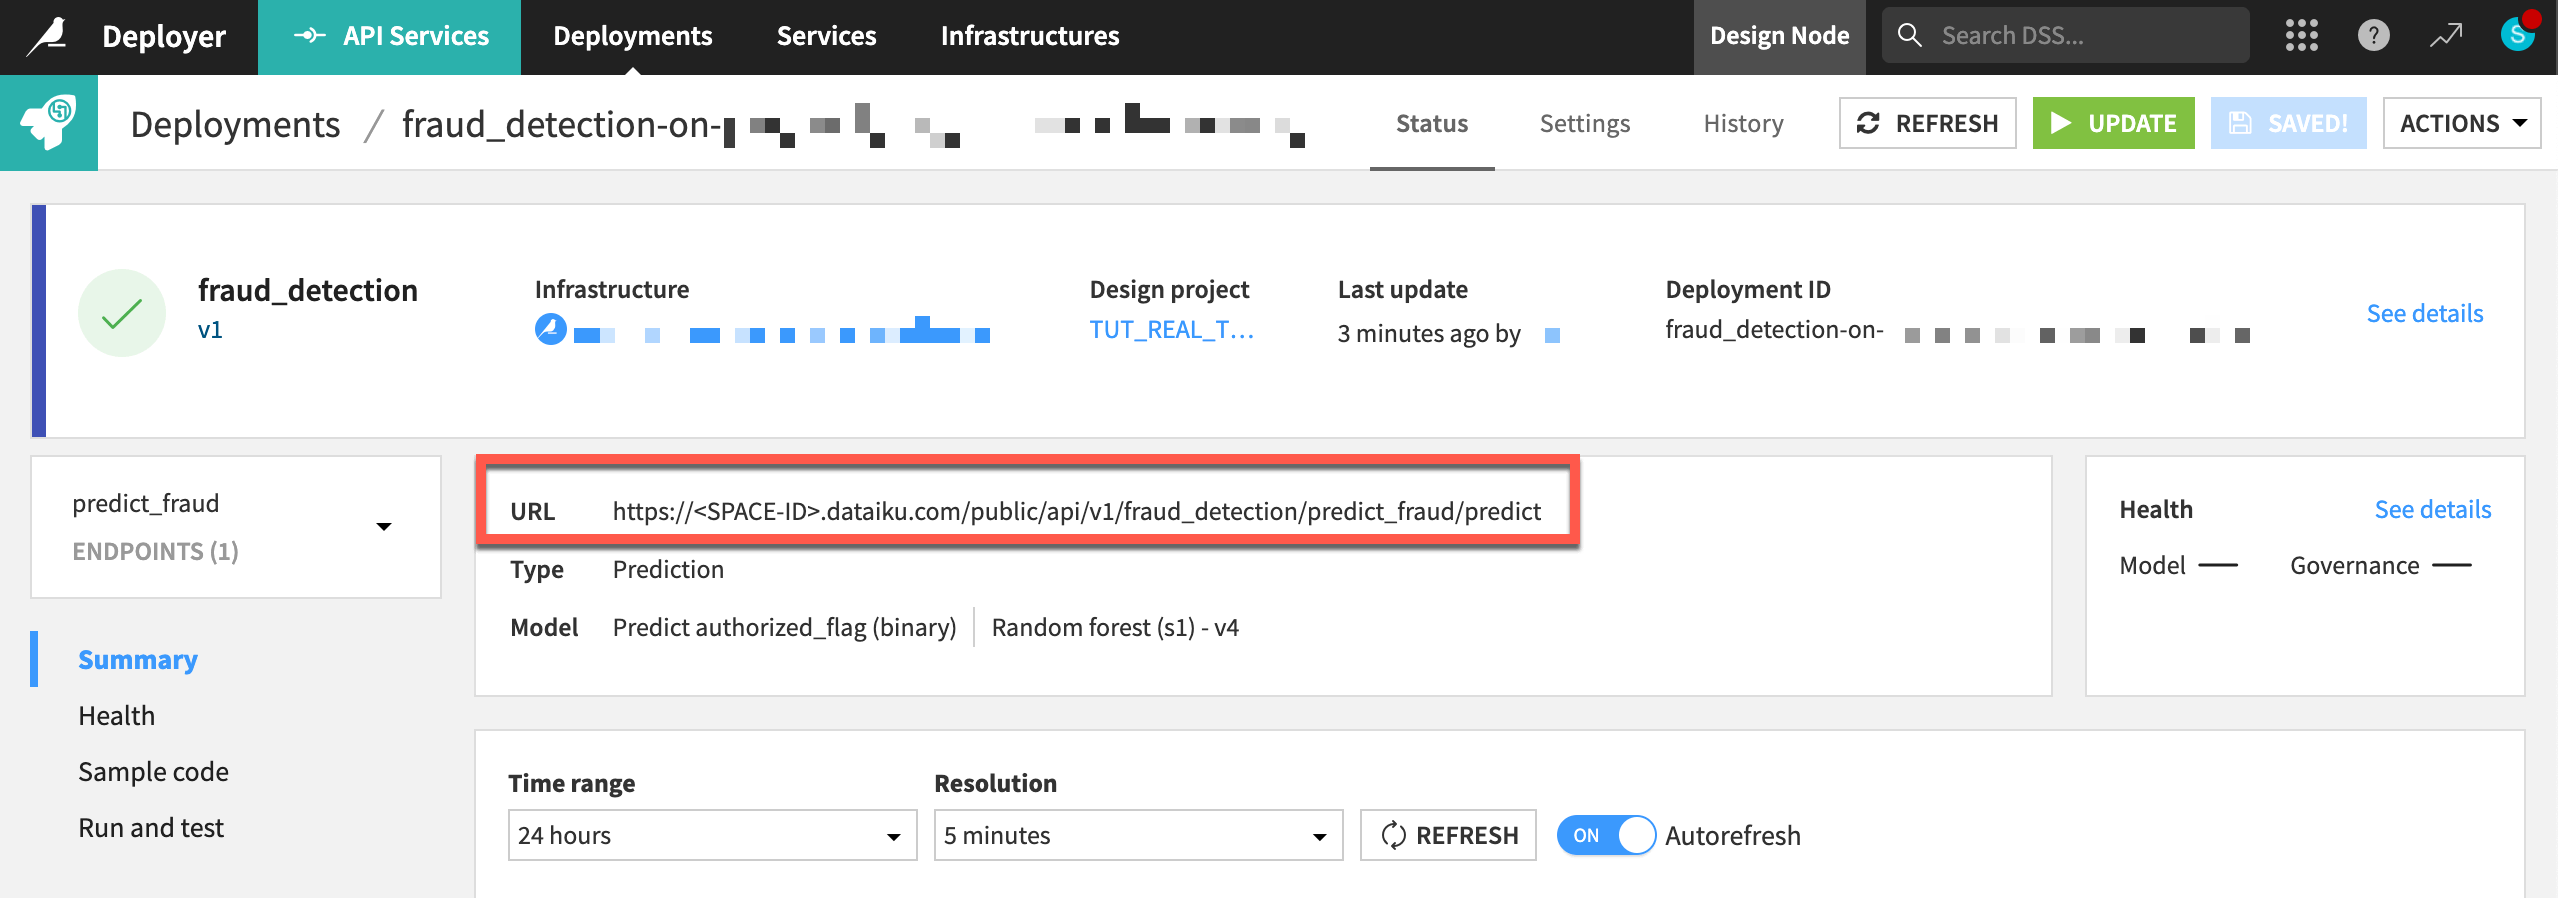
You now have an API service including a prediction endpoint available to serve real-time API calls. Note the dedicated URL of this API endpoint.
Query the API endpoint#
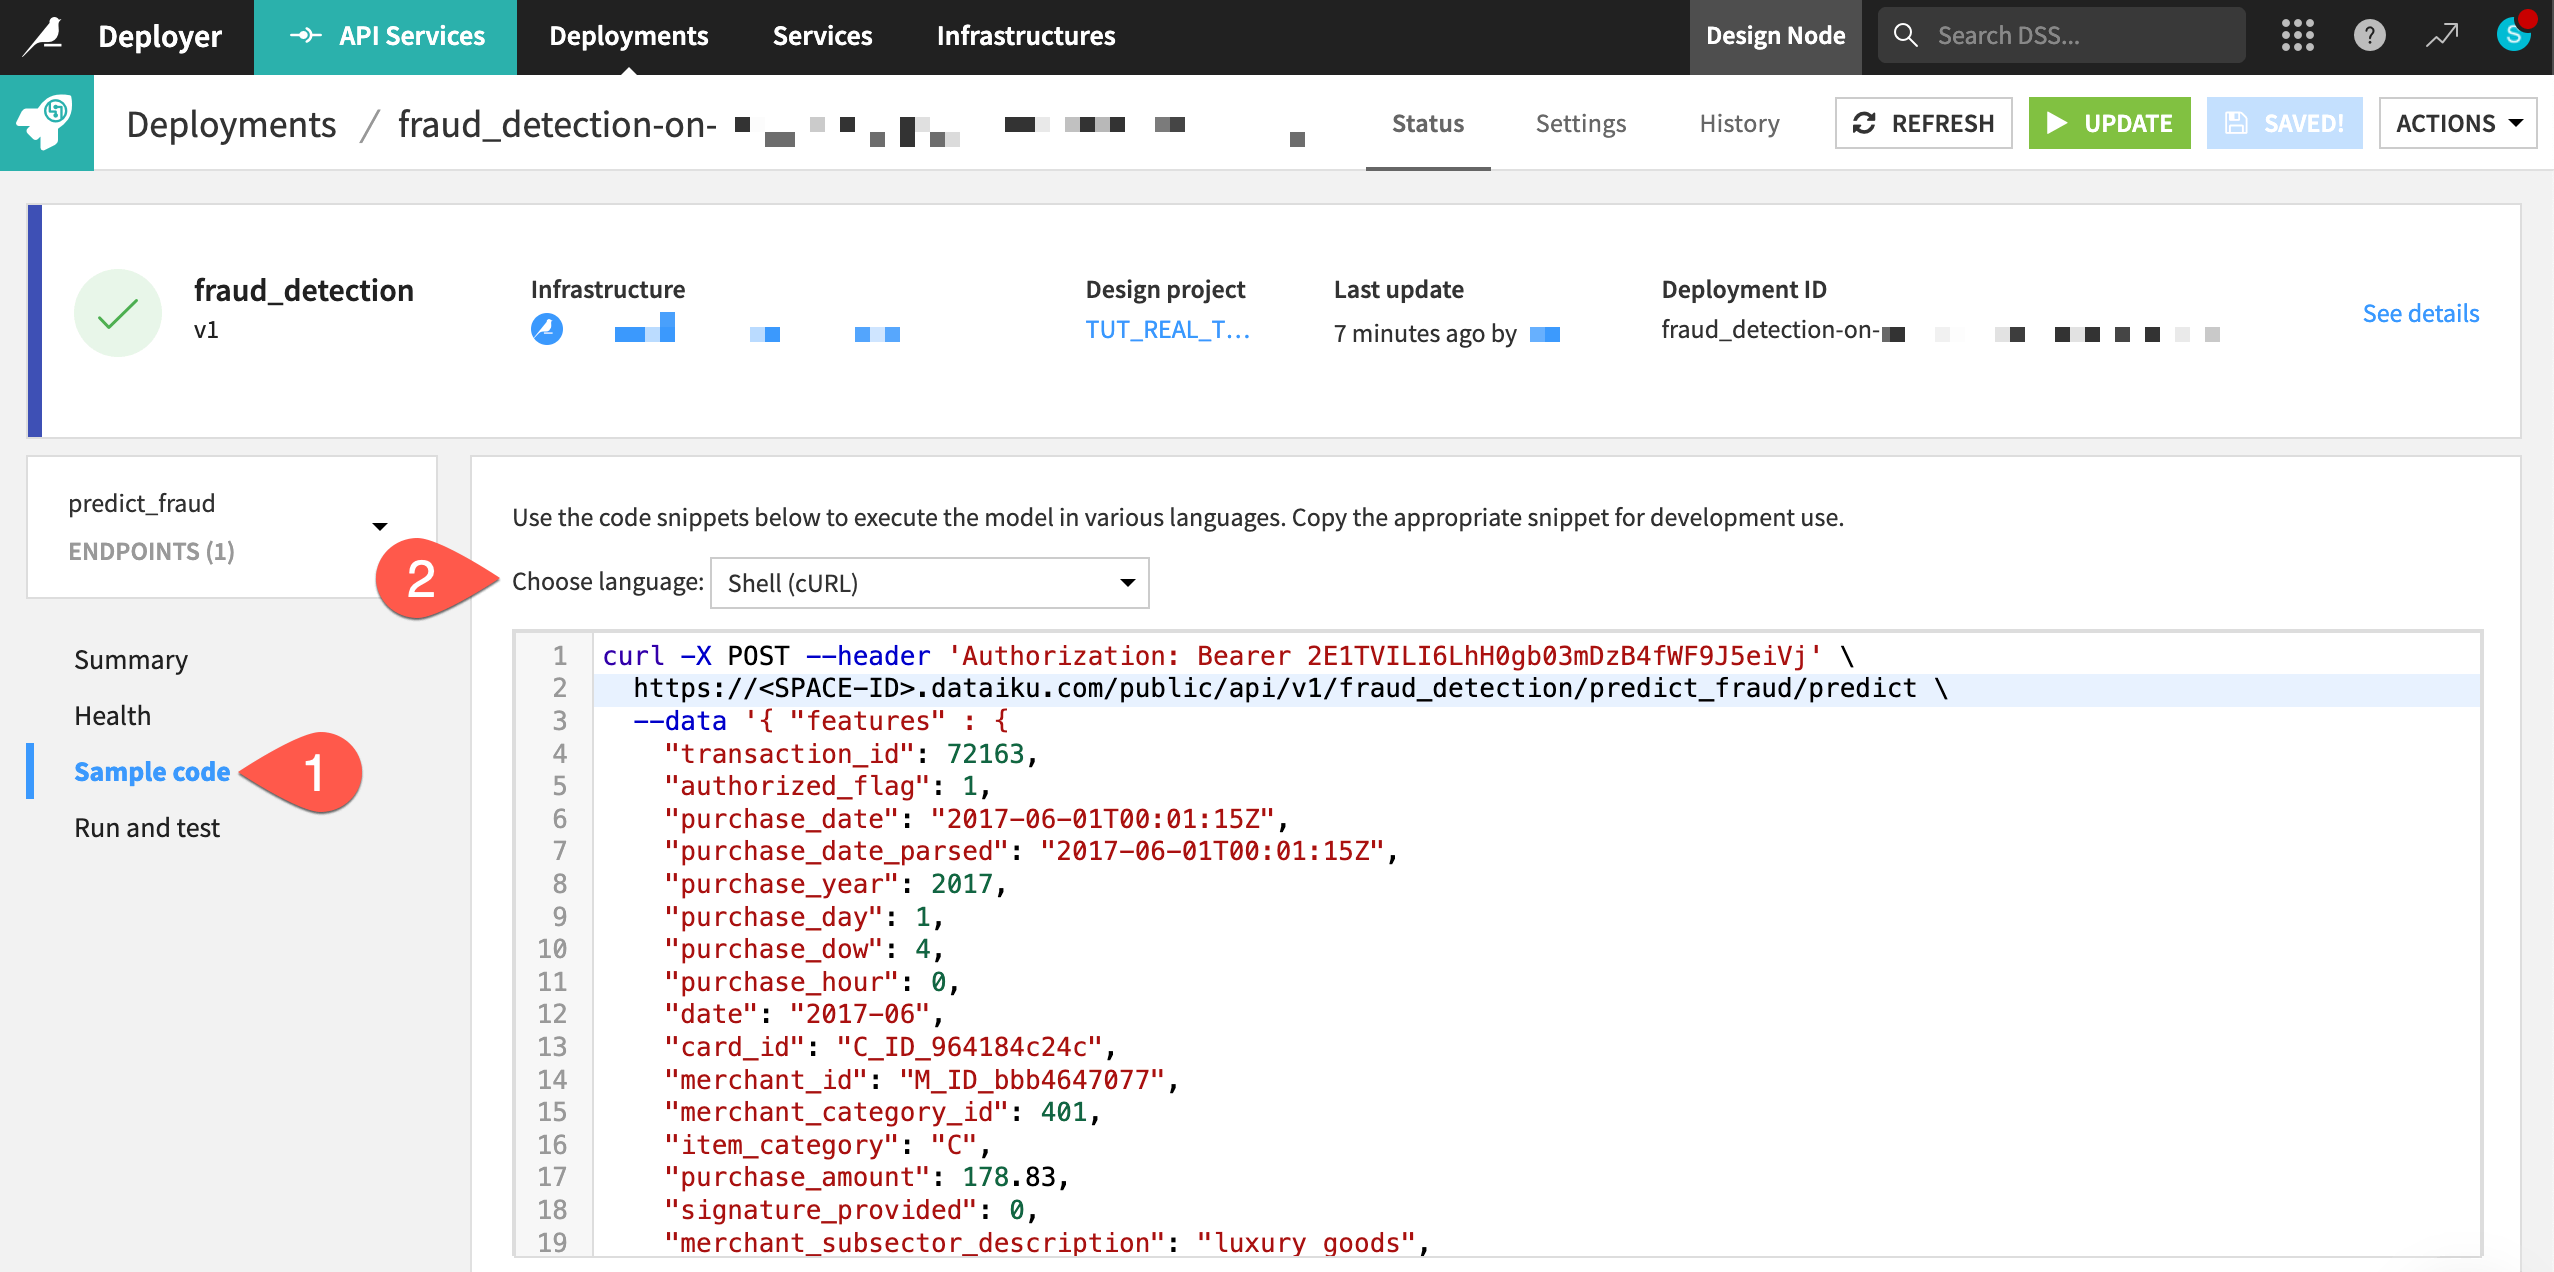
You can now submit real queries to this service by calling the endpoint URL. The Sample code panel provides snippets for calling the API in Shell (cURL), Python, R, or Java.
Within the Status tab of the prediction endpoint, navigate to the Sample code panel.
Copy-paste the Shell code into a terminal window.
Execute the live query, and see the prediction for this record returned in real-time.
You can also run the test queries previously defined in the API Designer of your project.
Still within the Status tab of the prediction endpoint, navigate to the Run and test panel.
Click Run All.
Now you have run on an API node the same queries initially tested in the project’s API Designer on the Design node!
Optional: Copy the deployment to another infrastructure#
Important
This section requires having a second deployment infrastructure. If you don’t have this available, you can skip to the next section.
When choosing an infrastructure in the previous step, you may have seen pre-configured lifecycle stages. An instance admin can modify these stages as desired, so your options may be different depending on the complexity of your organization’s deployment strategy.
Imagine your organization uses another stage of deployment infrastructure, and all tests on the first deployment infrastructure were successful. You’re now ready to copy the existing deployment to a new pool of API nodes.
Still within the Status tab of the API service, click Actions > Copy this deployment at the top right.
Select a new infrastructure, and keep the other default values.
Click Copy.
You’re now ready to deploy the service.
Click Deploy again on the page that opens up for the deployment.
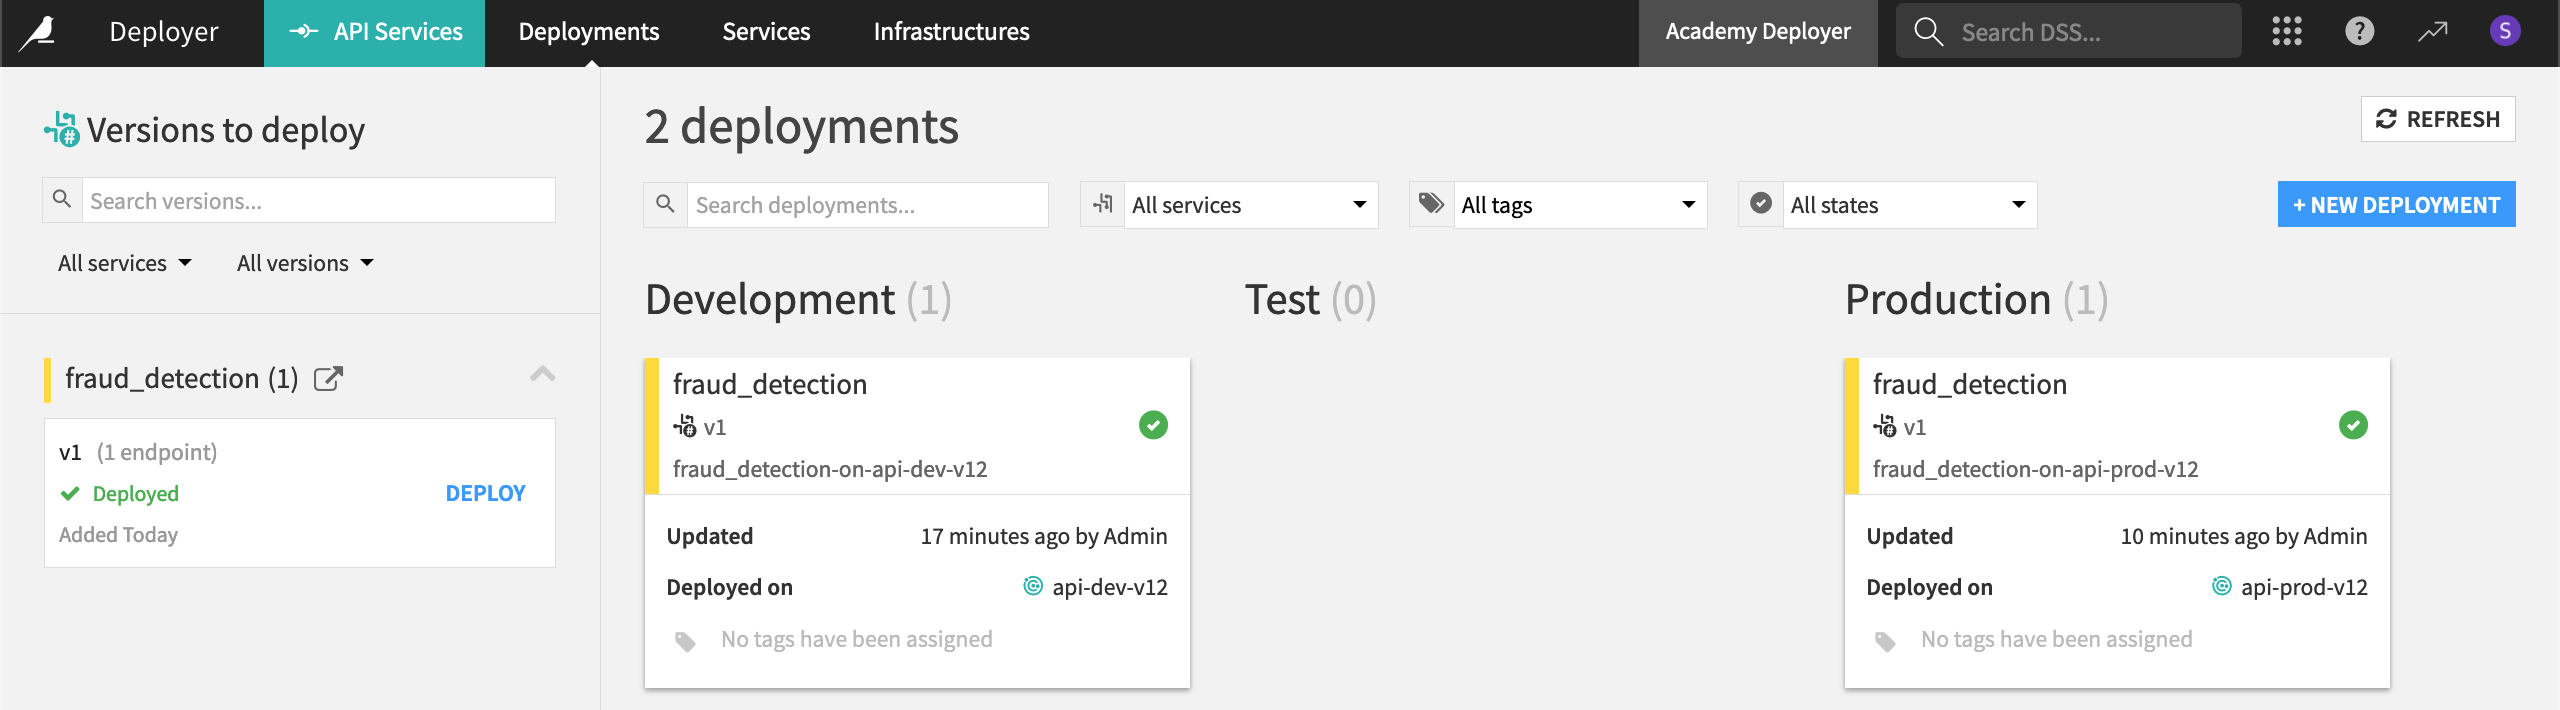
Once you’ve updated the deployment, click Deployments in the top navigation bar. Confirm that you deployed the fraud_detection API service to two different infrastructures at two different lifecycle stages.