Split data into training and testing sets#
See a screencast covering this section’s steps
One advantage of an end-to-end platform like Dataiku is that you can do data preparation in the same tool as machine learning. For example, before building a model, you may wish to create a holdout set.
You can do this with a visual recipe.
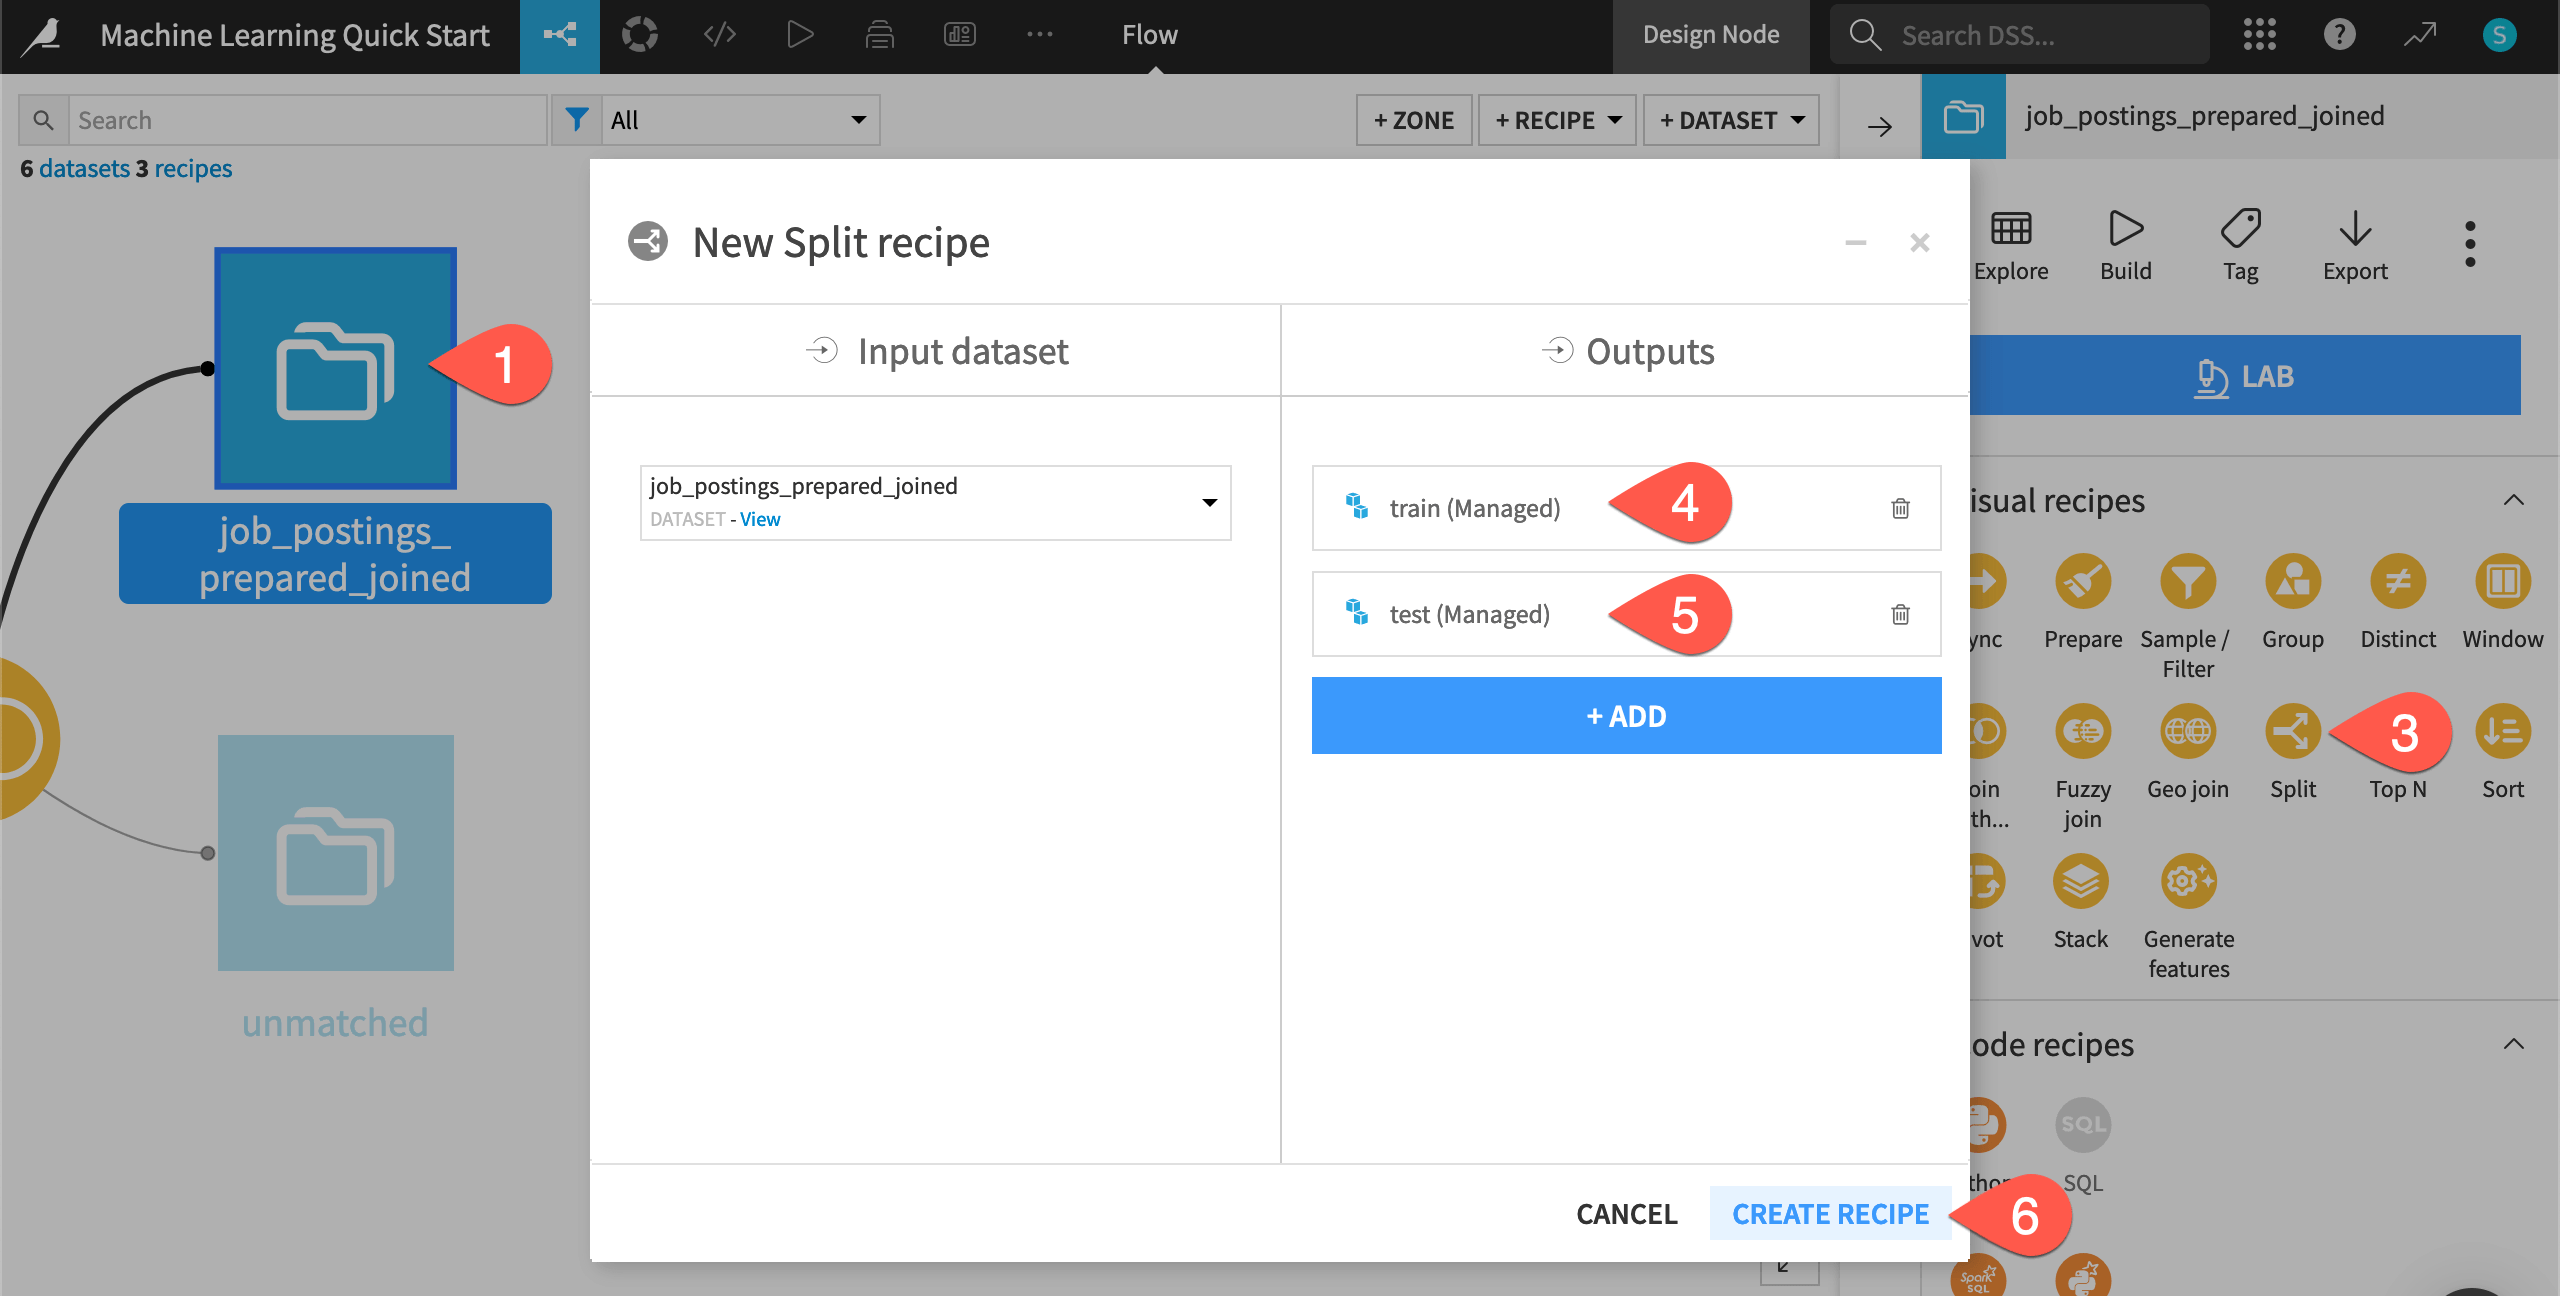
From the Flow, click once to select the job_postings_prepared_joined dataset.
Open the Actions (
) tab of the right panel.
From the menu of Visual recipes, select Split.
Click + Add; name the output
train; and click Create Dataset.Click + Add again; name the second output
test; and click Create Dataset.Once you have defined both output datasets, click Create Recipe.
Define a Split method#
The Split recipe allows for division of the input dataset into some number of output datasets in different ways. Possible splitting methods include mapping values of a column, defining filters, or, as you’ll see here, randomly:
On the Splitting step of the recipe, select Randomly dispatch data as the splitting method.
Set the ratio of
80% to the train dataset, and the remaining 20% to the test dataset.Click the Run (or type
@+r+u+n) to build these two output datasets.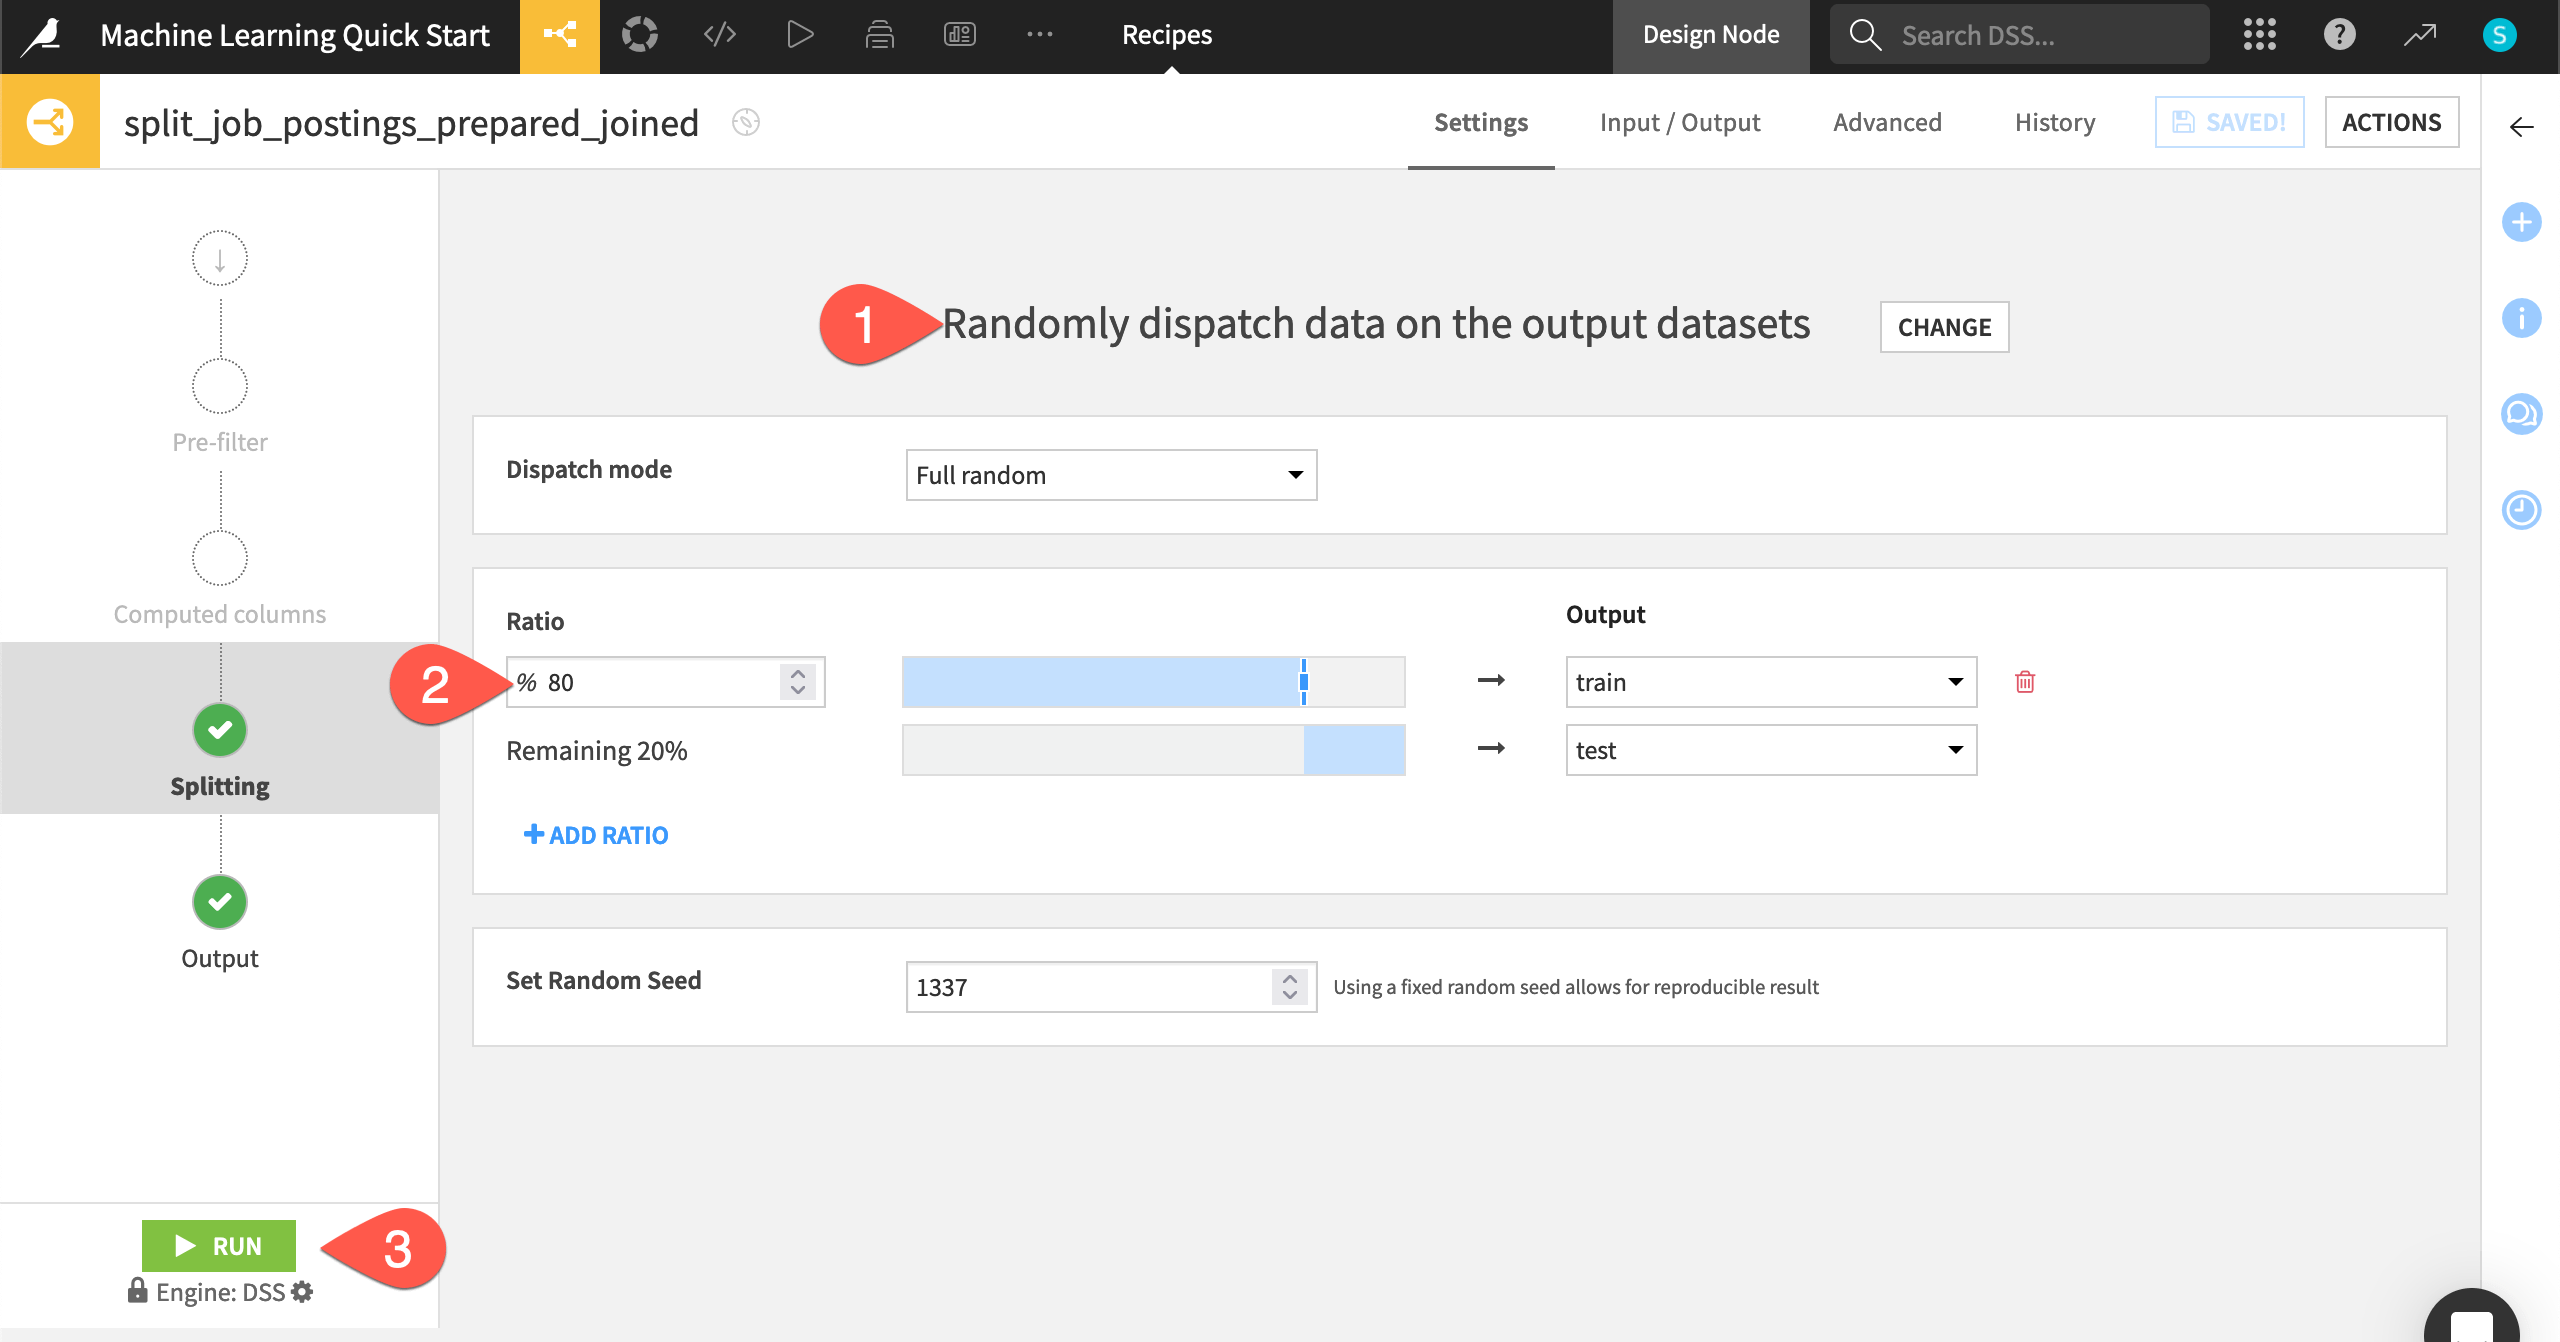
When the job finishes, navigate back to the Flow (
g+f) to see your progress.
Create a separate Flow zone#
Before you start training models, there’s one organizational step that will be helpful as your projects grow in complexity.
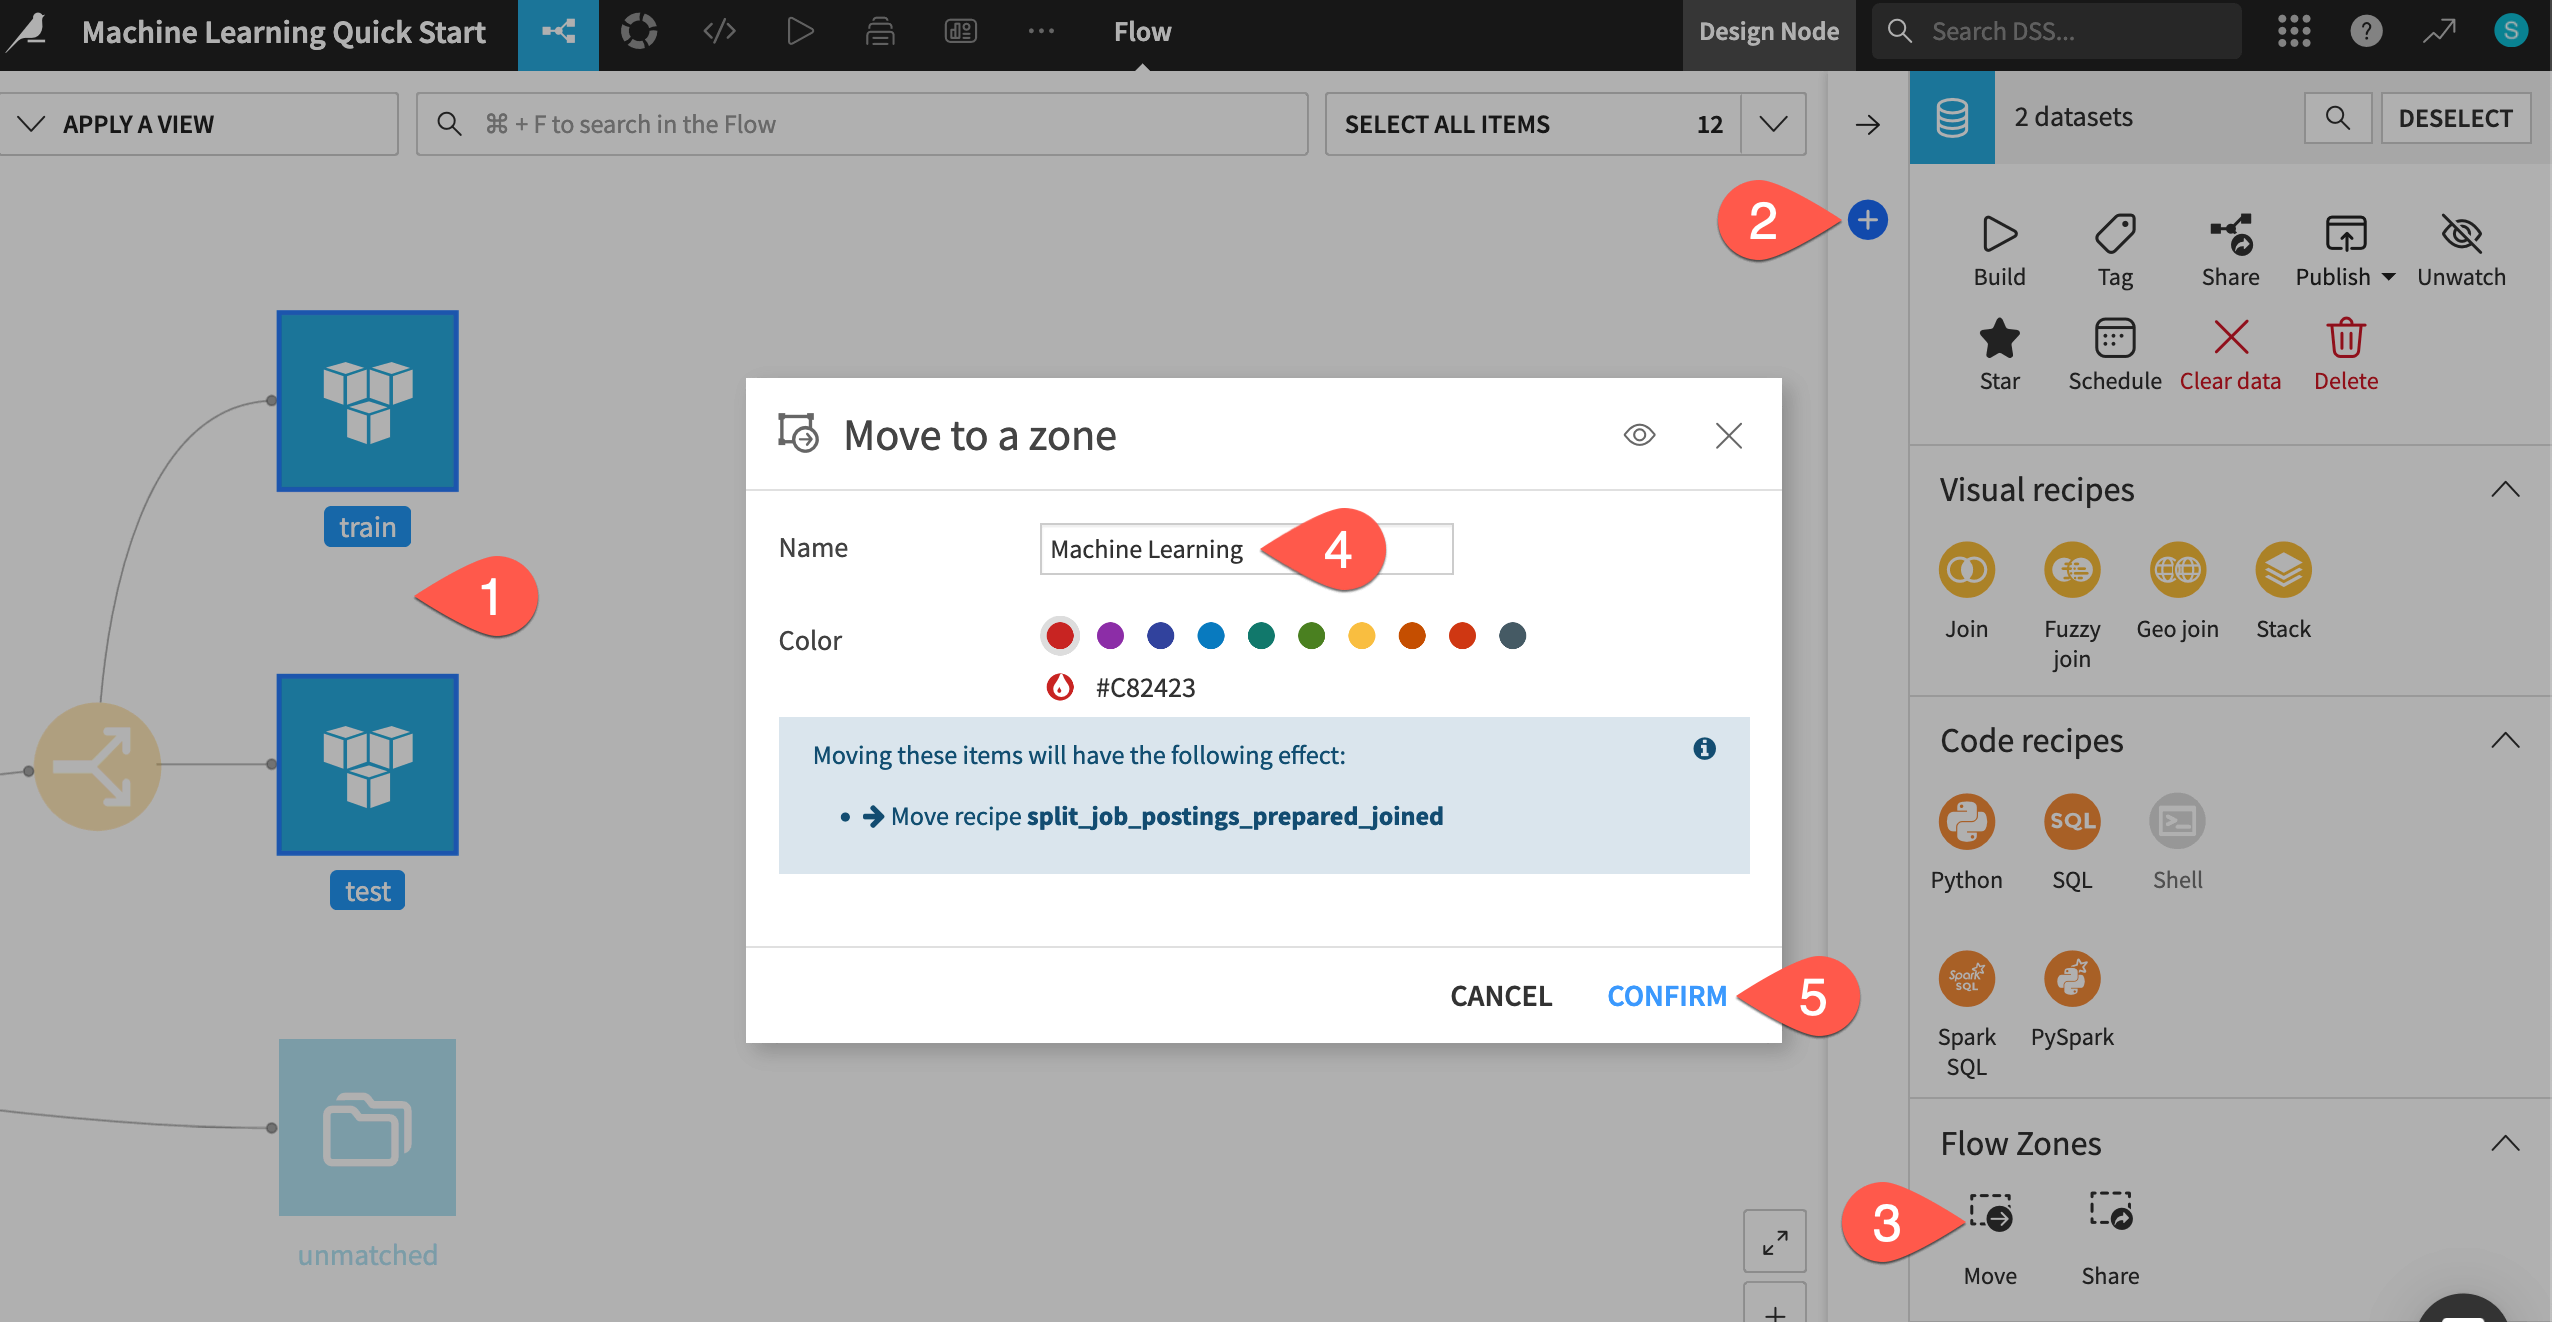
Create a separate Flow zone for the machine learning stage of this project.
Use the
Cmd/Ctrlkey and the cursor to select both the train and test datasets.Open the Actions (
) tab of the right panel.
In the Flow zones section, click Move.
Name the new zone
Machine Learning.Click Confirm.
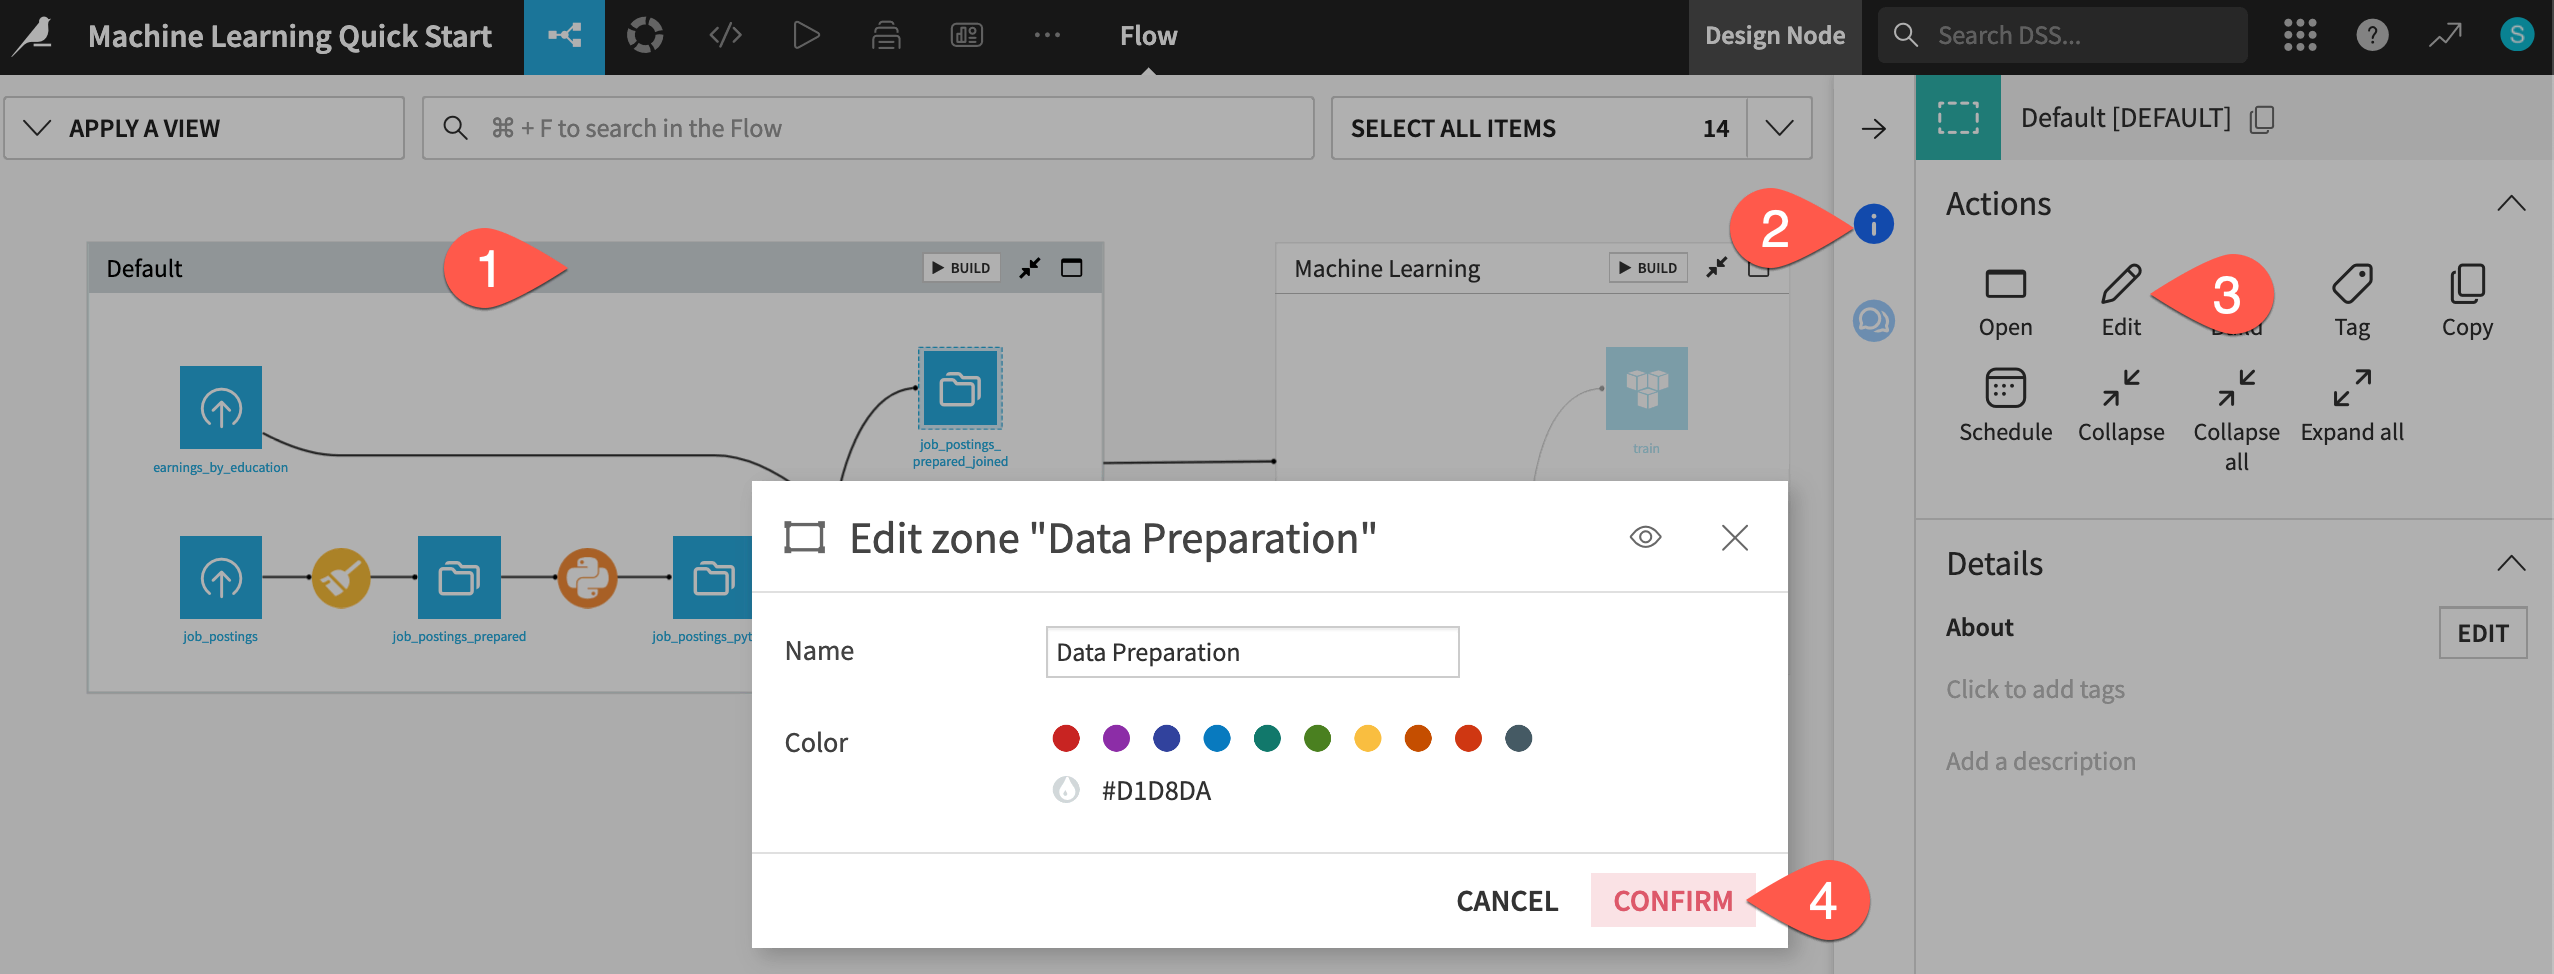
Now rename the default zone, and you’ll have two clear spaces for these two stages of the project.
Click on the original Default zone.
Open the Actions (
) tab of the right panel.
Select Edit.
Give the name
Data Preparation.Click Confirm.
