
Surface Dataiku items within the Govern node#
Before taking any actions, it’s important to recognize how the Govern node surfaces the metadata of items from connected Dataiku nodes.
Start at the Govern homepage#
Begin at the homepage of the Govern node.
If not already there, click the home (
 ) icon in the top navigation bar of the Govern node.
Recognize the presence of the following pages:
Governable items
Registries for models, bundles, and possibly GenAI
Business initiatives
Governed projects
When you finish this tutorial, you’ll understand the purpose of each of these pages.
Important
Your experience with the Govern node may differ depending on whether you have a standard or advanced license. An advanced license allows for greater customization, as well as greater capabilities with respect to GenAI. Nevertheless, the foundations covered in this tutorial apply equally to all users.
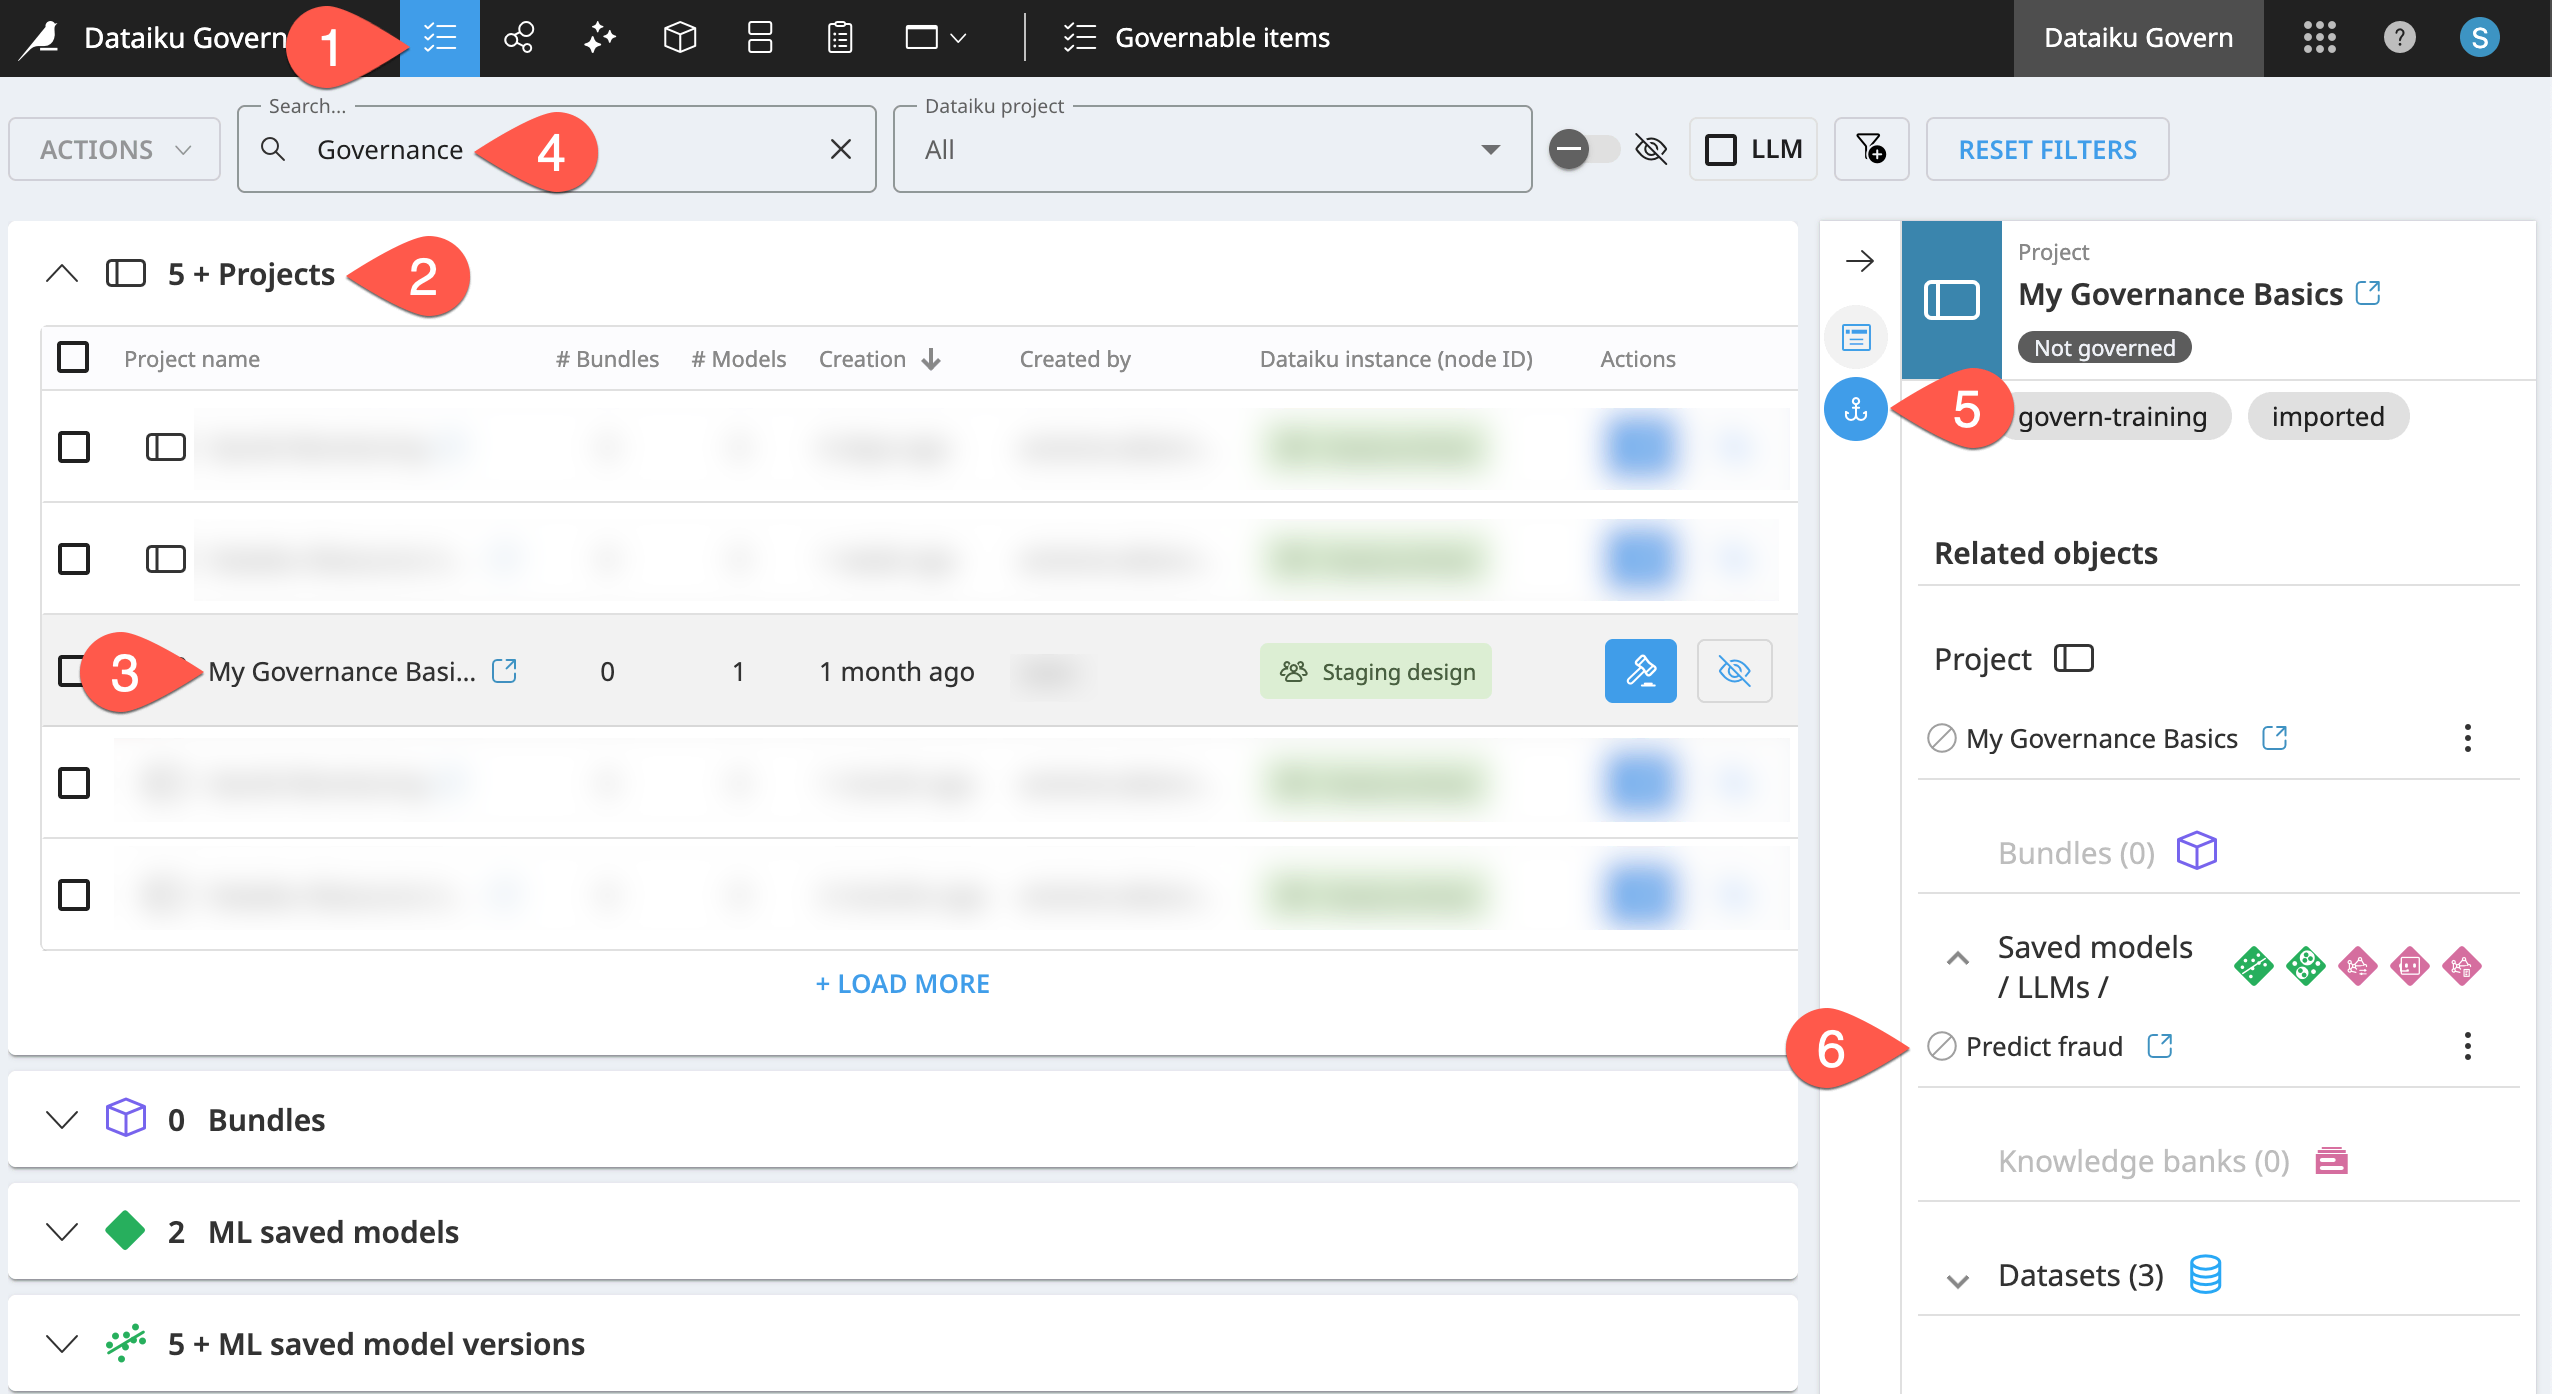
Review an inbox of governable Dataiku items#
An email service has a spam filter controlling which mails enter the inbox. Similarly, your Govern node administrator may define controls over what items appear in your governance “inbox.” The Governable items page serves as that inbox. It surfaces items eligible for governance from all connected Dataiku nodes. For example:
The administrator might automatically hide certain items so they never crowd your inbox.
Alternatively, the administrator might automatically govern certain items, bypassing the inbox entirely.
The project you just created is an ungoverned Dataiku item from a synced Design node. Unless your administrator has defined a rule saying otherwise, this project should appear on the Governable items page.
Either from the homepage or directly from the top navigation bar, navigate to the Governable items (
 ) page.
Recognize the accordion menus of surfaced Dataiku items, including projects, bundles, saved models, etc.
In the Projects section, find your Governance Basics project.
If needed, use the search box to find it.
Review the project’s metadata in the Source objects (
 ) tab of the right details panel.
Confirm in the Related objects section that this project contains one saved model, but no bundles.
Test the sync between the Govern and Dataiku nodes#
The Govern node actively tracks certain types of items from connected Dataiku nodes. Bundles are one such item. Add a bundle to the project, and confirm the Govern node recognizes this update.
Return to the Design node, and open your version of the Governance Basics project.
From the More Options (
 ) menu of the top navigation bar, select Bundles.
Click + New Bundle.
Name it
v1.Click Create.
Return to the Governable items (
) page of the Govern node.Select your Governance Basics project.
Confirm the presence of the v1 bundle in the related objects section of the Source objects (
) tab. (Refresh the page if needed).
Tip
You’ll notice the presence of a ![]() icon, indicating that the project, bundle, and model aren’t governed. You’ll understand this soon!
icon, indicating that the project, bundle, and model aren’t governed. You’ll understand this soon!
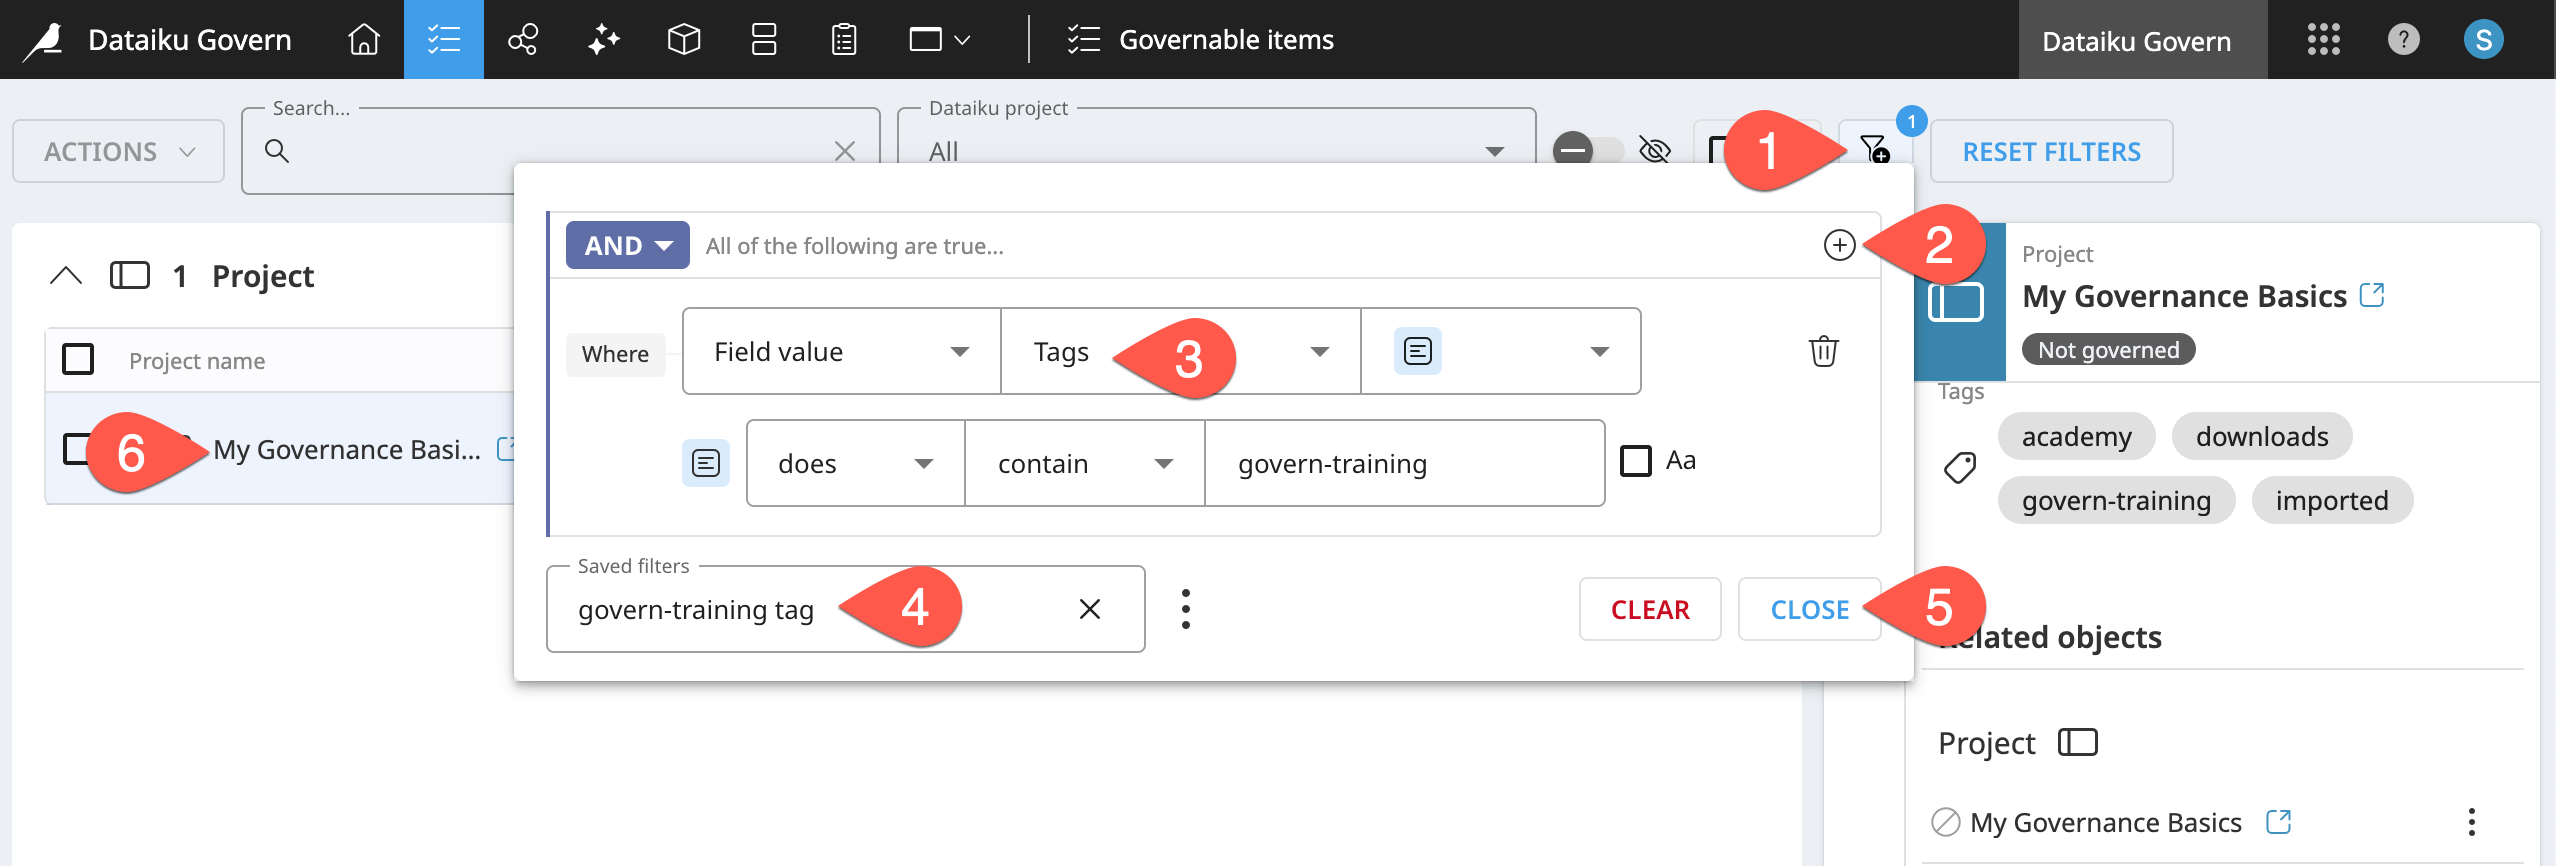
Filter governable items#
At the scale of an enterprise, you might have thousands of items you could govern. Accordingly, it’s worth getting familiar with the search, hiding, and filtering controls at the top of Govern node pages.
For example, the project you created on the Design node includes a specific tag: govern-training. Filter for ungoverned projects with this specific tag.
From the Governable items (
) page, click the Add Filter ( ) icon.
Click the plus (
 ) icon > Condition to add a condition.
Create a filter where the field value Tags does contain the value
govern-training.Click Save. Name it
govern-training tag, and click Save again.Click Close on the filter dialog.
Observe how only items with this project tag remain.
Explore registries of Dataiku items#
For now, resist the temptation to govern the project you’ve created. Complete the tour of the other key pages in the Govern node first.
The registry pages centralize all Dataiku items of a respective type into one location. From one particular registry, an organization can see all its models, bundles, or GenAI items. The ability to filter these lists in various ways makes these registries watchtowers for your data and AI initiatives.
From the top navigation bar of the Govern node, navigate to the Model registry (
 ).
).Recognize that you can filter the registry in many ways, including to show only deployed models (
 ).
).Find your version of the Governance Basics project, and expand the accordion menus to drill down into the model and model versions inside it.
Select the active model version (
 ) by clicking on its name.
Explore the right Details panel options, including the Model metrics (
 ) tab to review metrics of the model version.
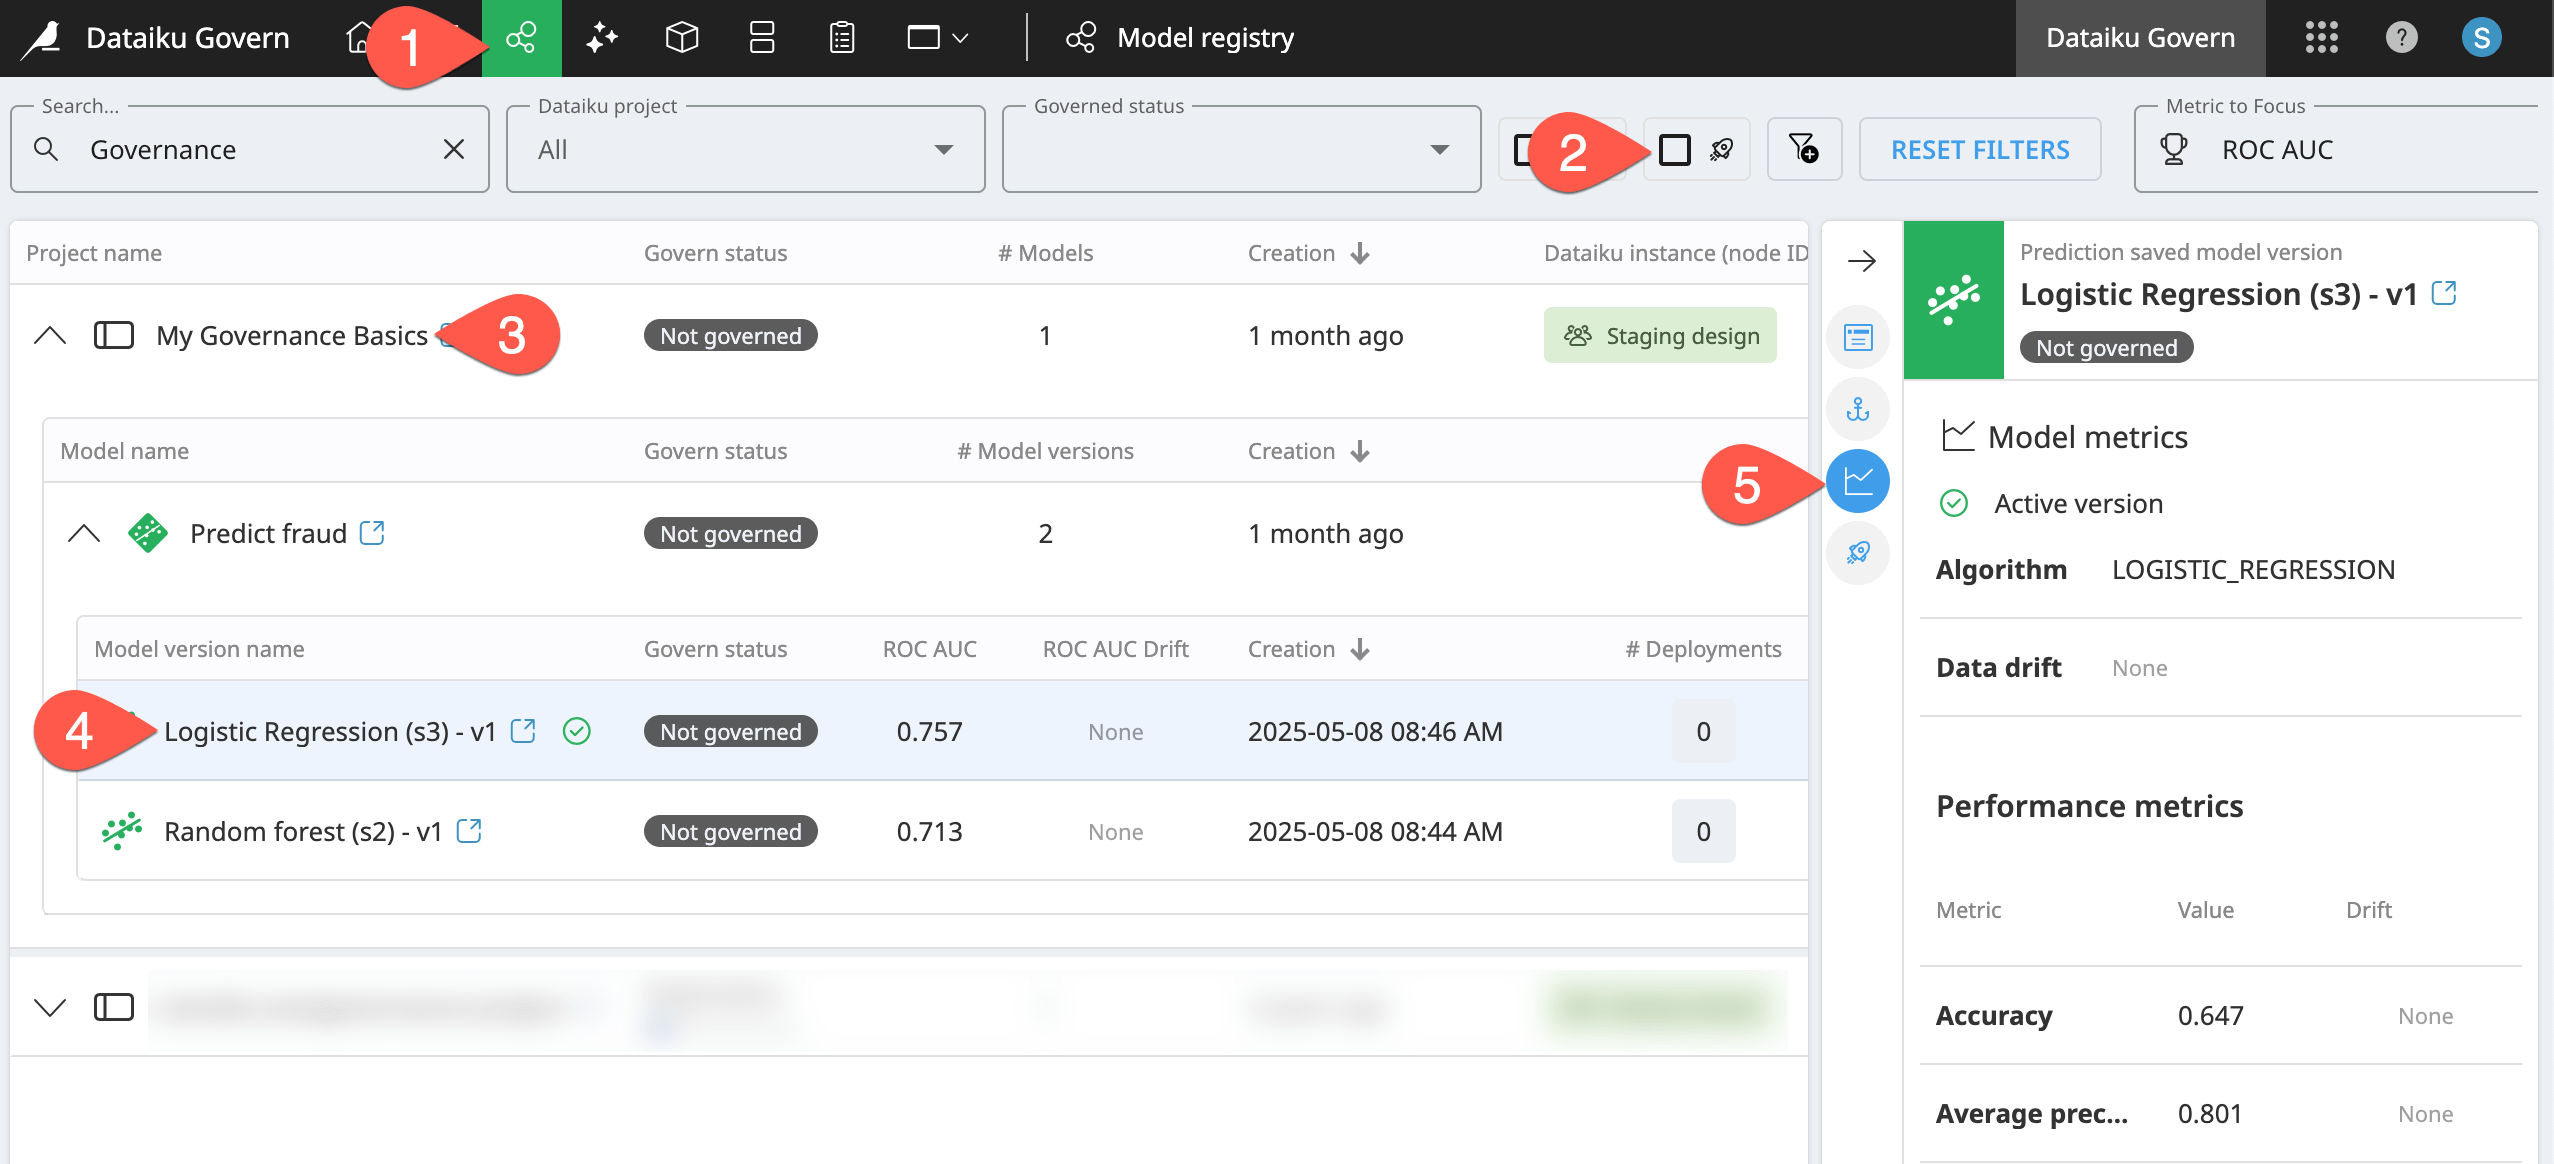
Repeat the same process for the Bundle registry (
 ), or, if available to you, the GenAI registry (
 ). You’ll find these pages function just like the model registry.
Tip
Remember that the Govern node surfaces items from all connected nodes. The Dataiku instance (node ID) column reports which node the item comes from.